Once E-Verify has been set up in your system, you can utilize the integration to create and view E-Verify Cases. For setup instructions, see Beyond - Setting up E-Verify.
*Note* You must belong to a security group with the everify-case-edit permission in order to process an e-verify case. In order to update the SSN within an E-Verify case for an employee, you must also belong to a security group with the employee-modify-gpi permission. See Security Group Administration Form for more information.
*Note* By modifying an SSN within an E-Verify case for an employee, the change will also apply to the SSN field on the employee file in Beyond.
This article reviews:
The E-Verify Charm
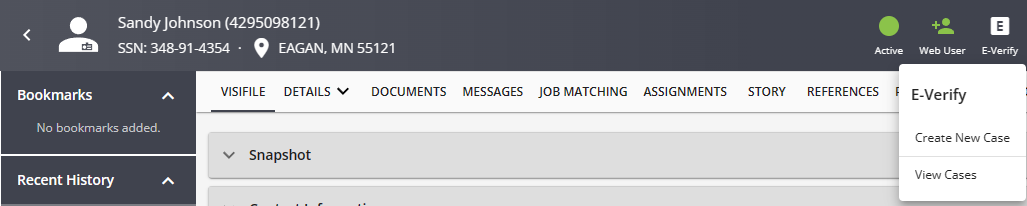
On the employee record in Beyond, there will be a list of charms next to the employees name. These charms give you different sets of information and can have additional functionality. If you have set up the E-Verify integration in Beyond, you will see the E-Verify Charm on each employee record.

*Note* Depending on your screen size, charms may be located under or next to the employee's name.
The E-Verify charm will change colors as you process cases for employees so that you can see at-a-glance their current status.
E-Verify Charm Colors & Their Meanings:
 Case completed and employee is verified to work in the US
 Case is pending or incomplete
 Case was closed without Employee Authorization
 Employee has not been E-Verified
*Note* A "Red" E-Verify charm could also mean there is an issue with connecting to E-Verify services or there are expired credentials.
Selecting the E-Verify charm will show what the potential issue is.
To Process a New E-Verify Case
*Note* In the event the employee does not have an SSN listed, and the Service Rep does not have the "Can modify employee Government Personal Identifier" permission, they will not be able to create a new E-Verify case using the instructions outlined below.

- Navigate to the employee record you wish to process an E-Verify case for
- Select the
 Charm next to or underneath the Employee's name
- In the event a duplicate case is found via the SSN, you will see the following prompt when selecting the E-Verify charm:
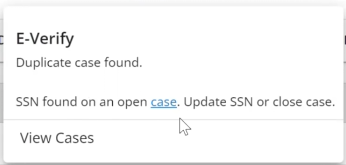
- In the event a duplicate case is found via the SSN, you will see the following prompt when selecting the E-Verify charm:
- Select 'Create New Case'
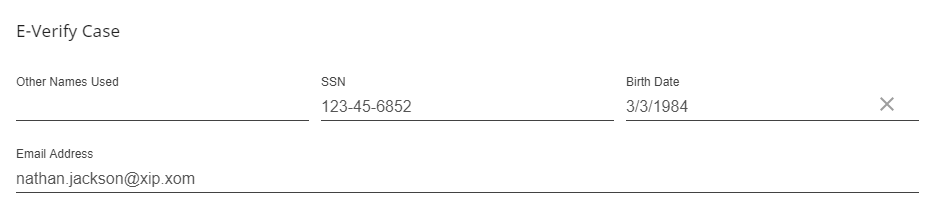
- Review or Enter all required information
- Any information including name, SSN, and date of birth will all populate if filled out on them employee record
- In the event a duplicate case is found via the SSN, you will see the following prompt when creating the case:

- Any information including name, SSN, and date of birth will all populate if filled out on them employee record
- Select Citizenship Status
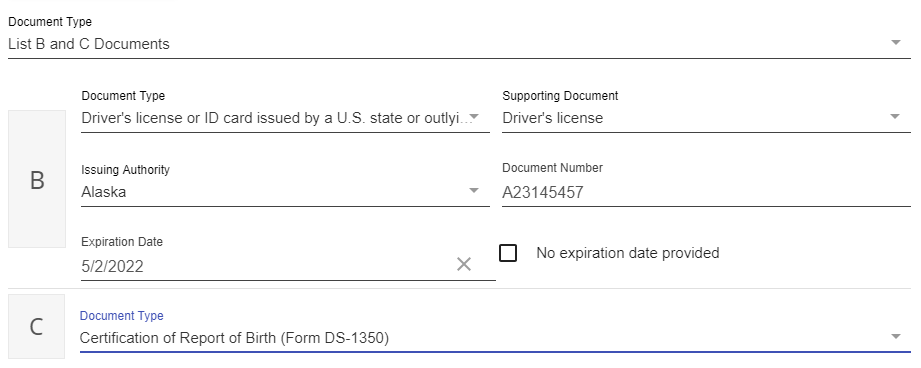
- Select Document Type provided - Either U.S. Passport or 2 forms of ID from lists B & C
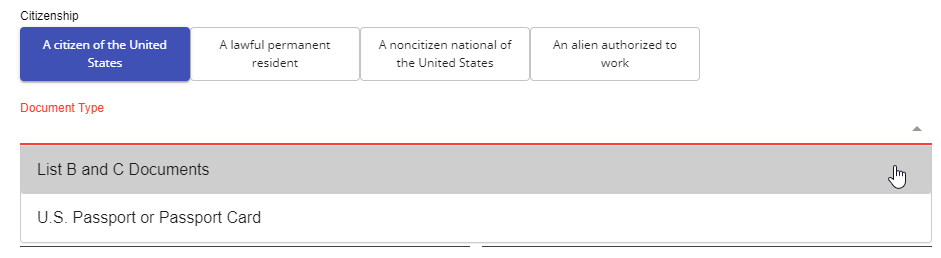
- If you choose the "List B & C Documents" option, you will need to select the 2 forms of ID provided by the Employee
- Additional details may appear based on forms of ID provided
- If you choose the "U.S. Passport or Passport Card" option, you will be required to upload images related to the passport.
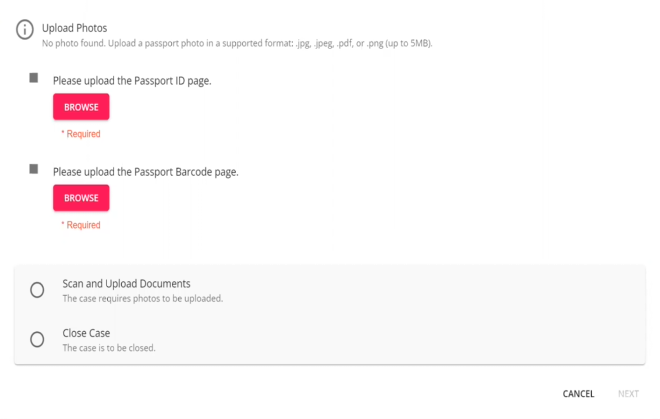
- You also have the ability to close the E-Verify case from this step if needed.
- Enter the Hire Date and Submitting Official Phone Number
- Select Next
- At this point, your E-Verify case has been created. If you exit out of the case information without completing any additional steps, you will be able to view and continue the case at any time by navigating the E-Verify charm
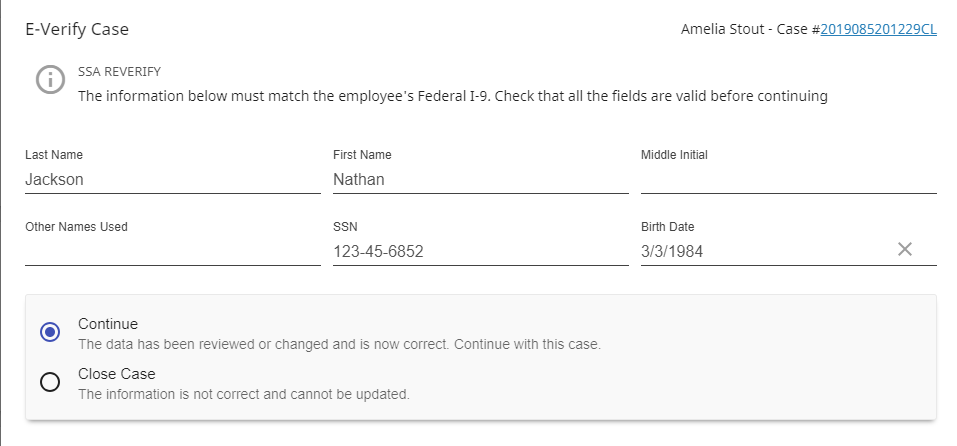
- You may need to verify additional information against the employee's I9:
- Once all steps have been completed, you will either receive confirmation on their work status or a tentative Non-confirmation
 Charm next to or underneath the Employee's name


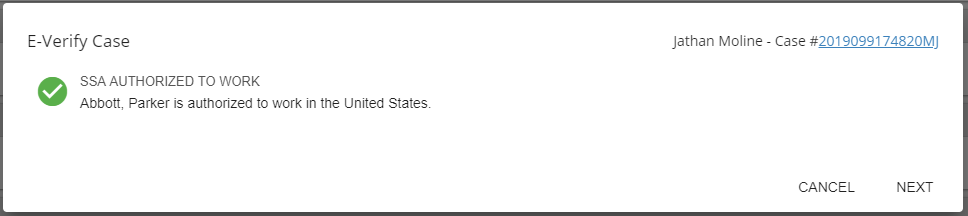
Confirmation:
When you receive an SSA authorized to work statement, it will look like this:
Tentative Non-Confirmation:
When you receive an SSA Tentative Non-Confirmation from E-Verify, you will see the following screen:
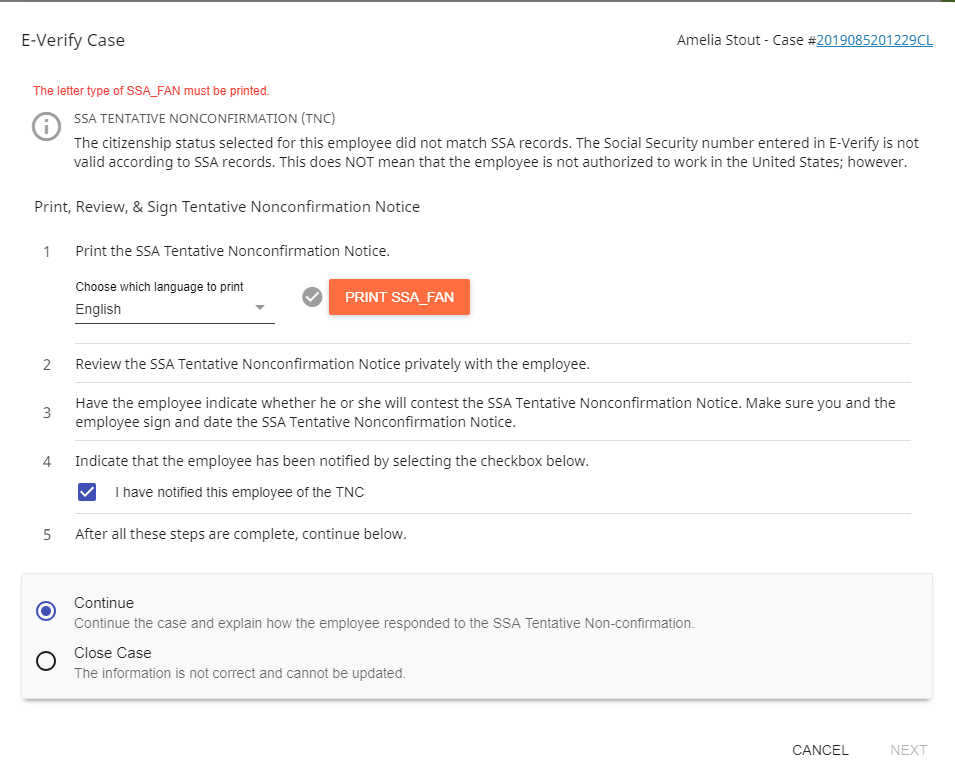
Follow the 5 steps and select Continue to move on to the next page. (make sure you select the print SSA_Fan in order to move forward)
Based on the conversation with the employee you will need to close the case or contest it:

If contested, you will be able to print SSA_FAN and SSA_RDC files. The employee will need to follow the instructions you provide in the file you print to contest the case. You will need to check back for results on the contested verification: 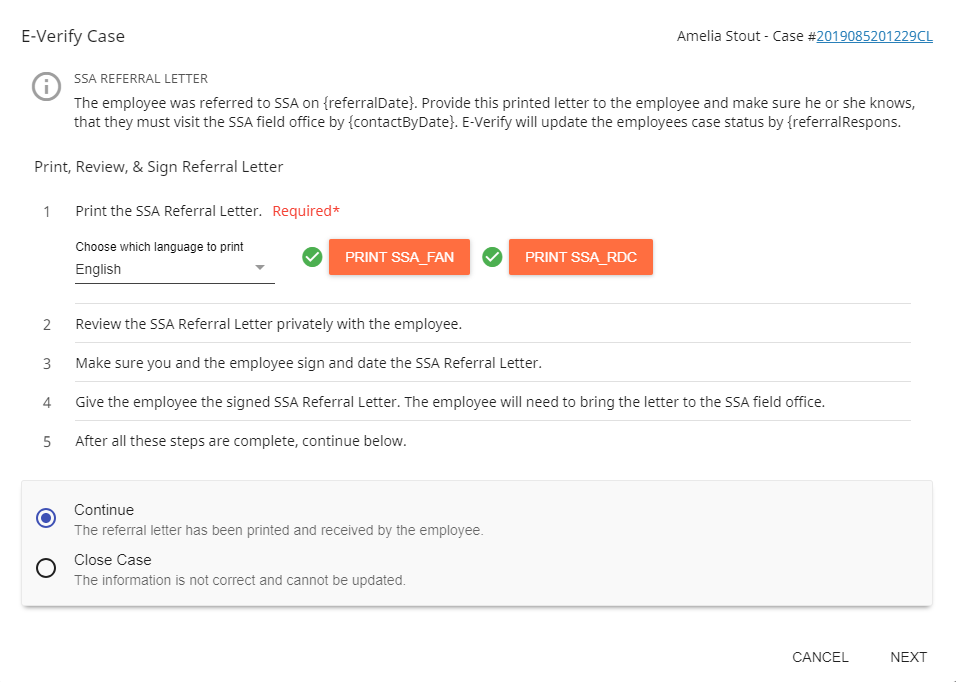
If the employee does not complete the necessary steps to contest the case within the time allowed, the case will update to a rejected status and you will be able to close the case.
To View an E-Verify Case
Once an E-Verify case has been created, you can review the results or check for updates on contested cases by utilizing the E-Verify Charm on the employee record. For any employee with an open case, you will be presented with 3 options:

- Continue Case - this will allow you to continue where you left off filling out and finalizing the case. This is also a great place to come back to check for updates on contested cases.
- View Current Case Details - this allows you to review all details of the current case in progress
- View Cases - see all current and past case information
Password Warnings
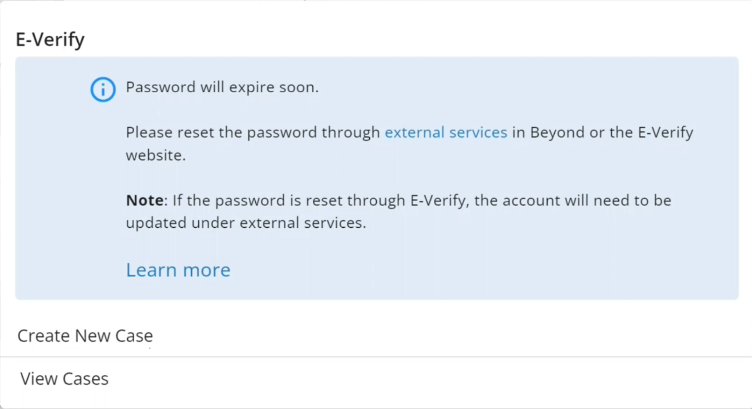
When selecting the E-Verify charm on the employee record, you may be prompted with a password warning in the event of one of the following:
- The E-Verify password is expiring soon.
- The E-Verify password has expired.
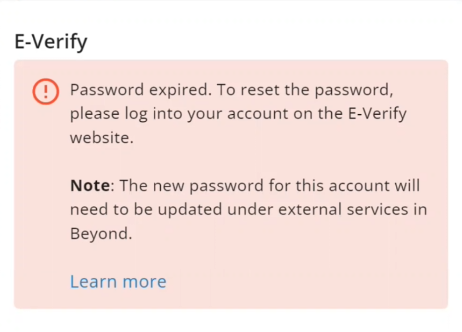


*Note* For more information on what to do when these warnings appear, please see the article titled Beyond - Resetting E-Verify Passwords.