What is a Prospect?
Prospect records allow you to quickly record and manage potential new customers or contacts, making it easier for your sales team to collect the information they need. Prospect records include the ability to track basic information, log messages and save documents electronically.
*Note* For new TempWorks clients as of 8/11/2023, Prospect functionality will be disabled. In the event you would like for this functionality to be enabled, please contact TempWorks Support.
Existing TempWorks clients prior to 8/11/2023 will continue to have access to this functionality. In the event you would like for this functionality to be disabled, and for your existing Prospect records to be converted to Customer records in mass, please contact TempWorks Support.
This article reviews:
How to Create a Prospect Record
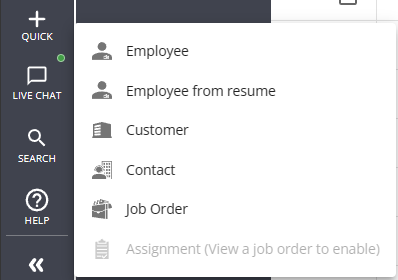
- Select the "+ Quick" button at the left of Beyond and select "Prospect"
- Enter information:
- Name - name of company or contact (Required)
- Department
- Source - where did this contact come from
- Phone and/or email
- Address of business, if applicable
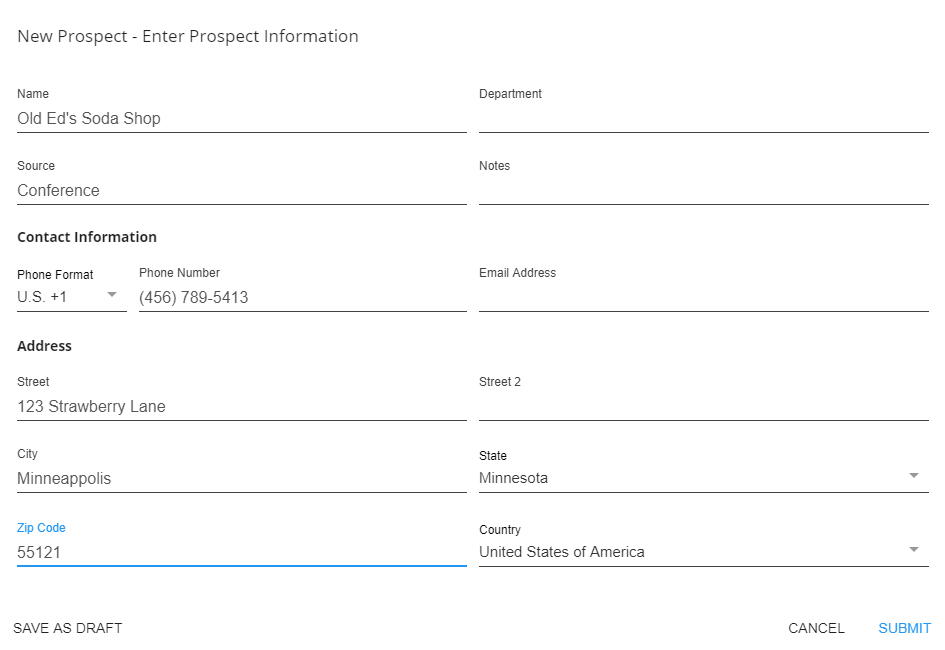
- Select Submit


Configuration Alert
If you are utilizing Address Standardization configuration for Prospect records, there will be an additional step to verify the address against the USPS database. For more information, see Beyond - Address Standardization.
Prospect Record Overview
The prospect record is comprised of 5 tabs:
Visifile

The prospect visifile, by default, has the following cards of information:
- Snapshot - quick set of information
- Select the
 button and choose customize fields to add or remove different fields from this card
- Select the
- Messages - displays recent messages logged on this record
- Contacts - displays a list of any contacts related to this prospect record
- Documents - displays list of documents attached to this record
 button and choose customize fields to add or remove different fields from this card
The prospect visifile, like all visifiles in Beyond, is customizable. For more information check out Beyond - The Visifile.
Details
This tab contains information including status, address, and more. 
Prospect information
This card contains basic information including the prospect name, status, and contact methods. 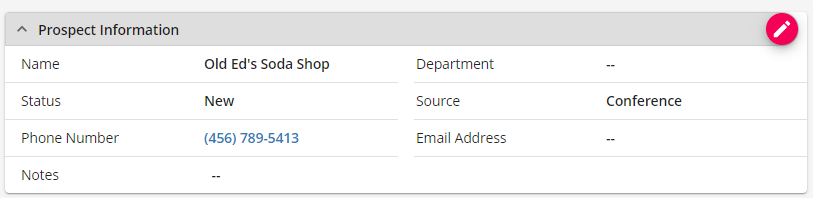
Address
This card contains the address for the prospect. To edit or add the address to a record select the  button.

Contacts
This card allows you to create contacts related to the prospect record. If the prospect you created is a business, this section will allow you to track people who work at this prospect and their contact information.
To Add a Contact

Documents
This tab allows you to drag and drop electronic documents to save with this prospect record. This includes scanned business cards, emails, or quotes related to this potential customer.

To Add a Document
- Select the

- Drag and drop or click to select a file from your computer
- Enter the following information:
- Name
- Document Type
- Expiration Date (optional)
- Description
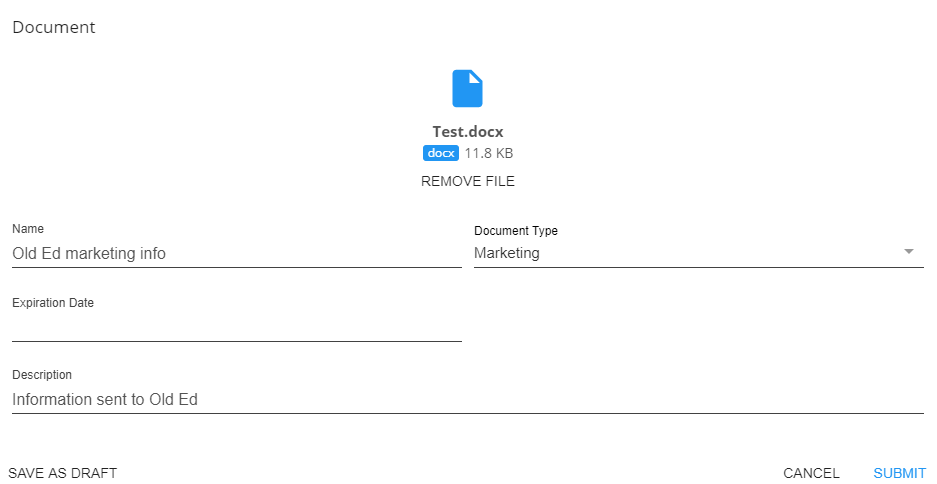
- Select Submit


Messages
This tab allows you to see a complete history of messages logged on the prospect record. 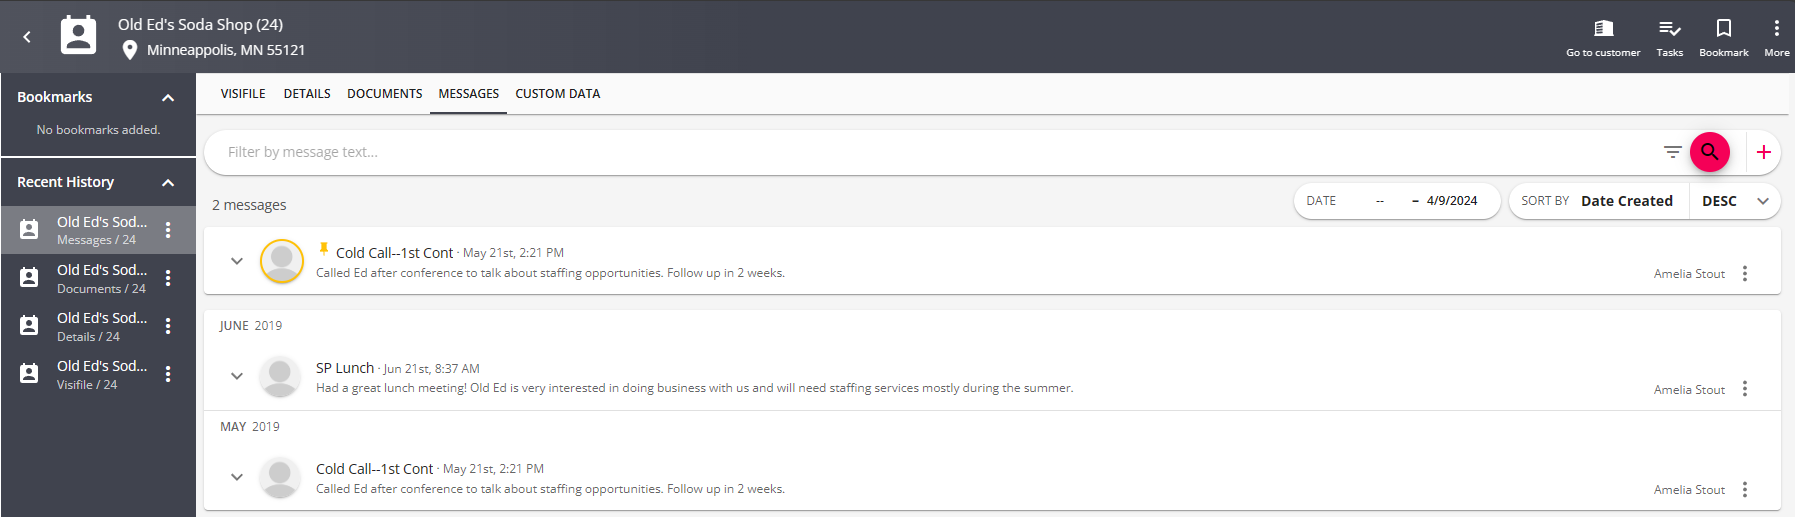
To Log a Message
- Select the + from the messages or visifile tab
- Enter the message
- Select a Message Action Code
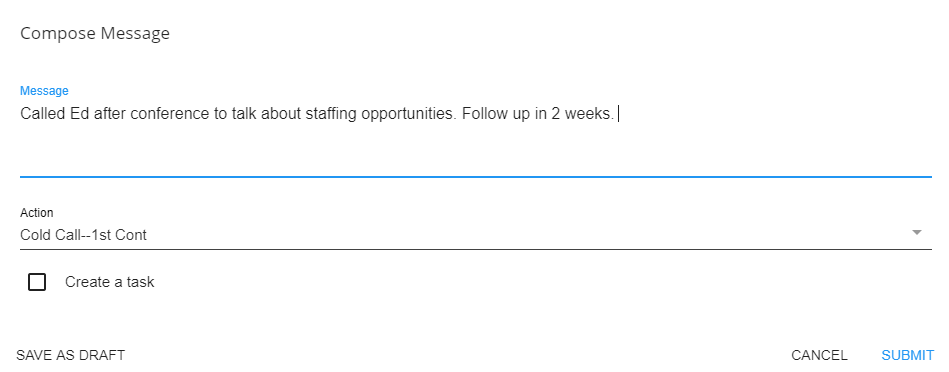
- Select Submit

*Note* Message action codes available to prospects are set up by your administration. See Administrator Manual for more information.
Custom Data
This tab contains any additional fields you would like to track on a prospect's record. 
Select the  next to the field you want to update.
*Note* Custom Data fields available on the prospect record are set up by your administration. See How to Set up and Manage Custom Data for more information.
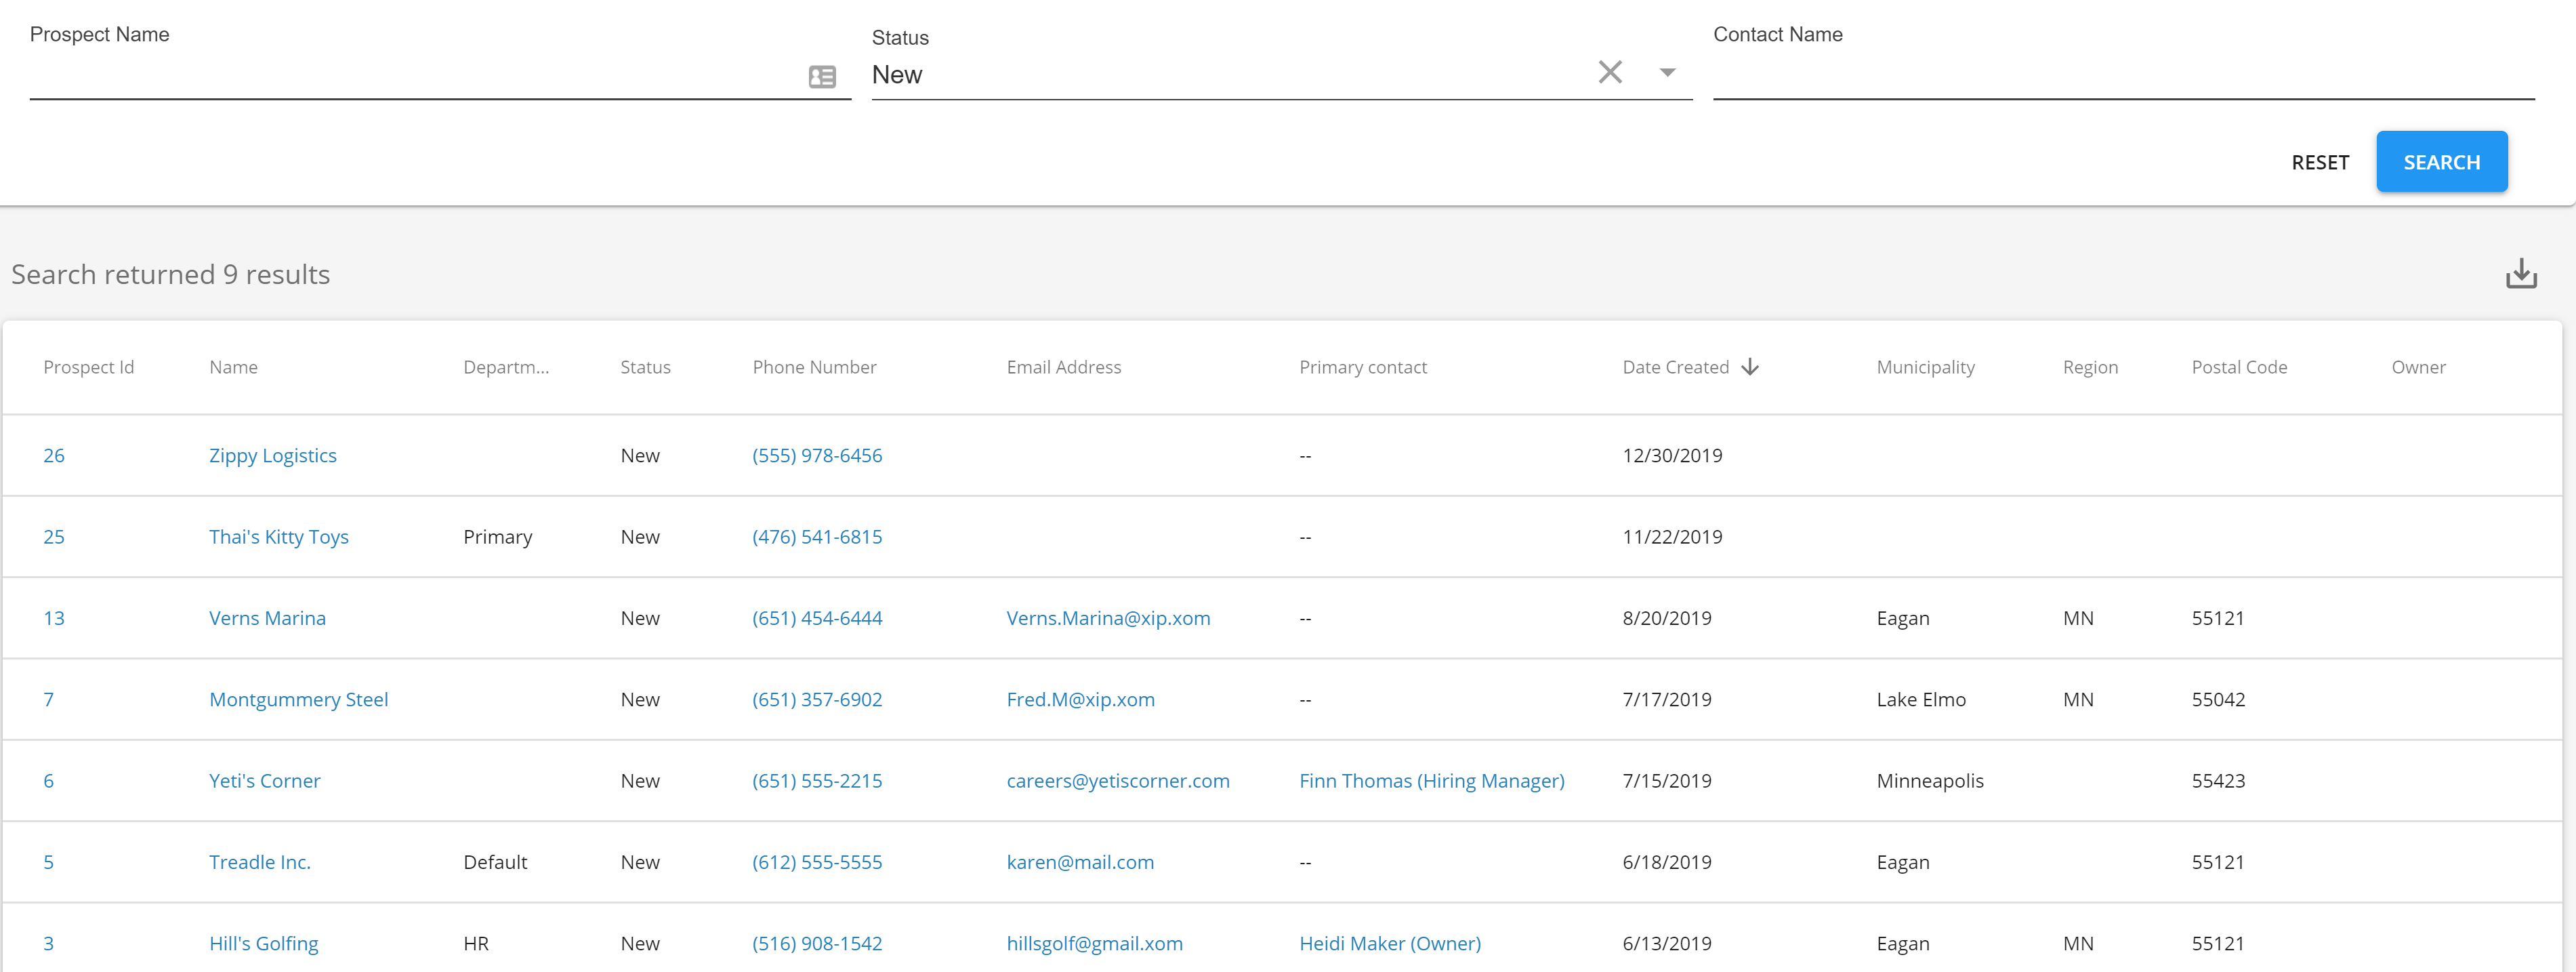
Searching for Prospects
You can search for a prospect record by selecting  in the left or from within B Menu > Records > Prospects:
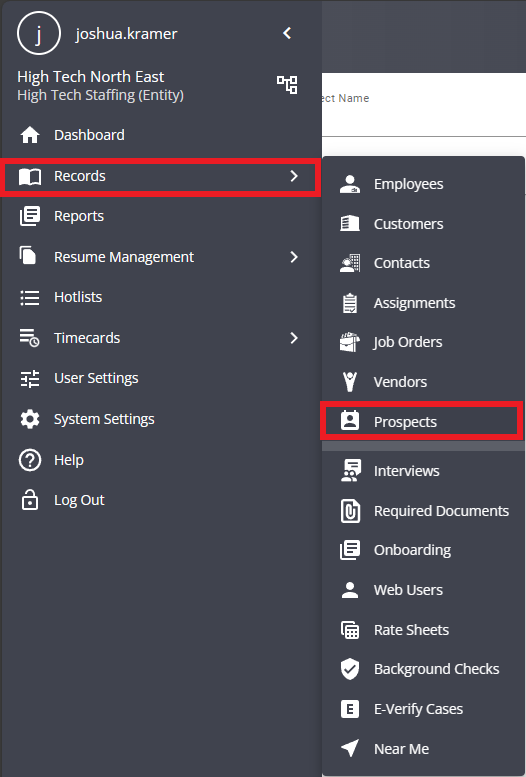
The prospect search screen has 3 options: 
Right click on a search result to see a quick view of the record: 
See Beyond - Quick View for more information on quick views.
In the example below, the user is looking for all Prospect records with the Status of New. Then by clicking on the column header titled Date Created is able to sort to see most recently created first: