What is an Adjustment?
An adjustment is a non-taxable reimbursement or charge for an employee. There are reoccurring adjustments such as child support payments, levies, or fees which are set up under the Employee record. There are also one-time adjustments such as equipment fees and reimbursements that are entered in the time entry part of pay/bill.
Before adjustments can be added to an Employee, Order, Assignment, or timecard, the adjustment type must first be added in Core administration.
Pre-set Adjustment Types:
The following list of adjustments are already set up in Core

How to Set Up an Adjustment Type in Administration:
- Navigate to All options > Administration > Adjustment.
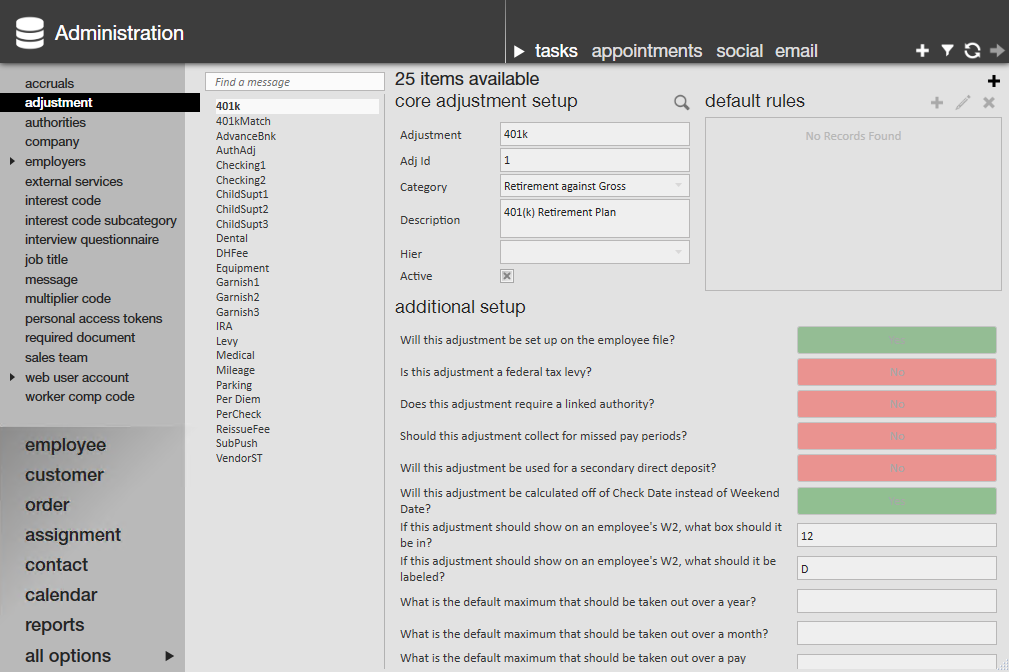
- Select the + icon in the upper right corner to add a new adjustment.
- Setup is split into three sections:
- Core Adjustment Setup
- Additional Setup
- Default Rules
- Setup is split into three sections:
- Enter Basics under Core Adjustment Setup.
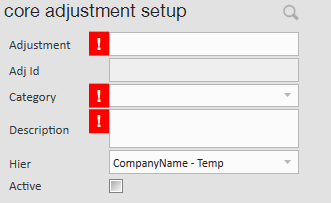
- Enter a unique name for adjustment:
- Ex. ChildSupt1 or BadgeFee
- This field is limited to a max of 10 characters.
- This field does appear on employee check stubs.
- Keep in mind that only one of each type of adjustment can be added to an Employee record, so for adjustments such as child supports where there may be multiple, you will need to create childsupt1, childsupt2, etc. depending on the number needed.
- Category
- This field determines how this adjustment behaves.
- Keep in mind the billable, adjust net, adjust gross, and benefit fields when selecting a category.
- Description
- A field used to describe and expand on the purpose of the adjustment.
- Hier
- Hier is short for Hierarchy.
- This field allows you to select where this adjustment is visible.
- Ex. A 401k might only be applicable to internal staff so if you adjust the Hier of the adjustment to be only the class side of your database, then it can't be accidentally picked on the temp side.
- Active Check Box
- This check box determines whether this adjustment is available to be chosen when adding adjustments to records or timecards.
- Uncheck this box when you no longer want an adjustment to be able to be chosen. This will leave the adjustment in a deactivated state.
- Enter a unique name for adjustment:
- Select options under Additional Setup:
- Begin by answering: Will this adjustment be set up on the employee file?
- If yes, this adjustment will set as a reoccurring adjustment on the employee file.
- If you are selecting 'Yes,' you will have to answer an additional 12 questions that relate to the adjustment.
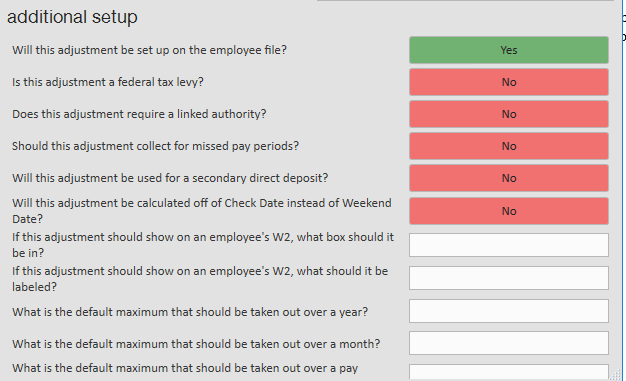
- If you are selecting 'Yes,' you will have to answer an additional 12 questions that relate to the adjustment.
- If no, this adjustment can only be added to timecards.
- If you are selecting 'No,' the only additional question to answer is what type of sales tax should be calculated, if applicable (if you have any questions on tax information, please contact a tax professional or your finance department for more information). Save, and then your adjustment setup is complete

- If you are selecting 'No,' the only additional question to answer is what type of sales tax should be calculated, if applicable (if you have any questions on tax information, please contact a tax professional or your finance department for more information). Save, and then your adjustment setup is complete
- If yes, this adjustment will set as a reoccurring adjustment on the employee file.
- Begin by answering: Will this adjustment be set up on the employee file?
- Enter Default Rules.
- Default rules are only available for those adjustments that will be set up on the Employee record.
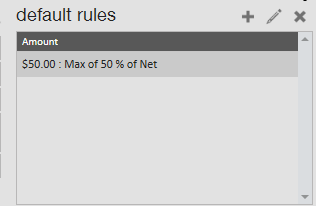
- Default rules allow you to save time by setting up amount and maximum amount information. This will not be applicable to all adjustments.
- Select the + icon next to Default rules to add a rule.
- This will open the adjustment rule window, enter your adjustment amount:
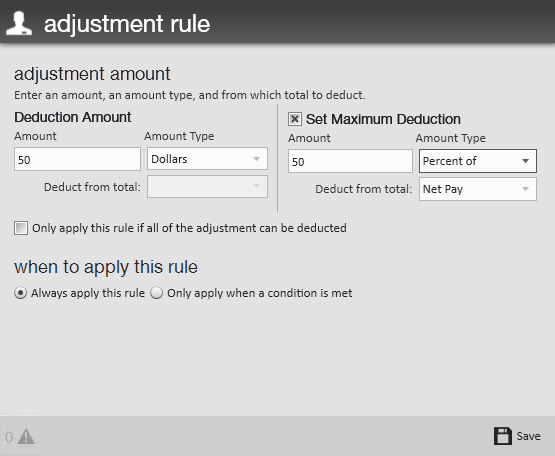
- This example shows a deduction amount of 50 dollars but no more than 50% of the employees net pay
- Default rules are only available for those adjustments that will be set up on the Employee record.
Related Articles
- None


