This document will cover various email functionality options, such as attaching documents to records, as well as creating email templates and mass emails.
To View Email Account:
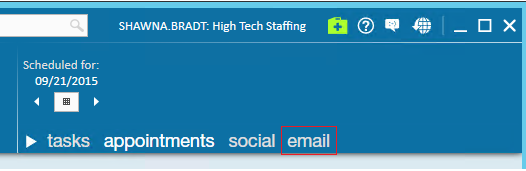
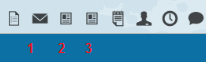
To view your email account, including sub folders of your inbox, drafts, and sent items, click on the email button toward the upper right of the screen:
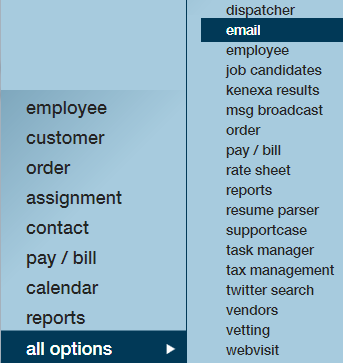
You can also access your email from the navigational tree on the lower left, but selecting all options, followed by email:
With the main email area displayed you are able to view your inbox, as well as your subfolders.
The number of new emails in your inbox will be displayed in the upper right.
If an email is highlighted you will be able to preview the email in the preview area just below your inbox view.
If an email address is recognized by Enterprise as a record that exists in your database an icon will be displayed with the type of contact on the email line item within your inbox: ![]() = customer contact
= customer contact ![]() = employee contact
= employee contact 
Right-clicking on any email within your inbox will provide you with a number of options.
If the email address IS NOT recognized by Enterprise, right clicking on an email will provide you with the following options:

- Mark as Read: If the email has not been read, clicking Mark as Read will indicate that this email has been read. If this reads Mark as Unread: Clicking here will mark the Email as Unread.
- Create a Follow-up Task: Allows you to create a follow up task associated with that email, which will show in your task area of Enterprise.
- Schedule an Appointment: Allows you to schedule an appointment in relation to the email.
- Mark as Undeliverable: Selecting this option will deactivate the email address of the employee or contact within Enterprise. Utilize this, for example, if you sent an email and received an undeliverable bounce back. If this is a Contact's message and the Contact is a member of a Contact Group by clicking Unsubscribe, this Contact will be removed from the Contact Group.
- Create a New Contact: Creates a new Customer Contact record, parsing in the Contact information possible, such as email address, name, and phone number.
- Delete: Deletes the email from your inbox.
If the email address is recognized by Enterprise, right clicking on the email from your inbox will display the options to Mark as Unread, Create a Follow-up Task, Schedule an Appointment, Unsubscribe, and Mark as Undeliverable (see above for more details) and Delete. In addition, you will have the options to:

- View this person's record: This will navigate you to this contact or employee's record within Enterprise
- Log email text as a message: This will create and log a message within the Contact or Employee's record in Enterprise, and will include the subject and body of the email.
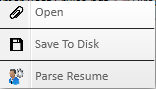
If an email includes an attachment, you will have some of the following options (depending on several factors, including is this an Employee, a Client, are they already in your TempWorks database) by right clicking on the attachment in the email preview area:
- Open will open the document
- Save to Disk: will allow you to save the document to an area of your choosing in your computer or shared drive
- Parse Resume: if the attachment is a Resume it this will allow you to Parse the Resume into your TempWorks Enterprise database
- Save Attachment to...: will allow you to save the attachment to the record the email address is linked to, whether it is an Employee or Contact
![]()
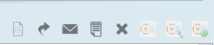
The integration of email within Enterprise also allows you the ability to Compose (A), Reply (B), Reply All (C), Forward (D), Delete (E), Send/Receive (F), Edit Signature (G), and Load More Messages (H). Additionally, you will note that toward the upper left there is an option for the template manager.
![]()
Following will be a breakdown of each of the previous mentioned (A-H). The template manager will be covered in more detail later in this document. Compose: Clicking on compose will bring up a blank email message. From here, you have the following options:
1. Message 2. Mass Mail 3. Advanced Formatting

1. Message

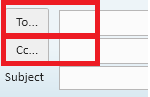
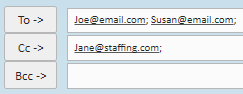
A Message should be utilized when you are free writing an email. This can be to one or more persons. You can either type in the email address(es) you wish to send the email to, or you can look them up by either selecting the Address Book or by clicking on the To... or Cc... fields (also seen below). Any of these will bring up the Address Book Search (right).

To select recipients from the Address Book, you can either:
- Search for the employee or contact by inputting a partial or full name, or an email address, in the text box below Search: and then clicking the magnifying glass.
- Search by contact type (Employee, Contact, or Service Rep) from the Search Type: dropdown to either broaden or narrow your search, depending on if you entered text in the general search area, and then clicking on the magnifying glass.
Once your search is complete you can select who the recipients are by either:
- Highlight the contacts name and then clicking on either the To, Cc, or Bcc buttons. This will place their email address in the field you clicked on.
Double clicking on the contact will place them in to the 'To...' field.
- If you have multiple people from your search that you wish to select, hold down the 'Ctrl' key while clicking on the contacts you wish to email. Once all recipients have been highlighted that you wish to select, click on the line you wish to insert them in, either To, Cc, or Bcc.
Once all recipients have been added from the Address Book, click OK.
- Selecting OK will pull those contacts you just selected in the Email Message. If you wish to discard your work in the address book, click Cancel. You may now continue your email message as normal by entering the text you wish in the Subject and Body of the email.
Once you have completed composing your email, click on Send to send out your email.
There are additional areas within the Message area which can be utilized to further personalize and format your email. The following will be a breakdown of Text Formatting, Recipients, Include, and Options:
Text Formatting
- There are multiple options within the email feature to personalize the email, such as, changing the font style and size, adding bullet points, and bolding text.
- These options are located in the upper left of the email message area.
Include
- There are also options within the email message to attach Documents to your email: Attach File.
- Select this option to attach a file from your computer, such as a Word or PDF document.
- This could be anything from your desktop, S: drive, C: drive, etc.
- Attach From Database: Selecting this option allows you to attach a document which is stored within your TempWorks Enterprise Database.
Options
- Show Bcc: Clicking on this will add an additional line item below Cc so you can include Bcc recipients.
- Requesting Read Receipt: Checking this box will prompt recipients when they open the email that a receipt is being sent, and you will be notified that the email has been opened.
- Log Messages: If you sent an email to a contact or employee within Enterprise and their email address is in their record, checking this box will log a message in their record including the body of the email which was sent.
2. Mass Mail
Once the Mass Mail tab has been selected a similar format will be seen as in the Message tab. If you had selected recipients or formatted anything on the Message tab and then clicked over the Mass Mail tab, your recipients and the body of the email will follow. The Mass Mail is unique in that it allows you to select an Email Template:

Selecting an Email Template will pull in the previously developed template and when sent out, will pull the appropriate information in to the selected fields. The subject line and body of the message will be populated. When sending an email using a Template, the emails will go out as individual emails instead of bcc's. The Email Template will be covered in more detail in the template manager area of this document.
3. Advanced Formatting
Clicking on the Advanced Formatting tab will allow you to select further options to customize your email message:
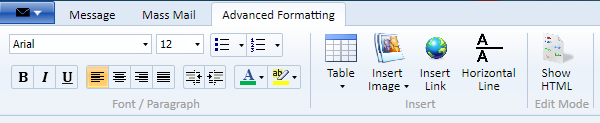
- Insert Table: Inserts a table into your email. Double click on the field you wish to insert text in to. Right click on the table to format. Image and Link options: Inserting an image or link allows you to insert an image url or link.
- Horizontal Line: Inputs a horizontal line across your email.
- Show HTML: Displays the HTML of your email. In the upper left of the screen at all times will be a save button (seen on the left). Clicking on the blue tab (in the upper left) will provide you with the options to Send, Save, Delete, and Print.
- Reply: Generates a reply email message for the sender of the email that is currently highlighted in your inbox. This will be a reply including the history of the email.
- Reply All: Clicking on the Reply All button will generate a reply email message to all of the recipients, including the sender, of the email that is currently highlighted within your inbox.
- Forward: Clicking on the Forward button will generate an email that can be forwarded on to other recipients. You can either utilize the address book to look up the recipients you wish to send it to, or other methods previously discussed.
- Delete: Clicking on the Delete button will delete the email currently highlighted in your email inbox.
- Send/Receive: Clicking on the Send/Receive button will refresh your email to update received and sent mail.
- Edit Signature: Clicking on the Edit Signature button will pop up a box in which you can edit the signature of your email. This will be self-generated on email messages that you compose.
- Load More Messages: Clicking on the Load More Messages button will load more emails from your inbox. Default will bring in your 20 most recent emails.
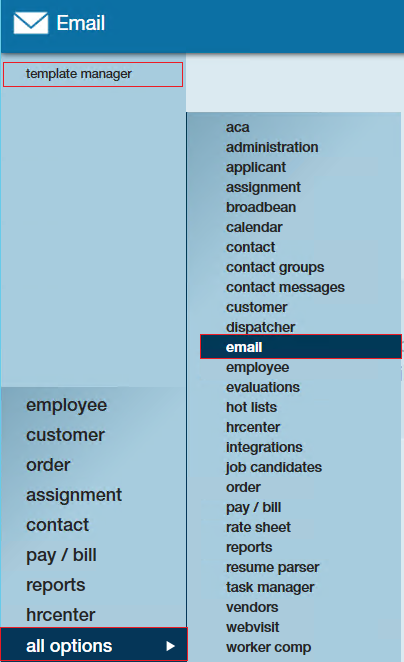
Template Manager
The Template Manager area allows you to add, edit, and delete email templates. To begin, navigate to the Template Manager by selecting all options, and email. The Template Manager will then be your only option listed in the left bar of your screen.
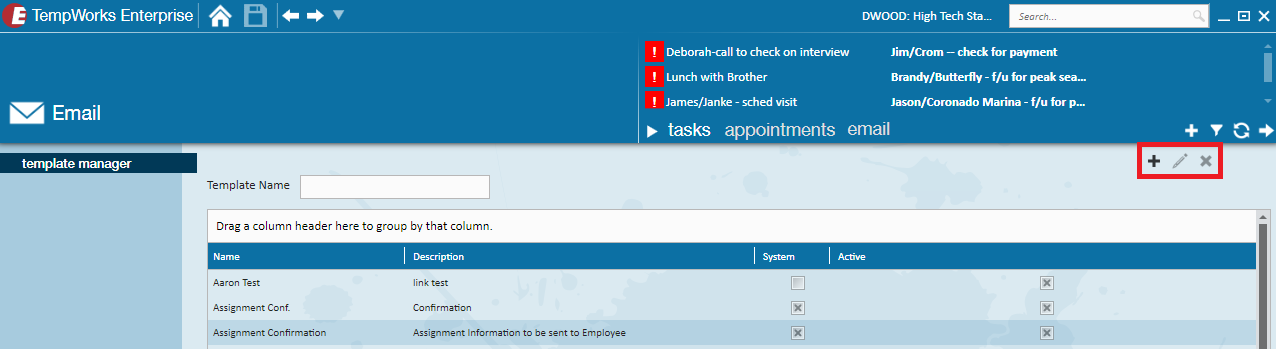
To create, or add, email templates click on the button
Once you have selected the add button ![]() you will be prompted to select a Template Type. This is the Audience who will be receiving the emails you send using this template.
you will be prompted to select a Template Type. This is the Audience who will be receiving the emails you send using this template.
A new screen will generate and you will want to enter a Template Name, Description, and Message Subject:

Enter what you would like to be the Template Name and Description.
What is entered into the Message Subject and the body of the message will appear in the emails which are sent using this Template.
To edit or delete an email template,
Highlight it from the list and select either the edit or the delete button
Other methods of sending emails within Enterprise:
There are a number of other ways besides going through 'Compose' to send an email. Anywhere you find a ![]() within Enterprise you have the ability to send an email directly from that record, whether that be an employee, contact, order, etc. Following are a few examples of various ways to utilize the integration of email within Enterprise.
within Enterprise you have the ability to send an email directly from that record, whether that be an employee, contact, order, etc. Following are a few examples of various ways to utilize the integration of email within Enterprise.
Emailing contacts and employees from an order
If you have an order which multiple employees are assigned to, from the order visifile screen, on the bottom where it lists the assignments, you have the option to email all of the employees who have been assigned to the order. The following are all options to email options from this area:
1. Email Employees Selecting this option from an order will prompt you to select either employees who are currently or have ever been assigned to this order
2. Assignment Confirm A screen will pull up asking you to choose a template (refer to the template manager section above) and will prompt you to select the recipients (contacts) based on those contacts that are associated with the order
3. Email New Hire Packet Clicking on this will prompt you to choose a template. Selecting recipients will not be an option as this will be being sent to all of the employees listed in the assignments area
Emailing contacts of the same customer
If you have a number of contacts you wish to email who are listed under the same customer, you can easily do so from the customer visifile screen.
From the customer visifile screen, on the right hand side where the contacts are listed, select the contacts you wish to email by holding down the Ctrl key and clicking on the desired recipients. Once you have selected the contacts you wish to email, click on the envelope button located just above the contacts area. This will generate an email message, with the recipients in the Bcc field.
Complete your email message as desired.
Emailing employees based on an employee search
There may be times when you want to send an email to a number of employees based on a search that you did.
For example, perhaps you did an Enhanced Search for employees who had required documents that have future expiration dates as you want to send them an email to remind them that they will be expiring.
To do this, run the Enhanced Search. When your results pull up you may decide that you want to email one, some, or all of the employees. Hold down the Ctrl key and click on the employees you wish to email.
Once you have selected your desired recipients, click on the envelope located just above the search results. This will generate an email message with the selected recipients in the Bcc field.
Complete and send your email message as desired.
Emailing documents from a record
If desired, you can email any documents that are attached to the document area of any record.
To do so, open the desired record and highlight the selected document within the documents area. Once the document is highlighted click on the envelope just above to generate an email message with the document attached.
Complete and send your email message as desired.
Email employee resumes to supervisors for consideration
Utilizing the candidate search function directly within an order allows for quick submission of candidates resumes to the order contact.
Once you have completed your search and have employees attached as candidates to the order, you can email the resumes directly to the supervisor by selecting the ![]() button just above the candidate screen.
button just above the candidate screen.
Once you have selected this you will have the option to either send the resumes that are attached to the employee record, or to generate and send emails from a new template.
Enterprise will then generate an email to the contacts on the order and attach the resume of the candidates you selected.
Emailing candidates on an order
From the candidates tab on an order you can also email the potential candidates. To do this, select the envelope icon in the top right. ![]()
This will generate an email to all of the potential candidates on the order.
Emailing contact groups
Creating contact groups is a great way to have quick efficient access to those contacts you frequently send emails to, for example, contacts you send marketing materials to.
To send an email to a contact group you will need to go to the contact group screen.
Once the contact groups screen has pulled up, select the group you wish to send an email to from the Select a group dropdown. The contacts within the group will be listed just below the dropdown.
To send an email to the group simply click on the envelope button just on the top right of the list.