Complimentary Webinar - Tips and Tricks to Save Clicks! from TempWorks Training on Vimeo.
For best viewing quality, expand the HD option, and select 1080p:

Enterprise Infinity Tips and Tricks To Save Clicks
As creatures of habit, we sometimes continue to do the same thing in the same way because we are "used to it". There may be an easier way to accomplish a goal but we are familiar with our "old ways" and are often too busy to take the time to learn something new. Work gets busy and we don't have time to "play around" with TempWorks Enterprise to learn little features that would make work so much easier.
"Tips and Tricks to Save Clicks" will cover some of the ways in which you may be able to shave precious seconds off different tasks that need to be performed each day.
Forward/Back:
At the top of TempWorks Enterprise, no matter where you go, the 'forward and back' icons are always visible:

Use them exactly the same way you would in an internet browser, click the left facing button to navigate back through forms you've opened in TempWorks and the right facing button to navigate forward through those forms.
Up/Down:
After conducting a search, double click to open the first record in your search result and go to the form you'd like to view within that record: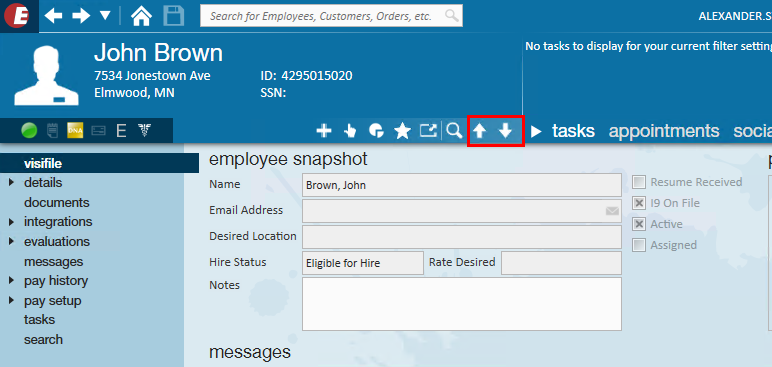 Click the 'down' arrow to go to the next record in your search result list but stay on the same form within that record.
This is very useful if you want to do things like verify all direct deposit data has been entered for a list of employees. Or you may want to view everyone's education or interview notes without having to go back to your search results.
*Note* This feature is available in the employee, customer, order, assignment and contact areas of TempWorks Enterprise.
Recent Pages:
To view recently viewed pages click the down arrow in the upper left corner of TempWorks:
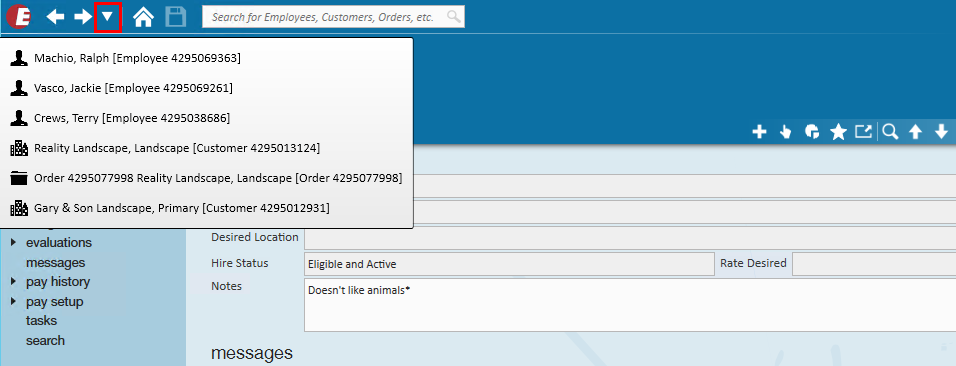
This will display all records which you have viewed since last logging into Enterprise.
*Note* Once you have a list the length of your monitor, the older records will drop off the list.
Wildcards:
Use the wildcard (%) in your searches.
If you are looking for a company by the name of "tile", using the % before the word "tile" in a search will bring up companies that have the word "tile" somewhere within the name:

The wildcard can be used for any unknown string of characters such as, in searching for an employee with the last name of Jablonski, if you know the name begins with a J and ends with ski, search using the wildcard by formatting it as: J%ski.
*Note* This works in free text search fields only.
*Note* When searching you will automatically get a wildcard at the end of what you are searching for. For instance: Searching for "Jab" will return results of anyone whose last name begins with "Jab".
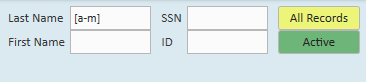
Brackets:
When conducting a search you may want to limit your result by the first letter of the search result.
For instance, when sending an email to all active employees, your search results may return more than the maximum allowable results (typically the limit is 1,000). You may want to search for only employees whose last names start with A through M.
To do this use brackets to surround the first letters of the names you want returned:
Right Click to Quick Log:
After conducting a search to find the Employee who has called in available:

Right click on the row which includes the Employee calling in available. Hover your mouse over Messages and select Available. This will log a Message that the Employee has called in Available.
This can also be used to log a message of Left Message to call, Reactivate, Deactivate.
Selecting Log Message will open the Message Dialog window.
Right Click Navigation:After conducting a search from any of the main areas of TempWorks Enterprise (Employee, Customer, Order, Contact) right click on the row which includes the Employee you want to be working with. Hover your mouse over Navigate to:

Select the form within the employee record that you want to navigate to. An arrow to the right of the form name indicates there are sub-forms available.
This will navigate you directly to the form within the employee record
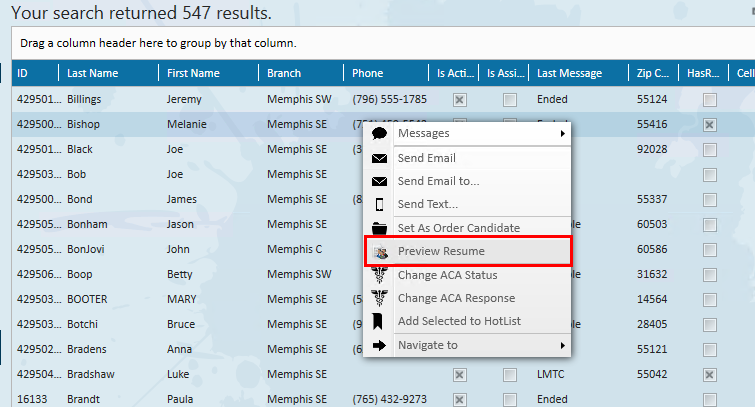
*Note - Right click navigation also works within the 'candidate' worksheet within the assignment.Right click to view resume:
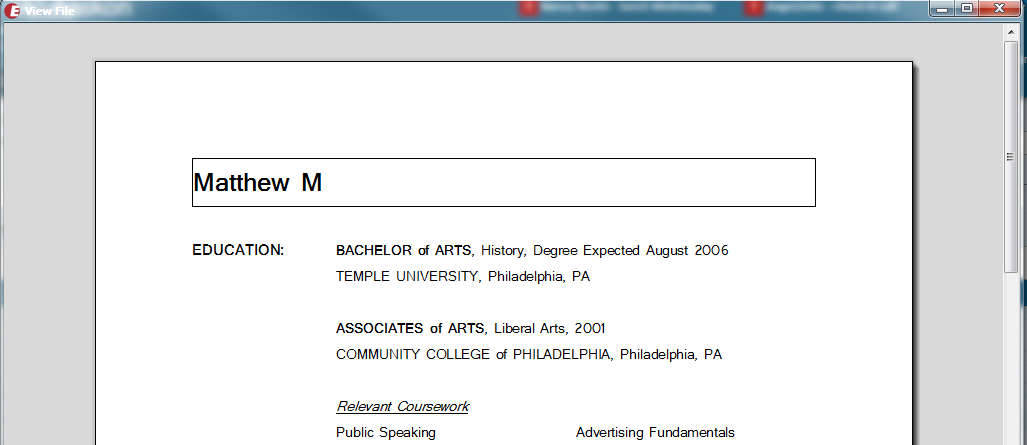
After conducting a search for an employee from the employee or 'order candidate search' areas right click on the line which includes the employee whose resume you would like to see.
Select the 'Preview Resume' action.
This employee's resume will open:
Any time a grid of information is displayed in TempWorks Enterprise, the columns can be rearranged as needed or desired.
Sort by Column:
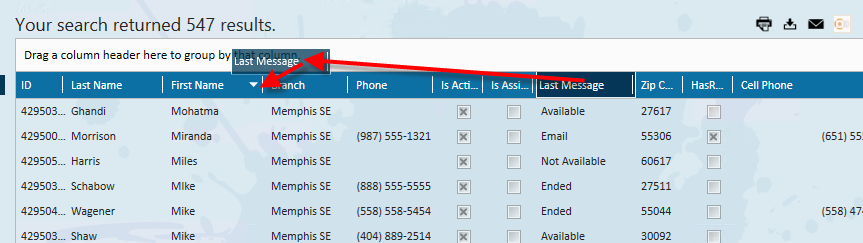
Sort the grid based on any column by clicking on the header of the column by which you'd like to sort.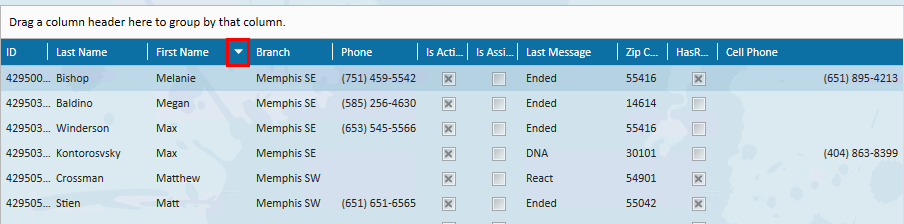 'Click' once to sort in ascending order.
'Click' again to sort in descending order.
'Click' a third time to sort in original order.
By dragging and dropping the column header to where you want it to be you can rearrange any column. Drop the column header directly into the header bar.
Group data by any column:Group data by dragging and dropping the column header(s) to the area just above the headers: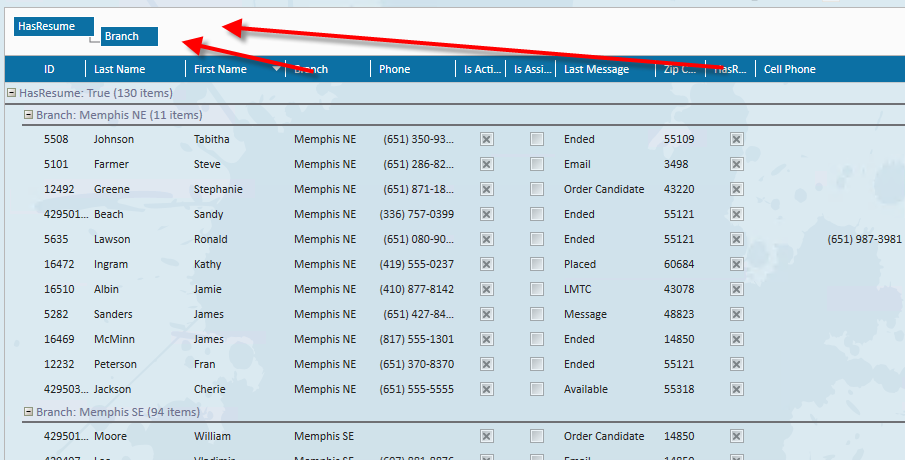
Once the grid is grouped click on any column Header to sort by that column.
To ungroup simply drag and drop the column headers back into the column header row.
*Note - Group by will work only with search results.Include or Exclude Columns:
Right click on the column header row to select or deselect columns.
Any column which has a check mark in front of it is currently displayed in the grid.
To hide a column click to remove the check mark.
To unhide a column click to add the check mark.
Customize navigation tree options:
When working in TempWorks Enterprise there is always a main Navigational Tree in the lower left corner of your screen.
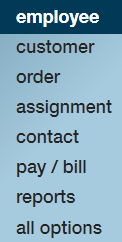
The options displayed here can be changed. Navigate to the 'E' Button in the upper left corner of TempWorks Enterprise then select 'Options'.
Within Options select Navigation.
From the Select a Group section, click to highlight a group. The forms which will appear in the main Navigational Tree will be selected. This is indicated by an x in the box proceeding the form names:

Select the group you would prefer then click 'Save'.
Your navigational tree will now display only the forms for the group you've selected. If your SecRole permits you can create new groups by clicking the '+' icon.
*Note - the All Options selection will still include all areas for which you have access.
If a message needs to be linked to an assignment (meaning it should show up on the assignment/order/contact/customer/employee) instead of starting the message from the assignment area, it can be added directly from the employee's visifile.
Look up the employee for whom the message needs to be logged. From the visifile, click to highlight the assignment you'd like to link the message to. Click on the 'message bubble' icon in the upper right of the 'visifile/assignments' area:
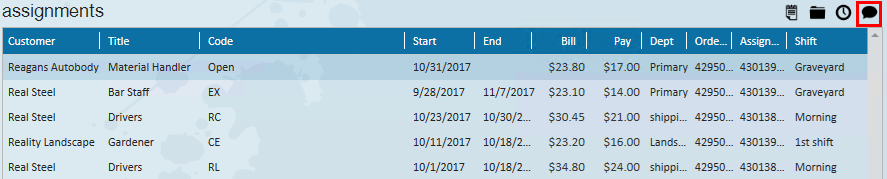
The message dialog box will open and the employee, customer, order and assignment will automatically be linked to the message.
Clicking the 'Link Contact' drop-down will display all contacts affiliated with this customer/department including their phone numbers. Select the contact to which this message should be linked:

Import:
When logging a Message on a record in TempWorks, if an incoming email is in your email you will be able to import that email into the Message:
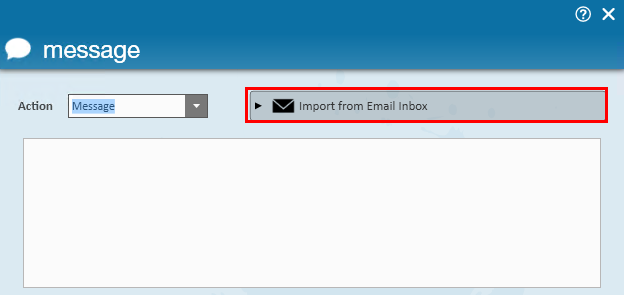
Click 'Import From Email Inbox' and the email subject lines from your inbox will be displayed. Select the email to import to this message.The verbiage can be modified prior to saving the message.
*Note - for this to work, your email must be setup within TempWorks.Email from a Message:
When logging a message, what you key in as the message text can be sent out as an email:
Type into the message the information you want sent via email.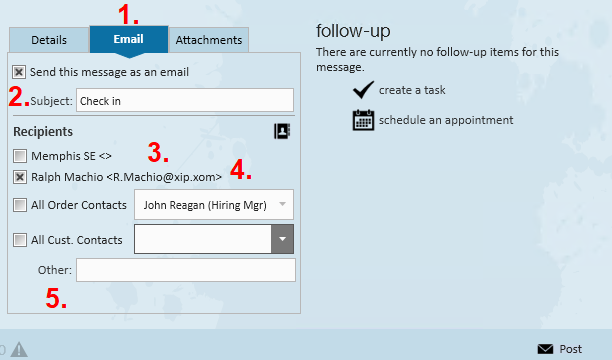
Click the Email tab within the message (1.). Click to place an x into the box in front of Send This Message As An Email (2.).
Select recipients by placing an x in front of:
(3.) The email address associates with your branch.(4.) The person who is affiliated with the record for which you are logging the message.(5.) Any additional recipients
Click the 'Post' icon to save the message and send it as an email.
When logging a message (and sending an email via logging a message), a document can be attached to the message.
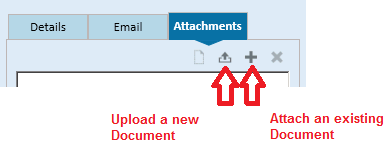
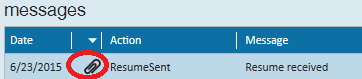
A message which has a resume attached will display a paperclip icon when viewing the messages from the Visifile:
Attaching a document to a message will also display that document in the Employee/Document area.
Message Record Links:
Messages can be manually linked to the records which are currently open in Enterprise:

When logging a Message, if the message should be linked to other records click on the corresponding 'link' icon. This will link the message to the Contact, Customer, Order, Assignment or Employee whose record is currently open in that area of Enterprise.
*Note* this will work only if the record is currently OPEN in TempWorks Enterprise.
From the 'order actions' menu click 'Update Assignments' to end any or all of the assignments affiliated with this Order:
This will display the list of assignments affiliated with this order:

Select any or all assignment by clicking to place an x in front of the assignment. Indicate the 'Performance Code' (1.) and enter a 'Performance Note' (2.), if desired. Enter the 'End Date' (3.) for any (or all) assignments which are ending. These can be different dates. Select if an employee should be DNA'd from this customer.
*Note* This will DNA the Employee from only the department for the customer. Should an employee be DNA'd from the entire customer, navigate to the customer record and set the assignment restriction.
Make records (or forms within those records) your favorites. This will enable very easy access to those records/forms. Look up the record and navigate to the specific form you'd like easy access to, this can be an employee, customer, order, assignment or contact.Click the 'star' icon:
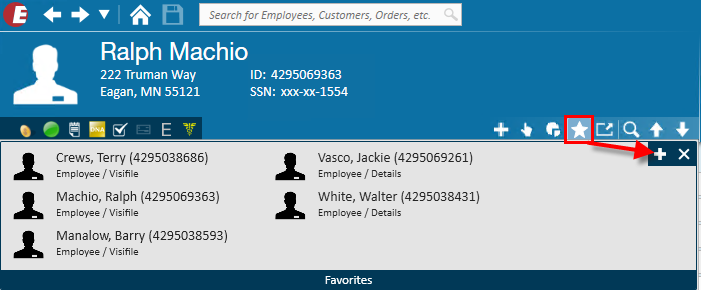
This form of this record will now be accessible by clicking on the Star button either in the Avatar area of the type of record you'd like to view favorites (Employee, Customer, Order, Assignment or Contact) or from the navigational tree:

To remove this record from your favorites list click on either Star button then click the "x" next to the record to be removed from favorites: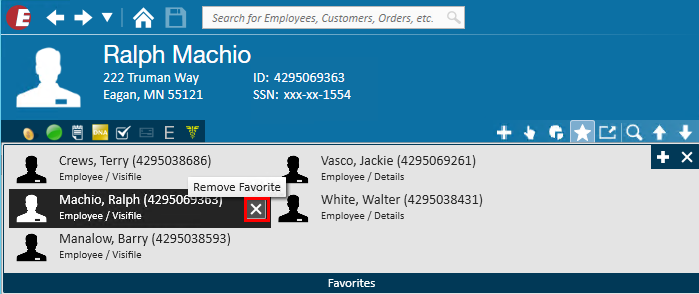
Hot Keys:There are a multitude of keyboard shortcuts (or hot keys) built into TempWorks Enterprise. If you are more of a "keyboard" person, this will help you navigate more quickly through TempWorks Enterprise.To view the list of hot keys click on the 'E' Menu at the top of your TempWorks Enterprise:

And select keyboard shortcuts:
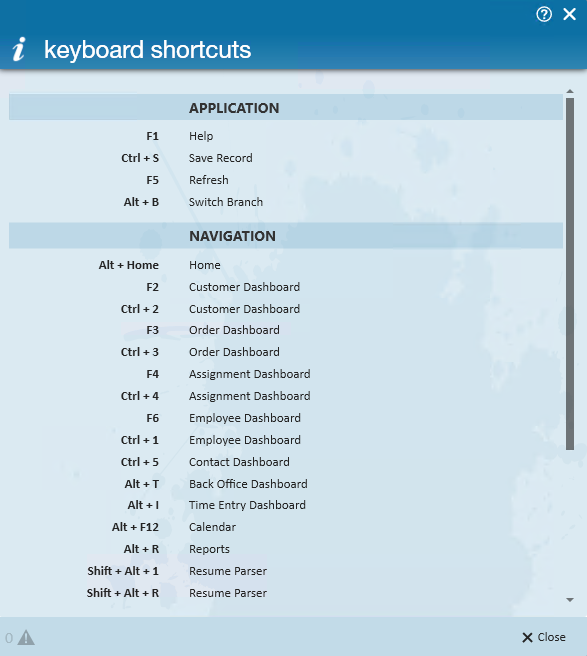
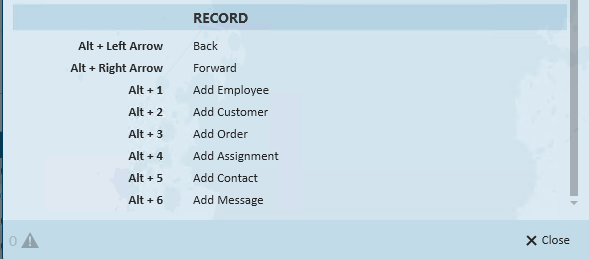
Additional Keyboard Shortcuts:Control + A Select AllControl + G Navigate to specific Record from a Search result+ (keypad) Lookup by Employee name within Time Entry* (keypad) Lookup by Customer lookup within Time EntryAlt + C CopyAlt + L Link Timecard*Alt + U Unlink Timecard*
*Note - Only available with TimeCard Linker.
Related Articles
- None