Enterprise can assist with tracking the accrual and the usage of the sick time. Accruals may be based on what the employee has qualified for, customer specific or assignment offering. This article will cover:
- Employee Accruals
- Customer Accruals
- Assignment Accruals
- Reviewing and Modifying Balances
*Note* Before an accrual can be added to the employee record, it must be set up in the administration area of Enterprise. Please see your system administrator for the specific accrual plans that are offered and setup in your database.
Employee Accruals
1) Start by navigating the employee that you would like to attach the accrual record to and once there, select pay setup → accruals.
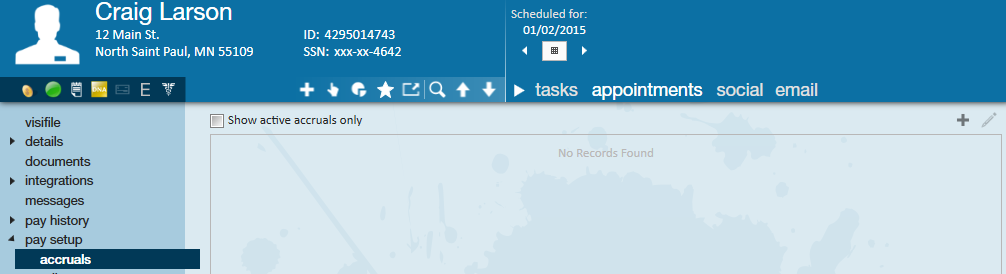
2 ) Next, select the '+' icon to add the accrual. This will open the accruals window: 
- Accrual Type: The items that display in this drop-down are the accruals that have been setup in the administration section of Enterprise. If this drop-down is blank it simply means that no accruals have been setup within your hierarchy view. See an administrator and the prior section of this help document for further instructions.
- Active: When selected, the accrual is active for this employee and hours will be earned and depleted based on the rules established for the accrual type.
- Requires Assignment/Customer Accrual: If this accrual needs additional setup on either the assignment record or the customer record to be in effect select these check box's. If the accrual is not set up in either of those places, then no hours will accrue.
- Annual Depletion Rollover: This date determines the date that the accrued time will be considered rolled over to the next "year".
- Adding Packages: Select the '+' icon to attach a package.
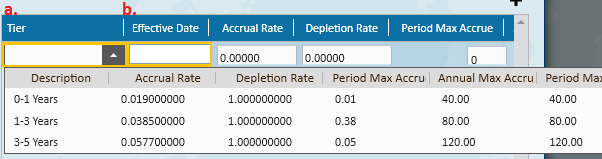
- Tier: Select the appropriate tier from the drop-down. The rate of accrual and depletion, as well as max balances are listed for your review.
- Effective Date: The date the accrual package should become activate. Allows users to set up accruals ahead of time by choosing a date in the future. Once active the accrual will begin calculating when processed through payroll.
*Note* The effective date of the accrual must always be backdated at least one week if you want it to be effective "immediately". This is because payroll is being processed for the previous week's hours worked and the system will want to pull in all accruals.
3) Once you are done entering in criteria for a tier and effective date, simply select save.
The accruals page will be updated to display the added accrual package:

If the package accrues on OT, DT, and/or allows a negative balance the related boxes will be selected. Additionally, the service rep who added the accrual will be listed under the rep name column. Users may always edit (![]() ) and add (
) and add (![]() ) additional packages.
) additional packages.
*Note* When making edits to Accruals within Enterprise Administration, the tiers for the Accrual on the Employee record will not be automatically updated. The Accrual Tier will need to be reassigned to the Employee record for the new information to take hold.
*Note* Accruals may be based on several different calculations including: anniversary, annual, hourly, hours threshold and pay period. Different rules can be set up by your administrator for each accrual such as: what payroll codes will allow for accrual, if the accrual allows for a negative balance, the maximum number of hours that can be accrued, carried over, etc. Please see your TempWorks administrator for details on your organization's specific accrual packages.
Customer Accruals
If an accrual is customer specific, meaning employees will accrue sick time while working at a specific customer, set up the accrual under the defaults/accruals area of a customer record.
*Note* Customer accruals are not automatically given to employees when assignments are created. They must manually be given to the employee by marking the accrual as "Requires Customer Accrual" unless they are used in conjunction with location-based/assignment or worksite accruals.
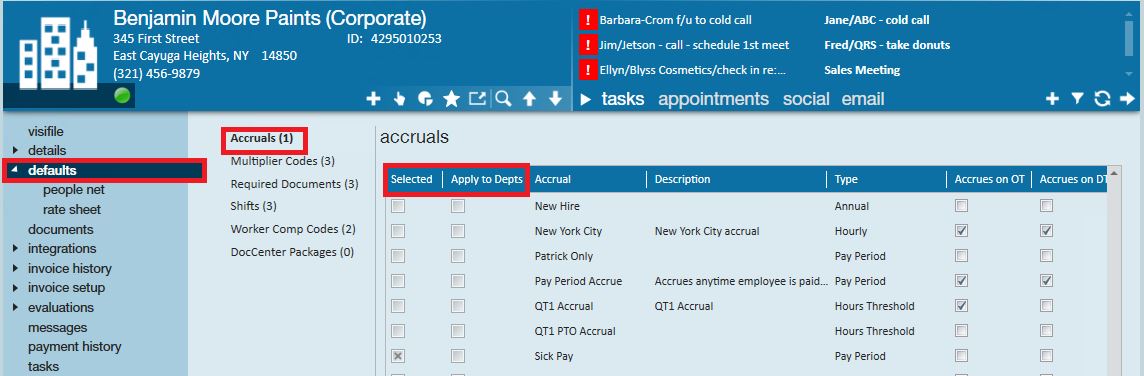
Choose the appropriate accrual package by clicking the "Selected" column's check box that corresponds to the package which should be applied. If the accrual should be applied to all of the customer's departments check the the "Apply to Depts" box, as well.
*Note* When a default customer accrual is set up, it will not appear under the assignment accrual section but will be calculated when payroll is processed.
Worksite Accrual Setup
Worksite based accruals are a great way to track accrual packages based on a said location the employee will be working at. This can be beneficial for you as a staffing company if this is a policy you wish to implement or have to follow specific regulations.
Navigate to the customer record you wish to apply worksite location accruals. Once there, select the worksite(s) you wish to setup the accrual package for. You may either edit an existing work site (1.) or add a new one (2.) if needed. If you are not sure how to setup a work site, follow this link: Departments vs. Worksites

Once in the setup-work site details wizard, navigate to accruals:

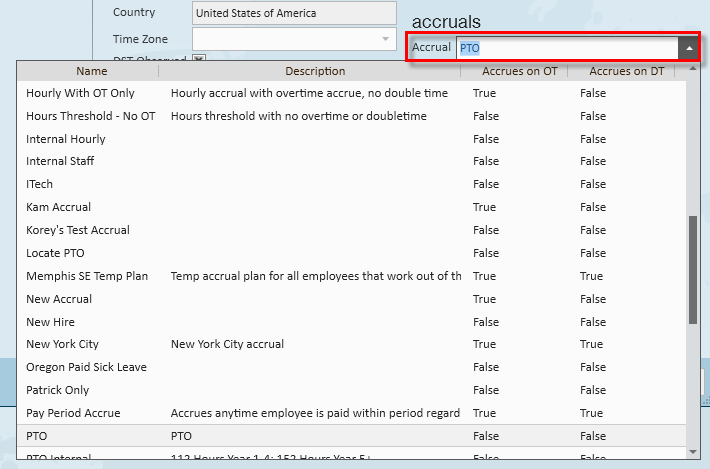
Within the drop-down, you will see accruals to select from. If this list is blank, you will need to setup the accrual package(s) within the administration section of Enterprise. After you select which accrual you wish to apply to the work site, select 'Save' and continue:
Any newly created orders with this work-site selected will automatically have the accrual package set in place. As you assign employees to this order, the assignments will take on the accrual package, as well as update the employee file with the package.

Assignment Accruals
If an accrual is assignment-specific, meaning the accrual will be specific to a particular employee's assignment, set up the accrual from the details/accruals area of the assignment record:
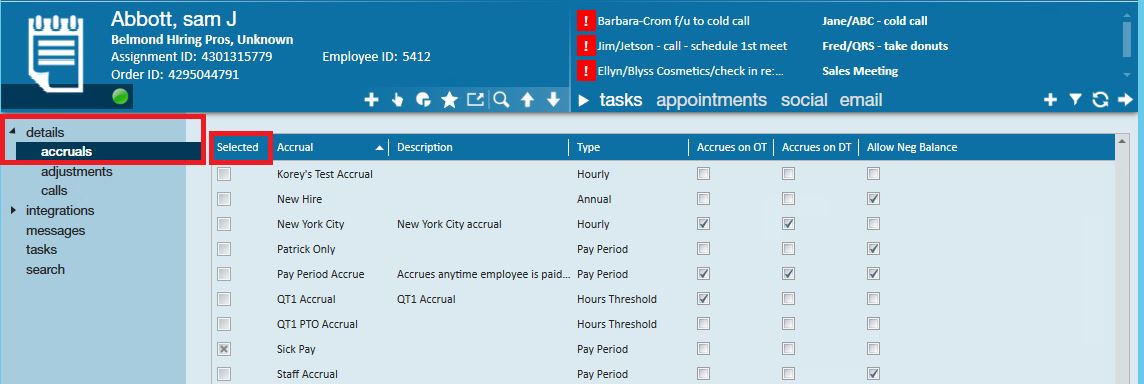
Select the appropriate accrual package by clicking an x in the "Selected" column next to the accrual package which should be applied.
Reviewing and Modifying Accrual Balances
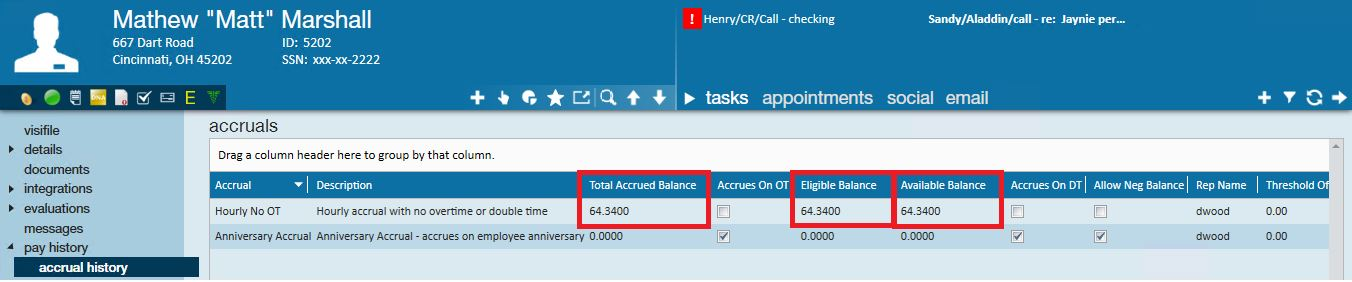
1) Start by navigating to the (1.) pay history → accrual history page for the employee of interest.

Any (2.) accrual packages that have been added will be listed in accruals table on the page. The (3.) accrual history table will display accrual information as well as the amount that has been accrued, depleted, or manually adjusted by date and service rep.
2) To manually adjust an accrual balance, select the (4.) '+' icon in the accrual history table:

Accrual: Items that display in this drop-down will mirror the accruals that appear in the (2.) accrual packages table.
Weekend Date: The weekend date you are adjusting the accrual balance for.
Amount: The amount you would like to adjust the accrual. If you are depleting an amount, enter this balance as a negative.
Notes: Include any information here regarding why you are adjusting the accrual's balance.
Accrual: Select this box if you need to increase the accrual's balance.
Depletion: Select this box to document that you are decreasing the accrual's balance. Note that simply selecting "depletion" does not deduct the balance. The amount entered must be keyed in as a negative for an accrual balance to be depleted.
3) Upon selecting save, the manual entry will be visible in the (3.) accrual history table.

Balances
Accruals will have 3 different balances associated with them:
- Total accrued balance: The total amount accrued less the total amount depleted.
- Eligible balance: The number of hours that have been accrued that have met delay requirements.
- Available balance: The number of hours that currently can be used by the employee. It is the eligible balance less any hours over the annual maximum.