The Outlook Add-in
The Microsoft Outlook Add-in is an integration that allows TempWorks users who are also working with Outlook to get the most out of their email and their database. This add-in is a sidebar that can be utilized in both the application and the browser-based platforms for Outlook.
Key Functionality in the Outlook Add-in Sidebar
- Manually creating records, both employee and contacts.
- Creating an employee record by parsing in a document such as a resume.
- Pulling in emails as messages in existing records both employee and contacts.
- Logging separate messages in records apart from email.
- Viewing past related messages to an employee or contact.
- Accessing contact methods as well as linking to a records contact address via maps.
- Import documents from an email.
*Note* The Outlook Add-in is currently only available for our hosted clients & utilizes BeyondTM. If you have not set up Security Groups or utilized Beyond, please talk to your Account Manager first. In order to log messages within the Outlook Add-in and Beyond, each user will need to be part of a Message Action Security Group. In order to parse resumes, or save documents, you will need to be part of a Document Type Security Group.
In order to Utilize the Outlook Add-in, it must first be installed by your IT Admin. For installation instructions, see Setting Up the Outlook Add-in.
This article covers:
- Finding the Add-in
- Creating a New Record
- Logging Emails on a Record
Finding the Add-In
After the add-in has been made available to you by your IT admin, you will be able to see the TempWorks Outlook Add-in Option within email.
To Open the TempWorks Add-in:
When looking at an email, you will see the "TempWorks" logo in the upper right of an email:

While replying to or forwarding an email, the "TempWorks" logo will appear in your home tool bar:

*Note* The add-in is only available on messages and appointments while composing or reading. For a full list of limitations on the add-in see Microsoft's Outlook Add-in Overview.
When accessing the sidebar, you may be required to enter your credentials. A separate window will open for you to enter your credentials in.
Enter your credentials as though you were logging into Enterprise or Beyond. You do not need to use the 'host\' as part of your username.
Now that your Outlook has been synced to a database, the sidebar will search for records in your database that are associated with the contact information from the email.
Creating a New Record
Upon opening the sidebar, TempWorks will search your system for an existing record.
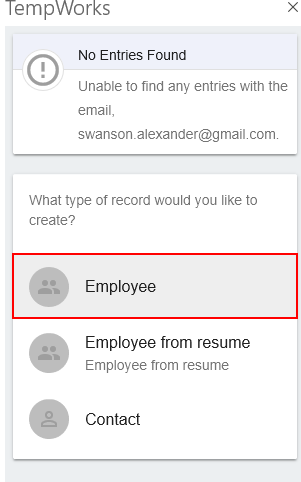
If none exist, you will have the option to make one: 
Using the add-in, you will be able to add:
- Employee Record
- Contact Record
Adding a New Employee
Two options exist for creating an employee:
- Creating the record based off the email's contact info
- Creating a record based off an attached document (resume)
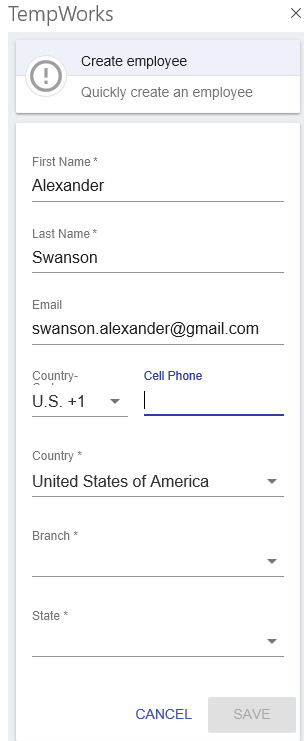
When creating a record from the employee’s contact info, select 'Employee' to manually create the record:
This will allow you to quickly make the employee with only basic info:
Alternatively, selecting 'Employee from resume' will create a record from the employee's attached resume:
 Utilizing this option will save the resume to the employees file and attempt to parse past job information.
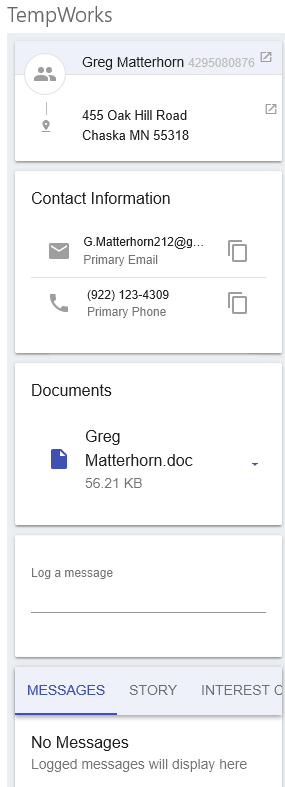
Once the record has been created, interacting with any email from the employee will allow you to access their sidebar.
*Note* If more than one record exists, you can use the 'open window' button to open the record in Beyond to confirm:


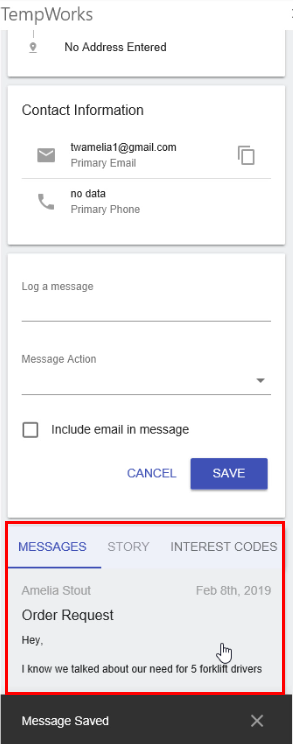
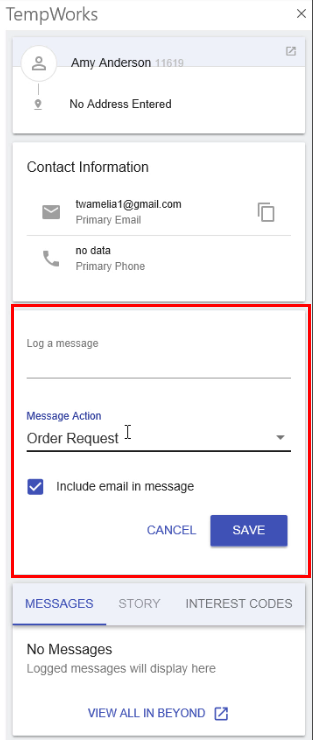
Once the contact/employee is selected, they will appear in the sidebar as though it were the quick view bar in Beyond. Here, messages can be logged and interacted with:
Adding a Contact
New contacts can be added when interacting with an email that has contact methods not found in your data base.
Select the contact option to add a new contact:

Contact information will be populated based on the information provided in the email. Add or update any of the fields below:
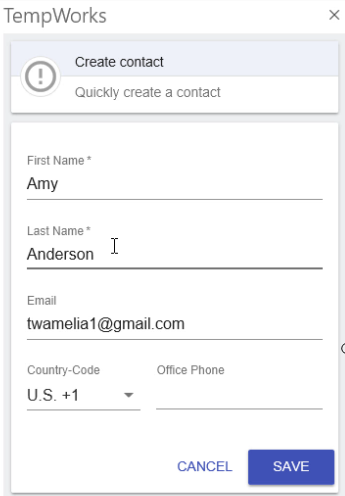
Select Save to save the contact.
*Note* The newly created contact has not been associated with a customer record when created within the add-in. Make sure you update the contact record in Enterprise or Beyond to include this information.
Logging a Message
When a contact or employee from your system emails you, you can utilize the Outlook Add-in to log a message on that persons' record without ever leaving your email.
*Note* In order to log messages within the Outlook Add-in and Beyond, each user will need to be part of a Message Action Security Group. If they are not part of any Message Action Security Group they will not be able to see any message action codes in the drop down. The Security Group can limit what message action codes the user is allowed to use when logging messages.
To log a message:
- Select the 'Log a Message' field.
- Optionally, enter any information you want to add to the Log a message section
- Select your message action code
- If you want the body of the email included in the message, check the 'include email in message' checkbox
- Select Save to post the message

*Note* Only message action codes that are employee AND contact relevant can be selected from the Outlook Add-in. For more information check out Administrator Manual.
Messages can now be viewed in Enterprise, Beyond, or within the Outlook add-in itself: