What is Timecard Linker?
Timecard linkers allows you to link timecard images to time entry line items in order to verify time and/or include timecards received on invoices to customers.
*Note* Timecard Linker is an additional module. If you do not have access to Timecard Linker functionality, please contact your account manager to learn more.
Including Timecard Images on Invoices
If you want timecards that you link to be included when emailing or printing invoices for a specific customer, you will need to update their billing setup information. This will need to be done for each customer you want to link timecards for.
- Navigate to the customer you want to send linked timecards to
- Select Invoice Setup > Billing Setup
- Under Invoice Method drop down, select one of the options displayed "with Timecard Image" included
- Select Save (CTRL + S)
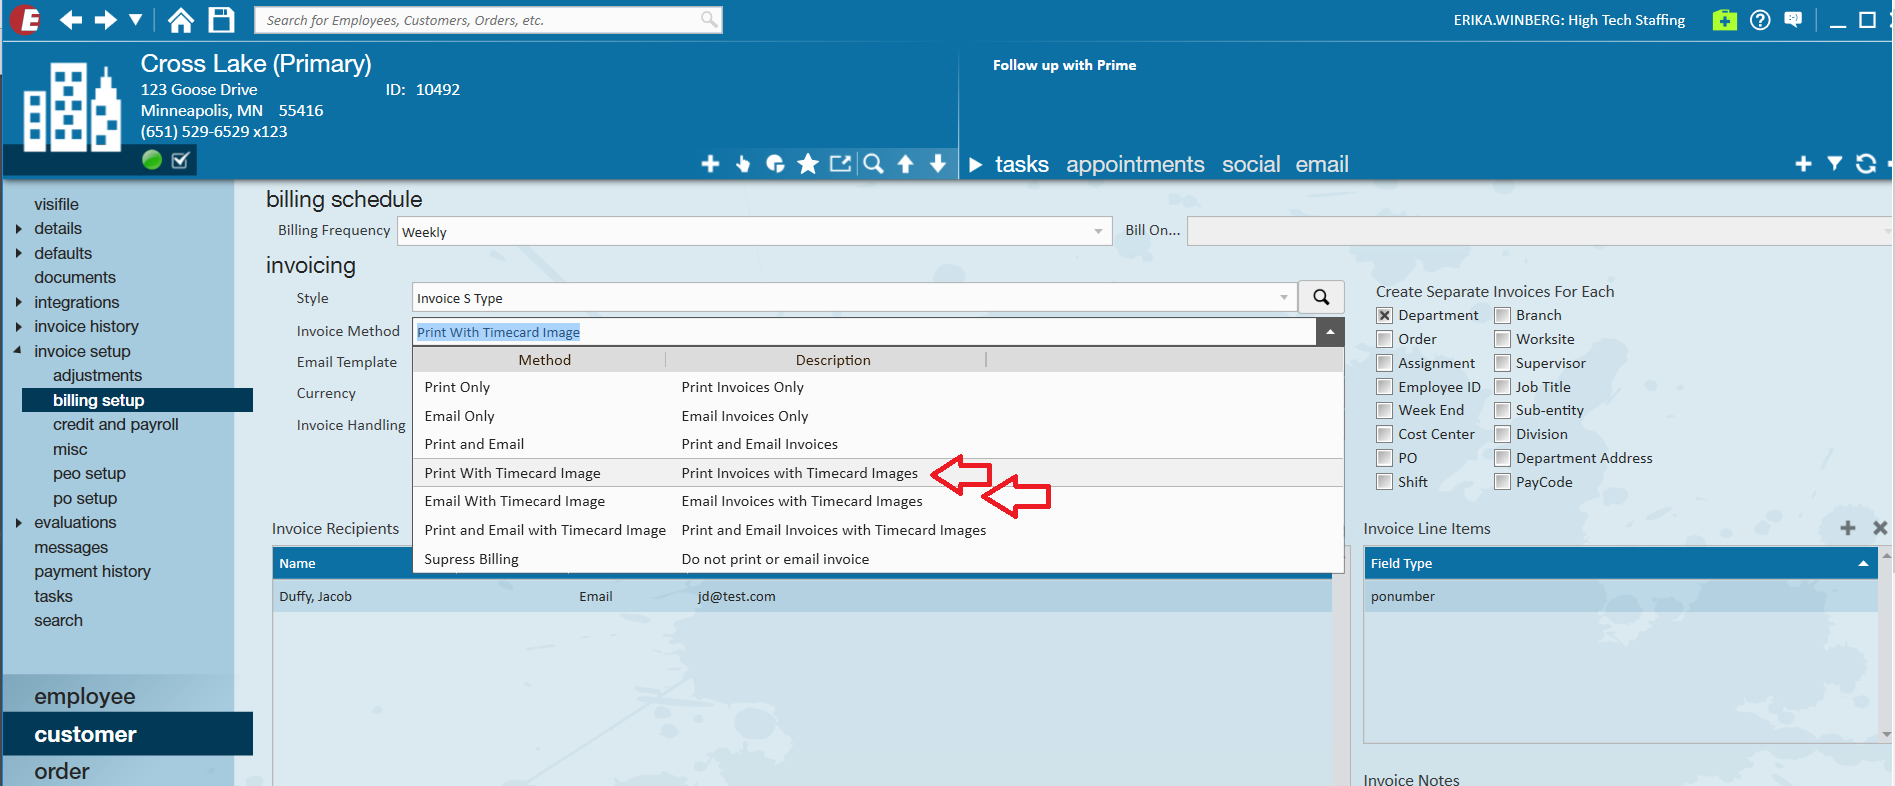
Currently you can either select “Print with Timecard Image”, “Print and Email with Timecard Image”, or “Email with Timecard Image”. Selecting one of these options will allow the linked images to be attached to invoices during the invoice run stage.
Linking Timecards
You can link image files of timecards to their related time entered in Time Entry in order to document signatures, total hours sent, etc. and email them with the invoices to customers.
*Note* Before you start linking, gather your timecard images and make sure they are all in PDF format. If you often receive images, excel files, etc. you can use a print to PDF software or option on your computer to covert them to PDF.
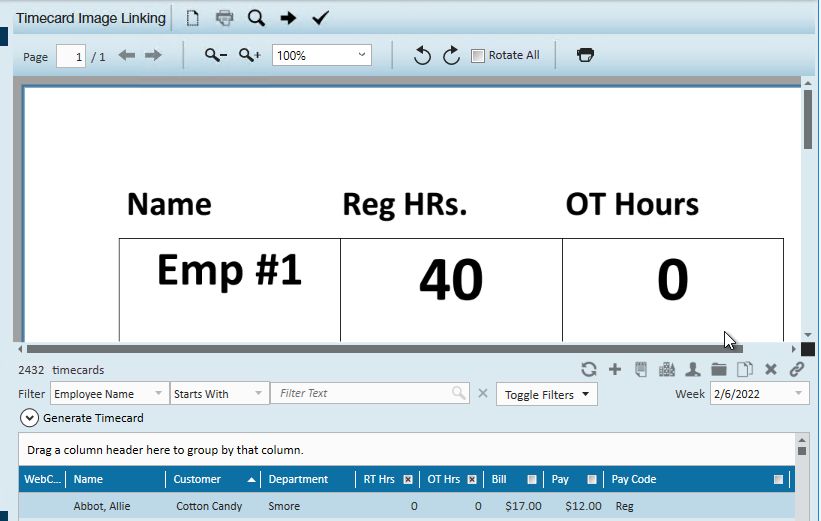
To Access Timecard Linking Options
To find the buttons to upload timecard pdfs, link timecards, etc. you'll need to open the Timecard Linker in Time Entry.
- In Enterprise, navigate to the Pay/Bill area
- Open Timecards > Navigate to Time Entry
- Select the Link Timecard Images button in the upper right
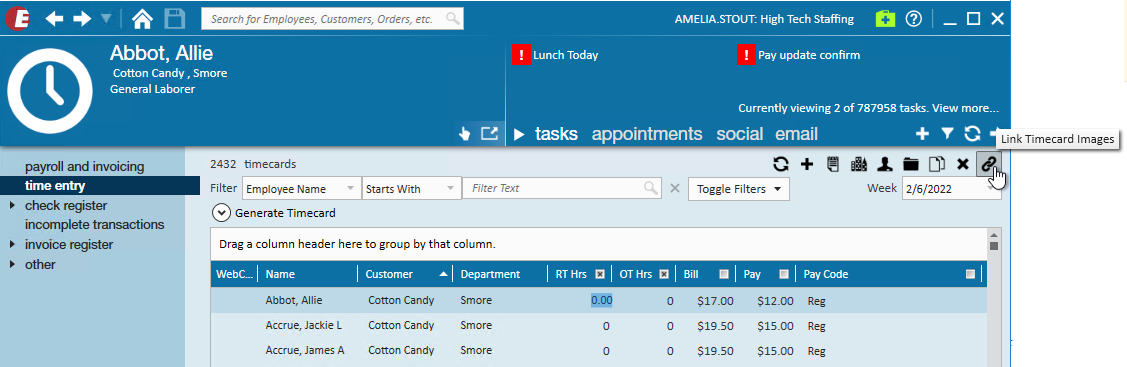
- The Timecard Linker Options will open at the top of the page


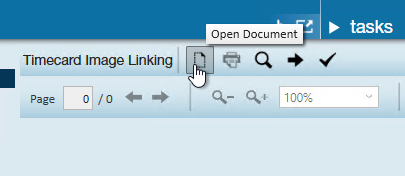
To Upload a Timecard PDF to Enterprise
You'll need to first upload the PDF of the timecard(s) to Enterprise in order to link them to the appropriate time entry items. PDFs can contain multiple timecards per page if needed.
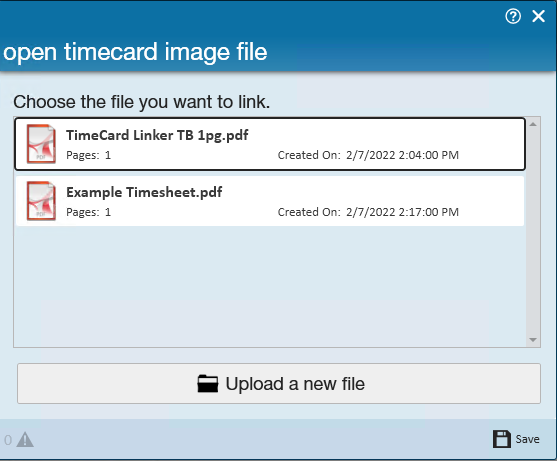
- Save a PDF copy of the timecard(s) you received to your computer
- Navigate to the timecard linker options in Time Entry (see above for more instructions)
- Choose the open document option at the top
- If a document has already been uploaded this week, the selector will show existing documents. To upload a new document, choose the upload option at the bottom.
- If a document has already been uploaded this week, the selector will show existing documents. To upload a new document, choose the upload option at the bottom.
- Select the PDF document from your computer
- Click open and the document will upload and display in the top window


*Note* If you are having trouble finding the documents on your computer, you may need to map your drives. Check out Accessing Local Drives in Enterprise for more information.
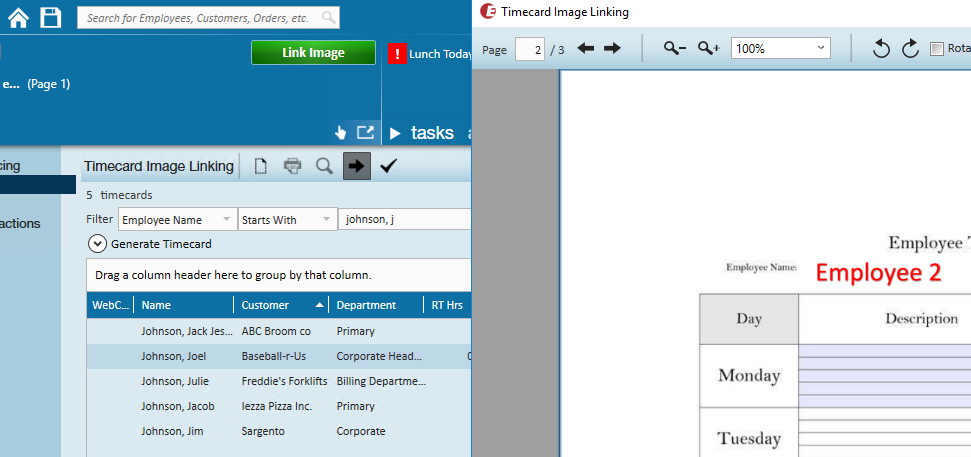
To Link Timecards
Now that you have navigated to the timecard linker options and uploaded at least one Timecard document, you are ready to link the document to the correct timecard(s) in Time Entry.
- While looking at the corresponding document page at the top, find the timecard below.
- Select the timecard
- Click the Link Image button that will be in the upper left in green

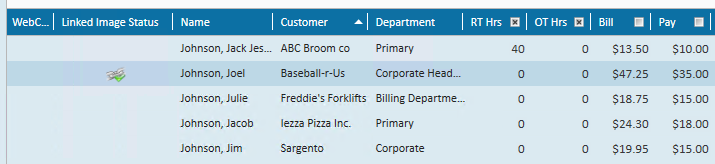
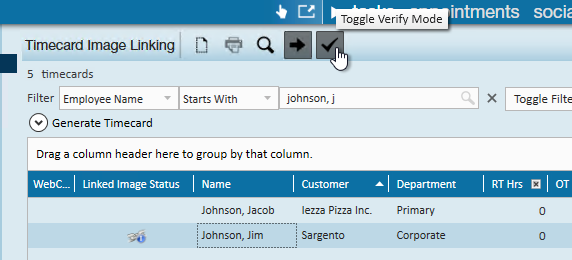
Right click to add the Linked Timecard Status column to your Time Entry to easy see which timecards have been linked
Link the wrong time entry timecard? You can select the time card in time entry and click the unlink timecard option.

Navigation Tips
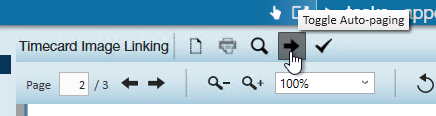
Move Between PDF Pages
If you have a PDF with multiple pages of timecards you will need to move between pages to link the correct timecards.
You can use the arrows above the timecard image to manually move between pages in the PDF 
If you have one employee timecard per page, consider turning on auto-toggle to have the timecard linker automatically move to the next page once you have linked a timecard.
To turn on auto-toggling select the Toggle Auto-paging arrow option at the top.
View Options for PDF
Is your PDF too large to read? sick of scrolling around? Use the magnifying options above the image to change the display size in the window you are working on
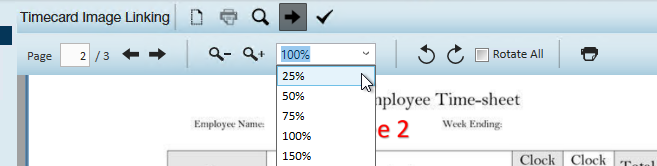
Is the image sideways? Sometimes when an image is converted or scanned in to PDF it can turn out sideways. You can use the rotate options to fix this. If your PDF has multiple pages, use the rotate all checkbox to rotate all the pages at one time.
Open Timecard Image in a New Window
If you are working with two screens or have to link a lot of timecards, we highly recommend opening the timecard image into a new window so you can have your timecard image on one screen while you look at the timecards in the other.
To do this, simply click the magnifying glass at the top to enable large screen mode 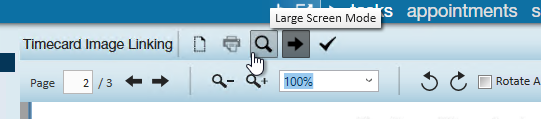
The timecard image will then be set in a separate window that you can move around to work best for you.
Use Keyboard Shortcuts
If you link timecards frequently, you can utilize keyboard shortcuts to speed up the timecard linking process.
Check out Keyboard Shortcuts for a full list.
Utilizing Verified Mode
If you want to triple check that all the time is entered correctly when linking the time, you can use verified mode which will require the linker to review the time entered vs the timecard image.
To turn on verified mode, select the checkmark at the top of the window.
With verified mode turned on you will see a new window pop up each time you link a timecard:

This window will have the employee's name and total hours. Enter the number of hours from the timecard image at the top. If the total hours are different, then the linked status will update to "Linked with partial hours verified" so your team can review and correct the hours on these timecards.
This can also be helpful when linking en masse. Use CTRL or SHIFT keys on your keyboard to grab multiple time cards related to the image. Once you have them all selected, choose the link image option. 
Verify all their hours are the same by typing in the hours at the top or click on each employee's total hours to enter hours for each person.
If the number linked on the timecard image does not match what was entered into the hours column the timecard will automatically be move to a linked with partial hours verified status.

To catch errors such as this you may run the Timecard Linking Hours Breakdown report or continue to proofing.
Timecard Linking Hours Breakdown Report
Utilize this report to verify timecards that are still missing linked images, have unverified hours, or unmatched hours. Within this report, you may select multiple variations of linked status options such as all timecards without linked images, those that are linked but have unmatched hours and more. Utilize the ' Group By' option to organize the report into said categories.
Reporting Errors on Timecard Images
To report an error with the timecard image (missing signature, incorrect number of hours, etc.), double click on the image file (listed under the Employee’s name in the Avatar area). 
The form below will open and list the Number of Hours on this Image. Click on the '+' button to proceed to the next step of image error reporting.

Select the issue from the Problem Type drop down menu. The Override check box can be used to ignore this error at this point or to approve the error during the Proofing process.

Click on Save to close the form or New to save and clear the form so that another issue can be added. You can also verify hours from this screen.
Once all of the timecard image issues have been added click on the Save button in the lower right of the Timecard Image Details form.
*Note* When a timecard image error is report, the hours indicator for the timecard image file will turn red in the upper left.
Completing Proofing & Invoicing
While timecard image links don't directly impact or change how you process payroll, they can impact proofing and invoicing.
Proofing
During the Proofing process for the session any timecard image errors will be listed. To view the Transaction, right-click on the error line and select View Timesheet.

Once errors have been corrected or approved continue with the proofing process and close the session. Once the transactions have been proofed they can be included in a payroll or invoice run. As timecard image linking does not affect employee paychecks, the payroll process will be unchanged.
Invoice Processing
Continue with the usual invoicing process. When selecting the Transactions to include in the run, viewing them by Invoice Method will allow the user to view and/or select Transactions that will be printed with the timecard images.

To view the invoice with timecard images during the invoice staging process, select the View Invoice icon :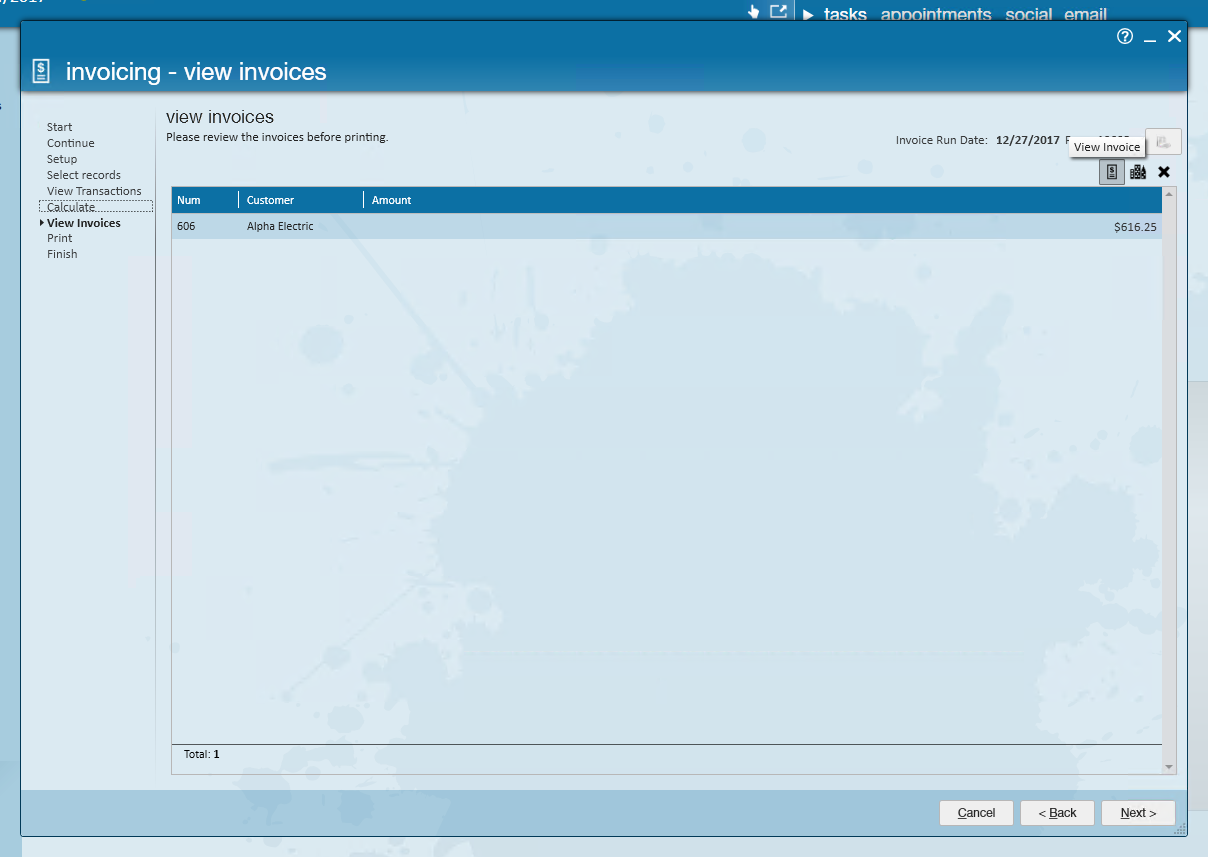
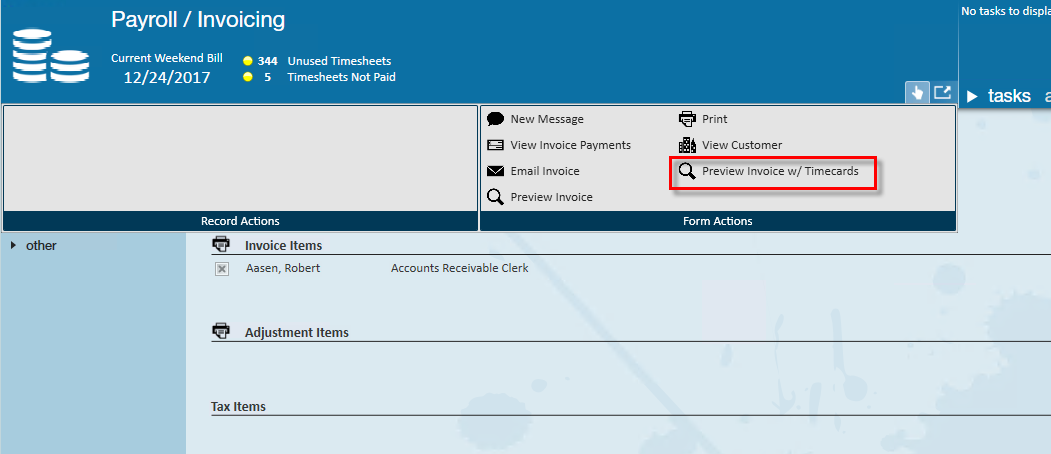
Within the invoice register click the actions menu and select to ' Preview Invoice w/ Timecards' :
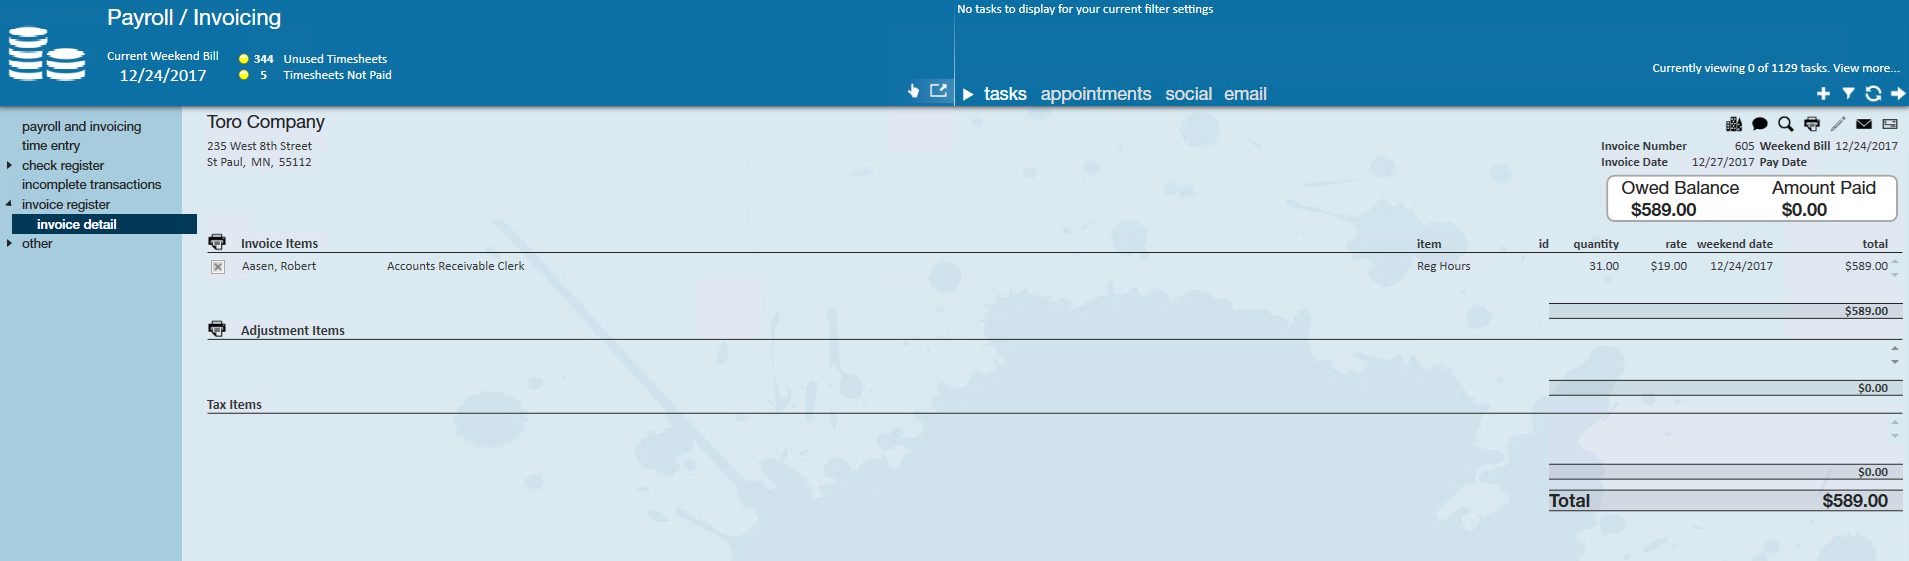
Within the invoice register select the invoice you wish to view, this will bring you into the invoice detail section as shown:
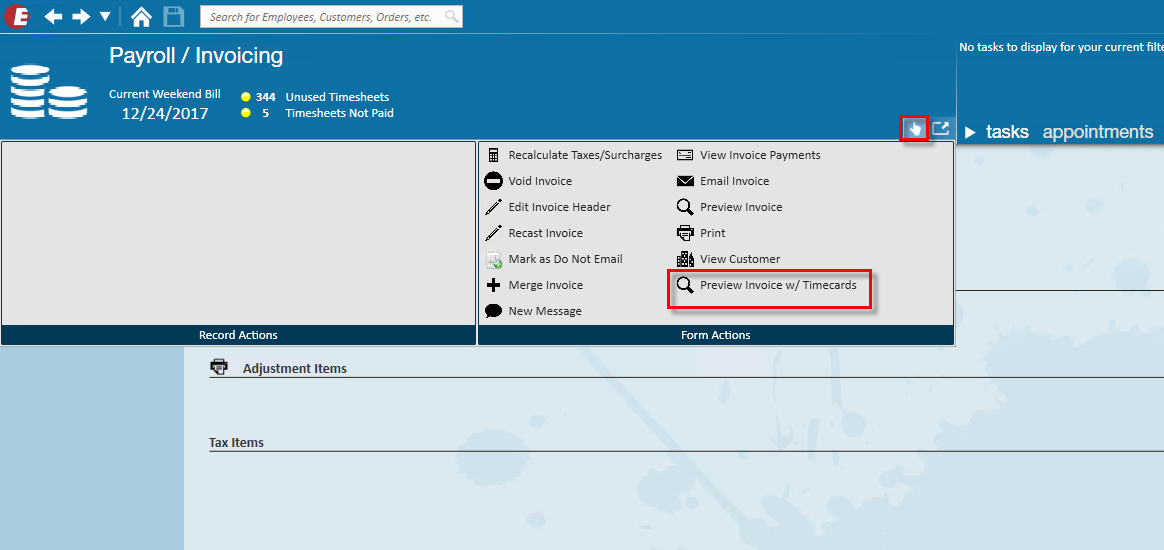
Click the actions menu and select ' Preview Invoice with Timecards' :
This will open the invoice preview section :
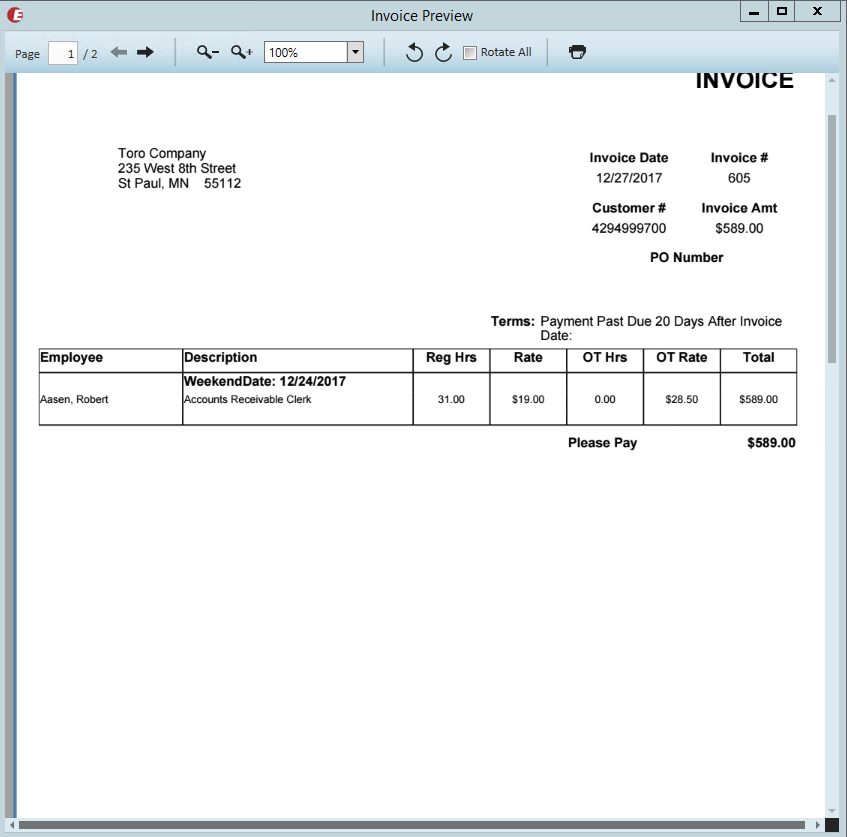

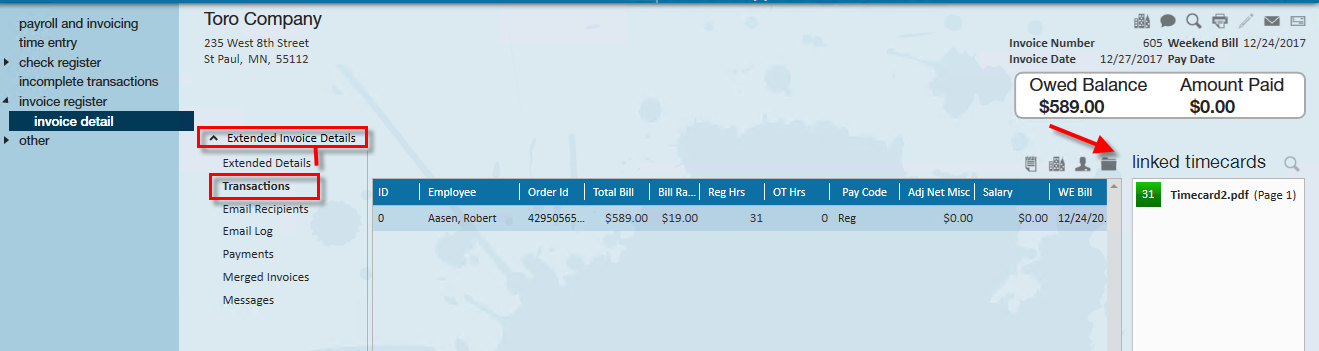
Once the invoice has been posted, you may view the linked timecard images by viewing the invoice and selecting 'Transaction' under 'Extend Invoice Details'.
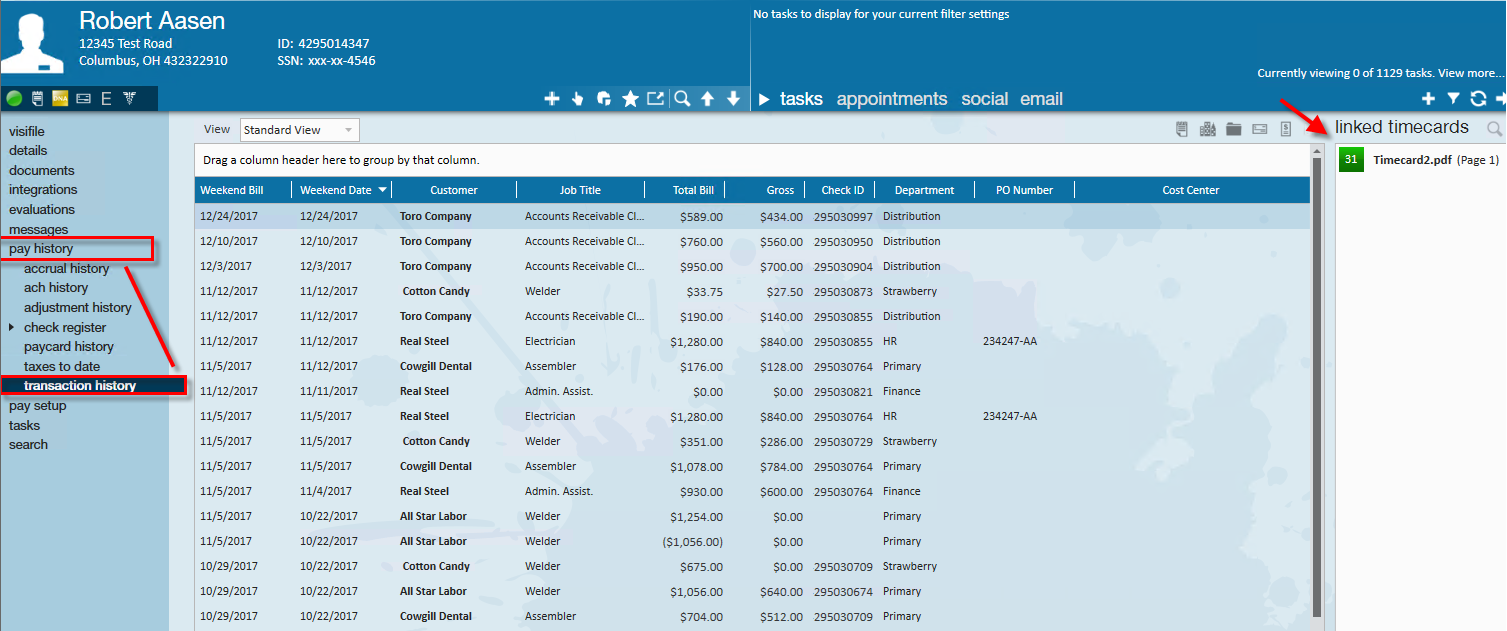
Employee Transaction History
Within the employee record navigate to pay history, transaction history, to view the linked timecard in association with the employee's transaction:
Timecard Linker & Dispatcher
If you are a staffing company that utilizes daily pay, timecards can be linked from within the Dispatcher/Daily Pay area. Once the ticket is in the instant pay-enter time process, select to Link New Timecard :
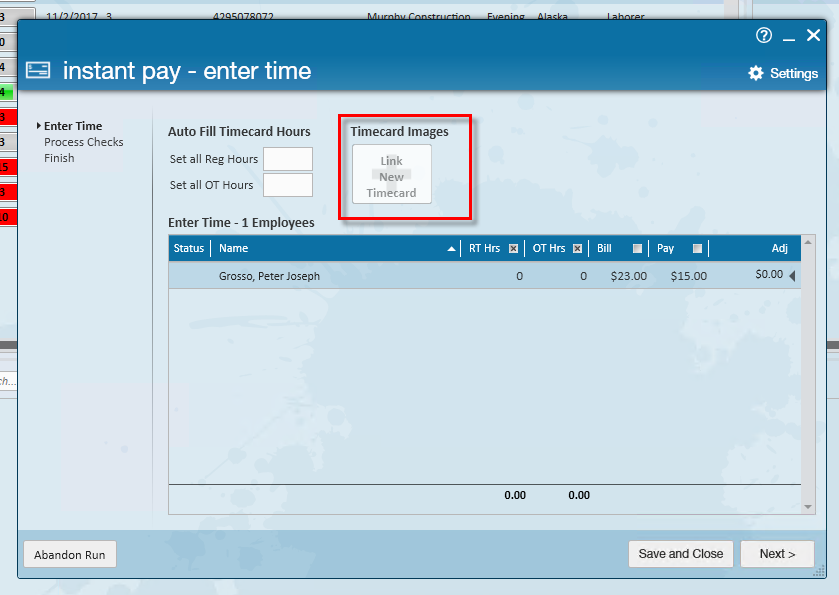
Within this screen you may select to open file and locate the timecard image on your computer:

To learn more about dispatcher, check out Dispatcher Overview.