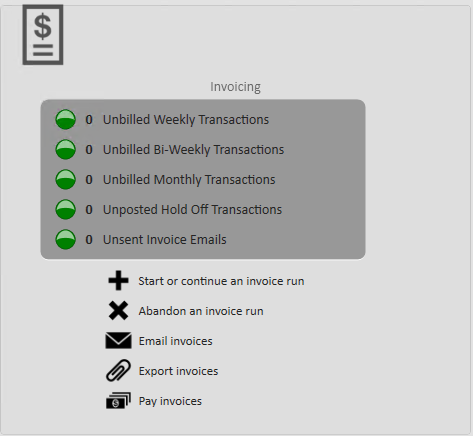
What is the Invoice Wizard?
The invoice wizard allows you to create and send invoices to customers. This must be done after time has been entered, proofed, and payroll is complete. The invoice wizard is found under the Pay/Bill dashboard. The Invoice and Payroll wizard are very similar.
To Complete an Invoice Run:
Before you complete an invoice run, it is important that you have set up your customer's invoice preferences on the customer record. For more information: Invoice Setup.
- Select Invoicing from the pay/bill dashboard and choose 'Start or continue an invoice run.'
- The invoice wizard will open in a new window:
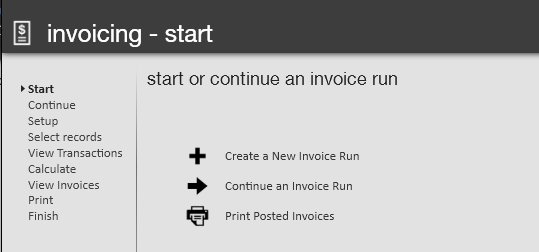
- The invoice wizard will open in a new window:
- Select 'Create a New Invoice Run.'
- Complete invoicing - setup:
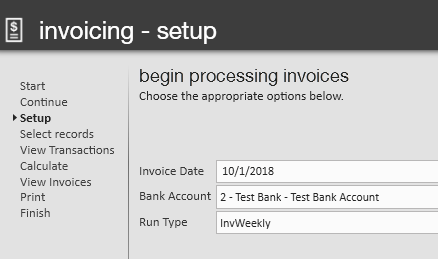
- Select Invoicing Date.
- Choose Bank Account – This will affect the invoice number based on the bank account.
- This could also be important for some clients that fund invoices for some clients.
- Select Run Type.
- Select 'Next.'
- Select which records to invoice:
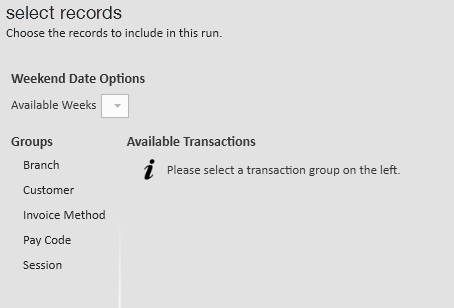
- Similar to Payroll, select which transactions you want to invoice.
- Choose groups by customer, session, etc.
- Select 'Next.'
- Review Transactions for billing.
- Select 'Next'
- Calculate Invoices.
- Review any errors found by Enterprise.
- Select 'Next' once complete.
- View invoices.
- See the number of invoices being produced.
- This is tied to the options selected under customer record > Invoice Setup > Credit and Payroll. See payroll setup above.
- Use the icons to jump to customer record or view staged invoice report.
- Select 'Next.'
- Select 'Post Invoices or Print Invoices.'
- This depends on billing setup option to email, print or both.
- Select 'Finish.'


