HRCenter Form Builder
Users that have access to HRCenter Administration have the ability to use a tool called Form Builder to take their paper documents and create digital versions that will be signed by employees and service reps. This article is a guide that will walk you through the process of building these articles.
*Note* Before getting started, please see When and When Not to Use the HRCenter Form Builder to determine whether a custom form will need to be developed. If you have determined that a custom form is not necessary, please continue with this article.
How To Use the HRCenter Form Builder from TempWorks Training on Vimeo.
For best viewing quality, expand the HD option, and select 1080p:

Creating a New Form
Existing company or client forms can be uploaded for use in HRCenter using its administration site's "Form Creator". Once the process outlined below is completed, newly created forms can be added into existing workflows, or be assigned as additional pages for employees to complete. Forms can include, but are not limited to, background check authorizations, company policies, direct deposit, PTO agreements, etc.
To create a new form, navigate to the 'Forms' section of HRCenter's administration site and select 'New':
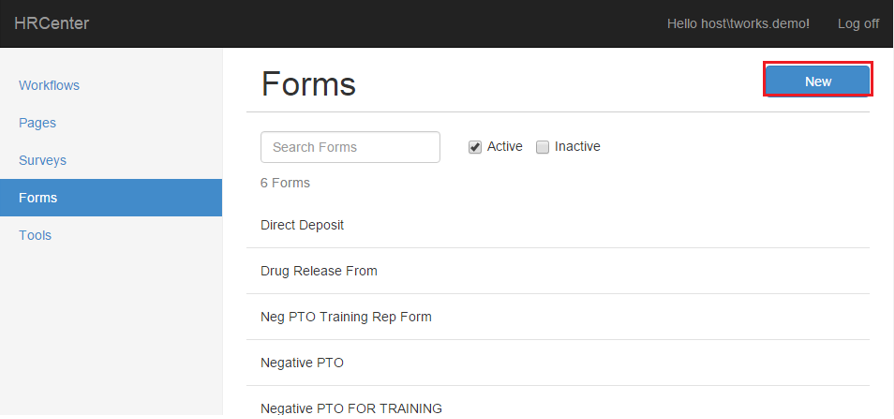
A 'New Form' line will then appear under the list of forms. Click this line to expand and begin editing the form's information:

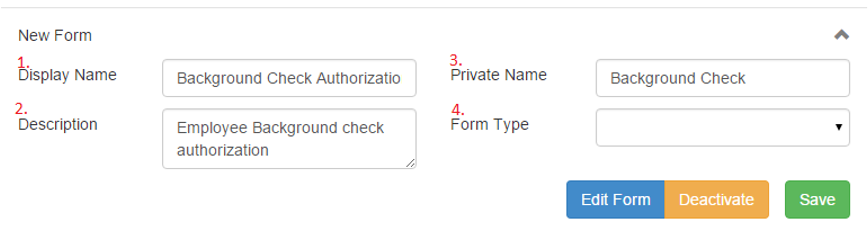
After clicking 'New Form', enter the Display Name (1.), Description (2.), and Private Name (3.), then indicate what Form Type (4.), select 'Save'. After saving the name click 'Edit Form' to begin.
*Note* Users will only select a "Form Type" if the form is a direct deposit so you get the direct deposit fields and post-fill procedure.
The HRCenter form builder overlays fields on top of an existing image of the form.
*Note* Depending on the format of the form, you may upload a .PNG, .JPG, PDF, or Word Doc format.
When uploading a PDF or Word Doc file, only the first five pages will be uploaded. Please be aware that the document is automatically converted to an image, and it may affect the sizing of the form if returned to the employee documents section.
Therefore, it is recommended to upload a .PNG or .JPG image.
You may drag and drop the file, or select the 'Choose Files' option to locate and place the image on the "Drop an image here" area.


*Note* Once the pages have been uploaded and converted to images, you will have the opportunity to reorder the pages as you see fit.
Assigning Fields
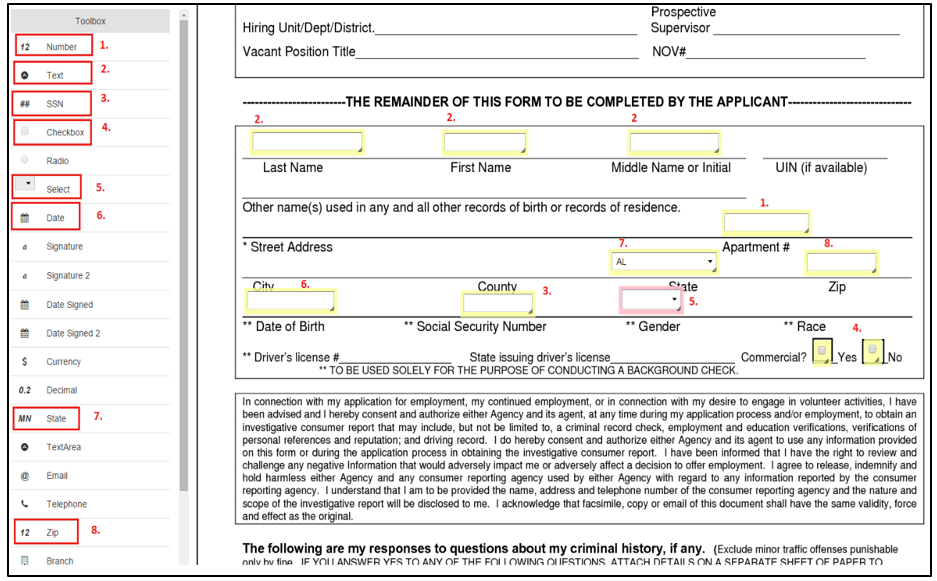
Once the image has loaded, the 'Toolbox' area will list various fields that can be added to the form. These fields determine what format the answer will be in, whether it is a number, text, or signature type, etc:
*Note* The fields listed in the Toolbox area are not editable or customizable.
Drag and drop the toolbox options into their corresponding fields on the form as shown:
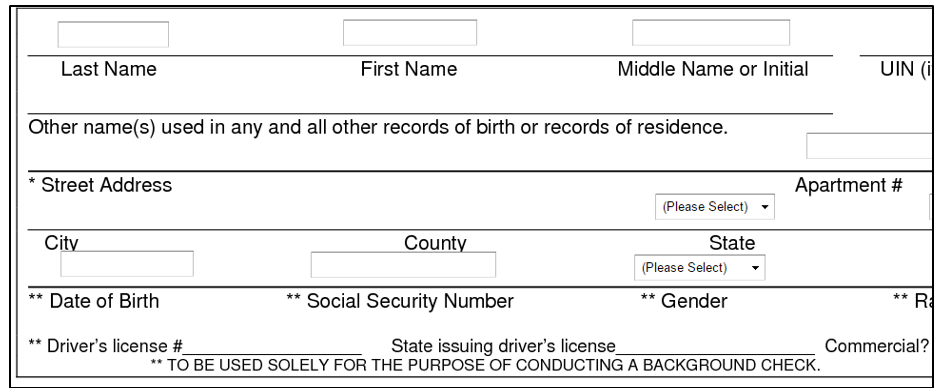
To preview how this will look to Employees, select 'Preview', this will allow you to make edits or changes and test validation fields before saving:

Properties
When selecting a field, the selected field will be highlighted in pink. On the right side of the screen its properties can be viewed.
Select a specific field (1.) to open the (2.) Properties and Dependencies section. If you wish to remove a field, select (3.) Delete.
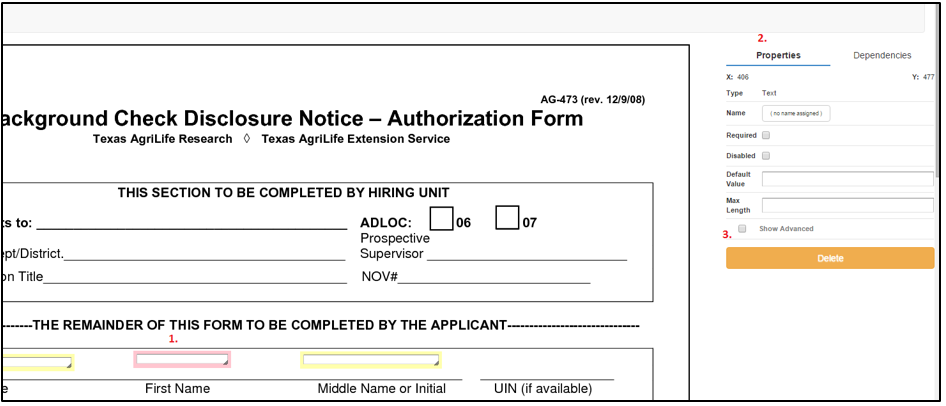
Within the "Properties" area, the type of field selected from the toolbox is listed under "Type"; in this example it is “Text.”
Additional criteria can be entered to customize whether a field is required, the amount of characters which can be added into a specific field, and whether or not information should be prefilled into the form depending on the field type.
*Note* Fields must have unique names in order to be recorded and recognized as separate values.
For example, if you are creating an insurance form and have space to enter dependent information, you would then name the fields something like "dependentname1", "dependentname2", "dependentname3", and so on. If you list them all as "dependentname", all the fields will share the same storage space and only the value in the last field sharing that field name will be recorded.
In circumstances where information is prefilled to the form, you may prevent Employees from modifying the field by selecting the "Disabled" checkbox. This is helpful in scenarios where items like a Social Security Number, or First/Last name should not be modified after initially entered by an Employee.

*Note* The "Show Advanced" option is for TempWorks' use only.
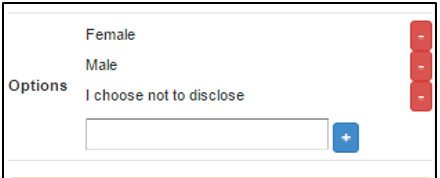
Depending on the field type you are editing, additional answer options can be selected. For example, within the Gender field, the type chosen was “Select.” You may add values the applicant can select from such as Male, Female, or I choose not to disclose in the "Options" section. To add those field values, select options, + icon.

Continue to select the + icon until all values have been added. Once completed, the Gender field now displays the chosen options in its dropdown.

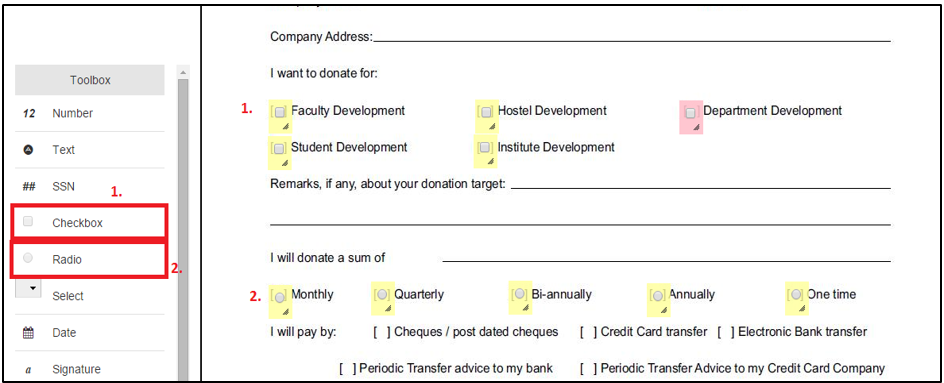
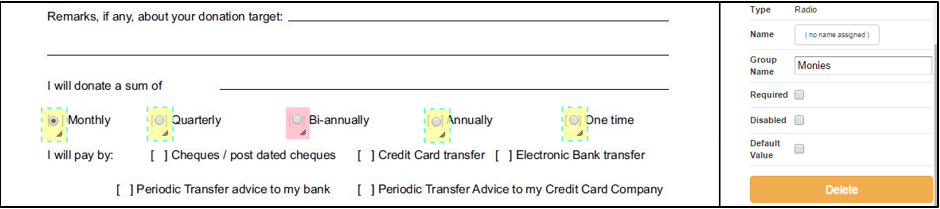
Selecting Checkbox (1.) within the form will allow for the applicant to select more than one option for their response. Choosing the Radio (2.) option on the form limits the applicant to only choosing one of the available options.
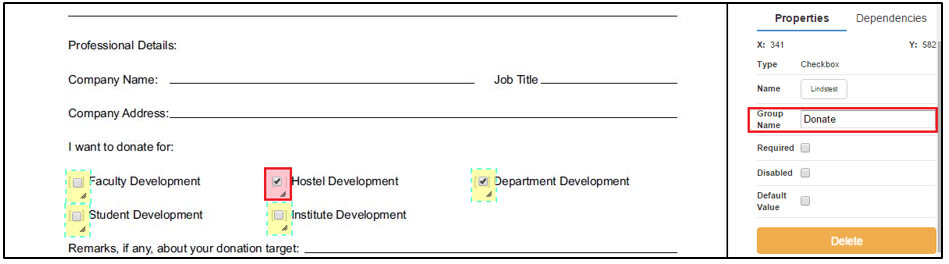
In order for checkboxes or radio options to work properly with one another, they will need to be grouped together. To do this, select the checkboxes together and enter a Group Name.
*Note* Users may only group the same toolbox item together. This may not be used to combine checkbox with radio option.
The checkbox highlighted in red indicates that you are currently editing and placing it into a group name (Donate), those outlined with the dotted line display that they were also added as part of the Group Name (Donate). You will follow the above steps to enter the Radio options into a group.
Once this is completed, preview the form to ensure the grouping has seen setup correctly:

Once Checkboxes or Radio options are added to the form, making one option required will automatically make the entire group required fields.
As the form continues to be built you have the ability to map information to correlating fields within Enterprise. Select the field, in this example we’ve chosen First Name, navigate to Properties, select Name.


Within the "Select an option" window click "Mapped Name" and select from the category drop down. Indicate whether the field is Personal Information, Address Related, Contact Information, or Employer Related. Once the Category is chosen, select from the "Field" option to indicate which corresponding field in Enterprise the information should map to.

If you do not wish to associate the field to anywhere in Enterprise, choose the “Do not associate any field" option.

*Note* Additional mapping to Enterprise which isn’t listed under the Mapped Name > Category section will be handled by Tempworks.
Dependencies
Utilize this area to hide and clear fields depending upon the question within the form.
*Note* For more information on how to setup Dependencies visit Dependencies in the HRCenter Form Builder.
Replacing Background Images
There may come a time where you have realized that the background image needs to be replaced within the form. In the event this happens, you can simply navigate to the bottom of the page and swap the image. If you had previously added fields, these will remain even if the image is swapped.
Service Rep Forms, Localization
Forms that require an applicant and employer signature need to be uploaded twice (once for each signature) and grouped within the Pages section. If you have forms which require localization (different languages), you will be adding 4 files; 2 for the English versions and 2 for the other language's translation. In the example below, "Negative PTO" has been added for both the Employee and Representative and labeled accordingly.

Form one (Negative PTO) - Select the Signature option within the Toolbox area, this indicates that you are obtaining the Employee signature.
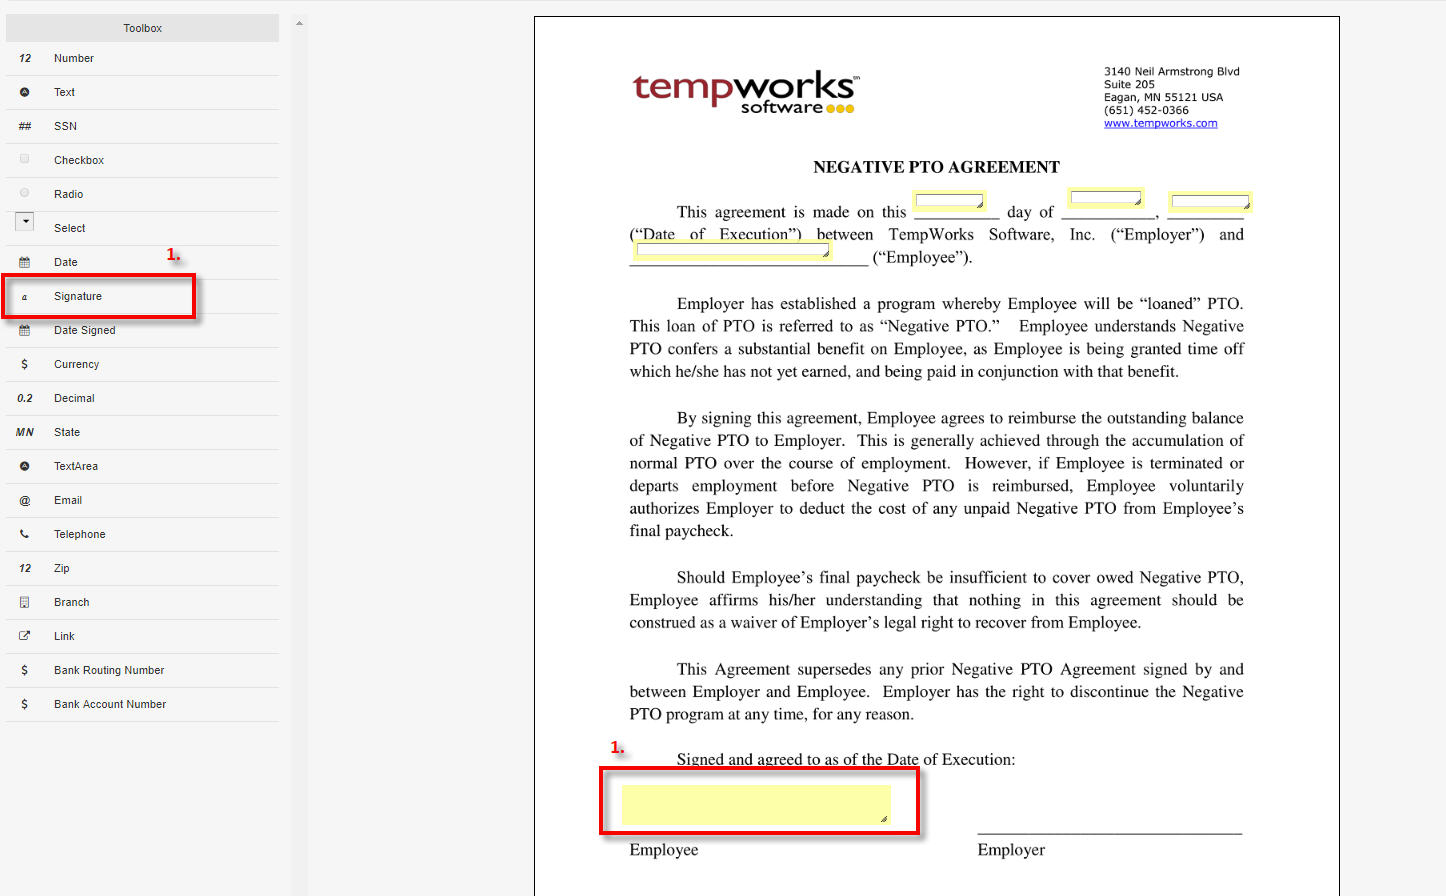
Form 2 (Negative PTO Representative) - Select Signature to obtain the Employer signature.

Adding the Created Form to HRCenter's Pages section
Once these two forms have been created, link them together by navigating to the Pages area of HRCenter administration, select "New". Enter the Private Name, Display Name and Description once the "Create Page" window appears.

Under the Page Type, select the Form radio button, clicking the > in the lower portion of the window to advance to the Premade Form section.
Select the "Use Premade" option and use each of the dropdown menus to link the Applicant and Service Rep files together. If there are any translations of the form in a different language, click “add localization” to choose any language(s) and additional file(s) from the corresponding dropdowns.

*Note* The Create Custom section is for internal TempWorks use only.
Once the files have been selected, additional configurations can be setup. Users will have the ability to select what the files will fall under within the Document Type category that appears within Enterprise. If a service representative needs to attach documents such as a driver’s license, SS card, etc. this can be added within the maximum and minimum documents area.
Form destination should be set to PDF format to appear correctly within Enterprise.
Once the Configuration Details section has been completed, click the > icon in the bottom right hand corner of the window and then the check mark icon to save the page. The newly created Form can now be assigned on its own, or added to a workflow form within the Workflows area of HRCenter's administration site.

*Note* Postfill and Prefill Procedure fields are for internal TempWorks use only. These are used to map data between forms and TempWorks Enterprise for fields that are not available in the Select an Option field area mentioned earlier in this article.