Searching
The goal of any database is to collect as much information as possible. As a record becomes more and more detailed through data entry and tools like HRCenter™, it becomes easier and easier to find the right employees later on. The better your data, the easier and more variable your searching can become.
The goal of this article it to walk the user through the basics of record searching within Beyond™. In addition, we will also examine our more advanced options.
This article reviews:
- Basic Searching vs. Advanced Searching
- Basic Searching Options
- Advanced Searching Options
- Search Results
*Note* Looking for other kinds of searches? Check out the following:
Basic Searching vs Advanced Searching
In Beyond, Basic Searching is used to typically find a singular record, whereas an Advanced Search is run to create a list of results or multiple records that adhere to a set criteria.
To conduct either of these searches, locate the six principal records at the left of the screen:
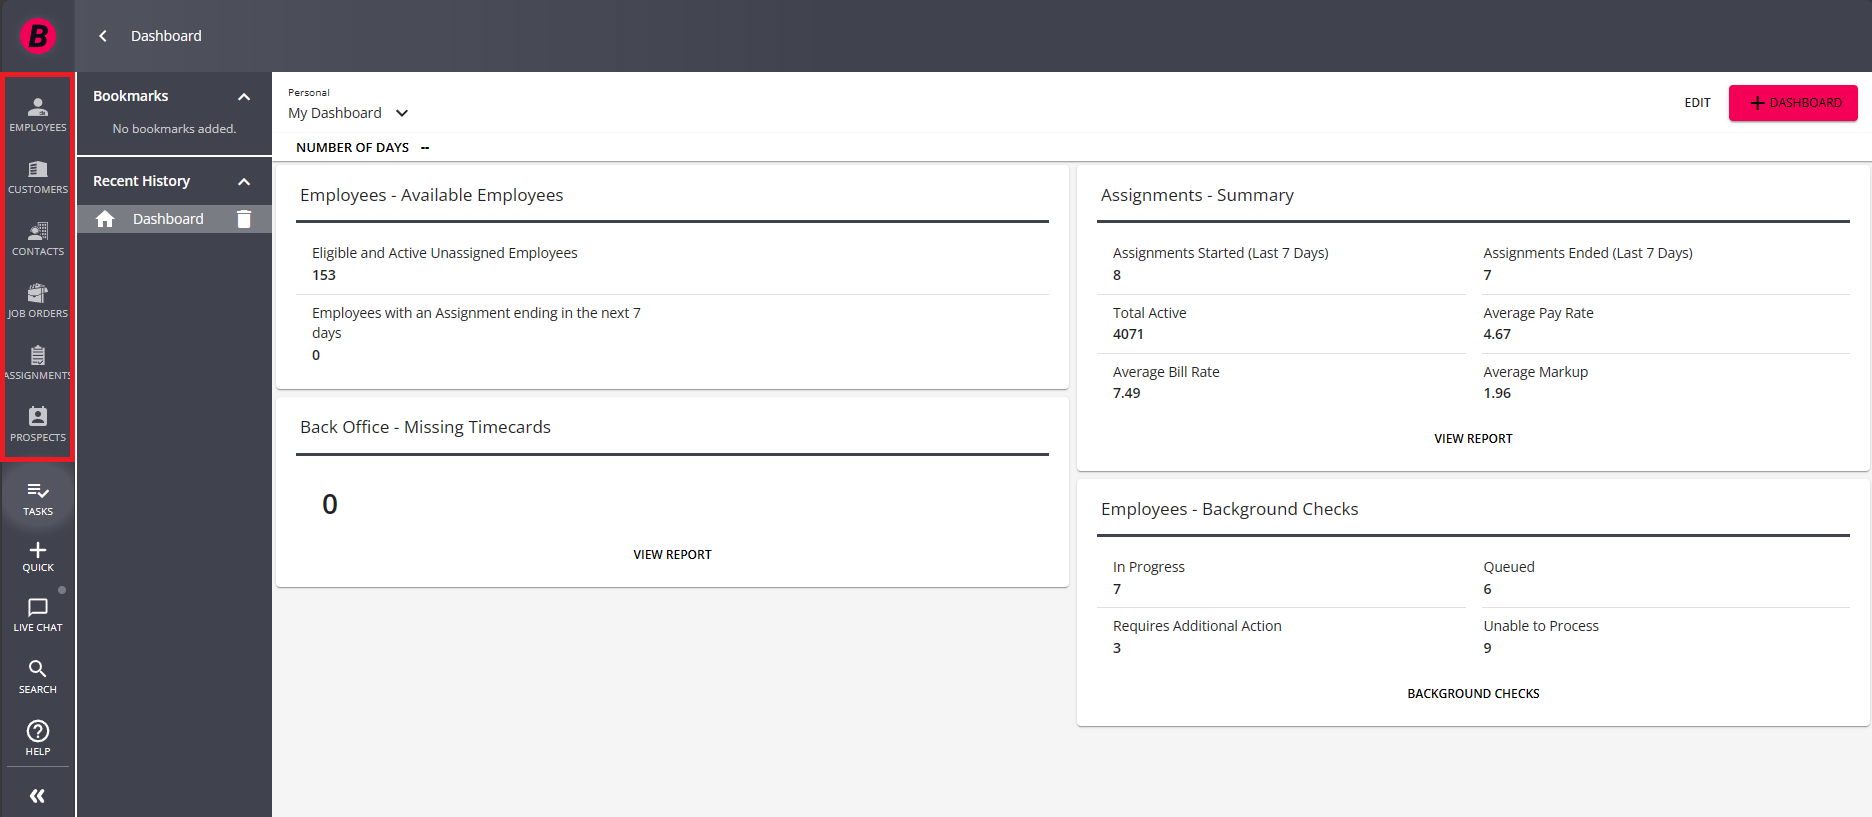
From top to bottom, the six principle records are:
- Employee: Records of individuals who could be placed on assignment in your system.
- Customer: The clients and businesses your company services.
- Contact: The individuals associated with Customer records in your system who are not considered your employees.
- Assignment: The record of an employee's employment. This will always be tied to a Job Order.
- Job Order: The request of a customer for employees, typically defined best by worksite and job title.
- Prospect: Record of a potential new customer or contact.
*Note* For new TempWorks clients as of 8/11/2023, Prospect functionality will be disabled. In the event you would like for this functionality to be enabled, please contact TempWorks Support.
Existing TempWorks clients prior to 8/11/2023 will continue to have access to this functionality. In the event you would like for this functionality to be disabled, and for your existing Prospect records to be converted to Customer records in mass, please contact TempWorks Support.
To perform any search, select the record type of the desired search.
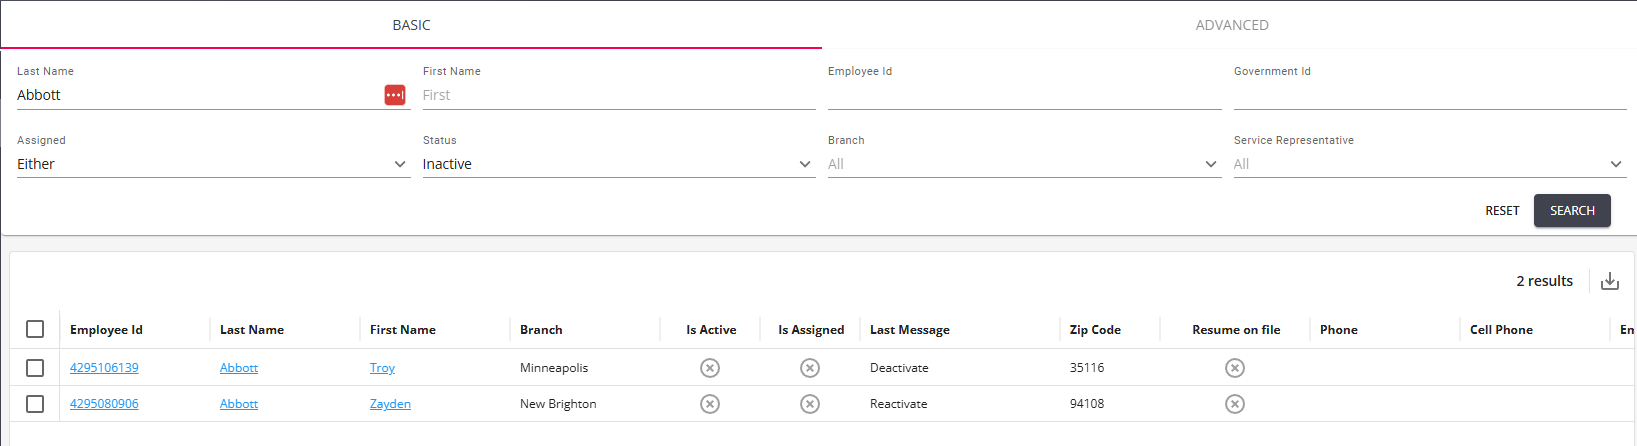
Once selected, this will usher the user into the searching area. The user can first select whether they would like to conduct a Basic or Advanced search:

*Note* Depending on the type of search, the screen layout will appear differently. The screen shot above is a basic search for employees.
Basic Searching
Basic searching is just that, designed to find a specific record. Options include searching by:

- Last Name: The last name of the record.
- First Name: The first name of the record.
- Employee ID: The individual ID of the record.
- Government ID: The Social Security Number or other Government ID of the Employee (can be with or without hyphens or spaces)
- Assigned: A drop-down filter allowing the user to select only those that are assigned, unassigned, or either.
- Status: A drop-down filter allowing the user to select only those that are active, inactive or either.
- Branch: The branch the record is associated with.
- Service Representative: The Service Representative that created the employee record.
*Note* Depending on the record type being searched (Employee, Customer, Contact, Assignment, Job Order, Prospect), the above fields may vary.
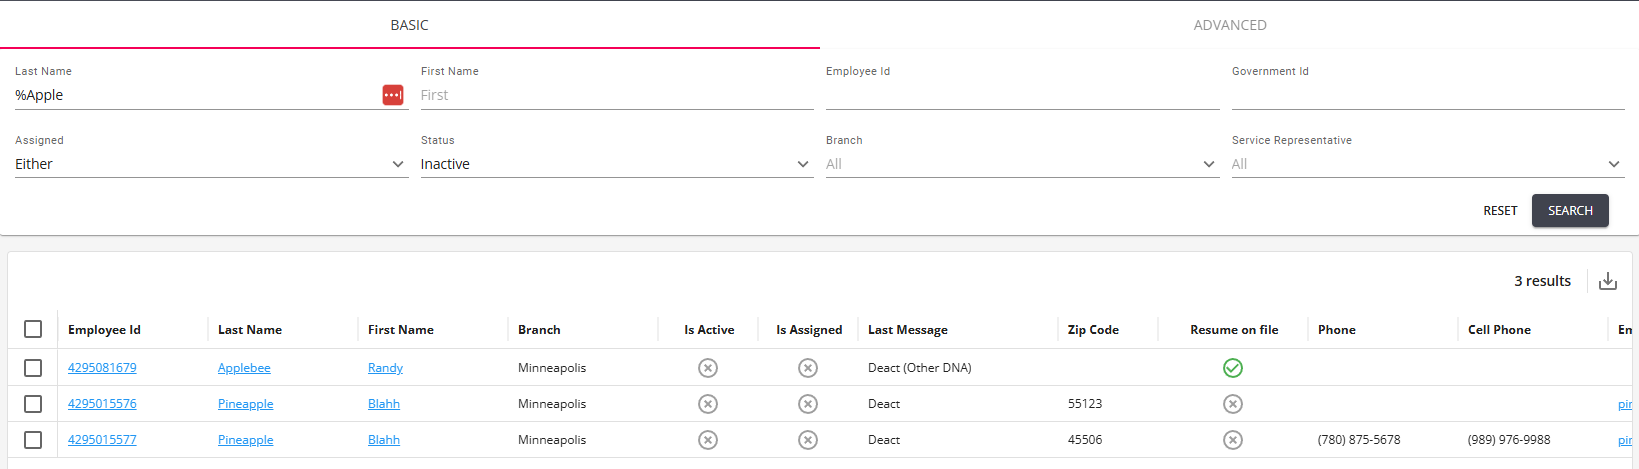
When a search returns results, those results will be posted in the lower half of the screen:
*Note* When opening the "Quick View" from a search (right-clicking on a record), so long as the search provides more than one result, you can select the arrows at the bottom of the "Quick View" window to navigate between records within the search results.
Depending on the record type being searched, selecting one of the following fields to open the Quick View will show the navigational arrows:
- Employee: ID, Last Name, First Name
- Customer: ID, Customer Name, Department Name
- Contact: ID, Last Name, First Name
- Job Order: ID, Job Title
- Assignment: ID
Right-clicking a field not mentioned above will not open the navigational arrows within the Quick View.
For more information on the Quick View functionality, please see the article titled Beyond - Quick View.
Additionally, opening a record from the search results via full screen will allow you to select the arrows at the bottom to navigate between records or navigate back to the search results by selecting "Back to Search".
Advanced Searching
Advanced searching in Beyond is designed to allow users to find records in their database based on detailed criteria. Every advanced search is built on a set of rules and groups that form a statement.
- Rules- A specific field to add as searchable criteria.
- Group- A series of rules that are first searched for and then compared to the remaining statement.
- Statement- The entirety of all rules and groups of rules that make up a search.
Rules
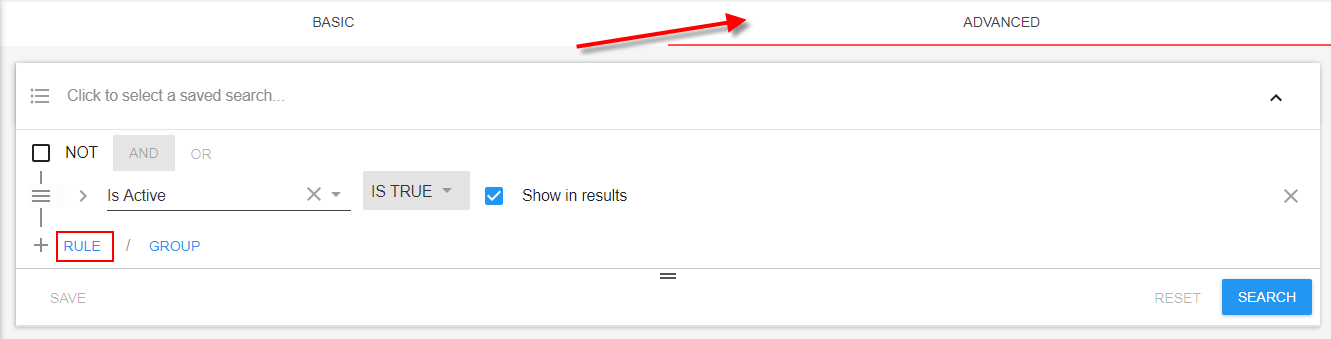
To add a rule, select the 'RULE' button. This will add a blank rule to be added to the statement. The newly added rule will have a field that can be entered to search on.
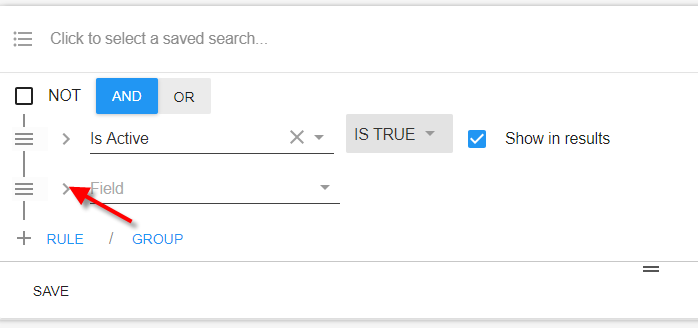
*Trainer Tip* If you are unsure what fields can be searched for in Beyond, select the caret beside the field, this will add the category field as well. This can be useful for learning about new searchable fields.

Those rules will be connected by the group concept of "AND." This says that any record must have all listed criteria in the statement to appear in the results:
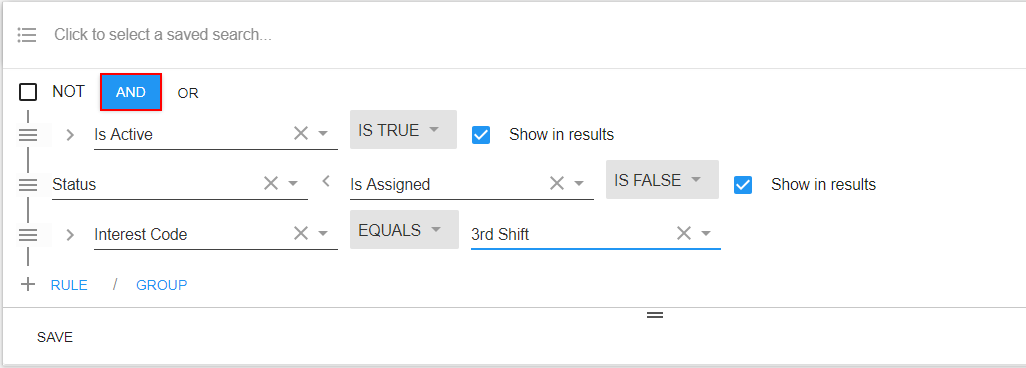
For example, in the statement above, a user might look for employees that are {active "AND" unassigned "AND" have the interest code of 3rd shift}.
Groups
Groups act as sections of rules within a statement that are to be run first when compared to the rest of the rules within the statement. Within a group, you must first define the kind of group. There are three basic kinds of groups:
- 'AND' Groups
- 'OR' Groups
- 'NOT' Groups
AND
This is an exclusive group and will only return results for records that posses all the criteria within the group. Let's look at an example statement:
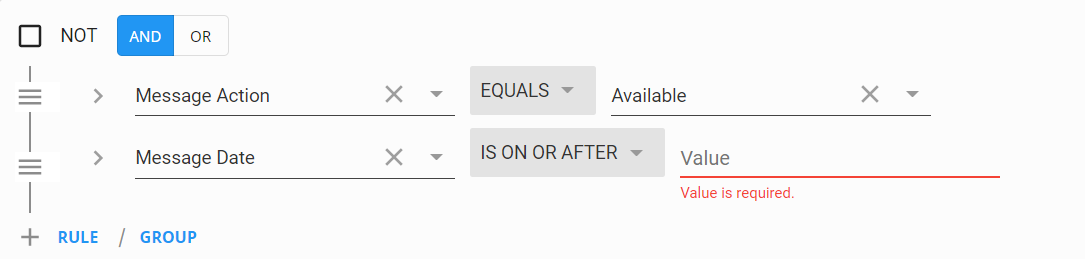
In this case, we are looking for employees that have a message logged with the action code of Available AND the message was logged on or after a specific date.
OR
This is an inclusive group and will return results with records that qualifies for any of the criteria within the group. Let's look at an example statement:
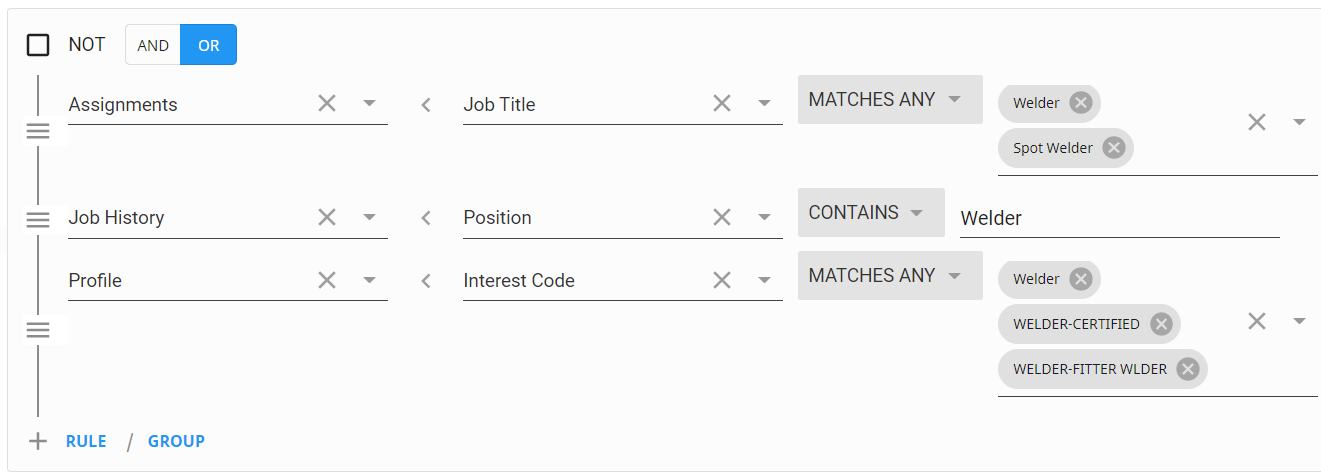
In this example, we are looking for a candidate for a welding position. So we are looking for an employee that has either:
- Had an assignment with us as a welder OR
- In their resume job history (on the story tab) have had a position as a welder OR
- Has an interest code that matches Welder/Welder-certified, etc.
The employees in the search results will have to meet at least one of these criteria (but not have to have all 3).
NOT
This allows the searcher to locate information that does not exist. This is used primarily to audit records for missing information. Lets look at an example statement:
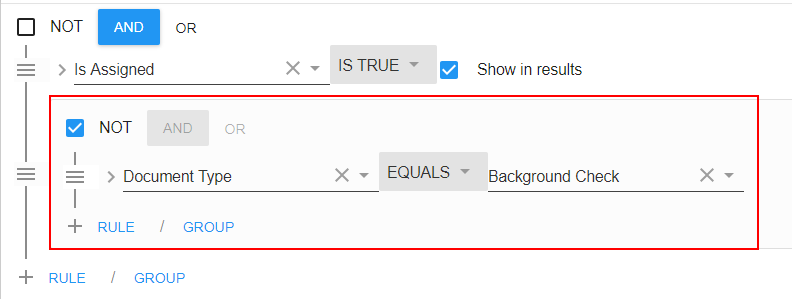 In the example statement above, the user is looking for people who are assigned do NOT have a background check document on file.
You can mix and match using AND OR & NOT options in a search and utilize groups within groups to customize your searches. For example, If you need to audit your system to see which assigned employees don't have a current I-9 on file.

- First you add the rule denoting that you are looking for assigned employees.
- Next you create a group and set it to OR because to audit the system you are looking for employees who do NOT have an I-9 OR employees who have an I-9 but it's expired.
- Then you create 2 groups inside that OR group you created
- One group will have a single rule that is a NOT Document Type = Federal I-9 stating you want employees that do not have an I-9 on file
- The second group will have 2 rules stating you are looking for employees that have a Federal I-9 and the Expiration Date is on or before todays date so you see who has expired I-9s
Saving an Advanced Search
Once you have set up an advanced search the way you like it, you can save this search to save yourself time. It is important to note that saving a search does not save the results of a search but instead saves the rules and groups established for the search.
To save an advanced search:
- Create the search criteria exactly as you want it saved
- Select the save button in the lower left
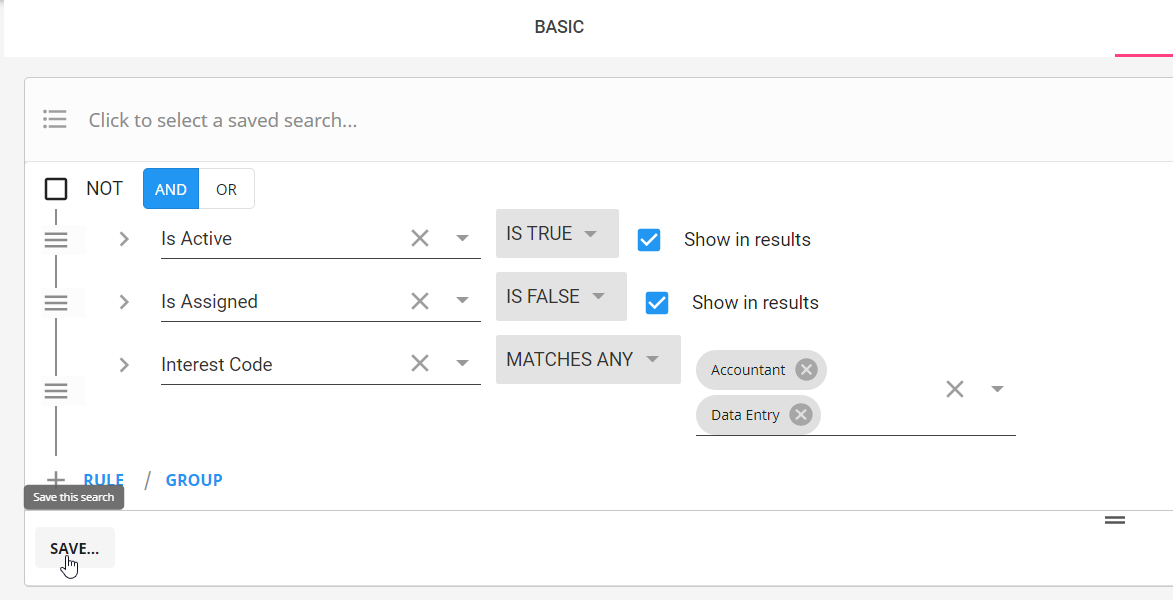
- Enter a name for the search
- Optionally, enter a description to help remind you what the search is used for:
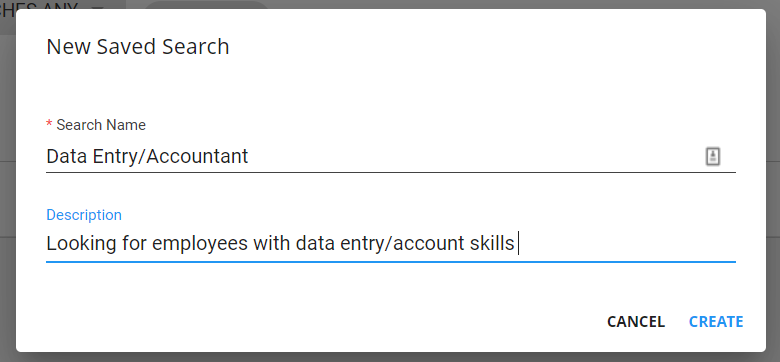
- Select Create


To find a saved search, select the white bar at the top of the advanced search options:
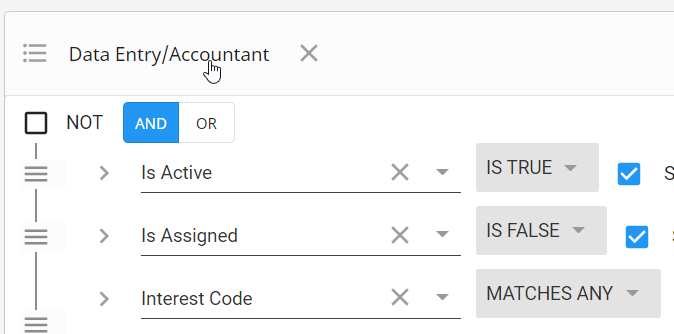
You can search for a saved search by typing a name or scrolling through the list. 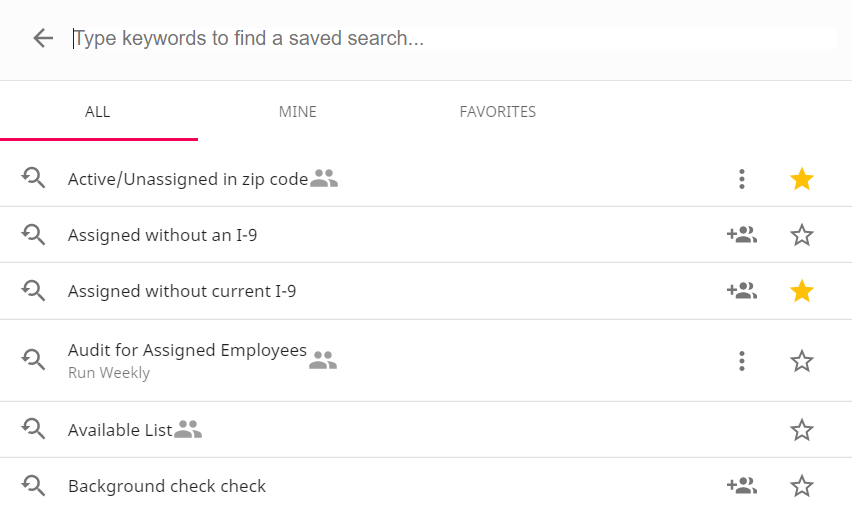
- Select the star icon to mark a search as a favorite. Favorite searches appear in the favorite tab.
- The Mine tab will limit your list to searches you have created.
Sharing an Advanced Search
By sharing an advanced search you are allowing other users to utilized one of your saved searches.
To share an advanced search:
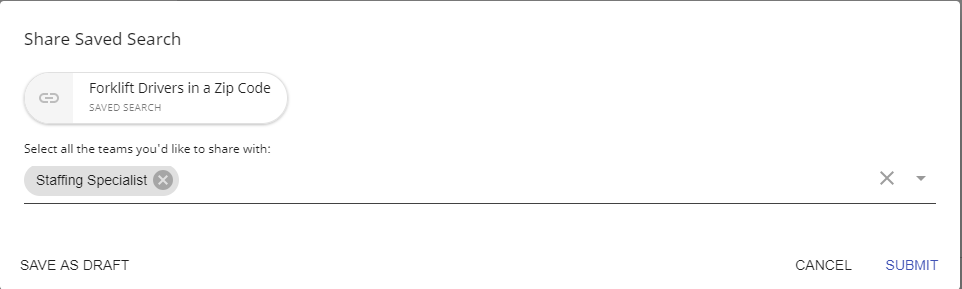
- Select a saved search you want to share
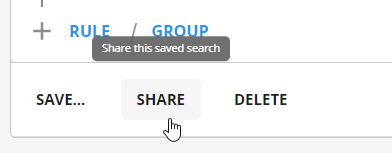
- Select the Share button in the lower left
- Choose the Team you want to share with (teams are set up by your administrators)
- Select Submit to share

A shared search can be identified by the share icon located next to the name of the search.

*Note* Teams must be set up by your administrators, check out Beyond - Creating & Managing Service Rep Teams for more information.
Search Results
Once a search has been ran, regardless of whether it was a basic or advanced, the results will display below it. 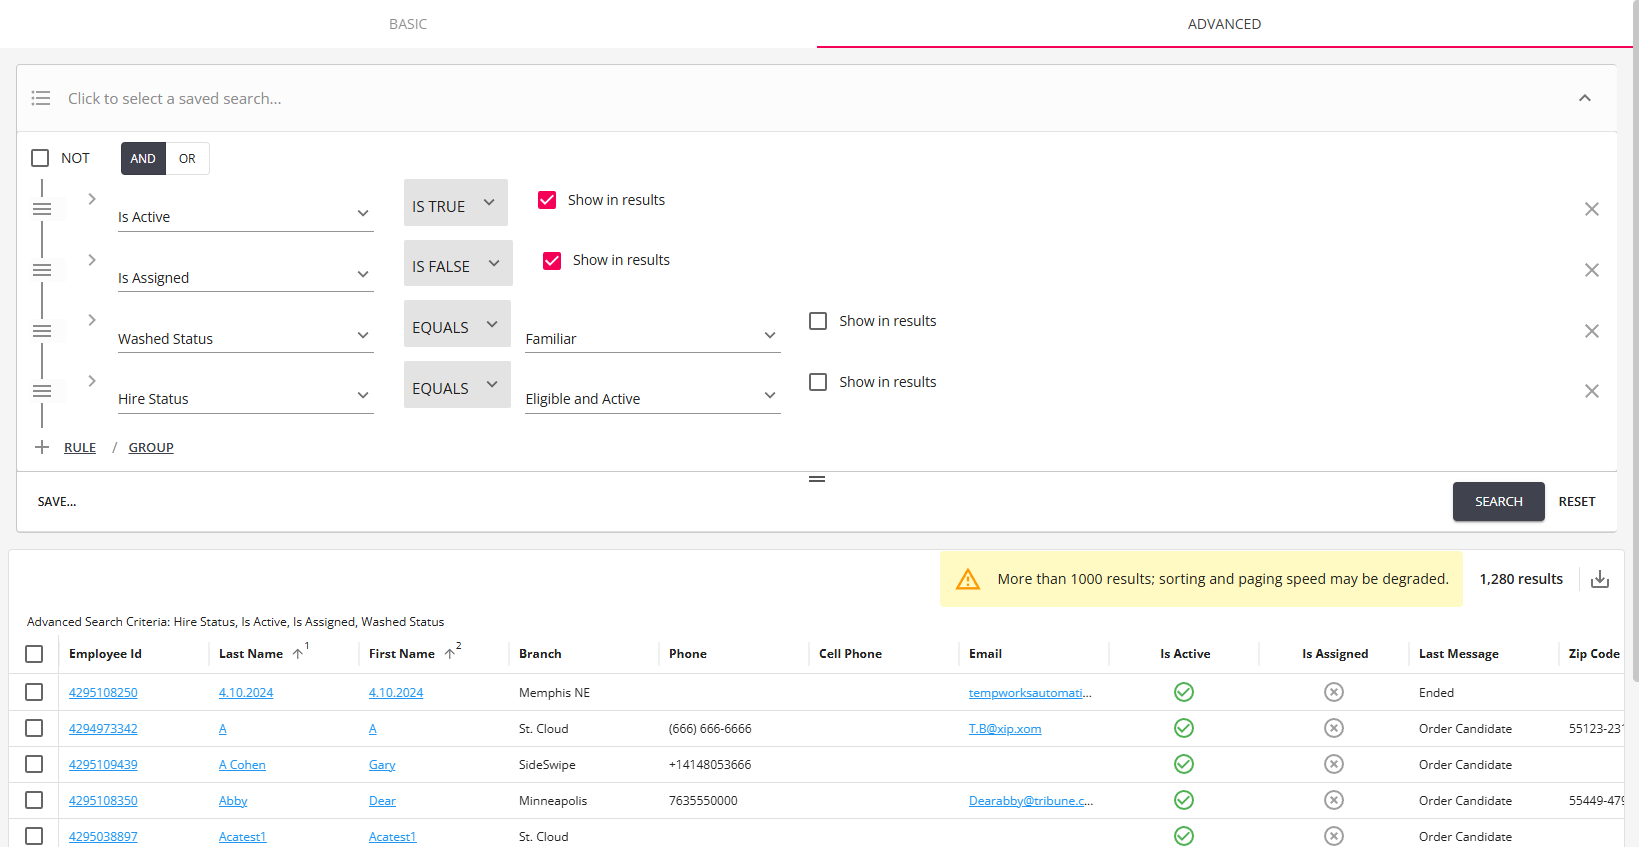
Organizing Search Results:
You can rearrange columns by holding and dragging the column header.
Select the  to the right of any column and select "Manage Columns" to change which columns are shown:
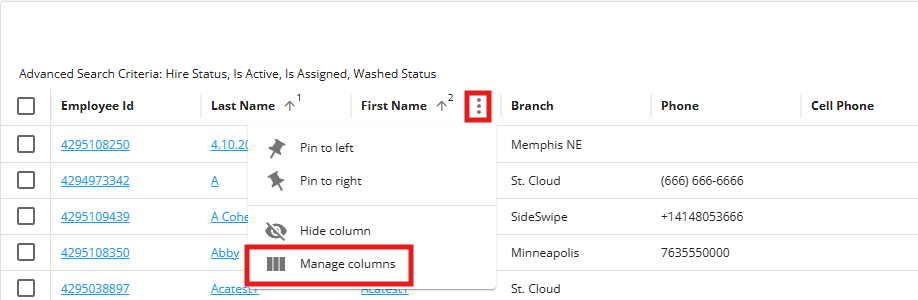
By selecting a column you can reorganize your results and order them alphabetically. The up arrow indicates the list is being sorted A-Z the down arrow indicates they are being displayed Z-A.
Functionality with Search Results
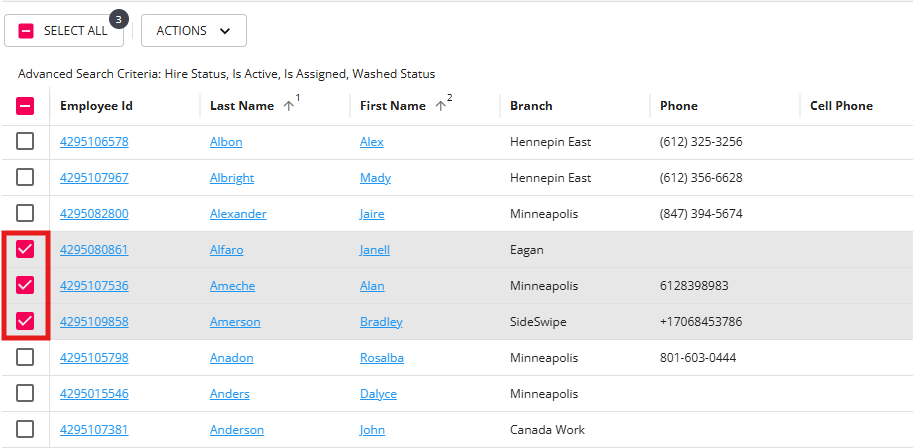
You can click on the blue highlighted name or ID to be brought to the related record or, in some cases, you can select multiple search results for more functionality.
To select multiple search results, tap the square to the left of the result
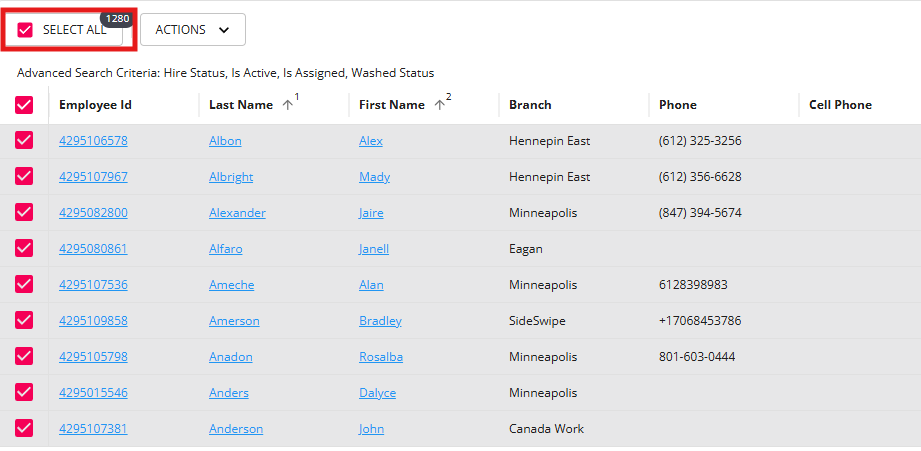
To select all results, tap the square at the top of the results - this will select all records shown,
Select the "Actions" dropdown to see a list of available actions:
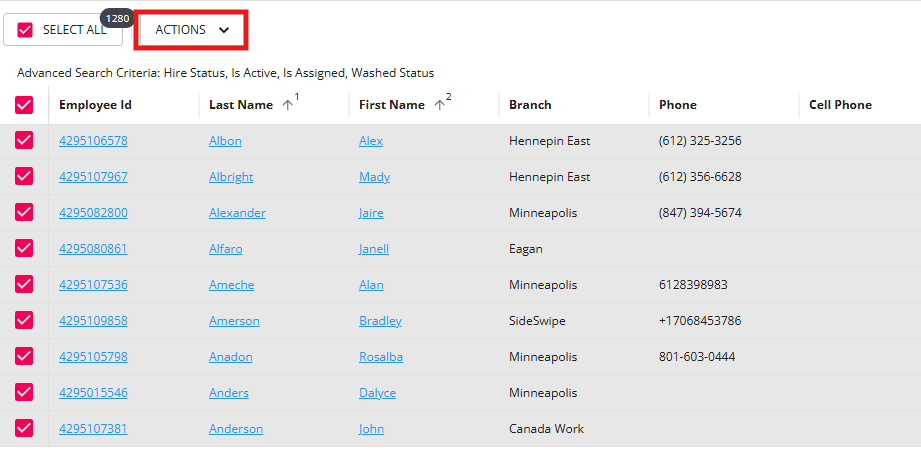
Check out this table for what actions you have available for each search:
| Record Search | Additional Search Functionality |
|---|---|
| Employee Search |
|
| Contact Search | |
| Assignment Search | |
| Order Search |