What is an Assignment Record?
An assignment record is the fulfillment of a job order for a client. When a customer places an order for temp employees it is the recruiters responsibility to create an assignment record for every employee intended to be placed on the order.
Active assignment records are those records that persist each week that the employee works. After the employee is finished an assignment that assignment should be ended. Ended assignments are no longer considered active and will have an end date and status update to show they are completed.
Active assignments are important as records for your front office team as they provide job details specific to that employee. They also are important for your back office team as each week a time card will be populated in the system for every active assignment.
How to Create an Assignment
When you create an assignment record, it will be based off of the last order you viewed. Therefore, it is a good practice to review the order record information before assigning an employee.
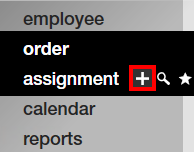
- Navigate to the order record you wish to create an assignment for.
- Hover over the assignment section of the navigation tree
- Select the + icon
- A new window will open, select your employee and enter a start date
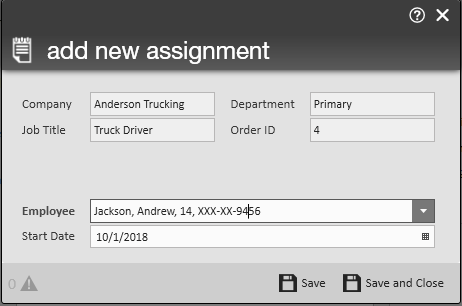
- Note that if you view the employee record for the employee you want to assign before you select the + icon, then it will default to the correct employee.
- Select 'save' to be redirected to the assignment record OR select 'save & close' to remain on the page you are currently on


Assignment restrictions
When you try to save a new assignment record, the software double checks the employee and order records to see if this employee meets all the necessary requirements. If an employee does not meet the requirements, an assignment restrictions window will appear.
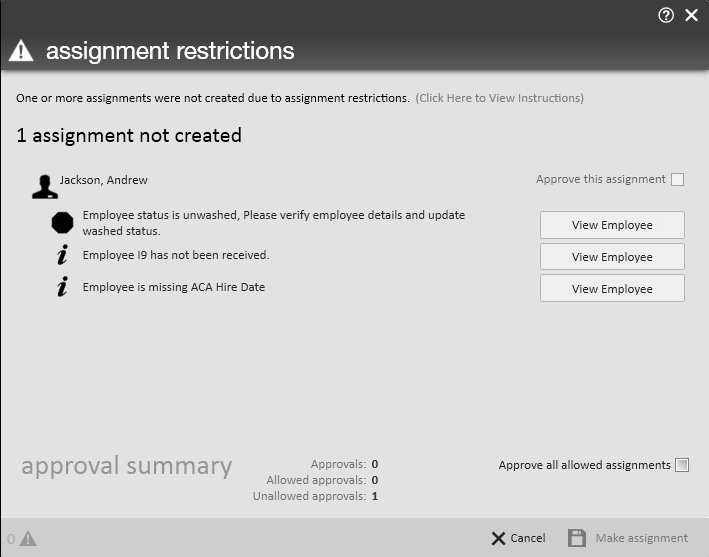
Assignment restrictions are made up of hard & soft stops.
- Hard stops are marked with
 and must be fixed before an employee can be assigned.
 - Soft stops are marked with
 and may be approved without making any changes. These are often seen more as reminders that you can fix or remember to fix after making the assignment record
 and must be fixed before an employee can be assigned.
  and may be approved without making any changes. These are often seen more as reminders that you can fix or remember to fix after making the assignment record
*Note* An assignment record will not be created until assignment restrictions are either approved or fixed and the 'make assignment' button is selected.
Selecting the 'view employee' or 'view order' option next to the assignment restriction will redirect you to the record that needs to be changed in order to rectify the restriction.
For a full list of restrictions see Core - Assignment Restrictions
Assignment record overview
The assignment record is split into 4 sections:
- Assignment Information
- This section pulls information from the employee, customer, and order record
- The status field denotes whether an assignment is currently being worked
- DNA options allow you to set a DNA for this employee/customer from the assignment record (to learn more about DNA see TW Core - Assignment Restrictions (DNA))
- Job Information
- This information is being populated from the order record but can be customized for this assignment (ex. the order is asking for a start date of monday but this employee can't start until wednesday)
- Financial details
- This information is populated from the order record but can be customized for this assignment. For example, if Andrew negotiated his pay to be slightly higher that the amount on the order, you can update that here.
- Other information
- This is where you can change the service rep who should receive credit for this assignment or enter any performance notes that will remain internal.
Closing an assignment
Once an employee is done working an assignment, the assignment record needs to be closed. This ensures and timecard will no longer be created for this assignment once it is completed and the employee will no longer have this assignment open on their record.
To close an assignment:
- Navigate to the assignment record you wish to close
- Change the status field under assignment information
- Any status other than open is closed
- Update the 'Actual Date Ended' field to the date the assignment will close or has closed.
- Select save
 in the upper left.
 in the upper left.