Enterprise Login Overview
Apps.ontempworks.com is an enhanced, user-friendly version of the Microsoft Remote Desktop Protocol that was created as a way to access Enterprise using the latest version of RDP. It provides all of the performance benefits of using remote desktop while having the application appear as if it is running locally on the user’s workstation. Connecting to Enterprise in this manner is commonly known as a "2-tier" connection, because it does not connect to data portals. The below instructions will help you emulate a local version of Enterprise while using a terminal server application.
How to Log in to Enterprise
*Note* Enterprise access via apps.ontempworks.com requires additional permissions that are managed within Bridge.
If you are unable to log into Enterprise via apps.ontempworks.com, please contact your Bridge Administrator/Supervisor for assistance.
For more information, please see the article titled Managing Users in Bridge.
Begin by navigating to apps.ontempworks.com using any internet browser:

Login using your Enterprise login credentials. Be sure to include “Host\” before your username:

*Note* Make sure you are using the correct backslash of "\" and not "/" when logging in.
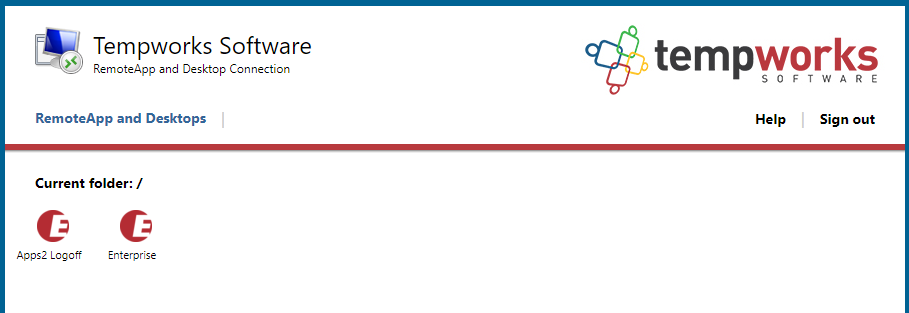
Select the “Enterprise” icon. A small RDP file will be added to your downloads:

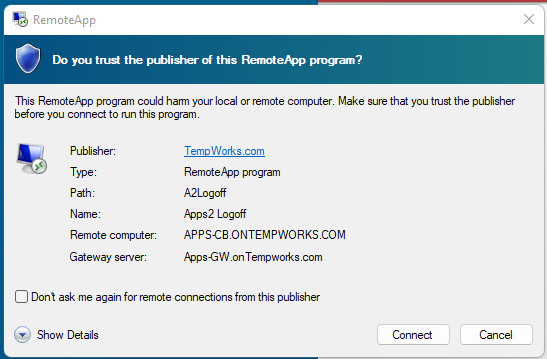
Open the downloaded file and accept all security warnings:

*Note* It is not recommended that the RDP shortcut be saved to your desktop due to Microsoft continually updating certificates that could lead to an error being received when attempting to utilize the shortcut.
When accessing Enterprise, it is always recommended to get a fresh RDP file from apps.ontempworks.com.
Enter your Enterprise login credentials (again, you will need to use "host\" before entering your username. The remote desktop terminal session loads and displays the Enterprise interface:


Accessing Local Drives and Folders
- Search for and open an employee record
- Select their Documents page, using the menu located on the left
- Click on the “Upload New File” icon located on the top right corner of the main window
- Click on the “Folder” icon next to the file path text box
- Browse to your folder location using the Windows Explorer pane. Because you are connecting through RDP, you will need to select your Network folder and Terminal server client first:

Symfile Connection and Mapping Network Drives
Symfile Connection:
- Below is a batch file that will create a symfile connection to folders added as favorites on your local PC. When running this file, please do not enter “Host\” before your username. This can be used to map shortcuts to your 'Desktop' and 'Documents' folders for easy access within Enterprise.
- Run the RDPShortcuts.bat file located inside the zip file.
- You will be prompted by Windows User Access Control to confirm you want to open the file, select "Yes". The file will run using the "Windows Command Prompt".
- When the command prompt window opens, it will prompt you for your username. You will not need to include the "Host\" before your username. Enter your username and select "Enter". It will let you know that it has mapped the user account to the current Windows account.
- Press any key to continue and the window will close.
- The shortcuts to your Desktop and Documents folders will now be available, when saving or loading documents.
Mapping Network Drives:
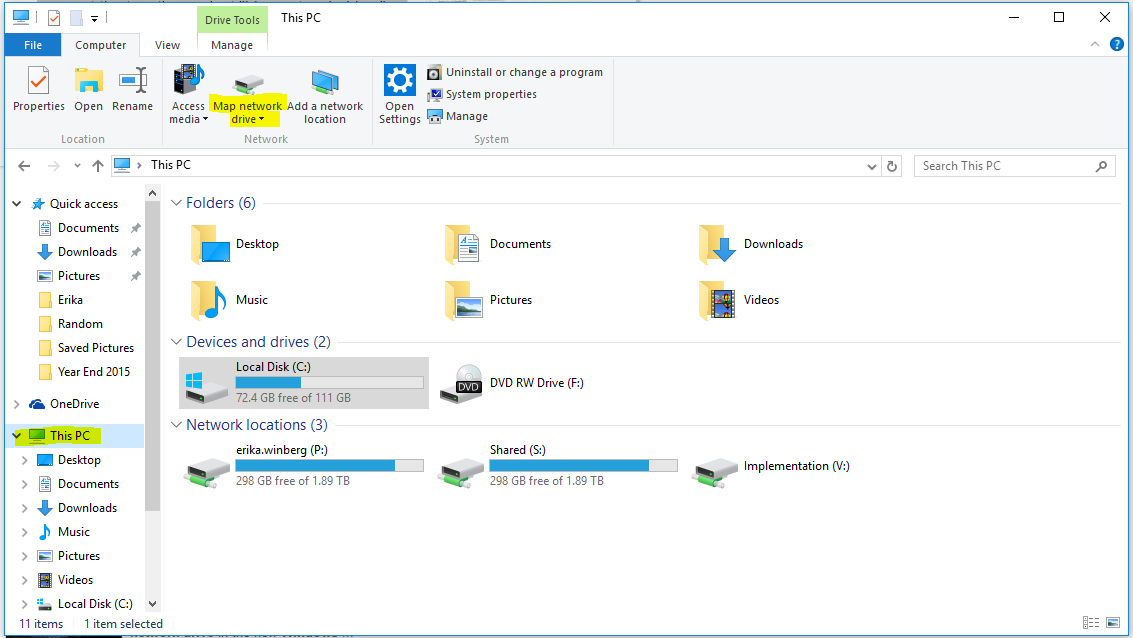
- Open "File Explorer" and select "This PC" from the Computer tab.
- Select the "Map network drive" icon in the ribbon menu at the top, then select "Map network drive":
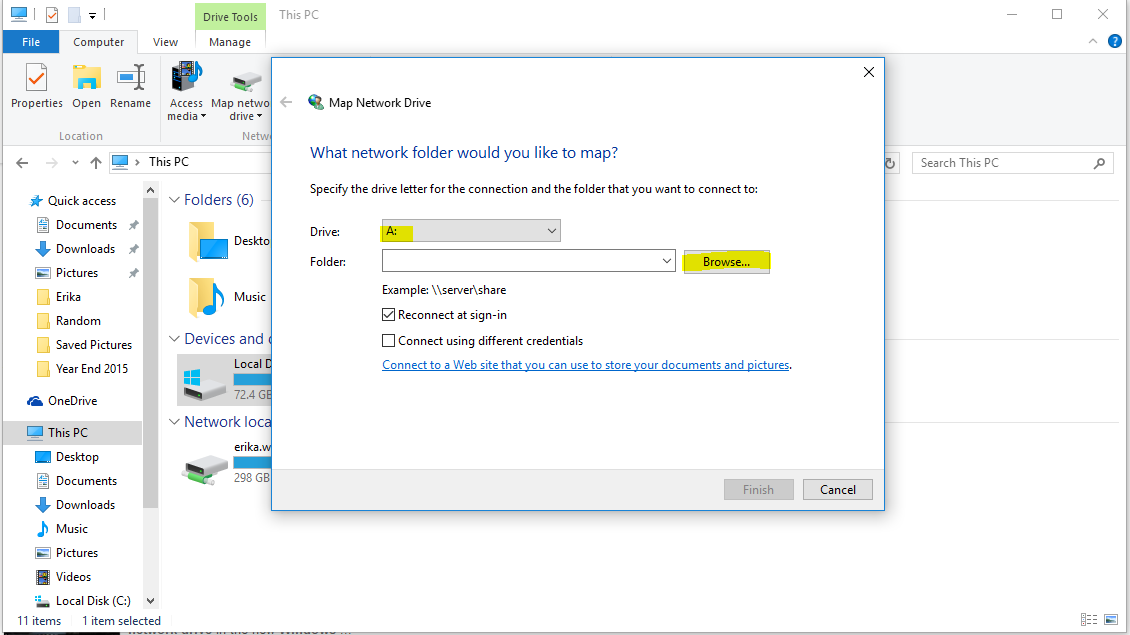
- Select the drive letter you want to use for the network folder, then hit "Browse..." to map to your "Favorites" or local folders:


Resetting a User Session
In the event a user session within Enterprise becomes frozen, the session can be reset.
*Note* The user with the frozen Enterprise session will need to complete the following steps.
Begin by having the user with the frozen session navigate to apps.ontempworks.com using any internet browser:
The user will log in using their Enterprise login credentials. Be sure they include “Host\” before their username:
*Note* Make sure they are using the correct backslash of "\" and not "/" when logging in.
The user will select the “Apps2 Logoff” icon. A small RDP file downloads to their desktop:
The user will open the downloaded file and accept all security warnings:
The user will enter their Enterprise login credentials (again, they will need to use "host\" before entering their username. The remote desktop terminal session loads and the users frozen Enterprise session will close:
*Note* If the users Enterprise session is still frozen after completing the above steps, please contact TempWorks Support.