*Note* TempWorks Software is no longer selling physical TimeClocks.
While physical TimeClocks are still in the Extended Support product life cycle, it is recommended that clients utilizing physical TimeClocks begin to research and plan for future TimeClock solutions.
Please contact TempWorks Account Management to discuss new solutions including the On-Site TimeClock that utilizes our Buzz application.
In order to utilize TempWorks TimeClocks, you'll need to verify that the worksite, order, assignment, employee and contact records are all set up properly.
To set up a TempWorks TimeClock:
- Set up the Worksite
- Link the TimeClock to the Customer
- Set up the Order
- Set up the Contact
- Set up the Employee
Step 1: Set up the Worksite
The TempWorks TimeClock uses information on the worksite to ensure that punches are recorded in the correct time zone and that they respect daylight savings time where needed.
To set up a worksite:
- In Enterprise, navigate to the customer record the TimeClock is for
- Navigate to Details > Worksites on the left
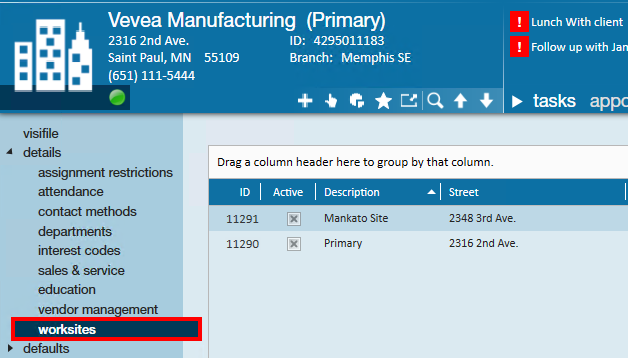
- Double click on the worksite the timeclock needs to be connected to.
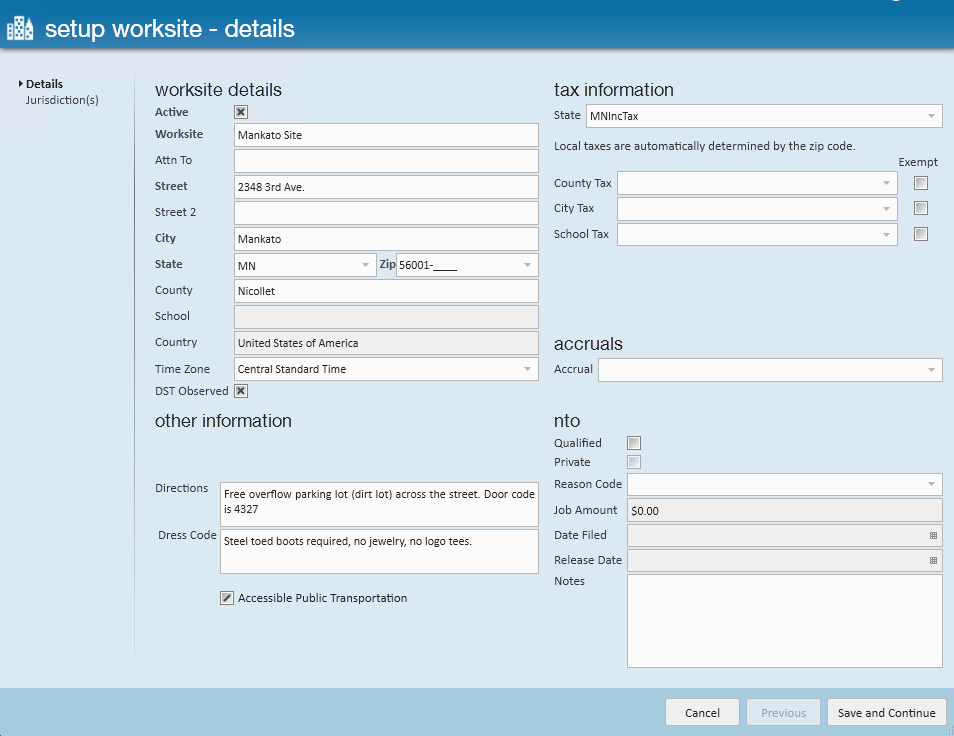
- If this is a new worksite, you will need to add the new worksite to the list. (see Departments vs. Worksites for more information)
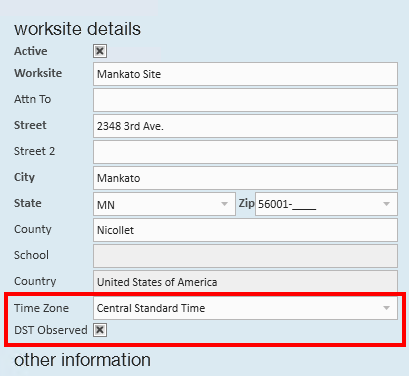
- Select the correct time zone for the clock under worksite details to ensure the clock displays the correct time.
- *Note: The DST Observed box is checked by default. If the area that the TimeClock is in does NOT observe DST (i.e. Arizona and Hawaii), uncheck this box
- *Note: The DST Observed box is checked by default. If the area that the TimeClock is in does NOT observe DST (i.e. Arizona and Hawaii), uncheck this box
- Select Save and Continue
- *Note: This will open a tax jurisdiction setup window. Complete this form as you normally would and select save and close


Now that the customer record is set up to have a worksite with a TimeClock, you must link the actual TimeClock to this customer record.
Step 2: Link the TimeClock to this Customer
- Navigate to the home screen of the customer record.
- Select the
 icon to expand the Actions Menu, then select Assign Time Clock to Customer. (This opens the 'assign time clock to customer' window.)
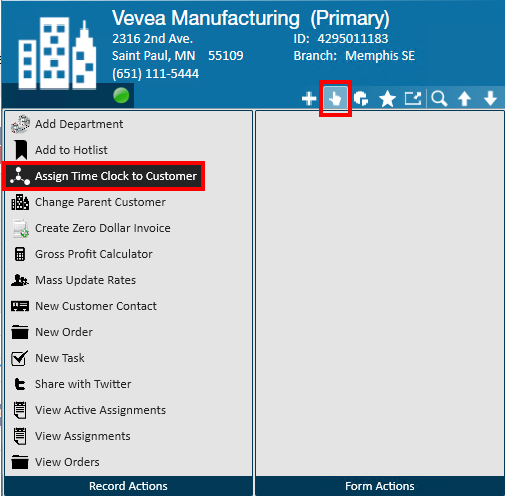
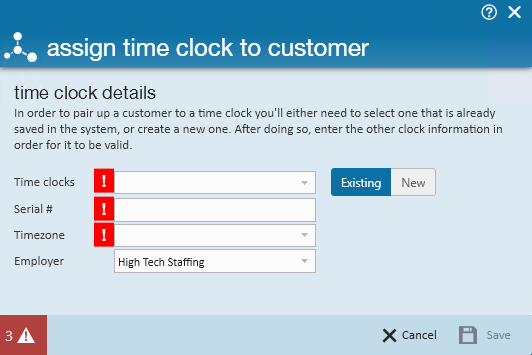
- Choose which TimeClock to assign to this customer. You may either select an existing clock, or assign a new clock. See below for examples of each:
 icon to expand the Actions Menu, then select Assign Time Clock to Customer. (This opens the 'assign time clock to customer' window.)

Existing TimeClock:
- If you wish to assign an existing TimeClock to this customer, you may select it from the Time clocks drop-down menu.
- Choosing an existing TimeClock will automatically fill in the rest of the fields for you, so all you need to do from here is select Save.

New TimeClock:
- If you need to assign a new clock, use the toggle button to select New.
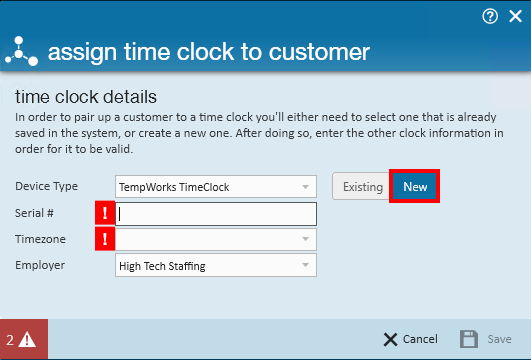
- Use the Device Type drop-down to select your new TimeClock, then enter the Serial # and Timezone information into the required fields.
- Remember, the time zone is important and must be accurate in order for employee punches on this clock to be recorded properly! When you're done, hit Save.

*Note* If you are going to have 3rd shifts using timeclocks then you will need to setup 1 department per shift.
Otherwise, you will run into the situation of having a Max Shift Length so long that the first punch of the new week gets pulled back onto the previous timecard.
Once each shift has been configured per respective department record, this will allow for three different sets of WebCenter rules to allow the use of 3rd shifts correctly.
Congratulations! Not only have you set up the customer record properly, you've linked the correct TimeClock and are ready to receive employee punches...almost!
*Note* Going forward, it is very important to create new orders for this customer properly so that future assignment records will be set up to receive TimeClock punches after employees are assigned.
Step 3: Set up the Order Record
It is very important to verify that the following are correct, because each flows to the assignment and affects how your TimeClock will behave: 
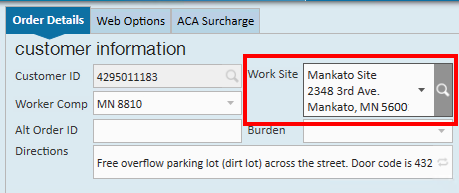
- Work Site - This address should accurately reflect the place your employees will go to work, and also the location of your TempWorks TimeClock.
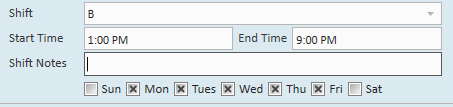
- Shift - Shift information automatically flows to the assignment record and is tied to snaps and warnings.
- Note: If not configured at the order level, you'll need to enter shift information on the assignment record. Shifts must be in the format of "8:00AM" - any other format will not be parsed properly for the TimeClock.
- Note: If not configured at the order level, you'll need to enter shift information on the assignment record. Shifts must be in the format of "8:00AM" - any other format will not be parsed properly for the TimeClock.
- Contacts - In order for your contact to be able to view and/or approve TimeClock punches in WebCenter, they must be set up with the "Supervisor" role on the customer record. (see step 4 below for more information)
- TW TimeClock - This box needs to be checked for all orders requiring assigned employees to punch time on a TempWorks TimeClock.


Step 4: Set up the Contact Record
This will ensure that your contact is set up to view WebCenter timecards.
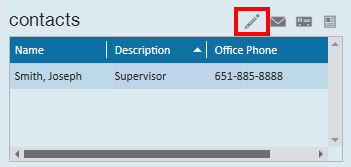
- Navigate to the order record
- Select the
 icon to open the order contacts window
 - From the contact drop-down, select the contact who will be responsible for WebCenter timecards
- Select the Supervisor contact role by selecting the + button on the right side of the contact role option
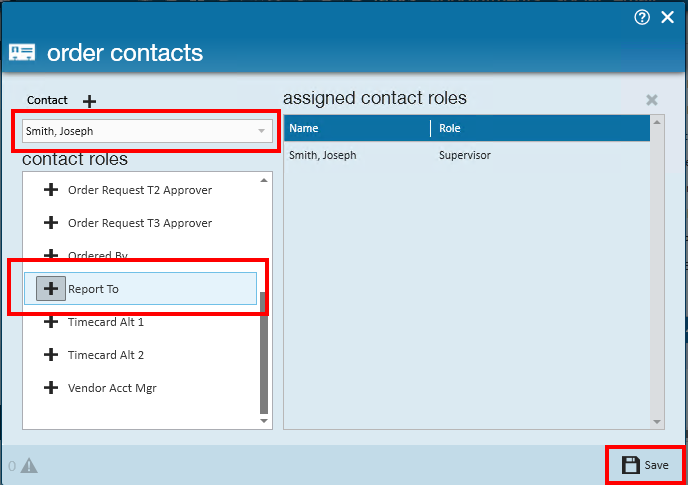
- Now you should see the contact name and role listed in the assigned contact roles box
- When you are finished, select Save
 icon to open the order contacts window
*Note: Contacts can be set up with any of the contact types listed on the left.
Additionally, if you haven't already, you will need to give them access to WebCenter by inviting them or setting them up with a user account. We cover that in this article. In order to see and approve time, the contact will need to be given the role "Customer supervisor with TimeClock".
Step 5: Set up the Employee Record
To link this employee with the TimeClock they'll use to punch in and out at work, you'll need to add the credentials for that TimeClock to their record.
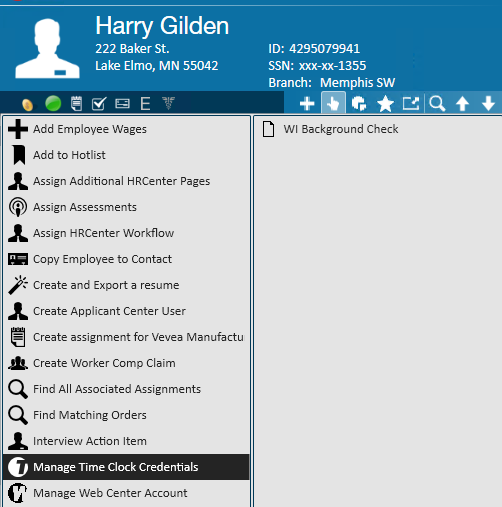
- Navigate to the employee record for the employee you wish to add a TimeClock to
- Expand the Actions Menu by selecting the
 icon
icon - Select Manage Time Clock Credentials. (This opens up the time clock credentials window.)
- Select the + button to add a new row
- Expand the credential type drop-down menu to choose which time punching method the employee will use to log in to the TimeClock
- Enter the data the employee will use to log in to the TimeClock
- Expand the clock drop-down to select which clock the employee will use to punch their time
- Select Save to update the employee's credentials
 icon
icon
For more information on the credential types, see TimeClock Authentication Options.