What are Customer Defaults?
The Defaults tab allows users to establish standards for multiplier codes and shifts that apply to the customer so they automatically flow into that customer’s orders. When properly set, this can be a powerful tool to expedite the creation of orders and eliminate making errors.
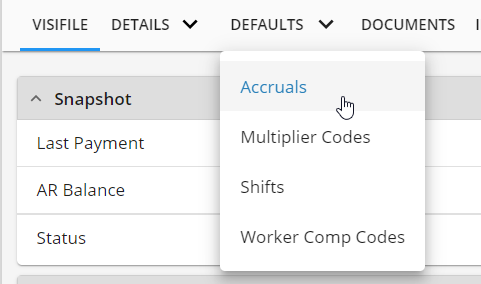
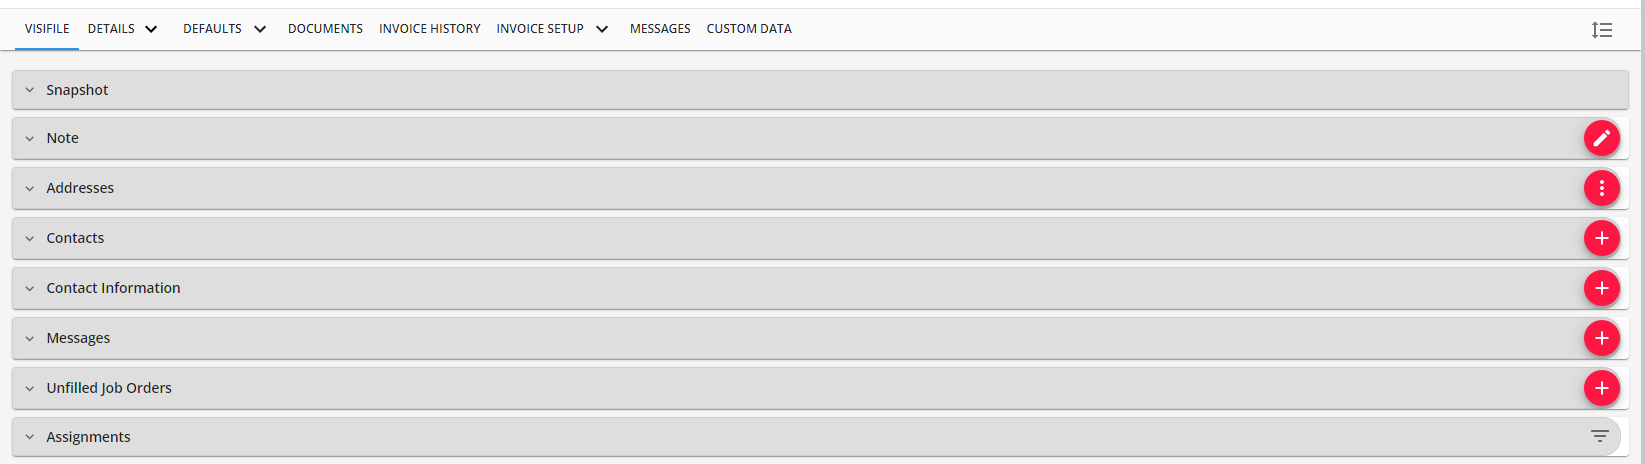
To find Customer Defaults, navigate to the Customer record and select the Defaults tab:

Accruals
Accruals refer to paid sick leave, vacation, PTO, etc. options that employees might be eligible for. You may have a few different accruals offered depending on where employees work, which customers they work for, etc. Accrual packages will need to be set up in administration and managed for each employee.
- Navigate to the customer record
- Select the arrow next to the Defaults tab and choose Accruals
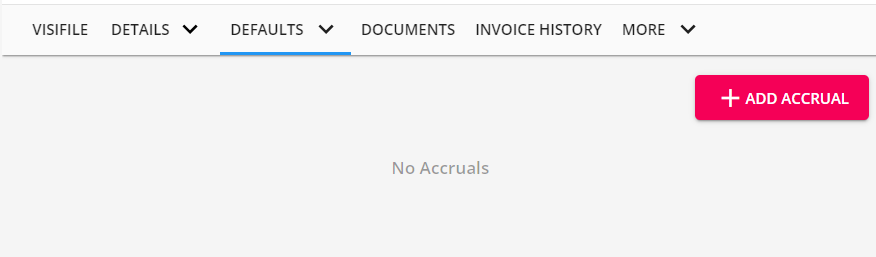
- Select the + Add Accruals button to add a new accrual package
- Select the accrual package from the drop down
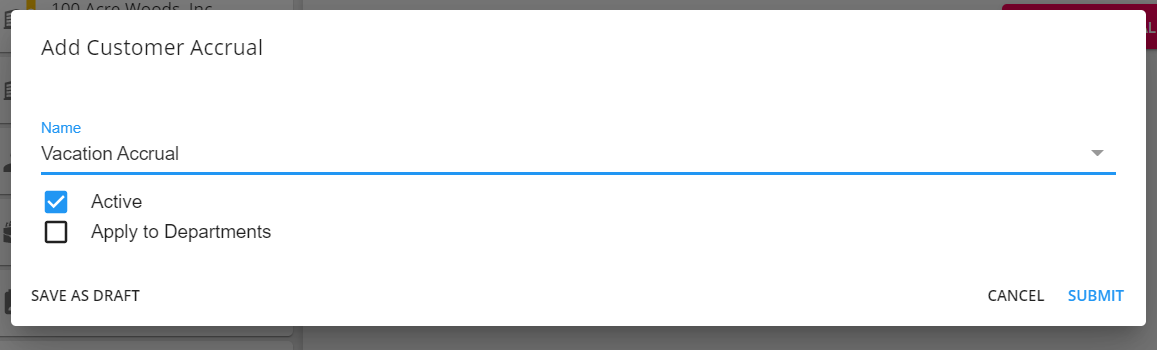
- Accrual package names are set up by your administrator. Talk with your manager or admin if you are unsure of which package to choose
- Optionally, if this customer has department records underneath it, you can choose to apply this accrual to departments as well
- Select Submit


*Note* For more information on managing Customer accruals, please see the article titled Beyond - Managing Accruals on the Customer, Worksite, and Assignment Records
Multiplier Codes
Multiplier codes, or markups, allow for the generation of a bill rate based on the pay rate when entered into the order's financial card.
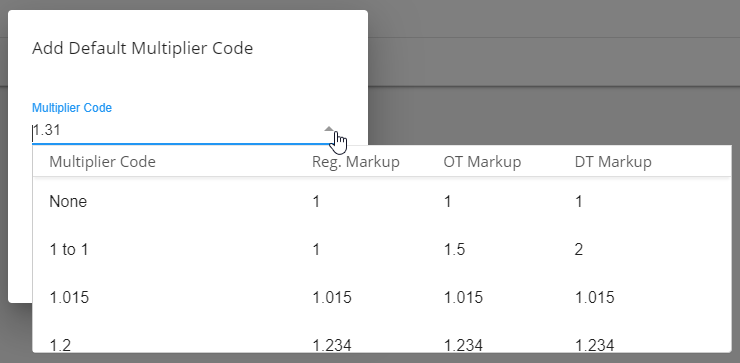
Select the multiplier code option from the drop-down. Here, current multiplier codes can be viewed and new ones can be added. Click the "+ Add Default Multiplier Code" button to open the "Add Multiplier Code" window:

In the upper left-hand corner, the system highlights the section users are currently viewing. The following example below shows users are in the Customer> Defaults> Multiplier Codes.
*Note* If this is the first time you are setting up a multiplier code for this customer, note that the system will display "None" with a priority of 1 and the following message will display:

Once the "+" icon is selected, the system will open the multiplier code window.
From the drop-down, select the matching code:
*Note* If you have not yet established multiplier codes in Administration, the drop-down will be blank. For more information on adding multiplier codes, see Creating Multiplier Codes.
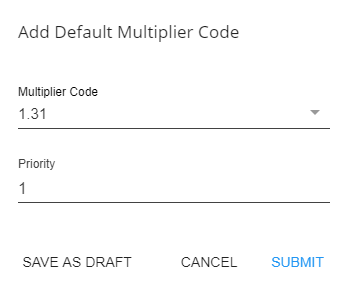
Priority: A numeric value which will determine the placement of this code in the order and assignment details page multiplier code drop-down list. Priority 1 is the order multiplier default for the customer. Users may add as many as codes as necessary to a customer record, however, no two codes can share the same priority value.
The priority is automatically assigned as the next available number, following a standard numerical order. Click "Submit" in the lower right to close the window and add the new multiplier code. Any/all saved codes will immediately display in the multiplier codes table.

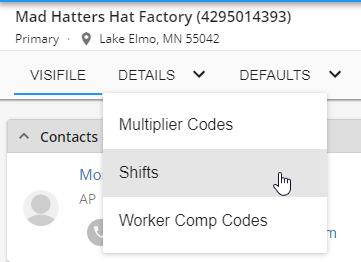
Shifts
Shifts are the customer specific start times, end times, break times, and days that employees are scheduled to work. Shifts that display here will automatically populate into the parallel shift fields within the 'Job Information' card of the 'Details' tab for all new orders for this customer.
To add a shift, select 'Shifts' from the defaults tab and icon to open the 'Shifts' window:
In the upper left hand corner, the system highlights the section users are currently viewing. The following example below shows users are in the Customer> Defaults> Shifts:

Select the '+' icon to open the 'Add Default Shift' wizard:
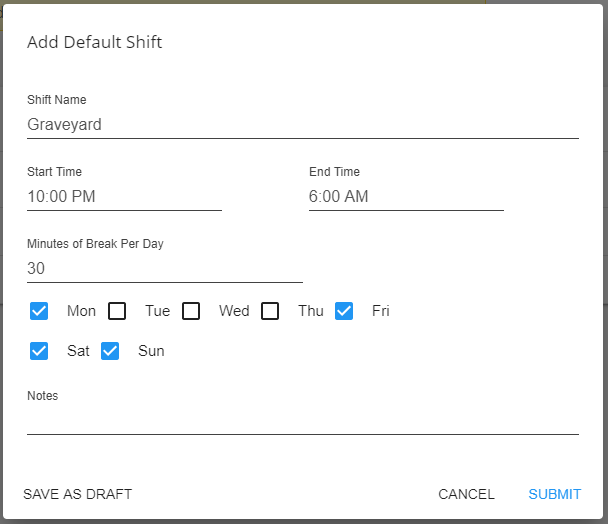
- Shift: (Required) A free text field (10 character limit) used to name/briefly describe the shift.
- Start Time: (Required) When the shift begins. The time the employee is expected to arrive.
- End Time: (Required) When the shift ends. The time the employee can expect to be done with work.
- Break Minutes: The length of time a customer has allotted for employee breaks in minutes.
- Days Worked: The days of the week the employee is expected to report to work at the customer.
- Notes: Notes strictly related to the shift that may be helpful to save.
- For example: “Crucial that employees are on time! They have a strict shift rollover schedule--3rd shift staff CANNOT punch out until 1st shift staff punches in!” Any notes entered display for reference only and do not appear elsewhere. They do not flow into orders, assignments, etc.
Click 'Submit' in the lower right to close the form and save the shift.
Select the  to the right of the shift to edit or remove a saved shift:

*Note* The system shift defaults will disappear after at least one shift has been added. They will have to be recreated to utilize those shifts.
Worker Comp Codes
*Note* If you utilize default Security Groups, you will need to ensure the "Can edit customer default worker comp codes" permission has been added to all the Security Groups that require this functionality:

If you utilize custom Security Groups with Advanced Permissions, you will need to add the Access to the "Worker Comp Codes" page within Customer > Defaults > Worker Comp Codes along with all associated fields and forms within the dropdowns to the Security Groups that require the functionality:
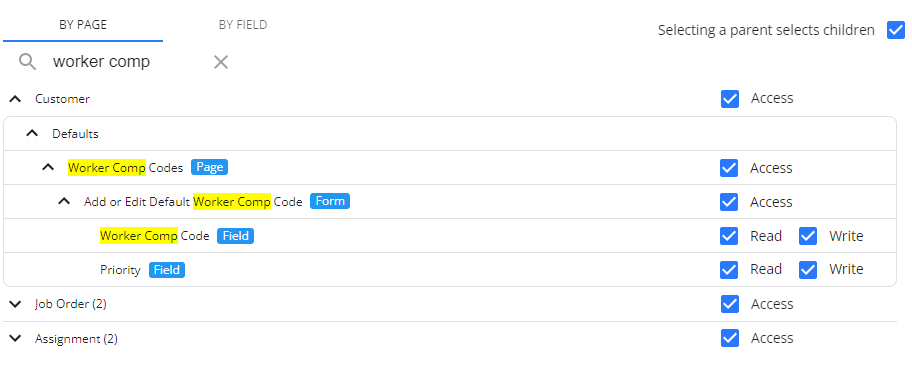
For more information on created custom Security Groups with Advanced Permissions, please see the following article titled "Beyond - Creating Security Groups with Advanced Permissions".
Setting up worker comp code defaults on the customer record allows you to set and rank the only available worker comp options on any order record for this customer. This can help reduce the chance of recruiters or sales selecting the incorrect worker comp code for any given order. 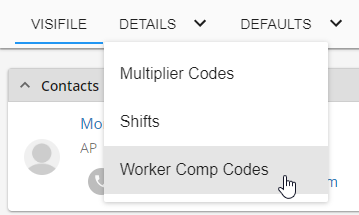
To Add a Default Worker Comp Code:
- Navigate to the Customer record
- Select Defaults > Worker Comp Code
- Select the "+ Add Default Worker Comp Code" button:

- Choose the worker comp code and set a Priority

- Select Submit


Required Documents
Required documents allow you to store, track, and manage documents that are required for employees.
Begin by navigating to the Customer record > Defaults > Required Documents:

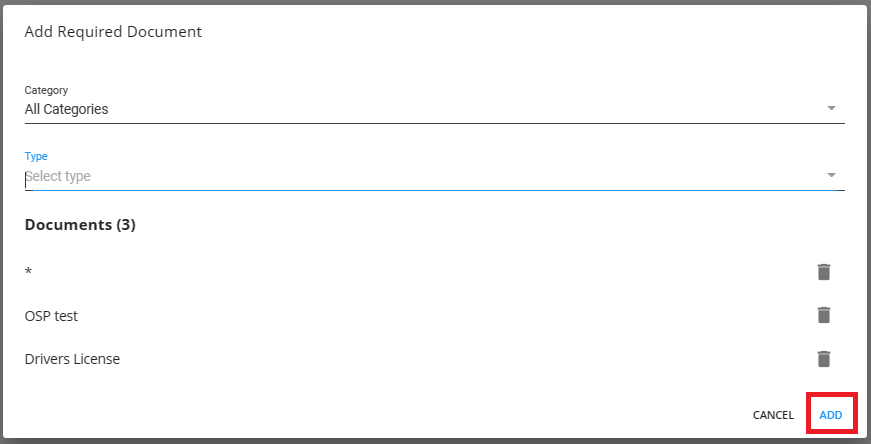
Select the option for "+ Add Required Document" at the top right to open the window for adding a required document:
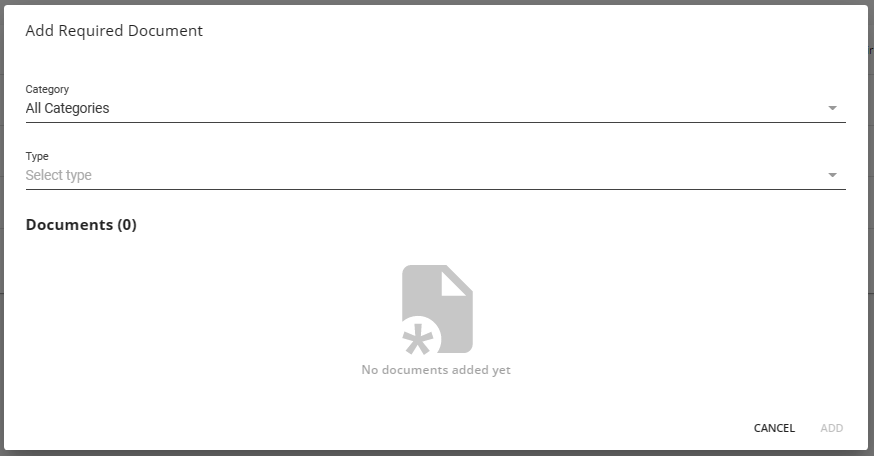
Select the following:
- Category: The category of the Required Document Type.
- Type: The Required Document Type.
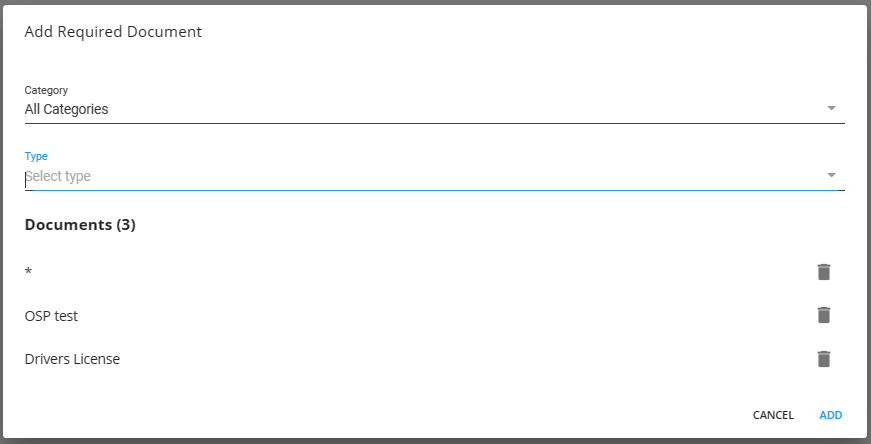
*Note* You are able to add more than one Required Document at a time. Continue to select the Required Documents from the "Type" dropdown and they will appear within the "Documents" list:
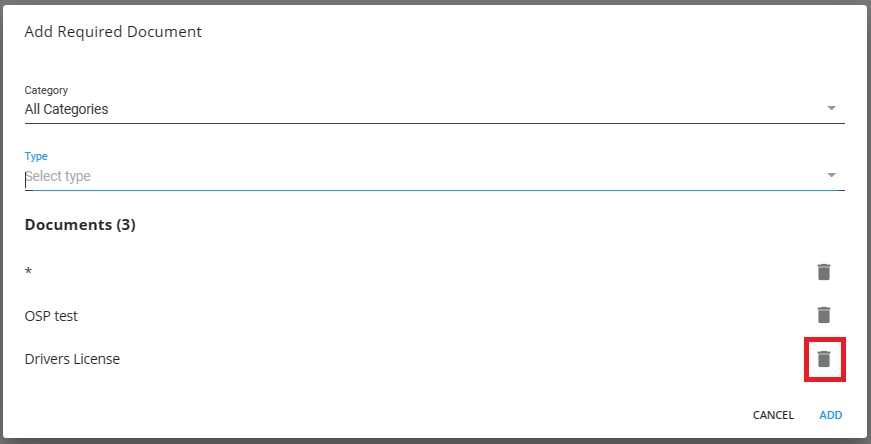
You can also remove a Required Document from the list by selecting the Trash Can icon to the right of the item:
Once all of the Required Documents have been added for the Customer, select "Add" at the bottom right:
You will now see the added Required Documents within the main list on the Customer record:

Once the Required Documents have been added to the Customer record, you can do the following:
- Apply Required Documents to Customer Departments
- Edit
- Delete
*Note* For more information on setting up customer required documents, please see the article titled Beyond - Customer Required Documents
Rate Sheets
A rate sheet is a tool that can be used to set up permanent pay and/or bill rates for orders/assignments created for a specific employee, customer, job title, shift, worksite, or branch.
The rate sheet is a great option for users that sign agreements with customers which have an agreed upon pay rate and bill rate. For example, perhaps we agree that any time we place 12 Hour Nurse temps at 123 Nursing, the bill rate is $45.00/hr and the pay rate is $25.00/hr. I can assure that every service rep will always respect that agreement by establishing a rate sheet.
With a rate sheet saved to the customer record, whenever an order is created for a 12 Hour Nurse temp at 123 Nursing, viola! our rate sheet is triggered, and the financial details automatically post fill into the order like magic!
Navigate to Customer > Defaults > Rate Sheets:

Select "+ Add Rate Sheet":

Complete the form and select "Submit" to create the Rate Sheet:

Selecting the drop down to the left of the Rate Sheet will also expand it's details:

*Note* For more information on creating and managing rate sheets, please see the article titled Beyond - How to Create and Utilize Rate Sheets.
Job Descriptions
Job descriptions can be a great tool to save staffing specialists time when a job description is consistent for the client within an order. Users may select a job title and enter detailed information in relation to that specific position, in return when the job title is selected within the order the information will pre-populate yet can still be modified on the order if necessary.
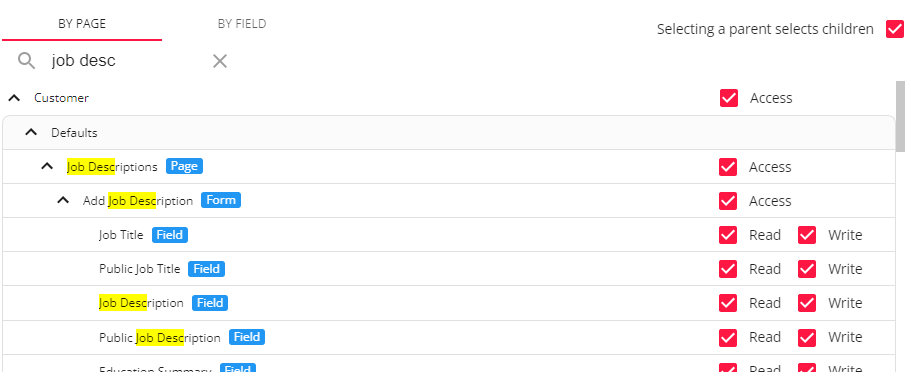
*Note* If you utilize custom Security Groups with Advanced Permissions, you will need to add the Access to the "Job Descriptions" page within Customer > Defaults > Job Descriptions along with all associated fields and forms within the dropdowns to the Security Groups that require the functionality:
For more information on created custom Security Groups with Advanced Permissions, please see the following article titled "Beyond - Creating Security Groups with Advanced Permissions".
To add a default job description:
- Navigate to the customer you want to add a default job description for:
- Select Defaults > Job Descriptions to navigate to the "Job Descriptions" page:

- Select "+ Add Job Description" in the upper right:

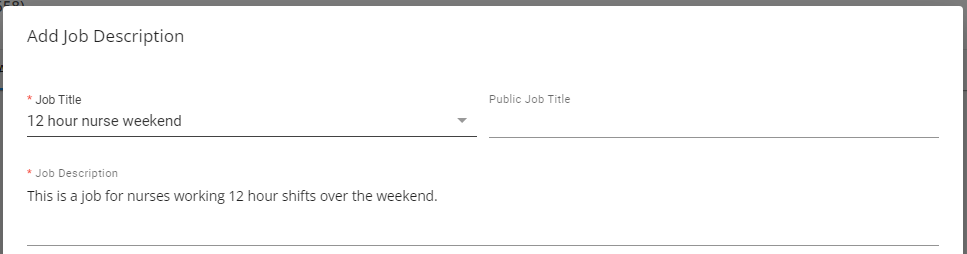
- Within the "Add Job Description" window, select the Job Title your recruiters would select on the Job Order:

- Enter the Job Description:
- Optionally, if you are posting to the Job Board, enter a "Public Job Description" and a "Public Job Title" that will display on the Job Board:
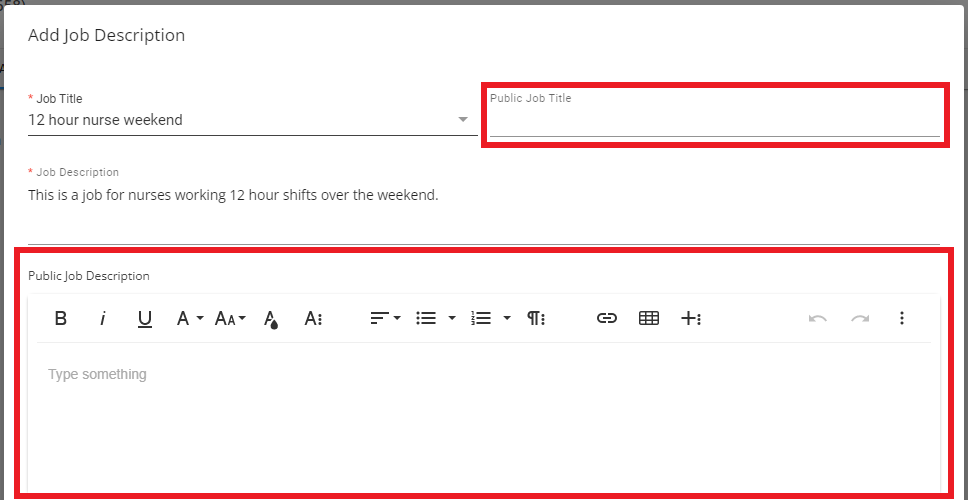
- Please see the article titled How to Post Orders to the Job Board for more information.
- Finally, if applicable, enter information within the "Education Summary" and "Experience Sumarry" fields:
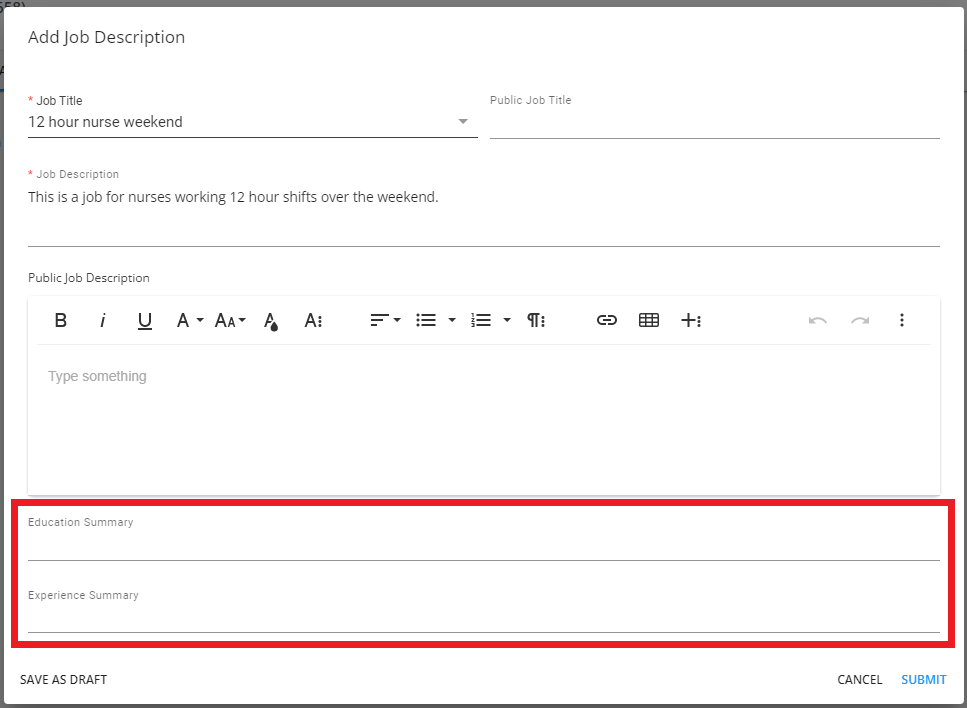
- Once all of the information has been added, select "Submit" to save the Job Description.


*Note* Default Job Descriptions are able to be edited or deleted within Defaults > Job Descriptions by selecting the  icon to the right of the entry and either selecting "Edit" or "Delete":

Selecting the option for "Apply default job description to departments" will ensure all default job descriptions setup on the primary customer record will also apply to the associated department records:

*Note* When navigating to a department record associated with the primary that has default job descriptions applied to all departments, you will see the following banner:

This means that if a new default job description is added to the department record, the previous default job descriptions will be removed.
Deleting the new default job description(s) will allow the original defaults from the primary record to appear within the department.
Therefore, it is recommended to add default job descriptions to the primary customer record if utilizing the option "Apply default job description to departments".
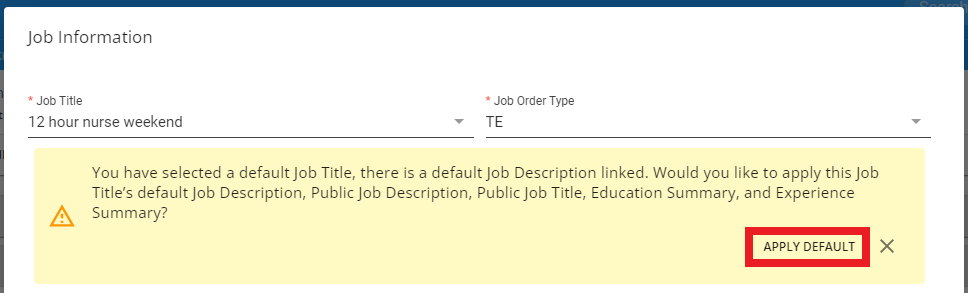
To apply a default job description to a Job Order:
- Navigate to the Job Order record that will need the job description added:

- Navigate to Details > Job Information > Edit to open the "Job Information" window:
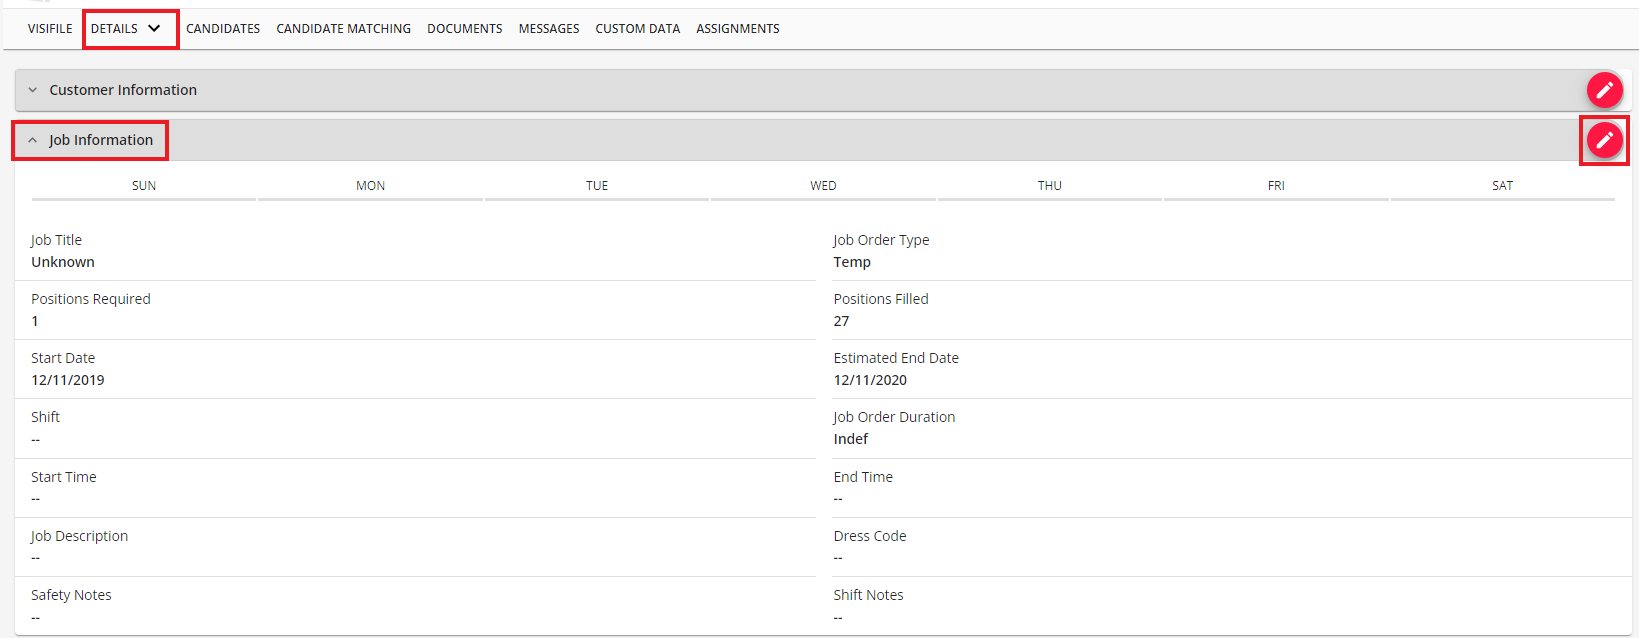
- Within the "Job Information" window, select the Job Title that corresponds to the default job description that was setup on the customer record:

- Once selected, you will be prompted with a message to override the description with the default saved one:
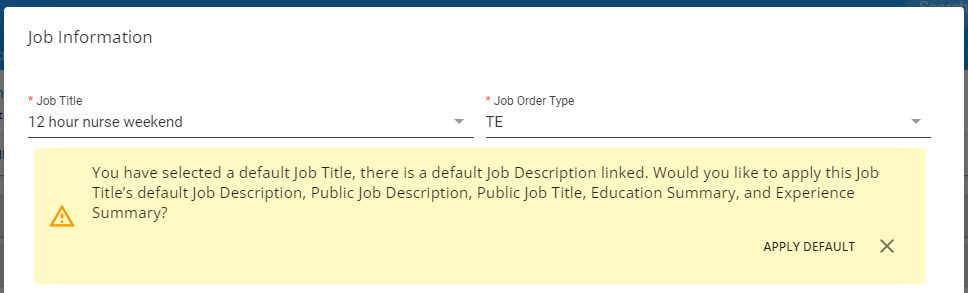
- Select "Apply Default" within the prompt and the default information will populate on the Job Order:
- Select "Submit" to apply the changes to the Job Order.


