Overview
Email templates, both basic and custom, can be created within HRCenter for the following steps:
- A new page, step, or workflow is assigned.
- A step has been submitted.
- A step has been rejected.
This article covers the following:
How to Setup Basic HRCenter Email Templates
Throughout HRCenter applicants as well as users will receive email notifications depending upon the actions performed throughout the stages of the application and hiring process.
*Note* These email options can be turned on/off depending on users preference within the tenants section of administration.
Creating Basic Email Templates
Begin by logging into HRCenter Administration.
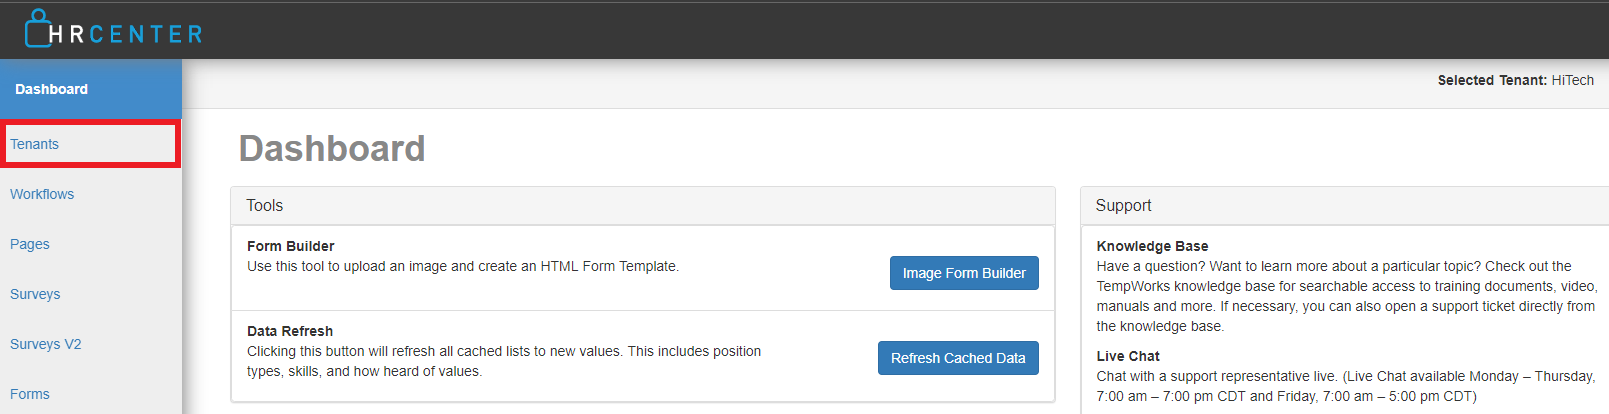
Within the Administration Dashboard, select the "Tenants" tab on the left:
Expand the information for the your HRCenter Tenant, scroll down to the bottom of the page, and select "Modify Templates" within the Email Templates card:

Within the "Choose Your Template" window, you will have the option to create/modify templates for the following steps of the Workflow process:
- New Item Assigned: Sent out to applicant when a new page, step or workflow is assigned.
- Step Submitted: Sent to the staffing company (the branch) to inform users the applicant has finished a step within the process.
- Step Rejection: Sent to the branch if applicant enters unqualified information within a page.
Enter text within the fields presented and, once complete, select "Save" for that tab:
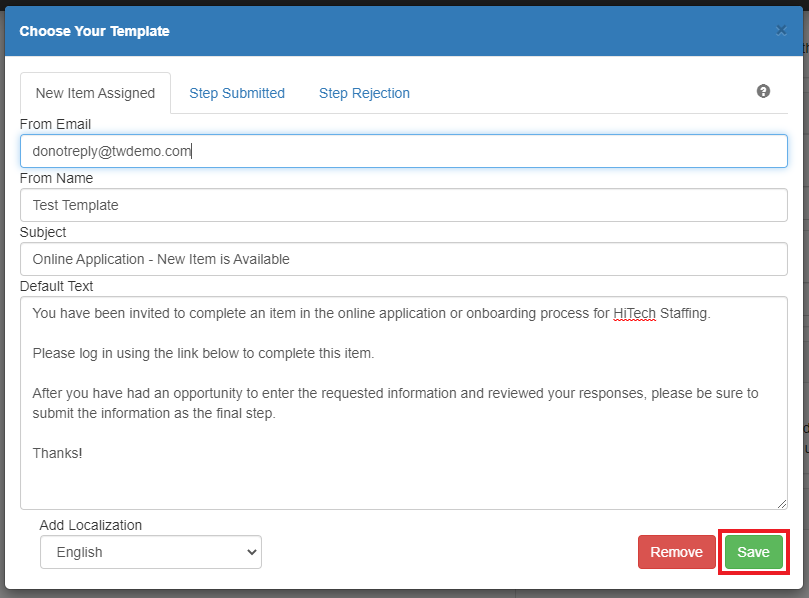
*Note* After modifying a template for a specific step, make sure to select "Save" for each tab before continuing to the next.
If you select another tab without saving, the previously entered information will be lost.
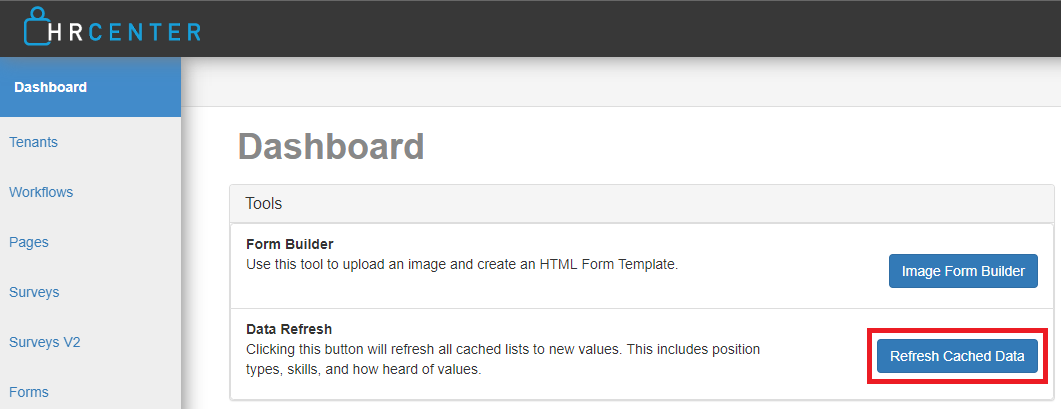
Once the templates have been saved, navigate to the "Dashboard" tab on the left and select "Refreshed Cached Data" to ensure the changes take effect for the email templates:
How to Setup Custom HRCenter Email Templates
Email templates are able to be created within HRCenter that contain data fields that will populate with the intended information once the email has been sent. These data fields are pre-determined and need to be entered exactly as shown for the intended information to populate within the email.
*Note* For Self-Hosted clients, in order to utilize the new email template functionality with data fields, you will need to ensure your API is updated to version 3.2022.310 or later.
If your API is not updated, you will still be able to continue utilizing HRCenter Email Templates but you will be unable to add the data fields.
Creating Custom Email Templates
Begin by logging into HRCenter Administration.
Within the Administration Dashboard, select the "Tenants" tab on the left:
Expand the information for the your HRCenter Tenant, scroll down to the bottom of the page, and select "Modify Templates" within the Email Templates card:
Within the "Choose Your Template" window, you will have the option to create/modify templates for the following steps of the Workflow process:
- New Item Assigned: Sent out to applicant when a new page, step or workflow is assigned.
- Step Submitted: Sent to the staffing company (the branch) to inform users the applicant has finished a step within the process.
- Step Rejection: Sent to the branch if applicant enters unqualified information within a page.
- Application Receipt: Sent to the applicant when applying to a job via the Job Board, Job Board via WebCenter, and/or Buzz.
*Note* After modifying a template for a specific step, make sure to select "Save" for each tab before continuing to the next.
If you select another tab without saving, the previously entered information will be lost.
When creating/modifying email templates, you can utilize the following data fields within the subject and body of the email:
| Template Compatibility | Data Field Name | Related Field Name | Location of Data Field |
|---|---|---|---|
| *|wf_name|* | Workflow Name | Beyond > Employee > Onboarding > + Assign > Assign A New Workflow > Workflow |
| *|step_name|* | Step Name | Beyond > Employee > Onboarding > + Assign > Assign A New Workflow > Start at Step |
| *|employee_first_name|* | Employee First Name | Beyond > Employee > Details > Personal > Employee Personal Information > First Name |
| *|employee_last_name|* | Employee Last Name | Beyond > Employee > Details > Personal > Employee Personal Information > Last Name |
| *|employee_id|* | Employee ID | Beyond > Employee > Visifile > Snapshot > ID |
| *|employee_phone|* | Primary Employee Phone Number | Beyond > Employee > Visifile > Contact Information > Phone that is set to Primary |
| *|employee_email|* | Primary Employee Email Address | Beyond > Employee > Visifile > Contact Information > Email that is set to Primary |
| *|branch_name|* | The name of the Branch the employee is assigned to. | Beyond > Employee > Details > Personal > Branch |
| *|branch_id|* | The identification number of the Branch. | N/A |
| *|branch_phone|* | Branch Phone Number | Enterprise > All Options > Administration > Branch > Main Info > Phone |
| *|branch_email|* | Branch Email Address | Enterprise > All Options > Administration > Branch > Main Info > Email |
| *|branch_address|* | Branch Full Address | Enterprise > All Options > Administration > Branch > Main Info > Branch Address |
| *|recruiter_name|* | Staffing Specialist | Beyond > Employee > Details > Hiring > Staffing Specialist |
| *|recruiter_phone|* | Recruiter (Hiring Specialist) Phone Number | Enterprise > All Options > Administration > Service Rep > Service Rep Info > Main Rep Info > Phone Number |
| *|recruiter_email|* | Recruiter (Hiring Specialist) Email | Enterprise > All Options > Administration > Service Rep > Service Rep Info > Email |
| *|UserName|* | Employee Web User Account Username | Beyond > Employee > Web User > View Account Details > Username |
| *|job_order_id|* | Job Order ID | Beyond > Job Order > Job Order ID |
| *|job_title|* | Job Title | Beyond > Job Order > Job Title |
| *|datetime_email_sent|* | Date Job Receipt Email Queued | Beyond > Job Order > Candidates > Date Job Receipt Email Queued |
*Note* The following fields can only be used within the default "Application Receipt" email template:
- *|job_order_id|*
- *|job_title|*
- *|datetime_email_sent|*
The aforementioned fields will only work for the "Application Receipt" email template. They will not pull data if used on the existing HRCenter email templates (New Item Assigned, Step Submitted, & Step Rejection).

The following fields are able to be used within the "Application Receipt" HRCenter email template:
- "branch_address"
- "branch_email"
- "branch_name"
- "branch_phone"
- "datetime_email_sent"
- "employee_email"
- "employee_first_name"
- "employee_id"
- "employee_last_name"
- "employee_phone"
- "job_order_id"
- "job_title"
- "UserName"
- "recruiter_email"
- "recruiter_name"
- "recruiter_phone"
For more information on the Automatic Job Receipt functionality, please see the article titled Beyond - Automatic Job Application Receipt.
*Note* Data fields need to be entered exactly as shown within the table above for their respective information to appear within the email that is sent:
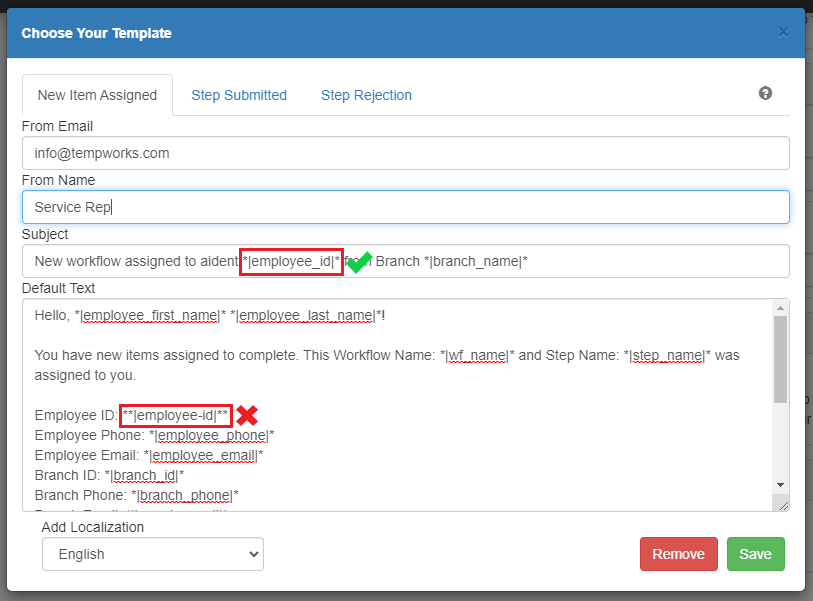
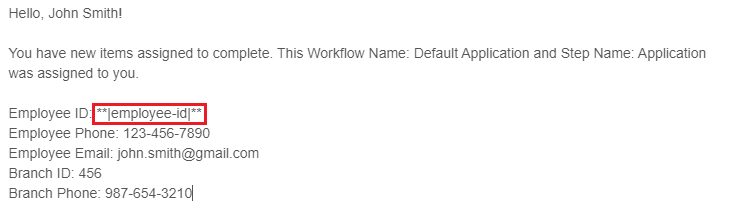
Data fields that are not entered exactly as shown will appear as the plain text entered within the email template once the email has been sent:
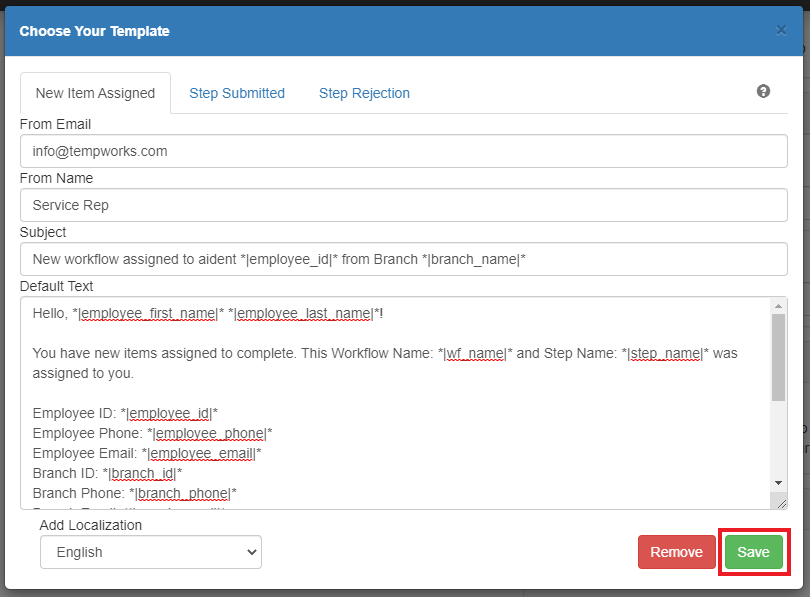
Once the information has been entered, within the specific tab, select "Save" and then continue to the next tab if you'd like to modify the email templates for the other steps:
Once the templates have been saved, navigate to the "Dashboard" tab on the left and select "Refreshed Cached Data" to ensure the changes take effect for the email templates:
FAQ
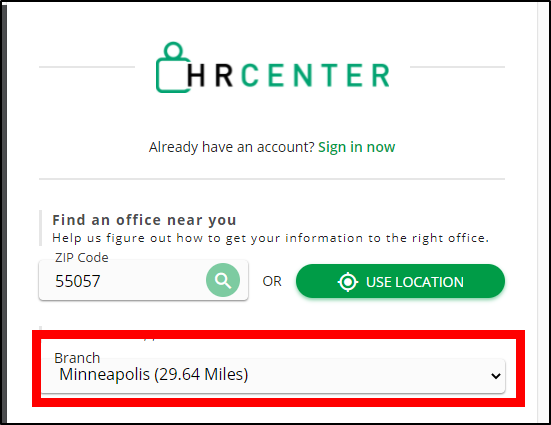
Q. What branch is the email being sent to for Step Submission and Step Rejection emails?
- A. The branch that will receive the notification is the branch that the employee applied to. This is the branch that the applicant chose on the drop down on the HRCenter registration page:

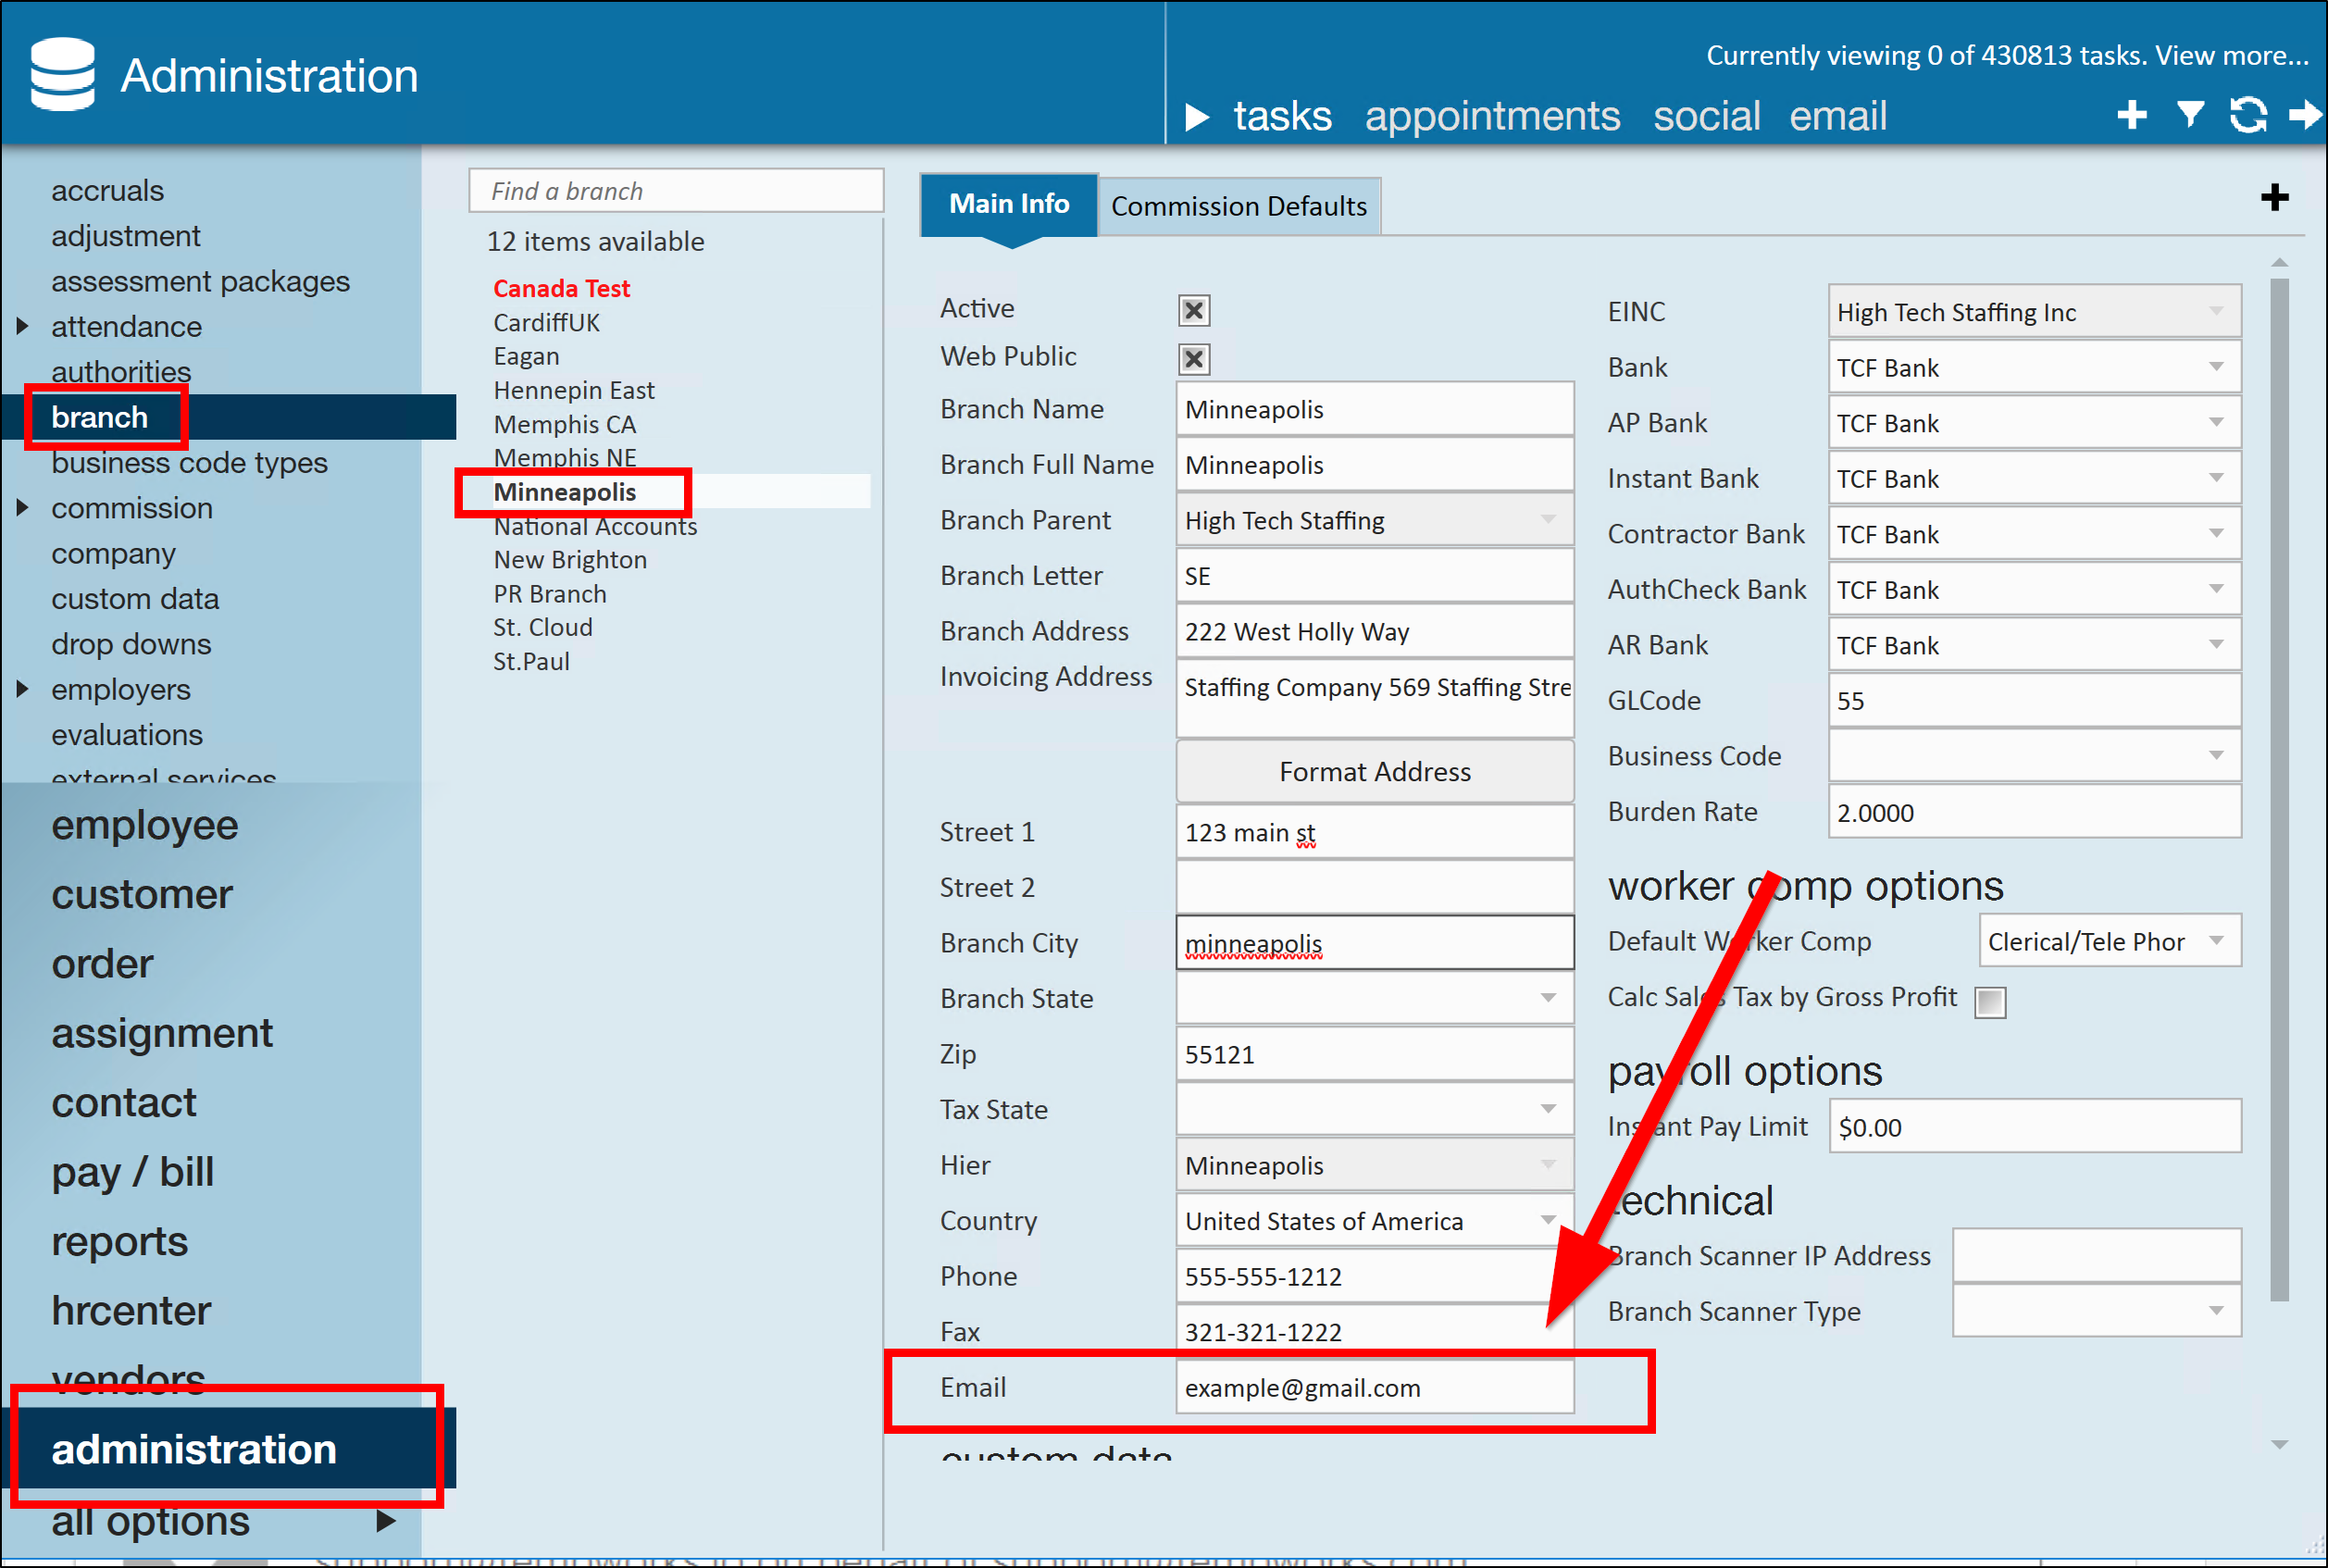
Q. How do I know what email is associated to that Branch?
- A. Within enterprise go to Administration. Choose the Branch tab on the left had side. Select your Branch. There will be an Email field. The email in this field is where the notification will be sent:

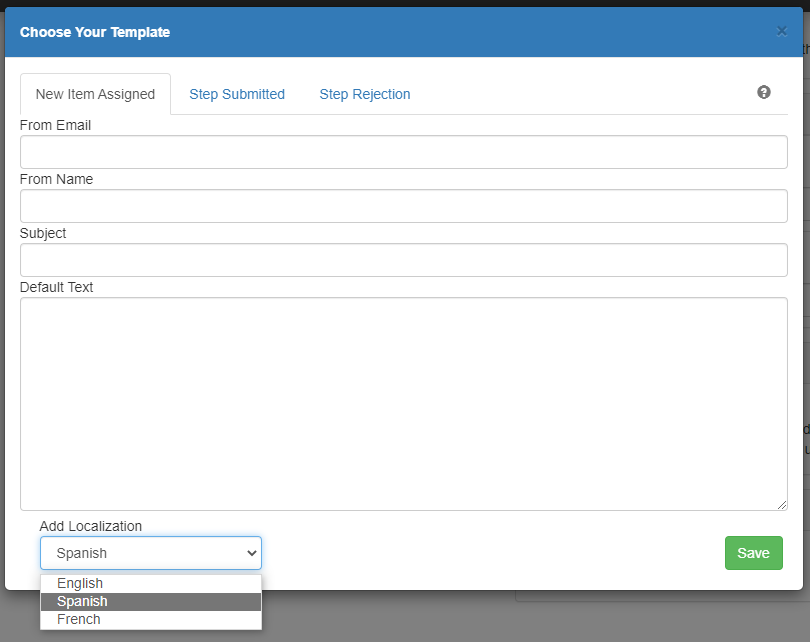
Q. I need the email templates to be in another language for my applicants, can this be accomplished?
- A. Yes, localizations for email templates can be added by selecting the "Add Localization" dropdown, selecting the language from within the dropdown (English, Spanish, or French), entering the intended text within the fields, and selecting "Save" for each tab once complete: