The TempWorks E-Verify integration allows users to create cases and search for those cases from within Enterprise. Enterprise has been integrated with the Department of Homeland Security as well as the Social Security Department to ensure that all Federal regulations have been followed.
*Note* E-verify integration requires additional setup and an existing relationship with E-Verify. For more information about getting this setup, please contact your Account Manager.
Our E-Verify integration requires API V3 which means our hosted clients need to log in via apps.ontempworks.com.
The E-Verify Avatar Icon
On the employee record, there will be a list of icons underneath the employees name in the upper left. These icons give you additional information. If you have our E-Verify Integration set up, you will be able to see the E-Verify avatar icon.
The E-Verify charm will change colors as you process cases for employees so that you can see at-a-glance their current status.
E-Verify Charm Colors & Their Meanings:
 | Employee has not been E-Verified |
 | Case completed and employee is verified to work in the US |
 | Case is pending or incomplete |
 | Case was closed without Employee Authorization |
Processing an E-Verify Case:
*Note* Because E-Verify's system utilizes API V3, you must belong to a security group with the everify-case-edit permission in order to process an e-verify case. In order to update the SSN within an E-Verify case for an employee, you must also belong to a security group with the employee-modify-gpi permission. See Security Group Administration Form for more information.
*Note* By modifying an SSN within an E-Verify case for an employee, the change will also apply to the SSN field on the employee file in Enterprise.
Step 1: Create the Case
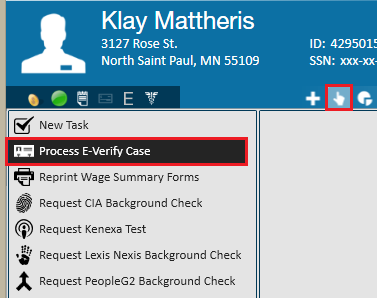
To process an E-Verify Case, you must start by navigating to the employee record you would like to process the case for. Once there, expand the actions menu and select process 'E-Verify Case' from the list of options, as shown:
In the event a duplicate case is found via the SSN, you will see the following prompt when attempting to create a new E-Verify case:
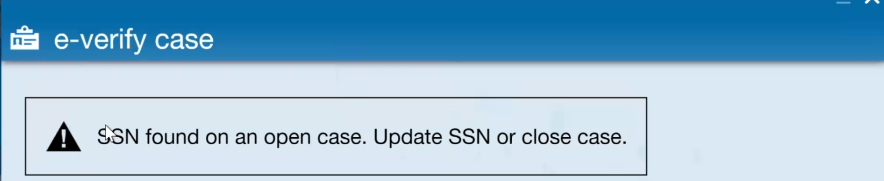
Selecting the above prompt will navigate you to the duplicate case that was found.
Step 2: Review and Fill Out the Employee Information and Documents Presented
Some information may already be pre-filled from the employee record.

Employee Information and Attestation 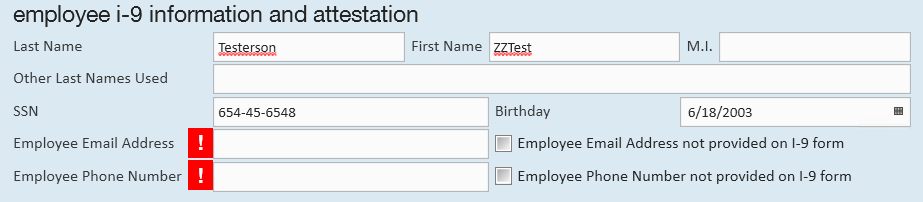
Information here may be pre-filled from the employee record. Ensure the information here is accurate and update or add any information not filled out.
*Note* If a SSN is changed or added here will be saved on the employee's record in your system.
Citizenship Status 
Choose the correct citizenship status from the drop down.
Documents Presented 
- Enter the information for the documents the employee presented to you when filling out the I-9.
- Choose either a document from list A or documents from list B & C and fill out all required fields.
- These fields may change based on the document selected from the drop down.
Employer Details 
Fill out or review employer details including hire date and submitter's name and contact information.
Review all your information before selecting Next.
Step 3: Complete Additional Information for E-Verify
Confirm Data
If information entered does not match fully with E-Verify's database, E-Verify may request that you confirm the data submitted before continuing. 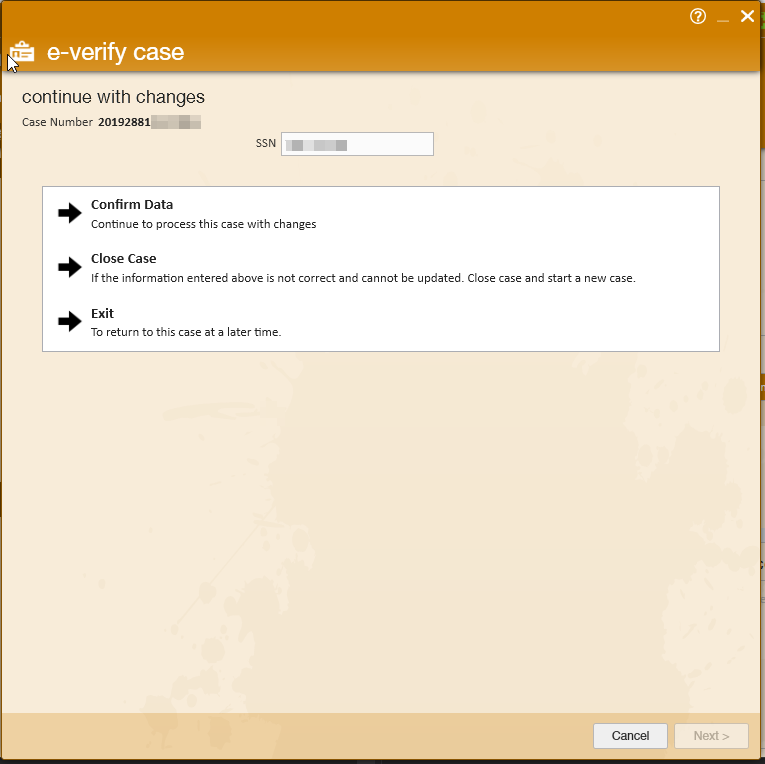
You will be able to choose to confirm the data, close the case, or exit to continue this case at a later time.
Verify Photo Information
This step only applies when an employee has presented a passport as their ID presented. 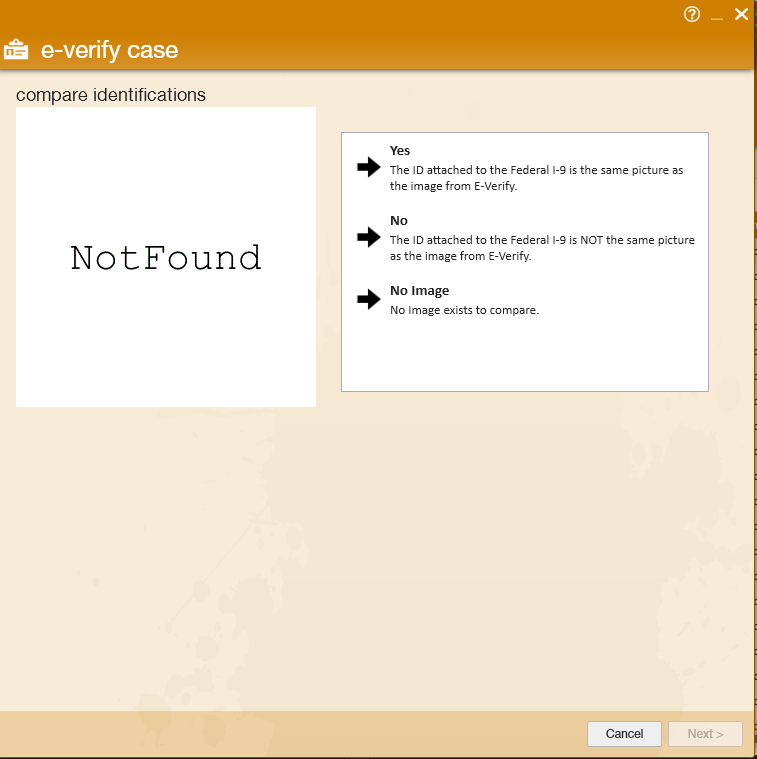
You will have 3 options:
- Yes - the ID attached to the Federal I-9 is the same as the image shown
- No - the ID attached to the Federal I-9 is Not the same picture as the image from E-Verify
- No Image exists to compare
If you choose No Image, you will be able to submit a valid photo of the passport:

*Note* The E-Verify case can be closed during this step.
Tentative Non-Confirmation (TNC)
If E-Verify requires additional action from the employee in order to verify employment status, you will receive a page notifying you that there is a TNC - Pending Referral. 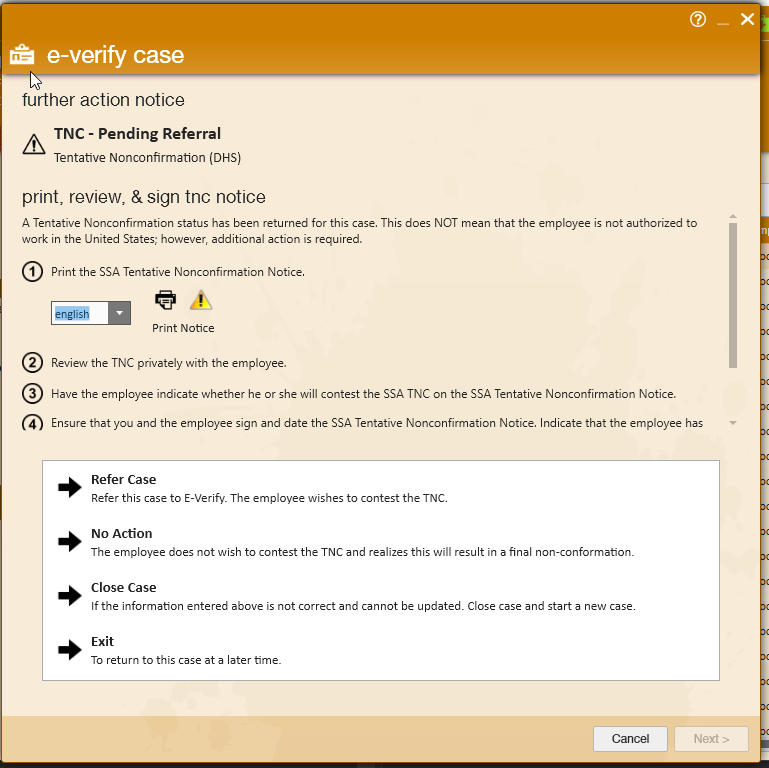
You will need to follow the instructions to print, review, and have the employee sign the TNC notice.
- If the employee chooses to take further action to complete this case you will be able to choose "Refer Case".
- The employee will then need to follow the SSA notice to contact the correct people before the deadline
- If the employee does not take the further action necessary within the time frame specified in the notice (usually 8 days), the case status will change to "Rejected" and you will be able to close the case
- If the employee chooses not to take further action, choose "No Action" to denote they do not want to take further action. If you entered information incorrectly, you can select the "Close Case" option.
- If you are going to review the TNC with the employee and return later with the decision, you choose the "Exit" option to return to this case later.
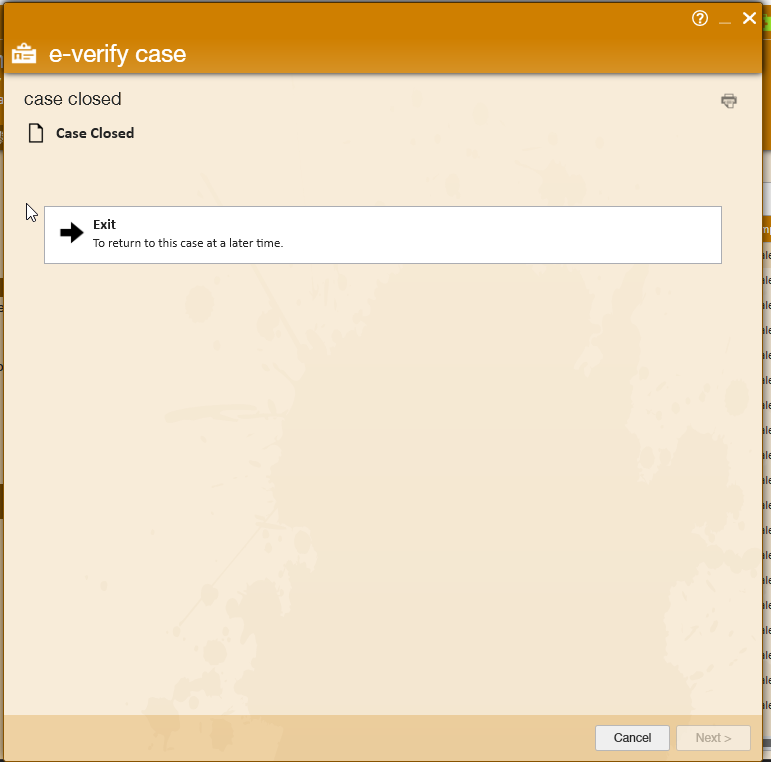
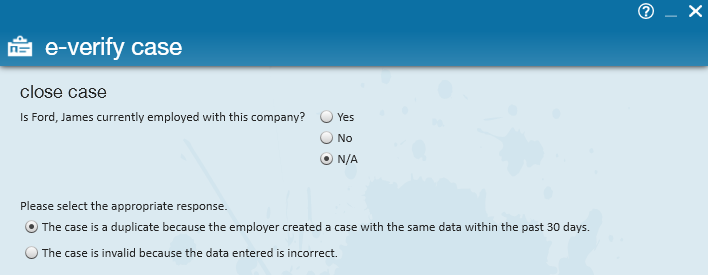
Step 4: Close the Case
No matter which way your case goes, you will be prompted to close the case at the end.
Select Close Case and then choose a reason if applicable.
Locating E-Verify Results
The results for your E-Verify cases will be returned and recorded within the individual employee record in Enterprise.
The status details categories will give information regarding where in the process the E-Verify case is. You will be informed whether the employment has been authorized or if there are further steps to be taken in the process.

Additional E- Verify Options
E-Verify Checks and Balances
There is functionality built into the E-Verify Enterprise integration to help make managing your E-Verify cases easier. This includes warning users of overdue cases, duplicate cases, and prompting users to change their E-Verify password as the expiration date for the password approaches.
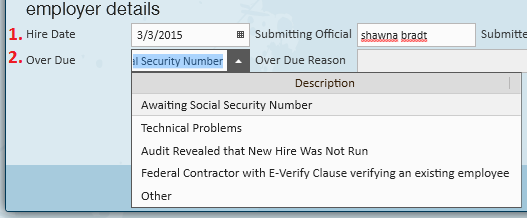
Overdue Cases
If a case is being processed more than three days after the hire date (1.) entered, the over due (2.) drop-down will require an explanation as to why the case is overdue:
Duplicate Cases
When a user attempts to process an E-Verify case for an employee (SSN) that has had a case already processed within the last 30 days, Enterprise will flag the case as a duplicate and present the user with three options:
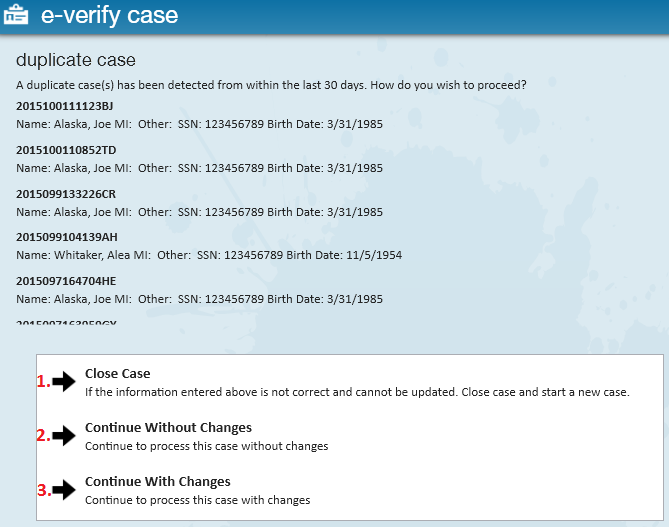
1. Close Case
Select this option if you do not wish to proceed. For example, perhaps you entered the SSN in incorrectly.
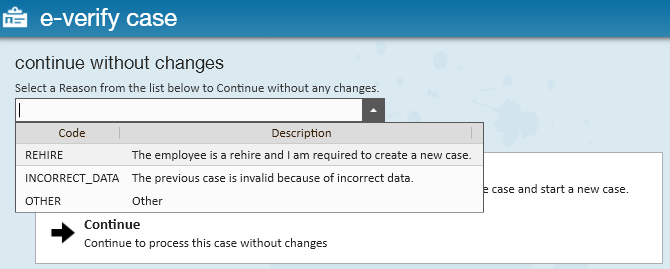
2. Continue Without Changes
Select this option if you would like to bypass the flag. For example, perhaps this a rehire or the original case was invalid (note that if the other case was invalid, continuing here does not change any information regarding the original case).
3. Proceed With Changes
For example, you incorrectly keyed the SSN and would like to make those changes before continuing.

Refresh Cases
Navigating to the E-Verify Cases for the employee will automatically refresh the case status.
Related Articles
- None