What are Hot Lists?
Hot lists allow you an opportunity to place employees or customers within given static lists in order to easily access and locate them, without having to run a search.
Some common ideas for hot lists:
- Group employees who have be pre-qualified for a specific customer/skill set
- Track key or target customers
- New hires that have not yet turned in background checks or I-9s
- Customers or employees that need to be contacted this week
The hot list section of Enterprise Core can be accessed directly from the navigational tree under all options > hot lists.
How to create a new hot list
- Navigate to hot lists by selecting all options > hot lists
- Select the + icon next to employees or customers

- A new window will pop up, create a List Name
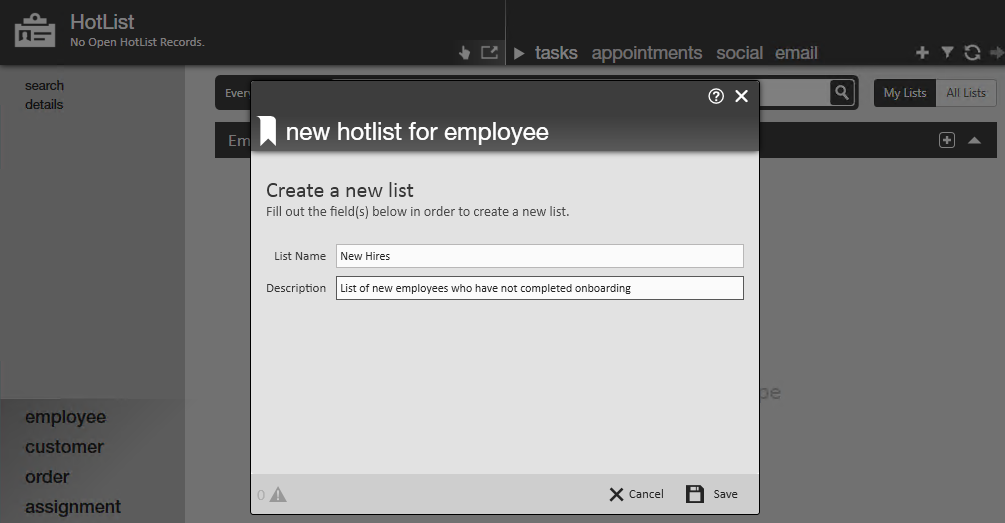
- Optionally, add a description for this list
- Select Save


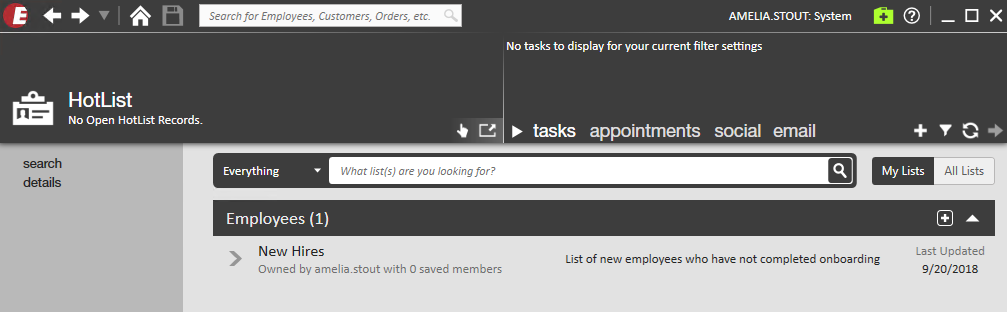
Your new hot list will appear under the employee or customer banner.
How to add employees or customers to a hot list
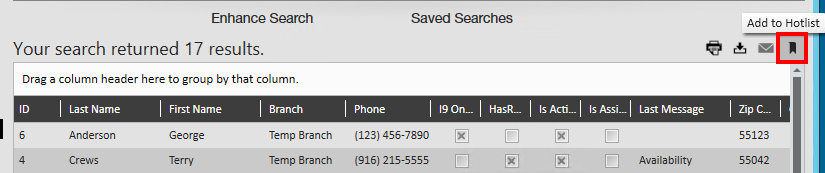
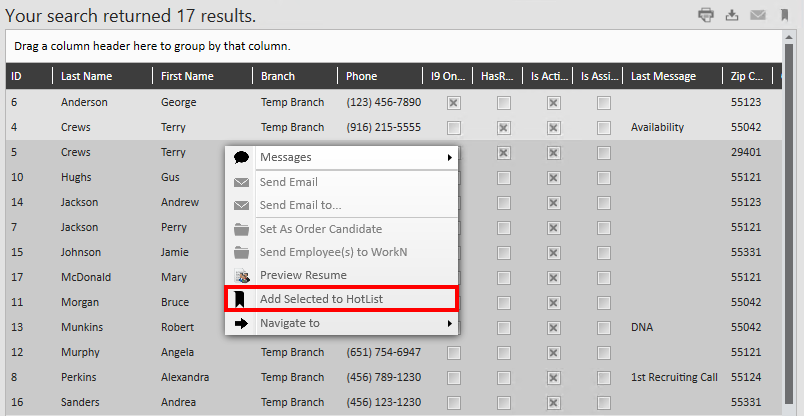
- Search for the employees or customers you wish to add to your hot list
- Select using the following options
- To add all records from a search to a hot list, select the bookmark icon in the upper right to add
- To add only select records from a search, hold ctrl and click on each record you want to add. Then right click and select 'Add Selected to HotList'
- To add all records from a search to a hot list, select the bookmark icon in the upper right to add
- A new window will pop up, select the list you want to add your select of employees or customers to
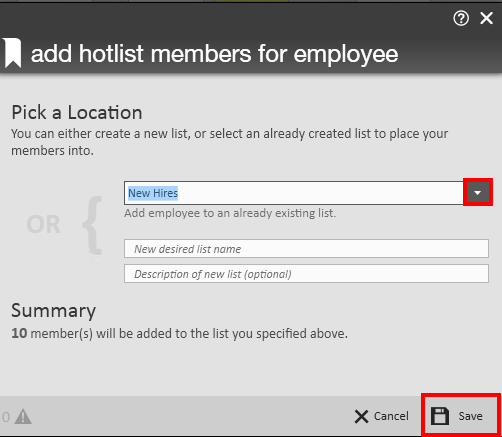
- Or create a new list by writing in a name under the 'New desired list name' field
- Notice the summary at the bottom will help you verify that the correct number of records are being added to the list.
- Select Save


Once your employees have been saved to your hot list, navigate to all options > hot lists to see your list. Double click on the list name to open it.
Managing hot lists
Once you have created and added employees or customers to your hot list, you will be able to view the list under all options > hot lists. From here you will be able to navigate to records, log messages, remove records from the list as things change, etc.
Privacy
Hot lists can be set to public in order to be shared with coworkers, or private in order to be kept to your user id only. To toggle the privacy of a hot list, click on the lock next to the hot list's title.
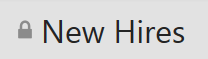 Private List ExampleThe default for new hot lists is private where the lock will be set in a locked position.
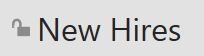 Public List ExampleWhen the lock is set to unlocked, it will be public, meaning anyone can search for your hot list and find it.
Adding information
On each record there will be a number of fields you can add information to
- Status
- This is only for employee hot lists
- Click on the + status icon to add/change an employee status.
- Contact
- This is only for customer hot lists
- Click on the + contact icon to see current contacts or add a new contact
- Phone
- Select the + phone to add a phone number or click on the existing phone number to edit
- Message
- Select the + messages icon or the date of the last message logged to see current messages or log a new message
- Note
- Write any notes you want displayed only on the hot list under the 'click here and type a short note' section on either customer or employee hot lists
Viewing additional information
There are an array of additional icons on the right side of every record on a hot list. These icons provide additional information and functionality.
For Customer Hot Lists:
- Orders
- View open orders for a customer
- Tasks
- View open tasks tied to that customer record
- Documents
- View documents stored on the customer record
- Other Actions
For Employee Hot Lists:
- Assignments
- View assignment history for employee
- Candidate on Orders
- View orders this employee is a candidate for
- Tasks
- View tasks tied to the employee record
- Resume
- View resume if saved on the employee record
- Email
- Email the employee (only if employee record has an email saved
- Other Actions
- The 3 lines icon at the end indicates additional options including:
- Navigating to the employee record
- Send email
- Remove from list
- The 3 lines icon at the end indicates additional options including: