Support Tickets in Bridge

The support section of Bridge allows you create, manage, and review any tickets you have with the TempWorks support team. Tickets refer to any issues or questions logged with the support team. They contain details and track the progress of the rep working on your ticket making it easy for you to track and review issues. 

To access the support section of Bridge, select 'Support' from the Bridge menu. For information on how to login: Bridge Overview.

This article reviews:


Creating a New Ticket

Having an issue or questions about our software? Skip the phone call and create a ticket here to get help from support: 

  1. Select the Create New Ticket button in the top center of the screen to begin. 
  2. A new card will appear, enter the following information:
    • Subject- this should be a short description of the issue you are having. 
      • When you begin typing, related help topics will appear on the right with related Knowledge Base articles based on the key words entered. Click the arrow or any of the articles to be redirected to the knowledge base for more information:
    • Type- select the ticket type using the drop-down. This should match the software/section you are having the issue with.
    • Description- enter the full description of the issue you are having. 
      • What were you doing when you ran into the issue?
      • What software were you using?
      • If there was an error message, what did it say?
      • Has this issue happened multiple times or to multiple users?
      • What was your hierarchy level when you encountered the issue?
    • If applicable, take screenshots of the issue and utilize the choose file button to upload them. 
      • Screenshots of the full screen are the most helpful.
      • If you are taking a picture of an error message, make sure to extend any additional details before taking the screenshot.
  3. Select Submit to send your ticket to support.

Example: 


Searching for Tickets

The search bar in the top center of the screen allows you to search for a specific support ticket: 

  • Enter key words or ticket numbers under the search field.
  • Utilize the drop-down to sort your search results.


Filter Tickets:

On the left, you can utilize the filter options to change which tickets you are viewing:
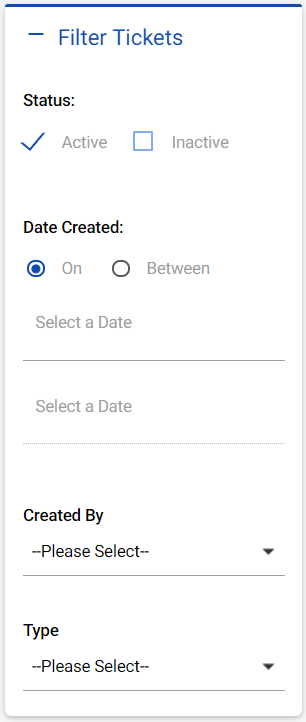
Status: 

Select 'Active' to see current tickets that have not been completed or inactive to review past support tickets,

Date Created: 

These options allow you to select a specific date created or look for a ticket created within a range of dates. 

To search for a specific date, select the 'On' option and enter a date on the first select a date field.

To search for a date range, select 'Between' and enter the start date on the first 'select a date' field and the end date on the second. 

Created By:

This allows you to look at all tickets created by a specific person. Utilize the drop-down menu to select a user.

Type:

This option allows you to narrow your results to only look at a specific support ticket type. Utilize the drop-down menu to select a ticket type.
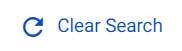


Clear Search

Once you have utilized the filter or search options and you want to start a new search, utilize the 'Clear Search' button in the upper left to clear your search criteria.


Updating Tickets

Click on any ticket to see the ticket details including any messages from Support. From this screen, you can add notes, docs, screen shots, and review ticket information. 

Ticket Information

Information on the specific ticket are located on the left. Here, you can review status, type, creation information, and the assigned rep working on your case. 

Add additional notes

Select the  Add Notebutton on the right to add a new note. Check the box next to 'Send a Copy to Myself' to CC yourself on the note created. 

Enter the note and utilize the format options if helpful. Click the insert options to add a link or photo to your note. 

Add media

Utilize the 'Add Media' button on the left to upload documents with notes or new/additional screen shots: 

  1. Select the  button to begin. 
  2. Select 'Add Files' and choose the file you wish to upload. 
  3. Select 'Submit' to upload your file.


Reopening a Closed Support Ticket

In the event a previously resolved issue resurfaces, you can reopen the Support ticket directly within Bridge.

*Note* In the event the issue is not exactly the same as presented within a previously closed Support ticket, please submit a new ticket.

  1. Select "Support" from the Bridge menu.
  2. Search for the "Inactive" Support ticket you would like to reopen.
  3. Once the correct "Inactive" Support ticket has been found, navigate to it, and select "Re-Open Ticket":
  4. The Support ticket will be reopened with the following information:
    • The status of the case will be set to "Active" and "Reopened".
    • The priority of the case will be increased.
    • The case will be assigned to the original Support representative if that representative is within the Support department. If not, another Support representative will take over assistance with the ticket.

Related Articles