What are Customer Defaults?
Customer Defaults allow you to select key information for this customer to default onto all future order records you create. Defaulted information can help limit choices and speed up the time it takes to fill out a new order.
This article will talk about the 6 default options available under a customer record > defaults. Keep in mind that Worksites and Rate Sheets also default onto new orders.
This Article Covers:
- Accruals
- Multiplier Codes
- Required Documents
- Shifts
- Worker Comp Codes
- Job Descriptions
- Additional Defaults
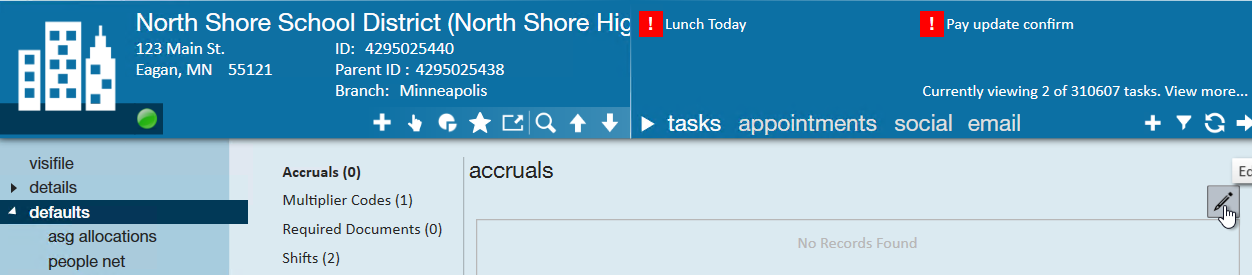
Accruals
If you have set up a deal with your customer that all employees working for this customer will be offered a PTO/Vacation/Sick time package, you can add the accrual package to the customer record.
*Note* The accrual package rates and restrictions must first be set up in administration by your admin. Check out Accrual Setup in Administration for more information.
- Navigate to customer record you want to add an accrual package to
- Select Defaults > Accruals
- Select the pencil icon in the upper right
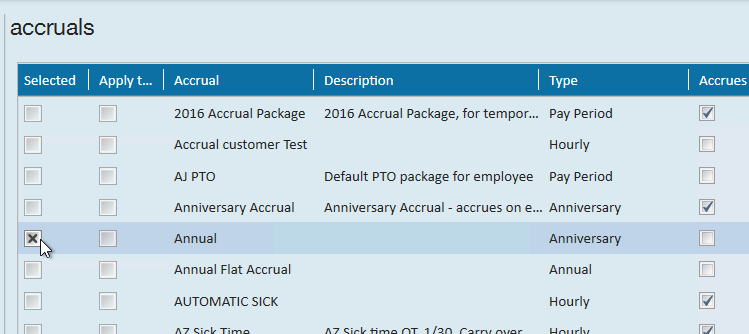
- Select the accrual package set up by your administrator
- Select Save in the upper left


For more information on Accrual setup, check out How to Setup and Manage Accruals
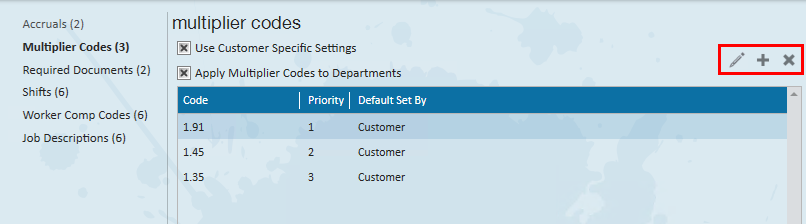
Multiplier Codes
Multiplier codes, or markups, determine pay and bill rate ratios. Maybe you have a regular and a discounted rate available, etc. Multiplier codes added to customer defaults will be available on any new orders created for this customer. The priority 1 multiplier code will be selected on every new order automatically.
*Note* Multiplier codes must first have their regular and OT rates set up by your administrator, check out Enterprise - Creating Multiplier Codes for more information.
If you are looking for static pay and bill rates, check out Enterprise - How to Create and Utilize Rate Sheets.
To add a default multiplier code:
- Navigate to the customer record you want to add a default multiplier code for
- Select Defaults > Multiplier Codes
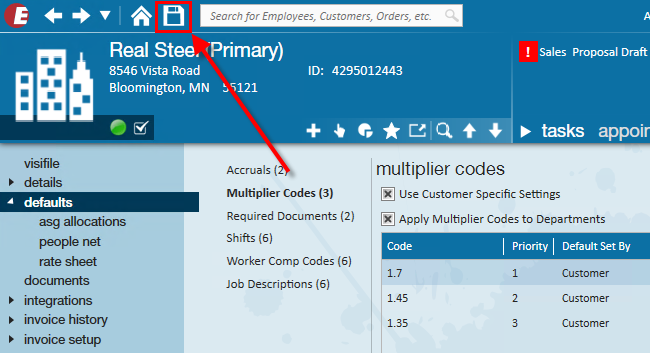
- Check the box to use Customer Specific Settings
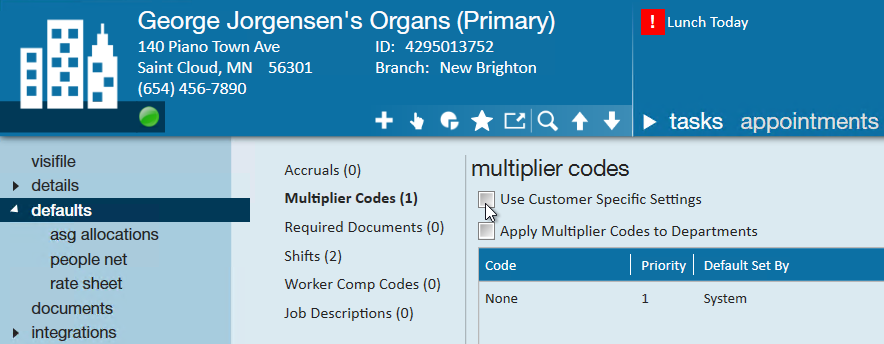
- Optionally, if you are utilizing departments, you can check the box to apply the multiplier codes added here to any departments under this customer record.
- Select the + icon in the upper right to add a new multiplier code

- Select the multiplier code from the drop down (your list will be made from your administrators and may look different)
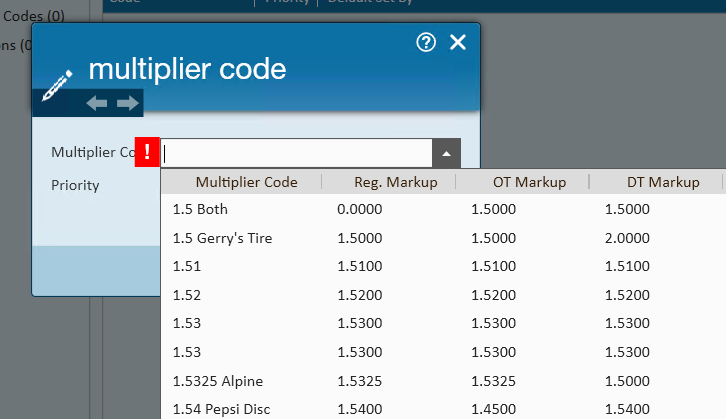
- Set a priority
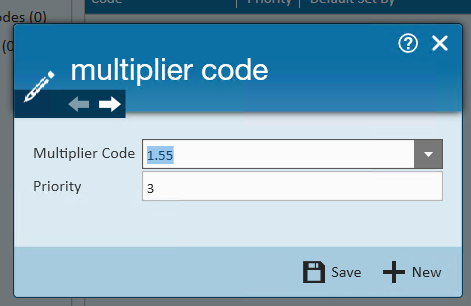
- Priority sets how it appears in the drop down on the order. The multiplier code with a priority of 1 will be defaulted for all new orders. No two multiplier codes can have the same priority level on a customer record
- Select Save to add this multiplier code or select + New to save this one and add another one


*Note* Even though you had saved the new code in the previous step, the save icon within Enterprise is bold (meaning there are changes that need to be saved or discarded). Once you select the save icon, the system level multiplier code will be officially erased/overridden by the customer level code.
*Note* Users may always re-add the multiplier code of “None” by selecting it from the multiplier code drop-down. In fact, this is a standard TempWorks “best practice” if it is common for you to have pay rates/bill rates fluctuate outside of a standard markup.
Users may edit or delete current multiplier code by highlighting the line for the multiplier code and double-clicking or by selecting the 'pencil' icon or 'x' icon respectively.
Required Documents
Required documents can be added as a default to create assignment restrictions on orders for employees. This will require them to have a current copy of this document on their file before being able to be assigned.
*Note* A required document must first be added to the system by an administrator. Check out Enterprise - How to Setup and Manage Required Document Options
To add a default required document:
- Navigate to the customer record you want to add a required document to
- Select Defaults > Required Documents
- Select the + in the upper right
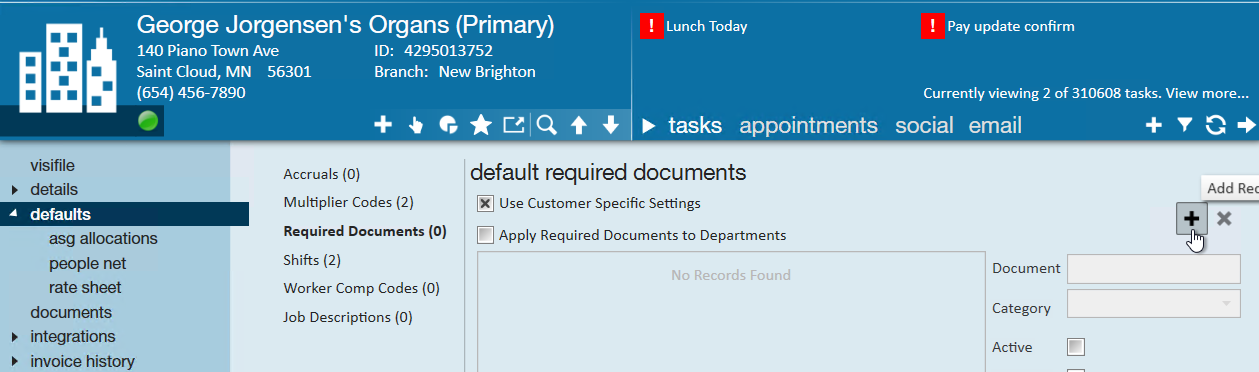
- Look through the list of available documents to find the required doc(s) you want to add
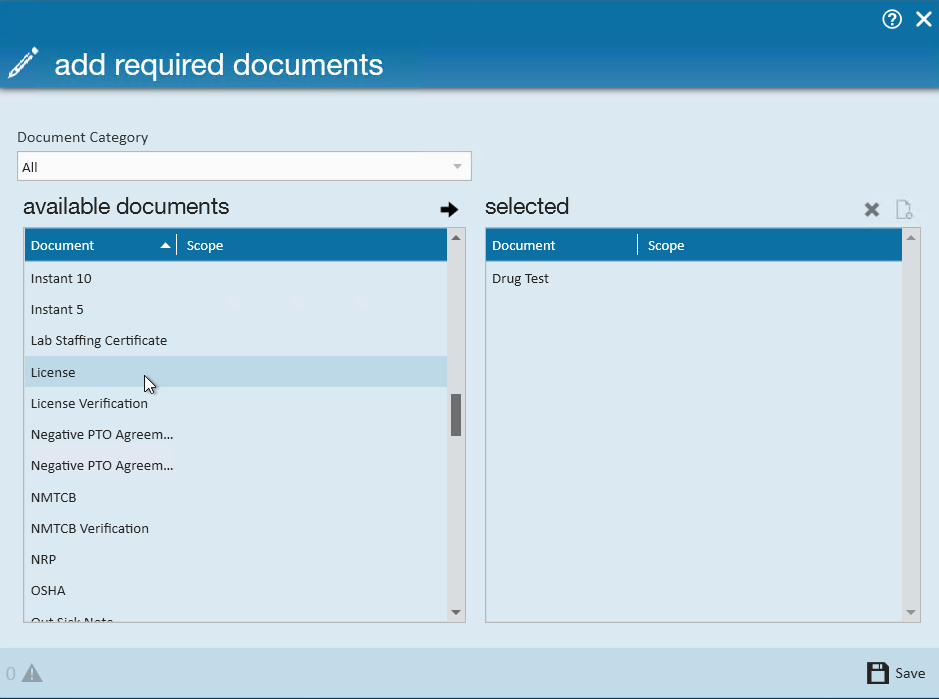
- Double click on a document or select it from the available list and use the arrow to move it to the selected list
- Once you have all the required documents you want to add under the selected list, select save


You can use the Document Category option to limit the list of available required documents, making it easier to find what you are looking for.
To learn more about how required documents work, check out Enterprise - How to Manage Required Documents.
Shifts
If you customer has a few common start and end times for different shifts, you can set up the default shifts on the customer record to match. This makes it easier when creating a new order to select from the list of default shifts to auto populate the start and end times for a job. \
To add a default shift:
- Navigate to the customer record you want to add a shift for
- Select Defaults > Shifts
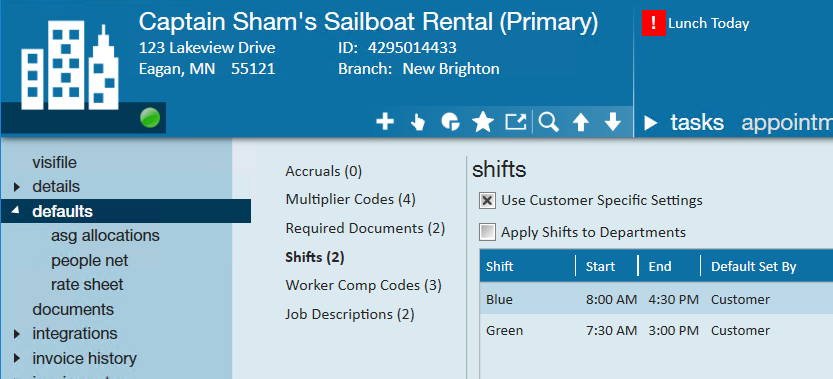
- Select the + icon to add a new shift
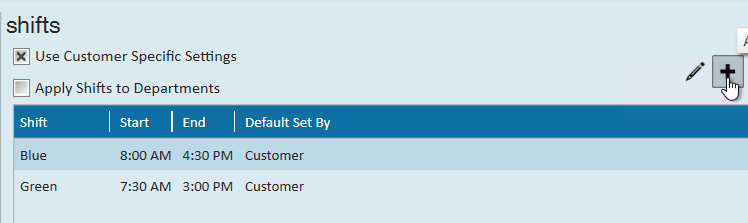
- Enter a shift name (limit to 10 characters)
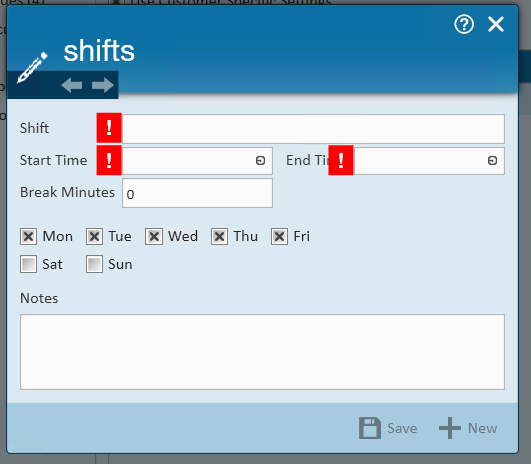
- We recommend using the same terminology your customer uses to make it easier to identify the shift whether that is 1st, 2nd, 3rd shift or Morning, Afternoon, Graveyard shift or even Red, Blue or Green shift, etc.
- Enter the start and end time
- Optionally, enter a break in minutes
- Select the days of the week employees are expected to work
- Enter any applicable notes
- Select Save to save the current shift or + New to save this one and add a new shift
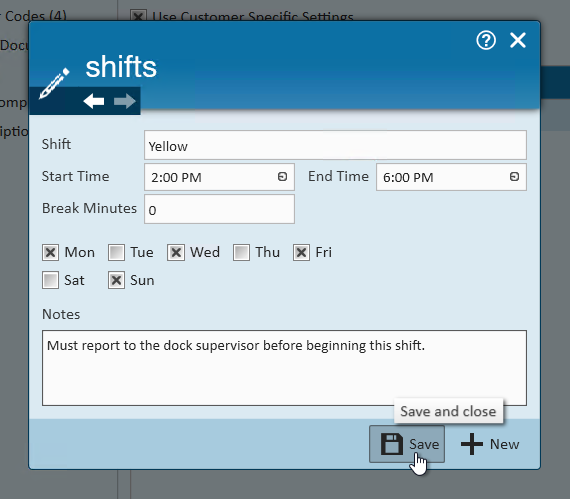


*Note* Even though you had saved the new shift in the previous step, the 'save' icon within Enterprise will be bold (meaning there are changes that need to be saved or discarded). Once you select the save icon, the (system level shifts will be officially erased/overridden by the customer level shift. 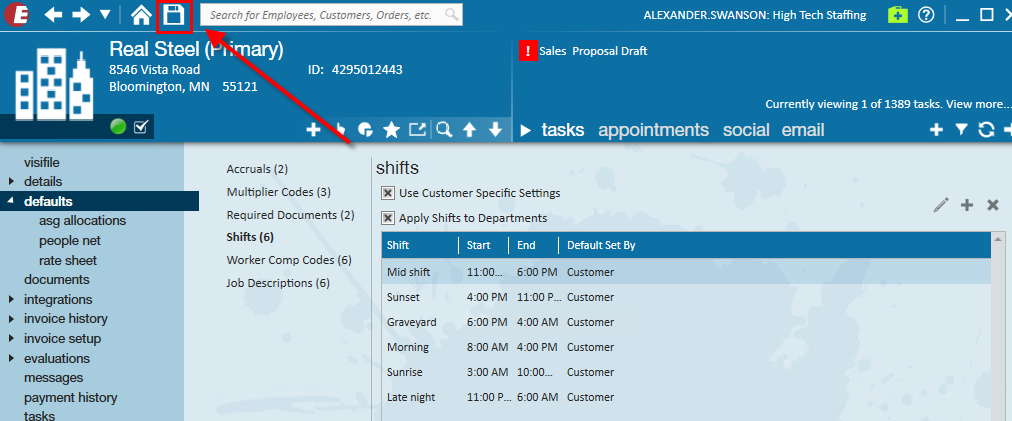 This is reflected in the table. Also note that on the refreshed page the 'save' icon is no longer bold.
Worker Comp Codes
It's important that worker compensation codes are correctly indicated on each order for insurance purposes. To help limit mistakes and make it easier to select the correct code, you can set up default worker comp codes for a customer. This list would include all the worker comp codes that could be selected for orders related to this customer.
*Note* Worker comp codes that are available in your system must first be set up by an administrator. Check out Enterprise - How to Add Worker Comp Codes for more information.
To add a default worker comp code:
- Navigate to the customer you want to add a default worker comp code to
- Select Defaults > Worker Comp Codes
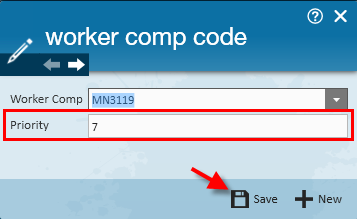
- Click on the '+' icon within the 'worker comp codes' section.

- This will open the worker comp code wizard:
- Select the desired code from the 'Worker Comp' drop-down:

- Set Priority
- This is a numeric value which will determine the placement of this code in the order and assignment details worker comp code drop down list. Priority 1 is the order worker comp default for the Customer.
- Users may add as many as codes as necessary to a Customer record, however, no two codes can share the same priority value.
- Consider setting your most commonly used or most expensive worker comp code to priority 1 since this will be set on any new orders created.
- Click Save


If/when worker comp code defaults are established, only those codes will be able to be selected on any/all future orders created for this customer’s orders and assignments.
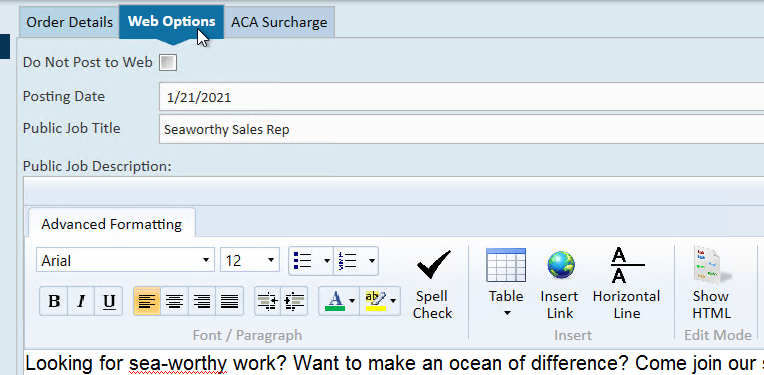
Job Descriptions
Job descriptions can be a great tool to save staffing specialists time when a job description is consistent for the client within an order. Users may select a job title and enter detailed information in relation to that specific position, in return when the job title is selected within the order the information will pre-populate yet can still be modified on the order if necessary.
To add a default job description:
- Navigate to the customer you want to add a default job description for
- Select Defaults > Job Descriptions
- Select the + in the upper right
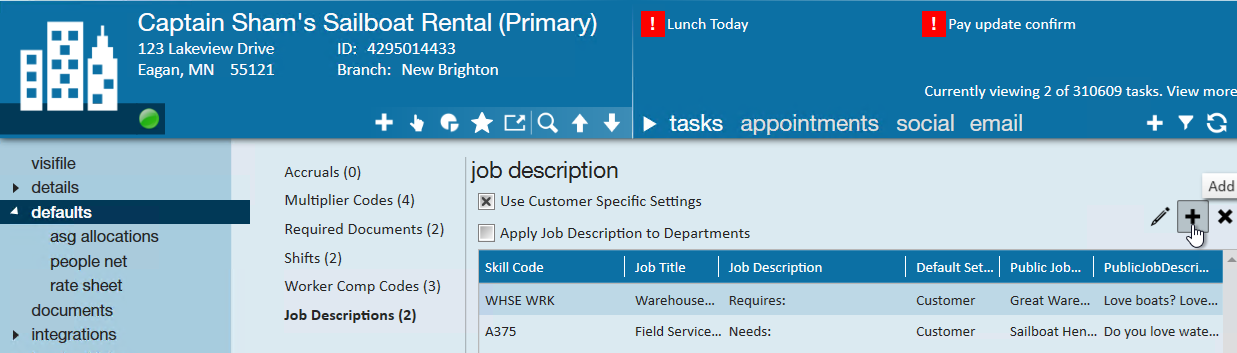
- Select the Job title your recruiters would select on the job order under skill code
- Enter the Job Description

- Optionally, if you are posting to the Job Board, enter a public job description and job title that will display on the job board
- Check out How to Post Orders to the Job Board for more information
- Select Save to save this description or + New to save and add another default job description


When the Skill code/Job title is selected from the drop down on any order, you will be prompted with a message to override the description with the default saved one: 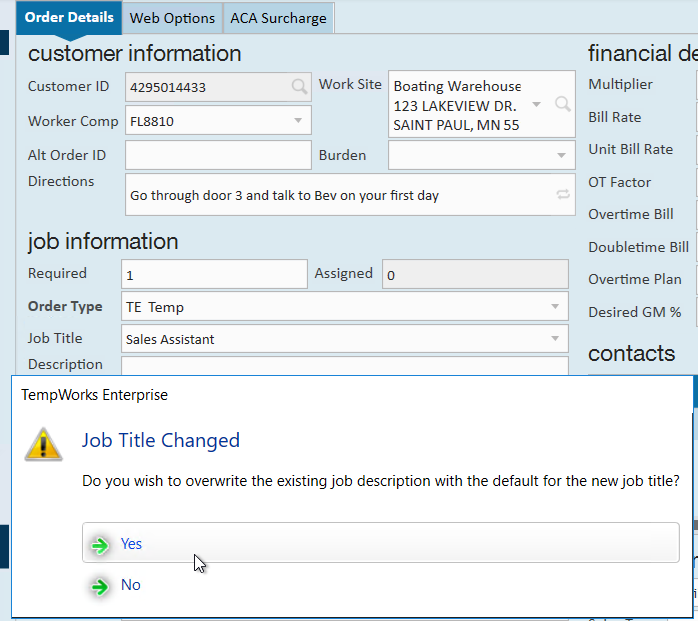
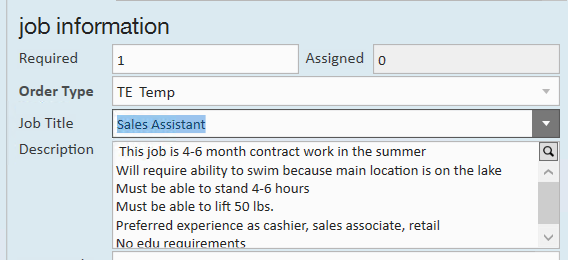
If you select Yes, the default information will populate on the order under order details and web options:
For more information on Job Board, check out The Job Board.
Additional Job Order Defaults:
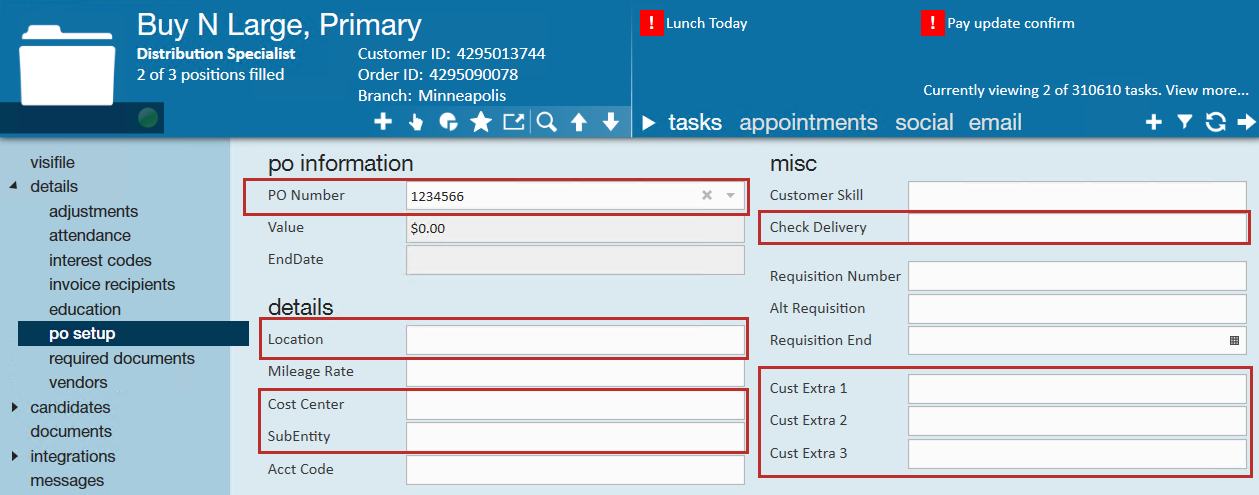
From the Customer Record > Details > Sales and Service record you can set additional defaults specific to Purchase Orders.
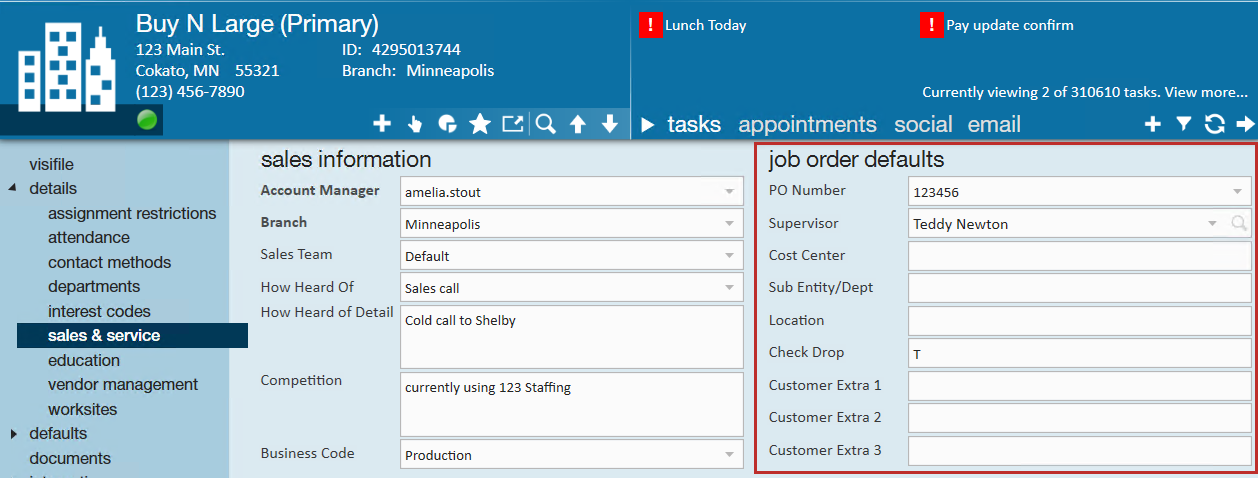
- PO Number: If you want to set up a PO that defaults on new orders you can enter one here. You can change the PO on individual orders if the default is not applicable. This information will flow into future orders. To set up a PO number, check out Enterprise - How to Create Purchase Orders.
- Supervisor: This field will not cascade as a default on future orders; it is most often used as a reference point. We recommend using the Contact Roles on the visifile if you have a supervisor that is most often the default for this customer.
- Cost Center: If this purchase order has a specific cost center it is tied to you can add that here. This information will flow into future orders.
- Sub Entity/Dept: This is an open text field if you have an internal name for a department that you would like to flow into the PO setup. This information will flow into future orders.
- Location: This field can be used to indicate the location of where to drop checks if that is what the customer will do. This can be used for other information you find useful to flow into future orders.
- Check drop: Indicates whether the customer will have a check drop. This information will flow into future orders.
- Customer Extra 1-3: any additional information. This information will flow into future orders.
Below is an image from the Order record to indicate where each field flows into. Navigate to the Order>PO Setup