Overview
Beyond allows for the creation of highly customized Security Groups which include precise restrictions for Service Reps within your system.
This article will outline the process to create a new Security Group using Advanced Permissions along with providing examples as to what is possible to restrict access to within Beyond.
*Note* For more general information about Security Groups and Service Representatives, please see the following articles titled Beyond - Managing Security Groups and Beyond - Managing Your Service Representatives respectively.
*Note* As explained later within this article, your ability to grant/restrict access to specific pages/cards/forms/fields within Beyond is directly linked to what you are able to view/edit within Beyond.
Therefore, please do not create a test Security Group with Advanced Permissions and link it to your personal Service Rep record in Beyond as this will prevent you access to information you had previous access to.
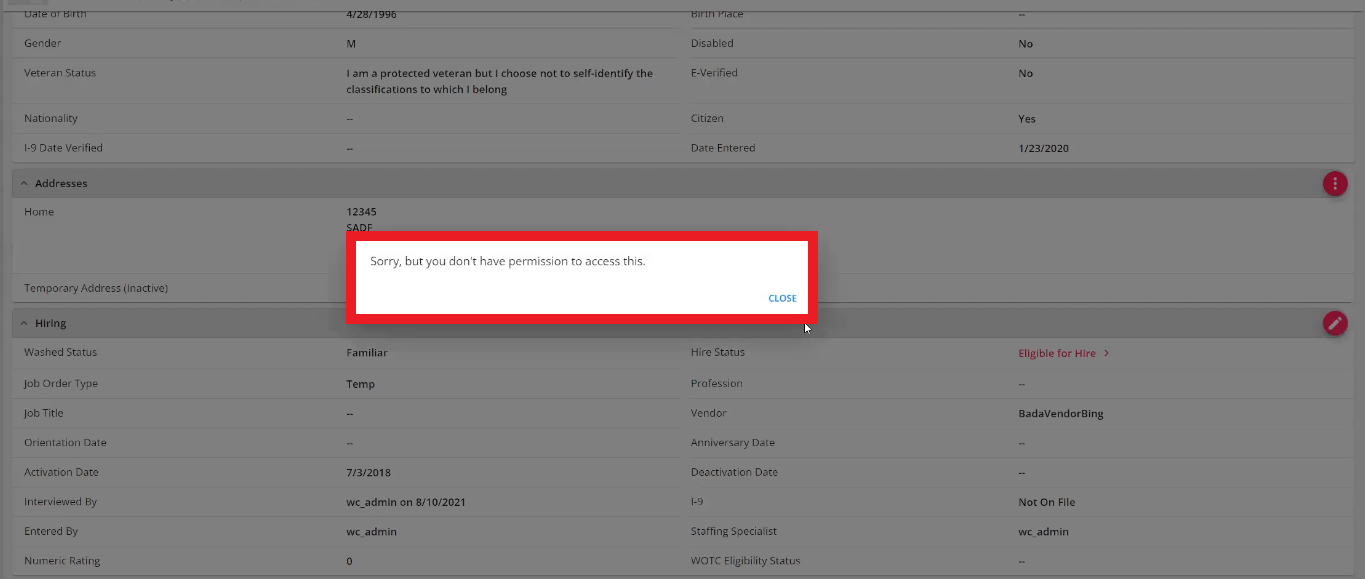
If you attempt to alter your own permissions, you will see the following message:
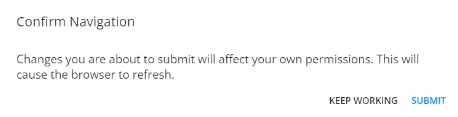
In the event this occurs, please contact TempWorks Support for further assistance.
This article covers:
- Getting Started
- Creating Security Groups with Advanced Permissions
- Assigning Security Groups to Service Representatives
- Managing Security Groups with Advanced Permissions
- FAQ
Getting Started
Begin by navigating to Beyond > System Settings > Security > Advanced Permissions.
*Note* To access this section of Beyond, you will need to be a member of a Security Group with the "Can administrate" and "Can administrate security groups" permissions.
This will bring you to the "Advanced Permissions" screen, allowing you the ability to create and manage Security Groups that contain Advanced Permissions:

Creating Security Groups with Advanced Permissions
Within the "Advanced Permissions" screen, select the "+ Add Security Group" button at the top right to begin creating the Security Group:

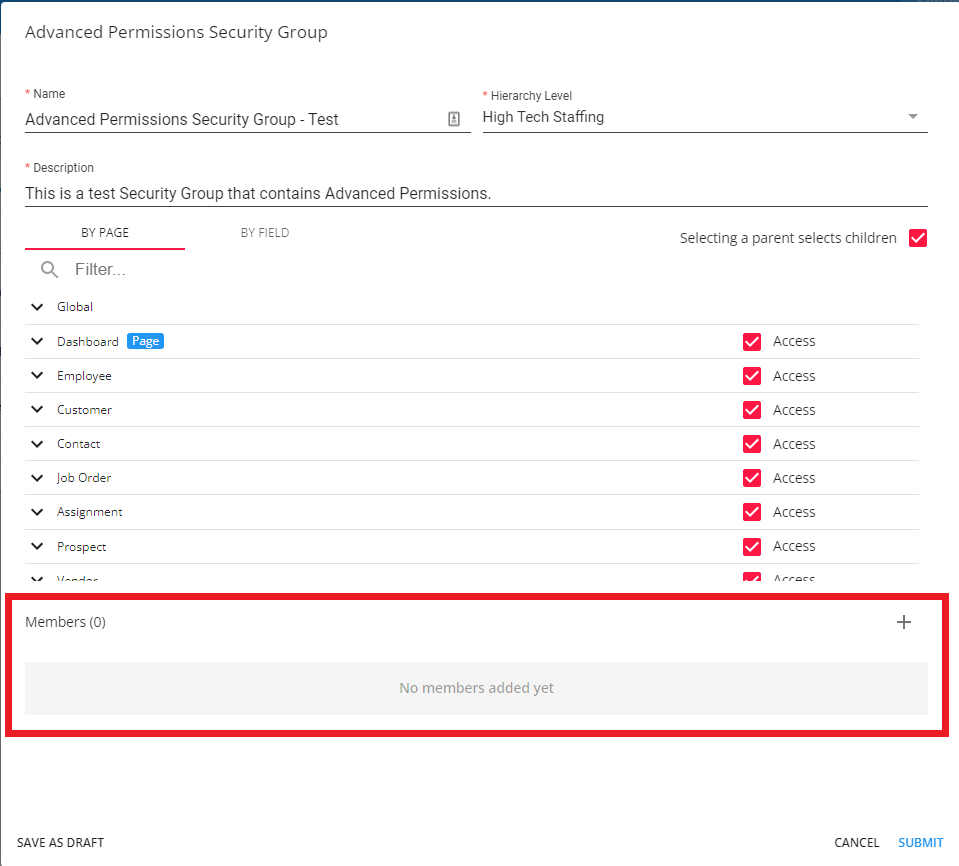
You will now see the "Advanced Permissions Security Group" window and you will be able to add the following required information:
- Name: The name of the Security Group that is being created.
- Hierarchy Level: The Hierarchy level this Security Group applies to (ex. system)
- Description: A brief description of the Security Group.
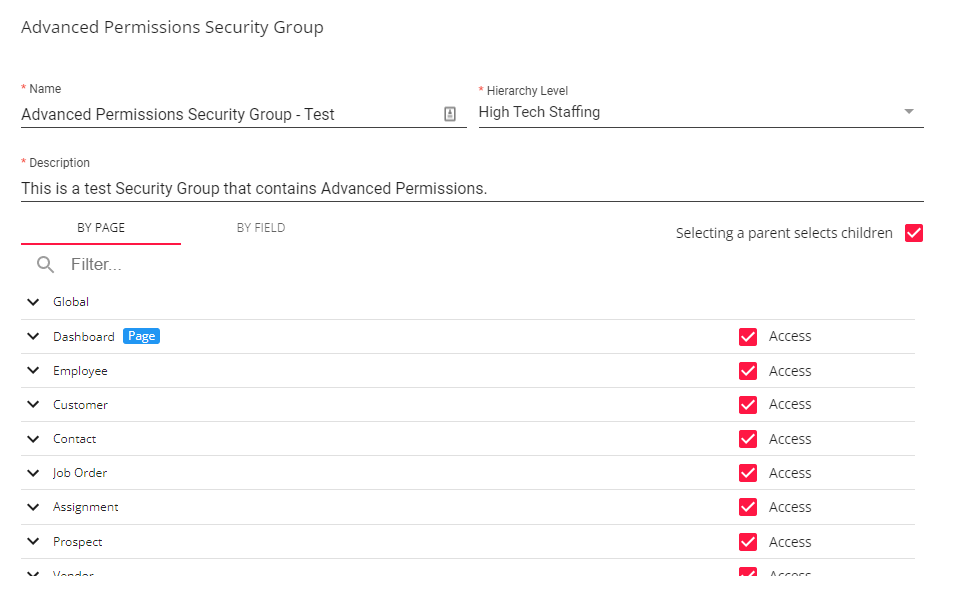
Once the required information has been added, you will now be able to add restrictions to specific pages/cards/forms/fields within Beyond via the drilldowns and checkboxes within the "Advanced Permissions Security Group" window.
*Note* Your ability to grant/restrict access to specific pages/cards/forms/fields within Beyond is directly linked to what you are able to view/edit within Beyond.
Therefore, please do not create a test Security Group with Advanced Permissions and link it to your personal Service Rep record in Beyond as this will prevent you access to information you had previous access to.
If you attempt to alter your own permissions, you will see the following message:
In the event this occurs, please contact TempWorks Support for further assistance.
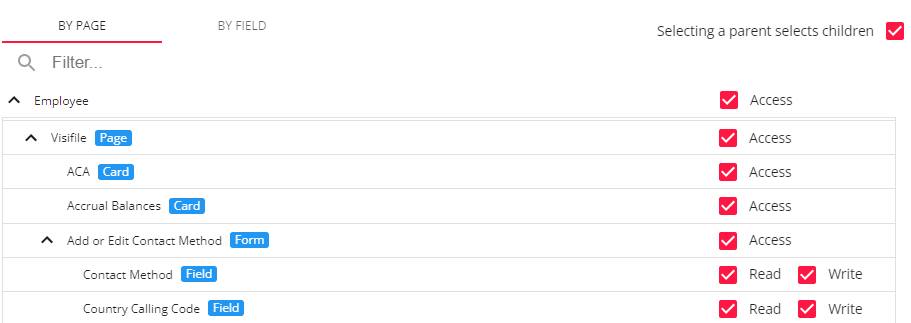
The drilldown menus are setup in a way to show how items are viewed within Beyond, starting with the main areas (Dashboard, Employee, Customer, Contact, etc), and continuing into cards/forms/fields within said main area (Employee > Visifile > Add or Edit Contact Method > Contact Method):
Example Part 1: Creating and Configuring the Security Group
The following is an example of creating a Security Group that restricts access to an entire page (Assignment), an individual card (ACA), an individual field (Employee First Name), and an individual form (Employee Hiring Information).
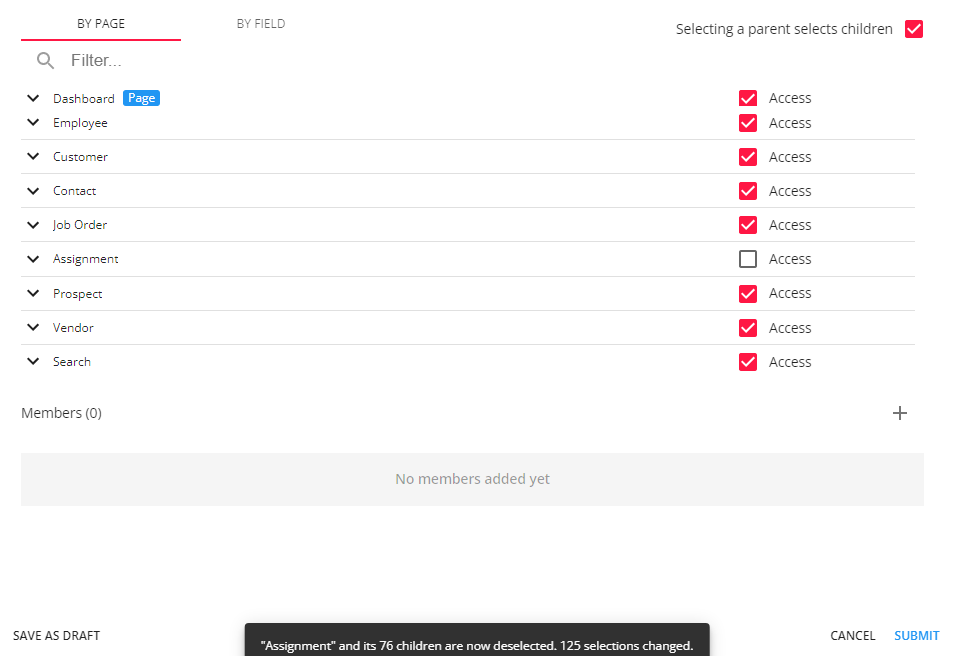
To begin, deselect the "Access" checkbox to the right of "Assignment" within the list of drilldown menus. This will restrict the Service Representative that has been added as a member of this group the access to viewing/editing any and all information within the "Assignment" window of Beyond:
*Note* By deselecting the checkbox for the entire page and having the "Selecting a parent select children" checkbox selected, all cards/fields/forms within the parent will also be deselected.
If you do not want to restrict access for an entire page within Beyond, select the drilldown menu for additional cards/fields/forms to restrict access to.
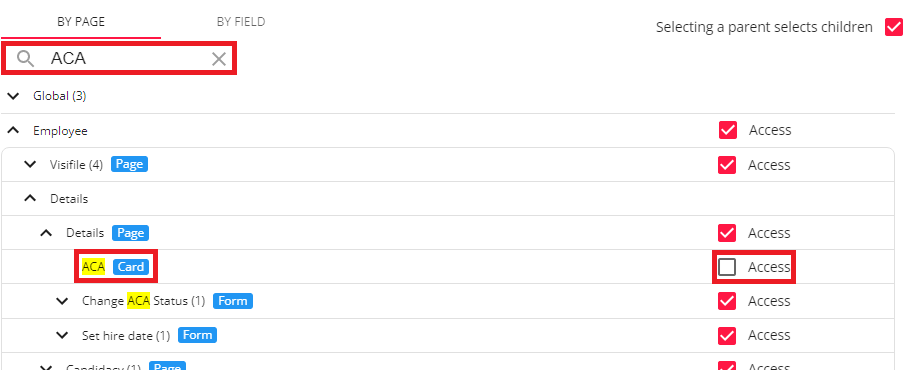
Next, to find the ACA card we want to restrict access to, we will enter "ACA" into the "Filter" Search field to help find what we need.
Once it has been found, deselect the "Access" checkbox to the right of the ACA card.
*Note* This search field can be used to find any pages/cards/forms/fields that are able to be configured within Beyond.
Follow the same process for the "Employee Hiring Information" form and the "Employee First Name" field:
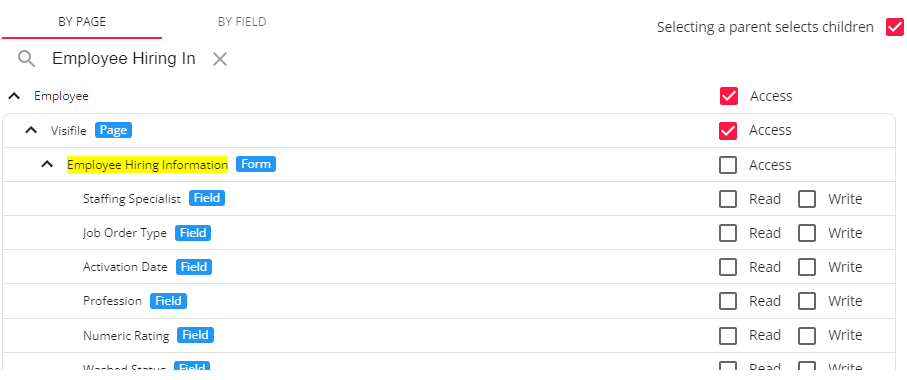
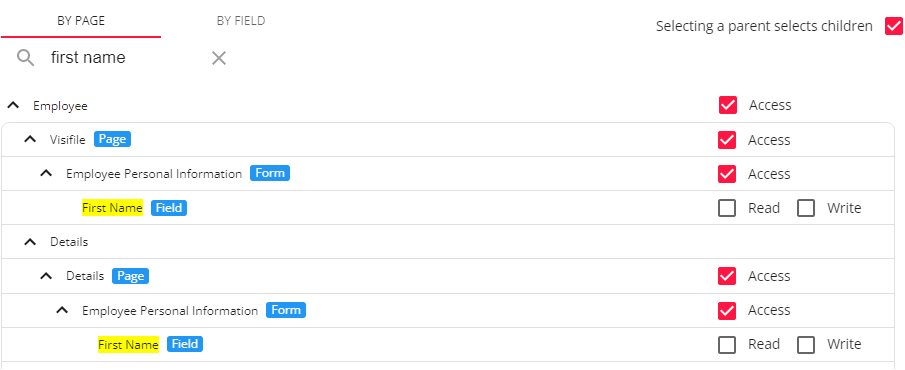
*Note* By deselecting any item that has been labeled as a "Field", read/write access will be restricted for every location in which that specific field appears within Beyond, regardless of where it had been deselected within the "Advanced Permissions Security Group" window.
For this example, this means anywhere the Employee's First Name would appear within Beyond will now no longer be seen by the Service Reps who are a member of this Security Group.
*Note* For items labeled as "Fields", they can have "Read" (able to view) and/or "Write" (able to edit) permissions restricted.
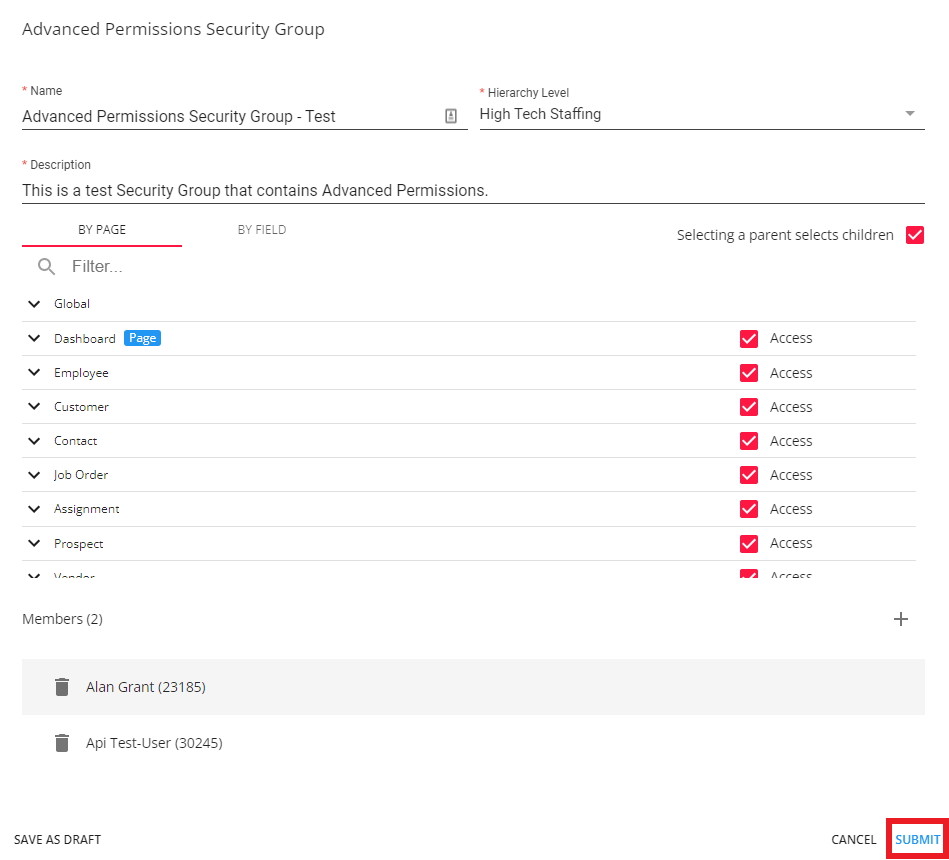
With the restrictions confirmed, select "Submit" to create the new Security Group with Advanced Permissions. Once saved, the Security Group will appear within the "Advanced Permissions" window:

Example Part 2: The Before and After
With the Security Group created, here are the before and after scenarios within Beyond for a Service Rep that is a member of this new Security Group with Advanced Permissions:
Assignment Page - Before:

Assignment Page - After:

ACA Card - Before:
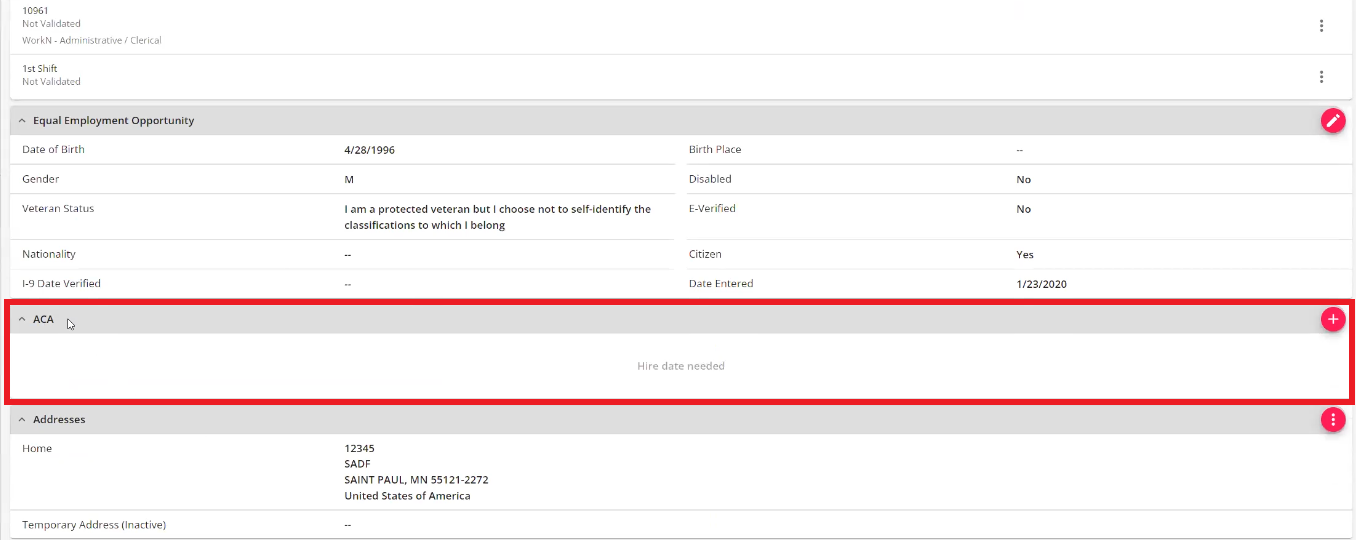
ACA Card - After:
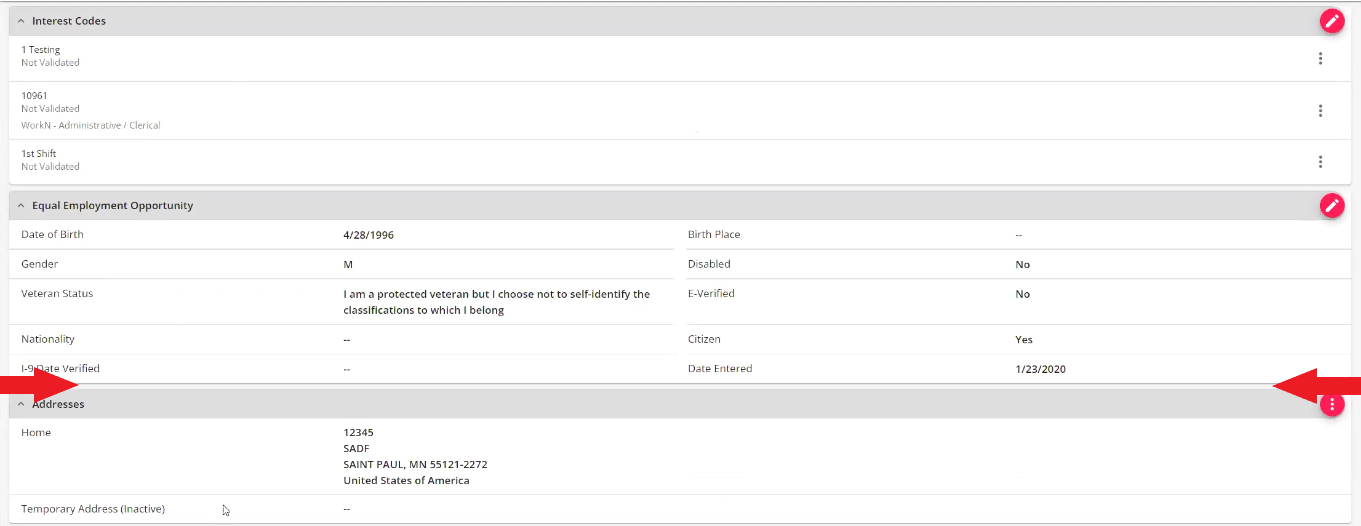
Employee Hiring Information - Before:
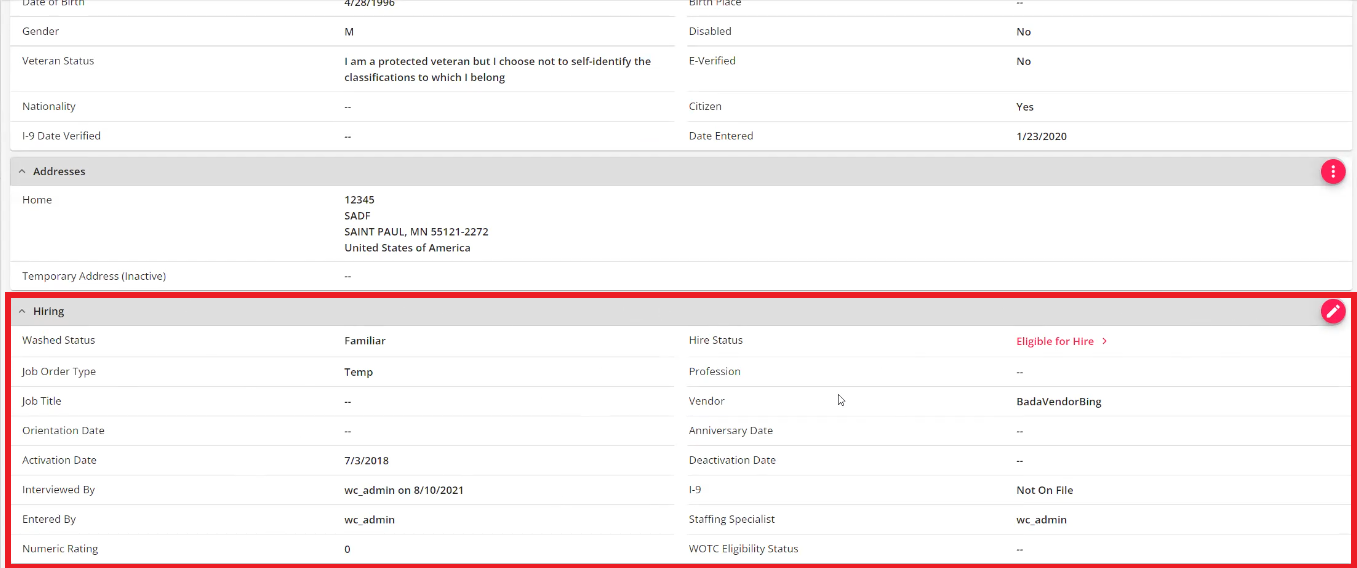
Employee Hiring Information - After (Upon Selecting Edit):
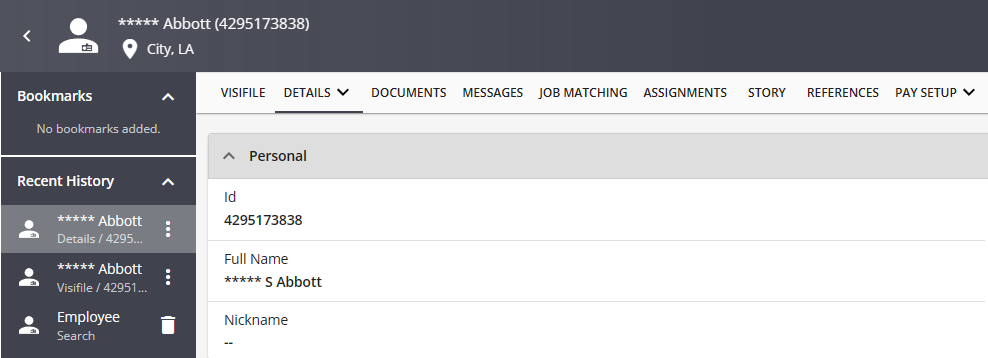
Employee First Name - Before:
Employee First Name - After:
*Note* The above example was just one of many different types of Security Groups that you can create based on the number of pages/cards/forms/fields that are utilized within Beyond.
Assigning Security Groups to Service Representatives
Once you have selected all the necessary restrictions for your Security Group, Service Representatives are able to be provided the new Security Group by selecting the "+" icon within the "Members" section of the "Advanced Permissions Security Group" window:
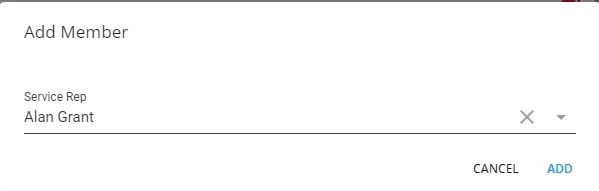
Once the "+" has been selected, choose the intended Service Representative from the "Service Rep" dropdown menu of the "Add Member" card, and select "Add":
*Note* Service Representatives can only be selected one at a time.
Once all the Service Representatives have been added to the Security Group, select "Submit" to finish:
Service Representatives can be removed from the list by selecting the  icon to the left of the Reps name.
*Note* For more information on managing Service Representatives, please see the article titled Beyond - Managing Your Service Representatives.
Managing Security Groups with Advanced Permissions
Security Groups that have been created have additional options by navigating to System Settings > Security > Advanced Permissions > 
These options include:
- Edit
- Delete
- Copy
FAQ
The following answers have been provided for some frequently asked questions surrounding this functionality.
New Pages/Cards/Forms/Fields from new Features in Beyond
Q. When a new feature is released to Beyond that adds pages/cards/forms/fields, how will this reflect within my custom Security Group with Advanced Permissions?
A. These new pages/cards/forms/fields will need to be granted access within your custom Security Group with Advanced Permissions. If the custom Security Group had been created before the new feature had been released to Beyond, the area will automatically be deselected within the Advanced Permissions options of the Security Group.