
What is Address Standardization?
*Note* As of 7/26/2022, TempWorks is no longer supporting & completing new installations of the Melissa integration.
Moving forward, clients will need to use the default address standardization for Beyond and Enterprise respectively. Information on these types of address standardization can be found within the following articles:
Address standardization compares an address entered or changed on a record by your staff with the Melissa standard addresses. This can be helpful to ensure the addresses in your system are accurate for tax and reporting purposes.
Address Standardization can be set up for:
- Beyond
- Employee Permanent Address
- Employee Temporary Address
- Employee Work History Address
- Employee Education Address
- Contact Address
- Customer Address
- Customer Billing Address
- Worksite Address
- Enterprise
- Employee Permanent Address
- Employee Temporary Address
- Contact Address
- Customer Address
- Customer Billing Address
- Worksite Address
- HRCenter
- Can be enabled per page
- WebCenter
- Employee Address
For each address listed above, you can choose to enable address standardization as an option or make it a requirement to use the Melissa standardized address when adding or updating addresses.
Address Standardization Basics
If the configuration is set to optional, the staff member will be able to choose which address they want to use. If they choose the standardized address, it will update the address when they close the window.
If the configuration is set to required, the staff member will need to choose the standardized address in order to save.
If the address can not be found in the Melissa database, a message will appear letting you know the address has not been found.
Beyond Address Standardization
Melissa address standardization can be enabled in Beyond for the following areas:
- Employee Permanent Address
- Employee Temporary Address
- Employee Work History Address
- Employee Education Address
- Contact Address
- Customer Address
- Customer Billing Address
- Worksite Address
The following is an example of how Melissa address standardization works within Beyond:
- Navigate to the record type you would like to validate the address for (this example is an employee):
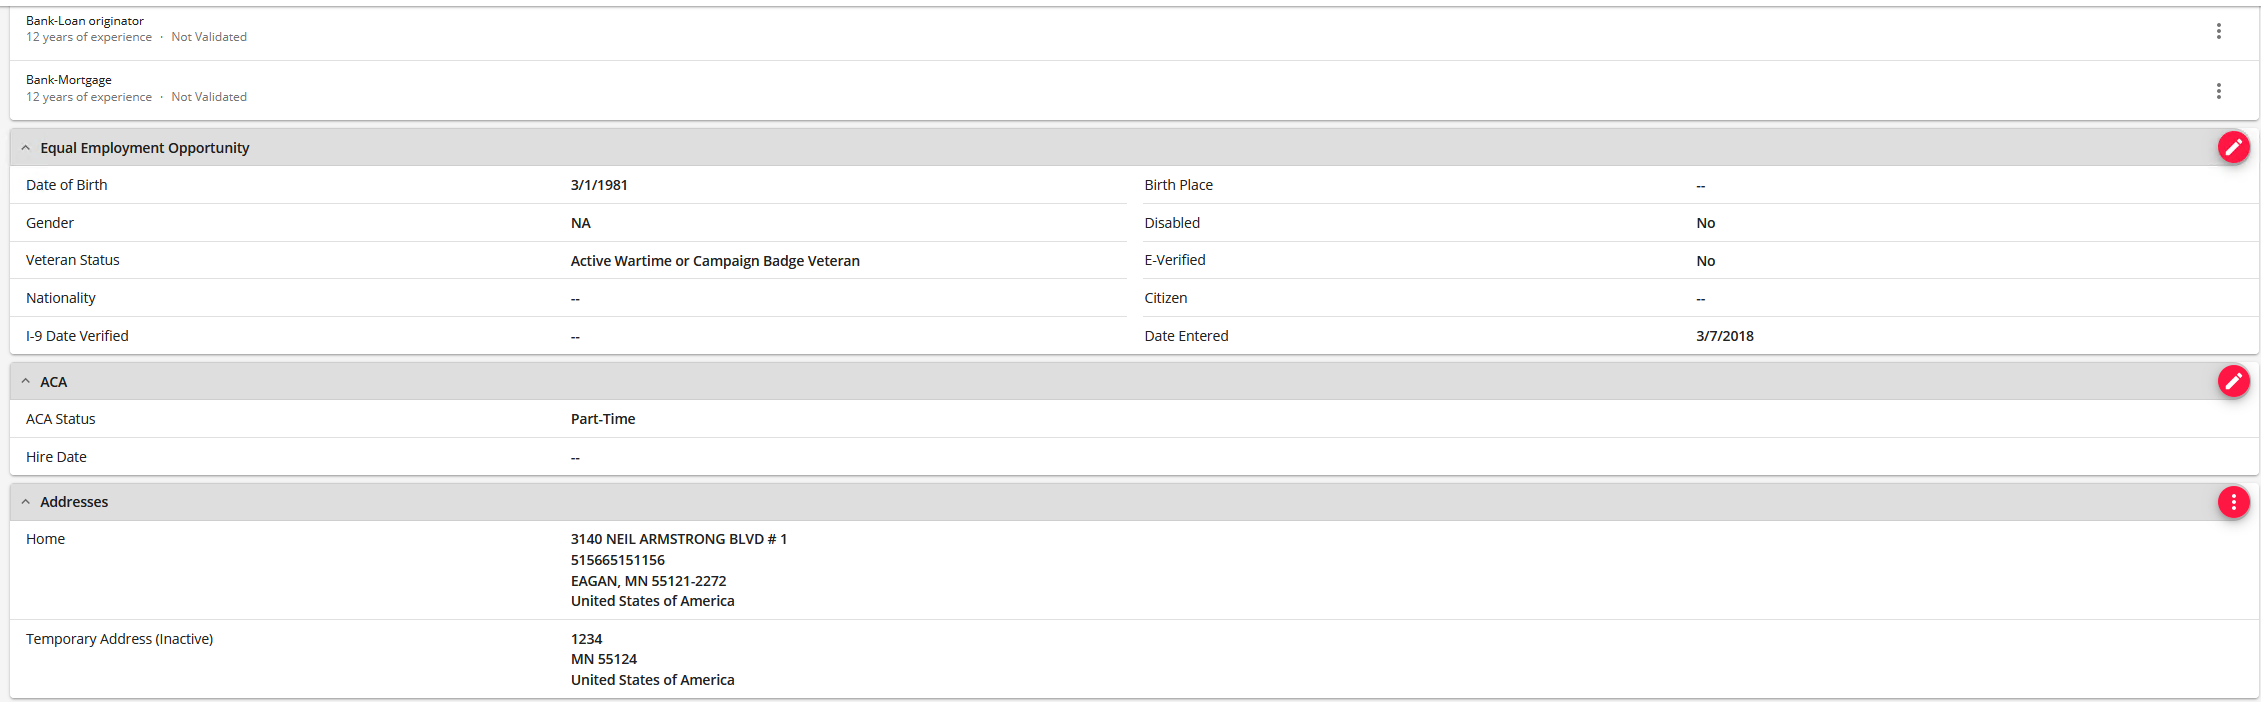
- Under the address section, select the three dot button on the right which will open the address editing window:
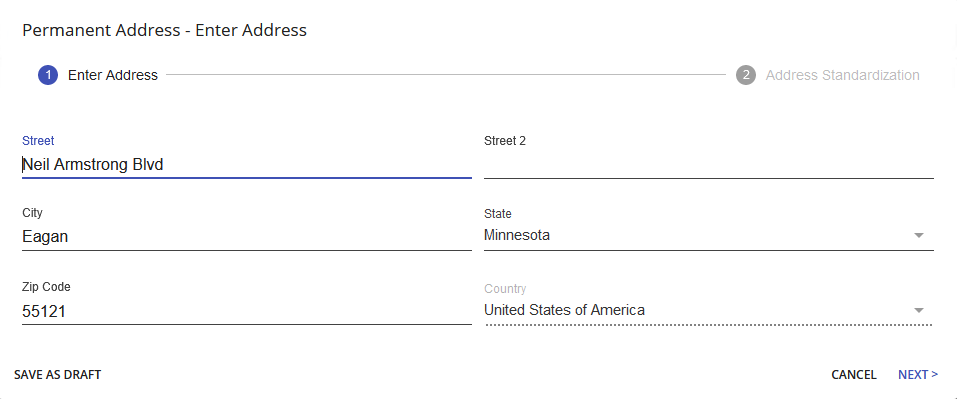
- Once the address has been entered, click 'NEXT' for the address validation to automatically run:
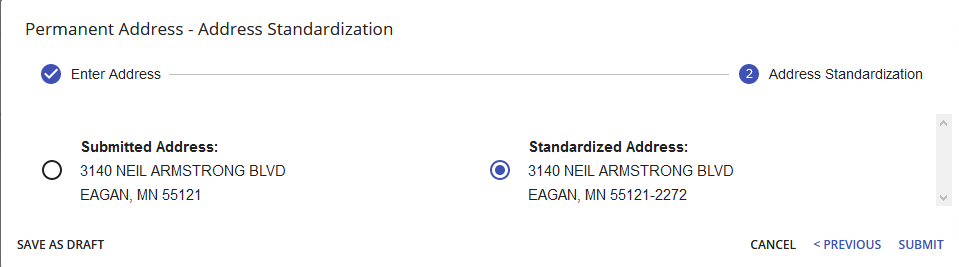
- Once a validated address has been chosen, click 'SUMBIT' to finish.


Enterprise Address Standardization
Melissa address standardization can be enabled in Enterprise for the following areas:
- Employee Permanent Address
- Employee Temporary Address
- Contact Address
- Customer Address
- Customer Billing Address
- Worksite Address
The following is an example of how Melissa address standardization works within Enterprise:
- Navigate to the record type you would like to validate the address for (this example is a customer):
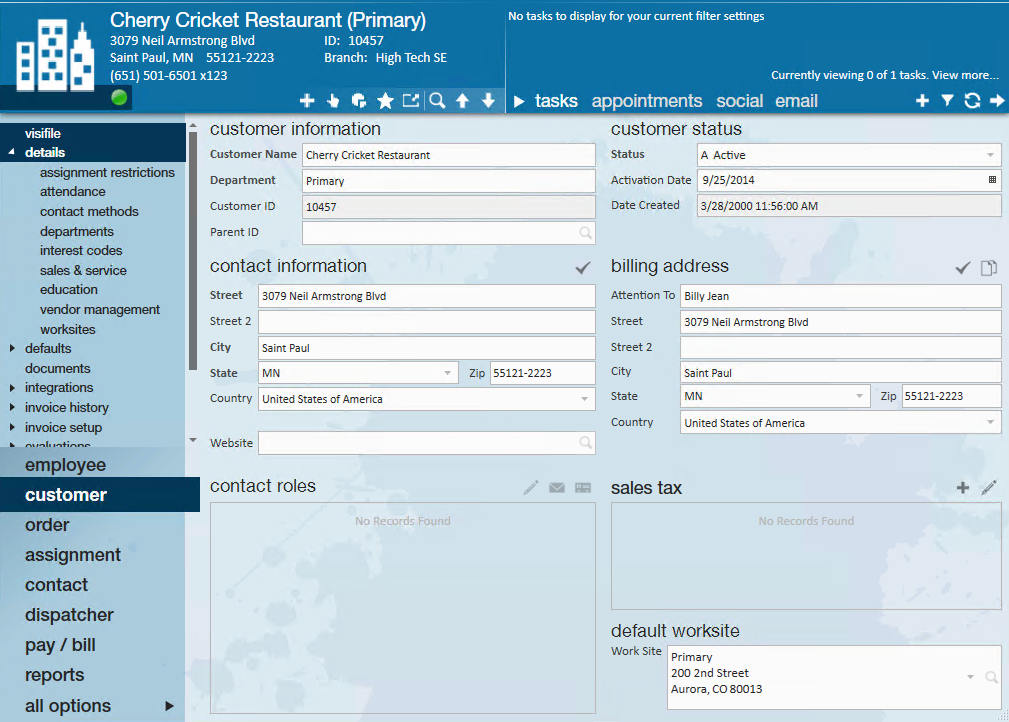
- Enter the address information within the field and select the checkmark for the validation process to run:
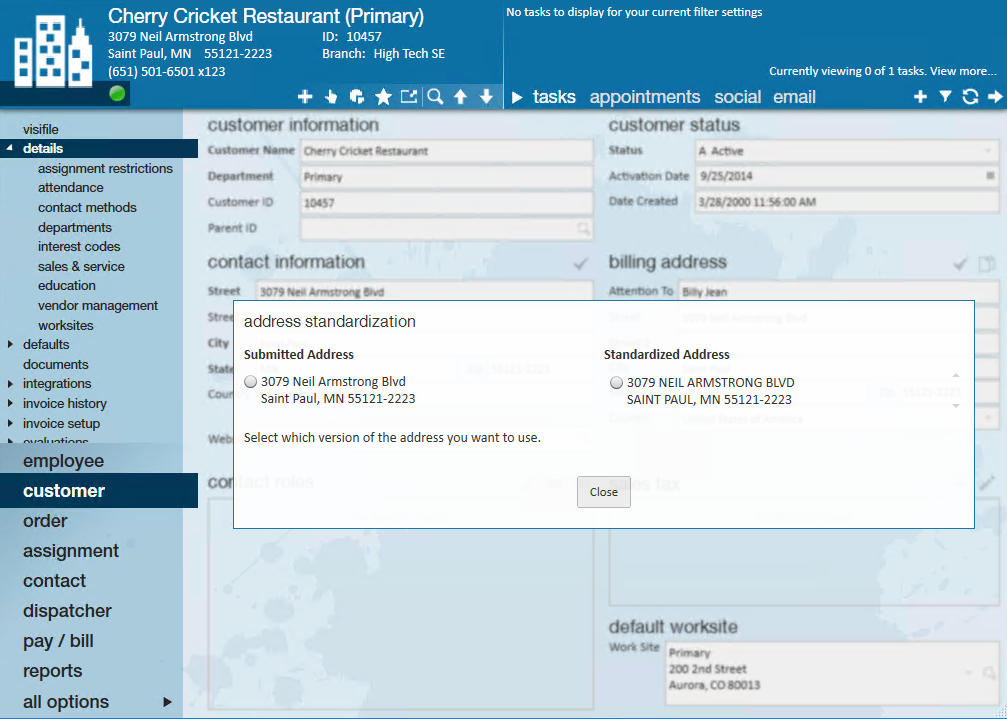
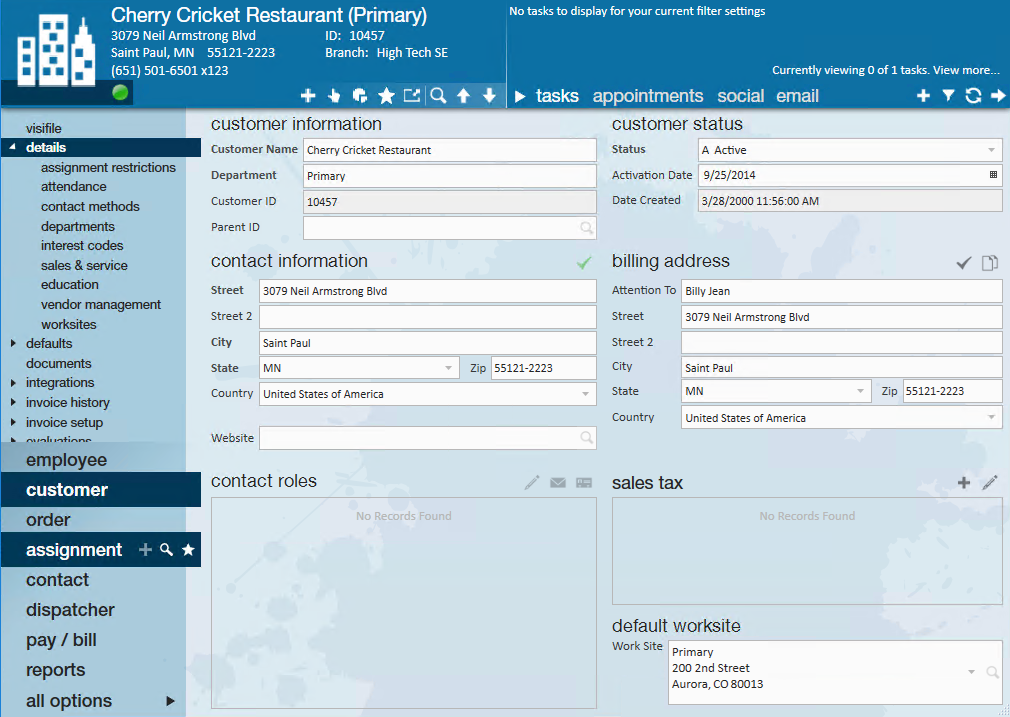
- Once a validated address has been chosen, click 'Close' to finish. Upon completion, the checkmark will change to green to signify the validation of the address:


HRCenter Address Standardization
Melissa address standardization can be enabled in HRCenter on a per-page basis:
- Can be enabled per page
In order for HRCenter to utilize the Melissa integration, you must have the following Personal Access Token:
- Employee Read/Write
*Note* For more information on setting up Personal Access Tokens, please see the following articles for Beyond and Enterprise.
The following is an example of how Melissa address standardization works within HRCenter:
- Navigate to the Page section of HRCenter Admin
- Once within the Page tab, a new page can be created or an existing page can be edited.
- Within the Configuration Details window of the Page setup, select the Address Standardization Service via the dropdown:
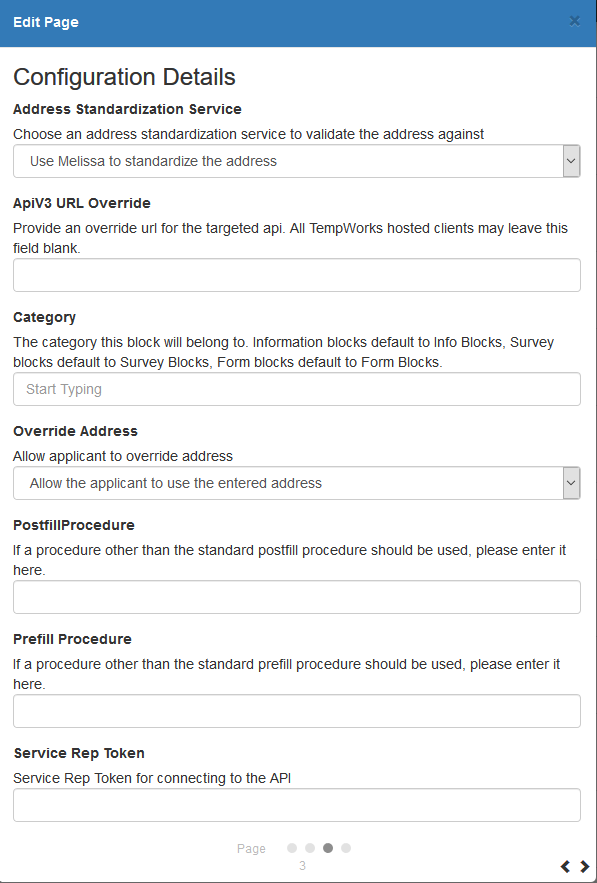
- Finish created/editing the page and save the changes.
- Once added to a workflow and assigned to an applicant to complete, the page will bring the applicant to the following screen when validating an address:
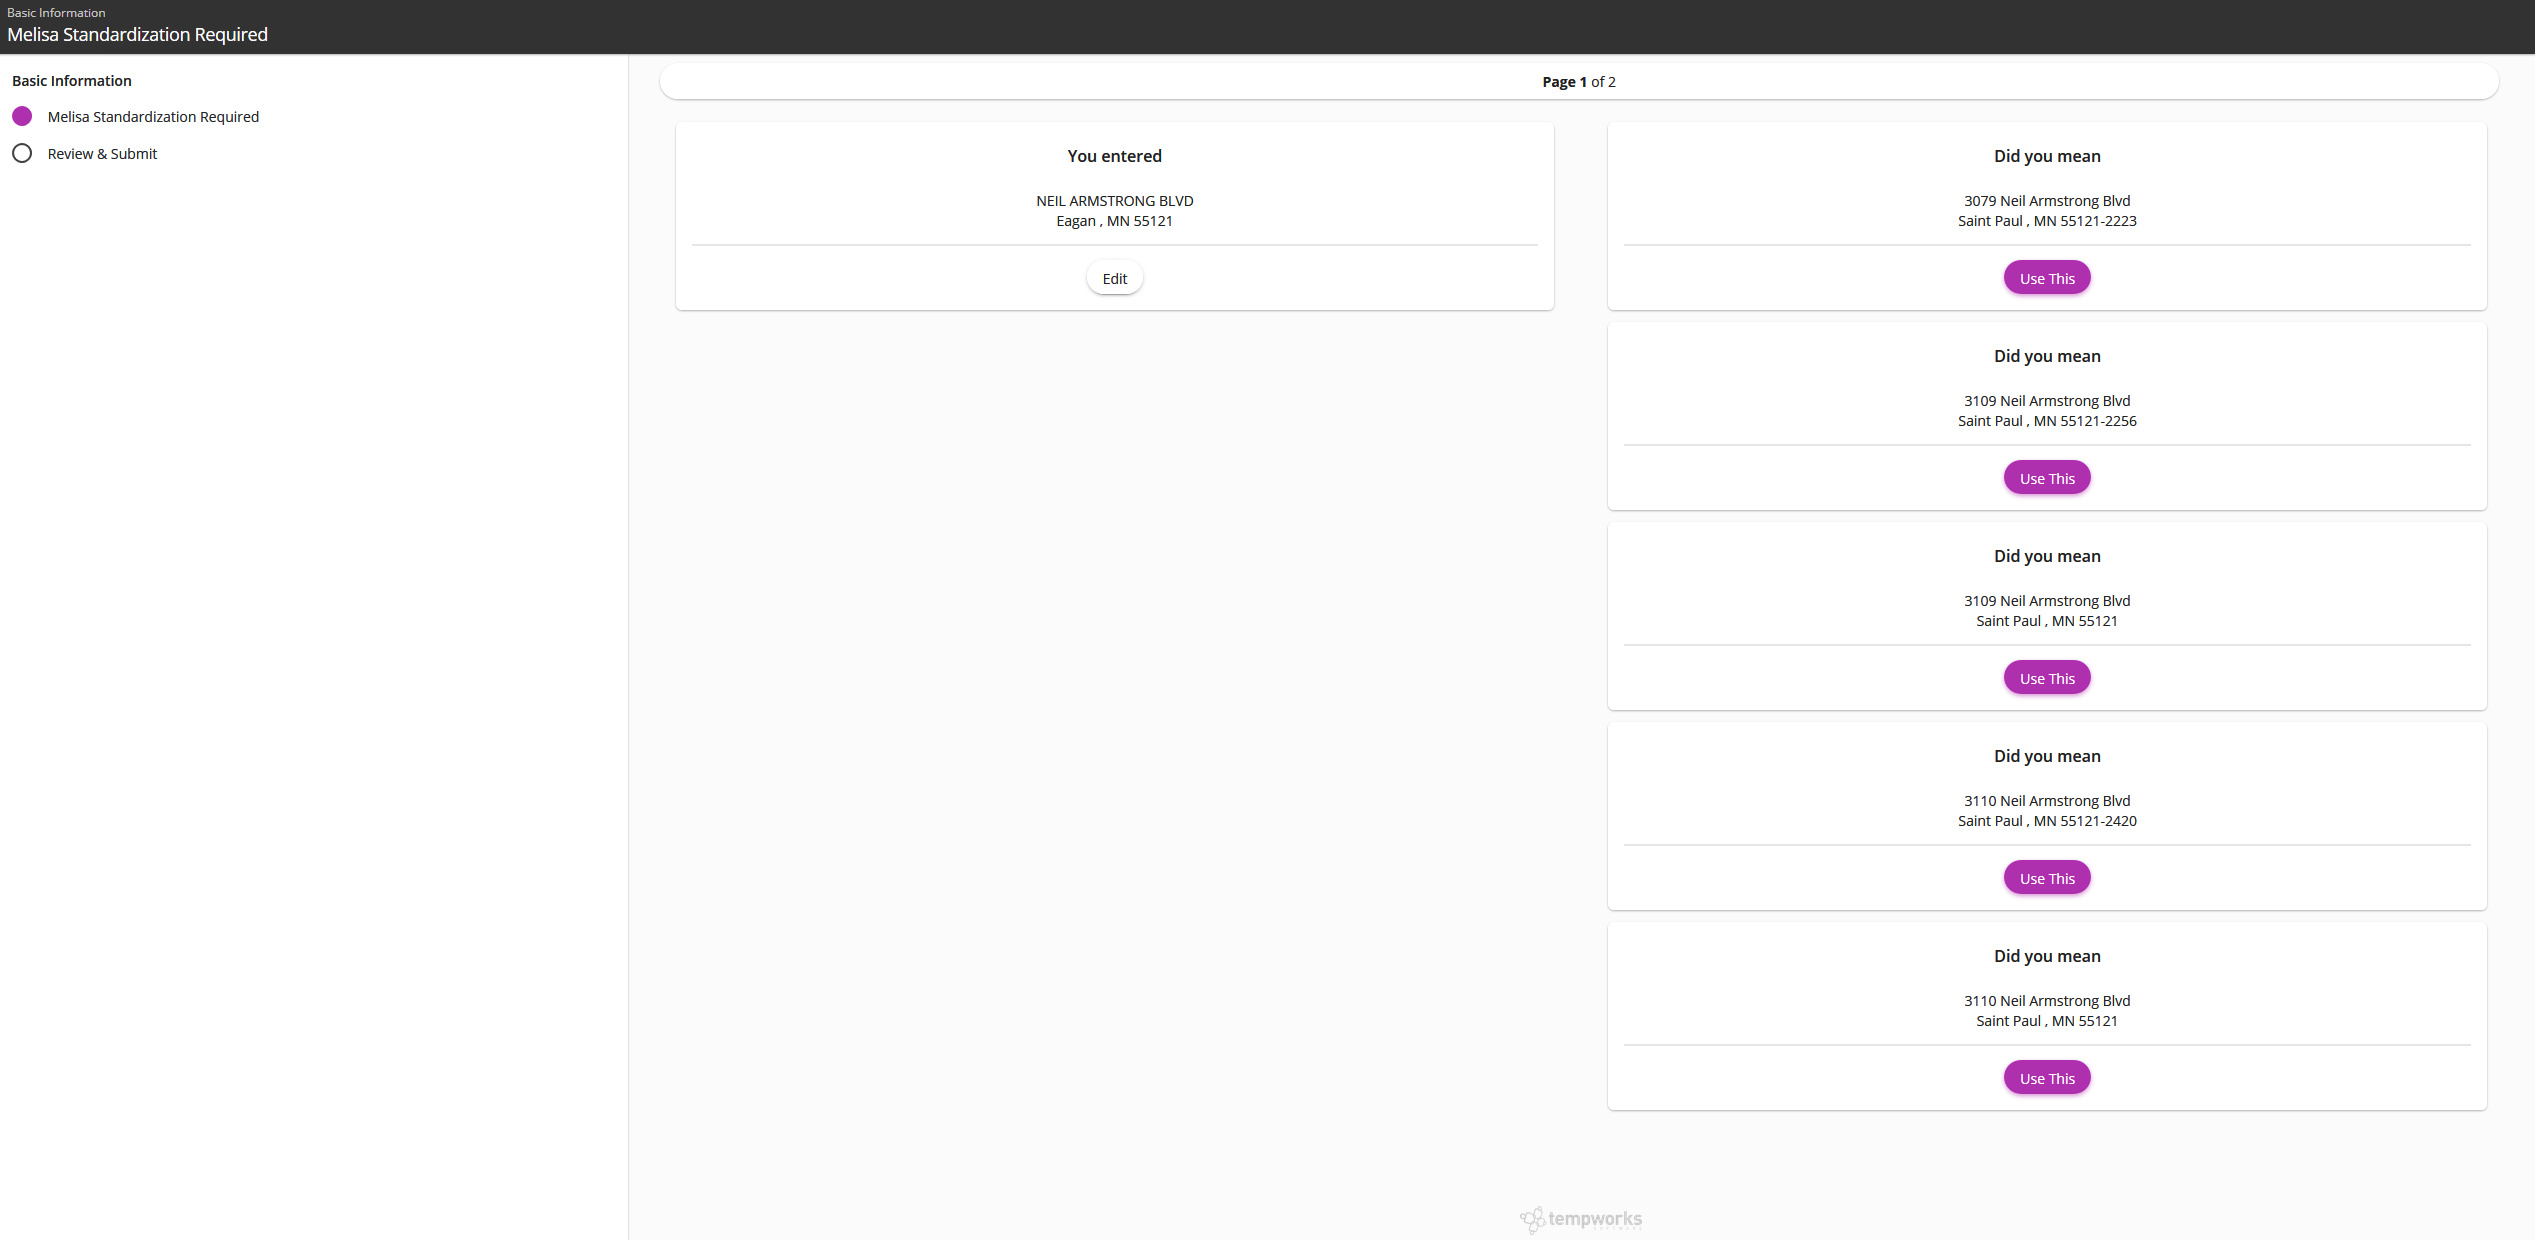
- Once the applicant has chosen a validated address, they can continue through the application.


If your employee runs into an error message when entering their address in HRCenter, here are some potential error messages:
- If configuration is not completely configured or the authentication token is invalid, employees may receive an error message: "Service unavailable because address standardization page is not setup correctly"
- If we have error returned from Melissa: "Address could not be verified" or "Address could not be verified because Street1 is invalid"
WebCenter Address Standardization
Melissa address standardization can be enabled in WebCenter for employees:
- Employee Address
Related Articles
- None