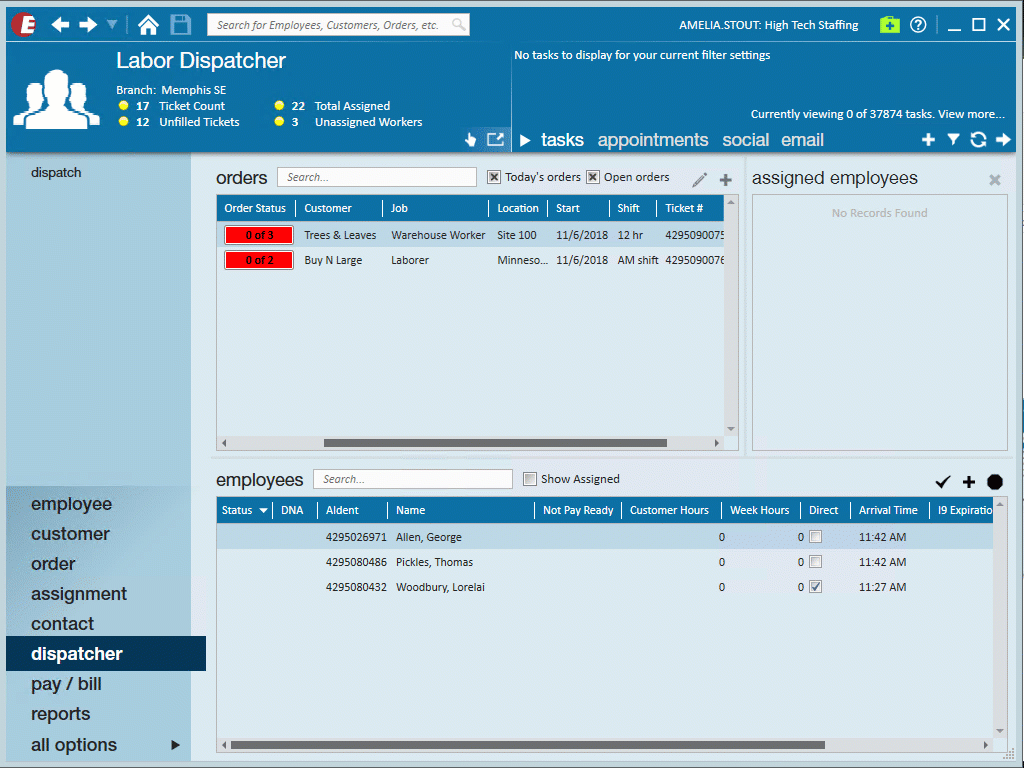
Assign & Dispatch Tickets
Once tickets have been created and employees have been checked in, the employees need to be matched to a ticket and dispatched.
Not sure what Dispatcher is? Check out Dispatcher Overview first.
Assigning and dispatching tickets is step 3 in the Dispatcher timeline:

Assigning Employees to Tickets
Dispatcher offers many different ways to assign employees to a job. Try out the following options and find what works best for you.
To Assign an Employee:
- Select the ticket you want to assign the employee to.
- Try any of the following options:
- Double click on the employee record.
- Right click on the employee record and select 'Assign Employee.'
- Click and drag the employee to the assigned employees section.
When assigning employees, you may need to review any assignment restrictions before being able to save the assignment.
*Note* You can assign en masse by selecting multiple employees (Use keys: Shift to select a range or Ctrl to select employees in any order) before dragging and dropping or right clicking to assign.
Check out this video for a walk through on mass assigning and un-assigning in Dispatcher:
Changing Assignments
Made a mistake? Change your mind about an assignment?
No problem! Assignment records for employees assigned in Dispatcher are not created until an employee is paid.
To un-assign an employee:
- Select the ticket the employee is assigned and find the employee on the list under the assigned employees section.
- Try any of the following options:
- Double-click the employee record.
- Right-click on the employee record and select 'UnAssign Employee.'
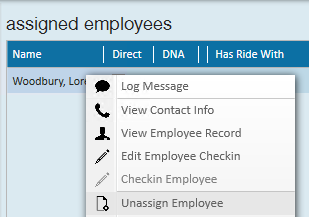
- Click and drag the employee to the employee section of Dispatcher.

The employee will then reappear in the employees section as a checked-in, unassigned employee.
*Note* You can select multiple employees (Using the Shift or Ctrl keys on your keyboard) to unassign en mass.
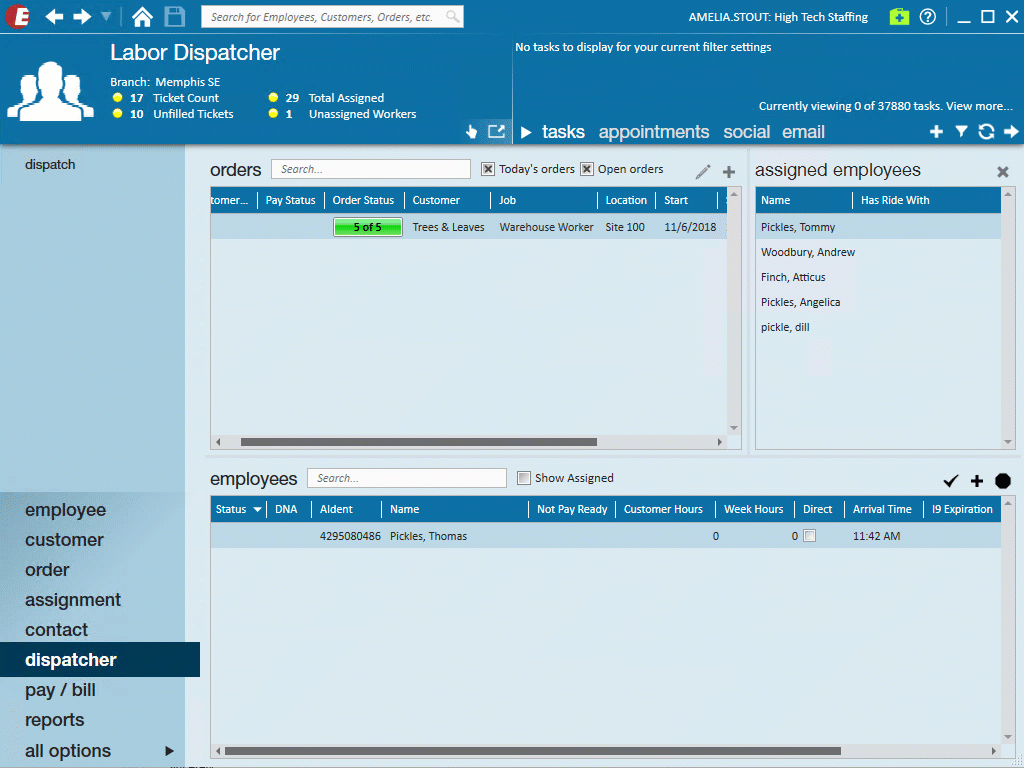
Dispatch a Ticket
Once all your employees have been assigned to a ticket, you can print or email the job information including the employees assigned for your customer to enter hours on. While this ticket isn't required in order to pay, dispatching the ticket can provide your customer with a list of expected employees.
To dispatch a ticket:
- Right-click on the ticket.
- Select 'Print or Email Ticket.'

- Select 'Dispatch Ticket.'
- For emailed, the email will be sent to the supervisor set on the order record.
- You must have your email set up in the system and an email template created before you can utilize this option.
- For printed, select the printer and print the ticket
- This ticket can be handed to your employees to give to their supervisor upon arrival at the job site. Basic information including the worksite address will be included on the sheet.
- For emailed, the email will be sent to the supervisor set on the order record.

Dispatched ticket example: 
*Note* Once you have dispatched a ticket that has the required number assigned, the order status column will display a green check mark to denote that this ticket has been dispatched.
Transportation Manager
If your dispatching team matches employees with rides, you can utilize the transportation manager to track it.
- Under assigned employees section, right-click on any employee.
- Select 'Transportation Manager.'
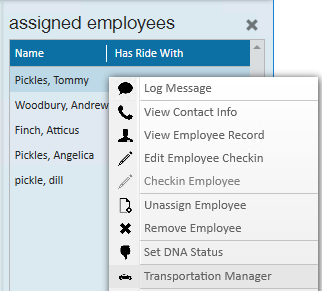
- Select a 'Driver.'
- Select the + next to each rider that will be paired with the driver selected.
- Repeat steps 3 & 4 until all riders are assigned.
- Select 'Close.'

*Note* You can add the "Has Ride With" column to the assigned employees section for quick reference of who is riding with who.