What are Required Docs?
Required documents allow you to store, track, and manage documents that are required for employees. Required documents can be set up on customer and order records to require a specific document type before an employee can be assigned to that order. Required docs can be saved and searched on the employee record to make managing documents a breeze. To learn more about required docs, check out Enterprise - How to Manage Required Documents. 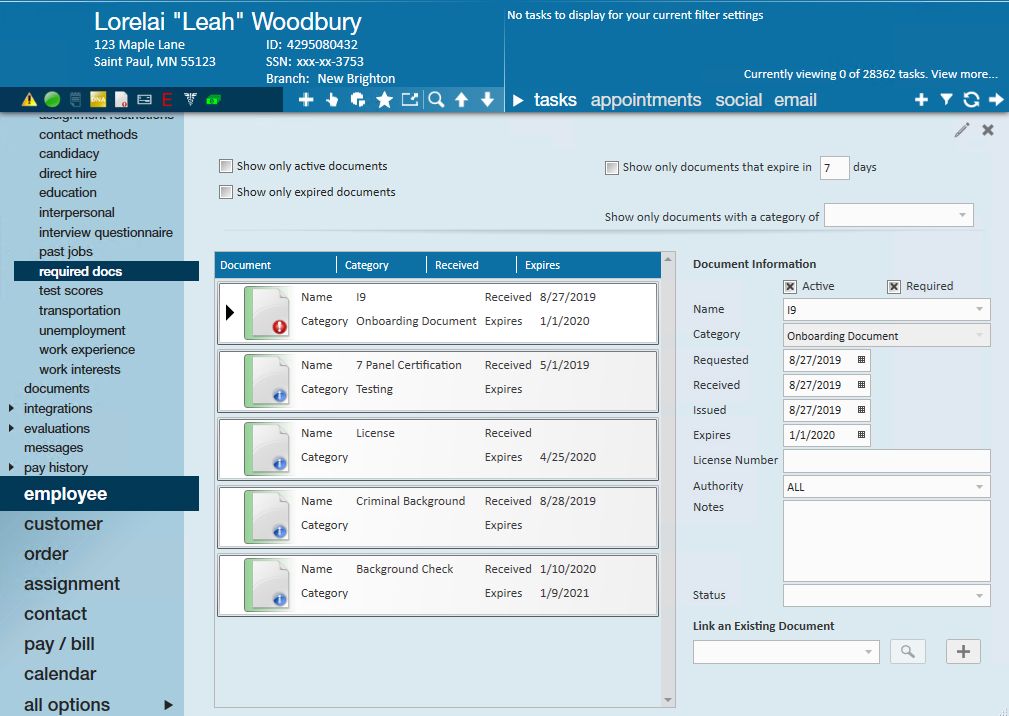
Before a required doc can be set for a customer, order, or saved on an employee record, the required document type must first be set up under Administration.
Adding Required Document Types
*Note* Before you start adding required documents, we recommend being at the highest Hierarchy you have available (whether that is entity, subsystem, or system) to ensure you have access to edit and see all options in administration.
- Navigate to all options > administration.
- Select 'required document' on the left:
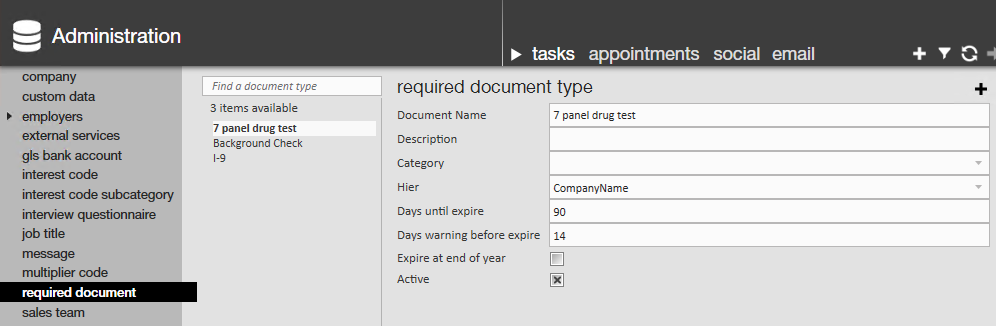
- Select the + icon on the right.
- Enter the following information:
- Document Name: enter the name as you want it to appear for service reps to select
- Description: optionally, add a description to further explain to recruiters or sales when this document type should be used
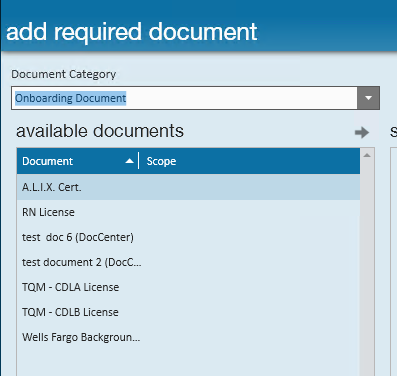
- Category: This allows you to group required documents to make them easier to find for your service reps
- Hier: Determines where the required doc will exist and be accessible in your database. If this doc is only applicable to one branch, then you can set it to that branch. Most of the time, we recommend keeping required documents at the highest level (system, subsystem, or entity) to ensure all users can utilize it.
- Days until expire: optionally, add an automatic expiration date to each document set to this type.
- Days warning before expire: optionally, set a number of days before the expiration date that a warning will appear
- Expire at end of year: check this to have the document automatically expire at the end of each year (can't be used with days until expire)
- Active: Uncheck this box to have this custom data field deactivated (no longer seen or able to use).
- Select the
 icon in the upper left to save your changes


 icon in the upper left to save your changes
*Note* If a service rep can't find a required document you just added, make sure you have them "Refresh their Hierarchy" by selecting their name in the upper right and clicking next and finish. This will refresh their system without forcing them to log out and log back in.