Setting Up the Sense Integration
Once you have your account with Sense and have worked with your TempWorks Account Manager to set up this integration, use the following steps to get you and your users ready for Sense.
*Note* In order to text using Sense, you will need to use the Chrome browser and download the Sense extension. Please see the Sense Knowledge Base for further instruction on the other tools that the Sense integration supports.
Giving Users Access to Sense
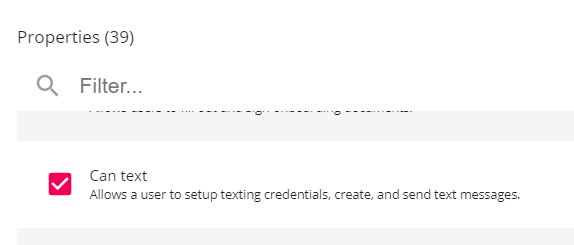
The administrator that is setting up the Sense credentials will need the "Can Text" permission. All other users who will be utilizing the Sense Texting integration will not need this permission.
- Navigate to B Menu > System Settings > Security > Permissions
- Either:
- Add users to any group that already has this permission OR
- Create a new group with the "Can Text" permission checked and add users to it (remember that users can only be part of one permissions group and will inherit all the permissions that you check.
Looking for more information? Check out Beyond - Managing Security Groups
Users will also need to be a part of a message action security type to see the messages on the corresponding record type.
Adding Sense Credentials
Once credentials have been gathered from Sense, they will be entered within Beyond:
*Note* As of April 1st, 2024, TempWorks and Sense will be adding functionality for Object and Field Writebacks.
As a result, new fields have been added to the Sense credentials setup that will enable future functionality:
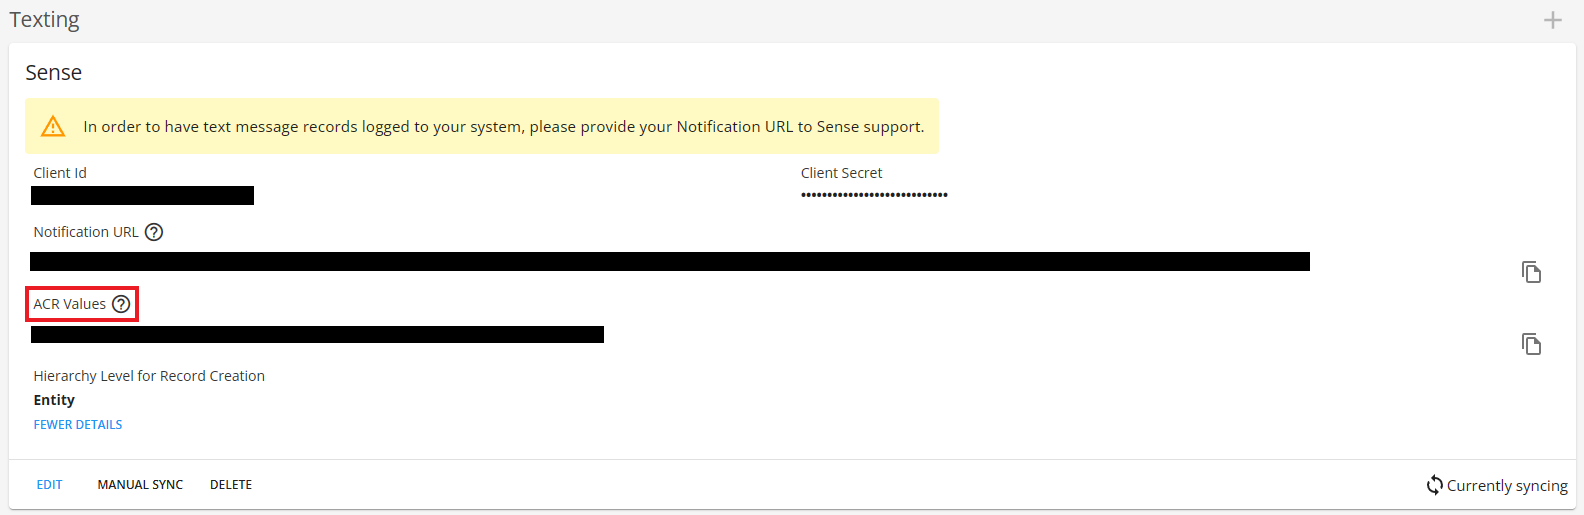
- ACR Values
- Hierarchy Level for Record Creation
In the event you have existing Sense credentials, and you would like access to the new functionality, please do the following:
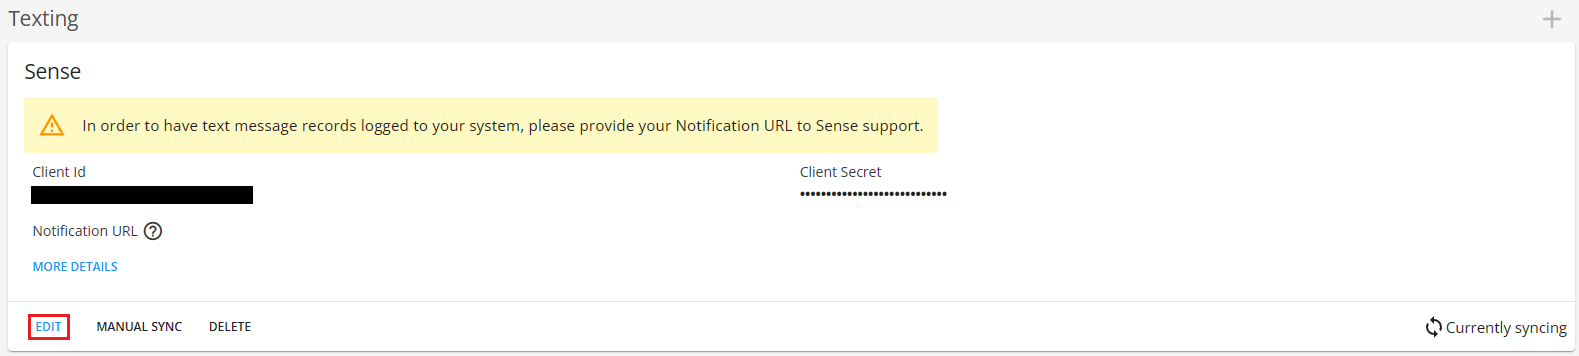
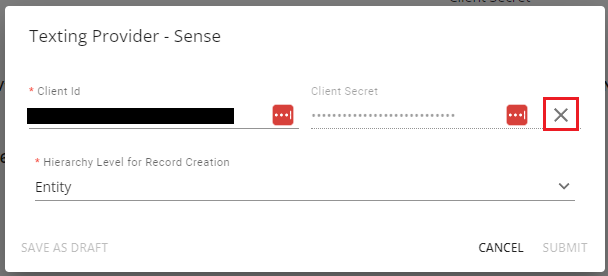
- Select "Edit" within the Sense credentials card.
- Select a hierarchy option within the “Hierarchy Level for Record Creation” dropdown.
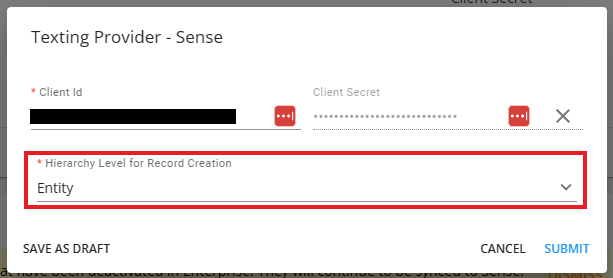
- Select "Submit" to save the changes to the Sense credentials.
- Once saved, you will notice how the “ACR Values” field will be automatically populated and will need to then be provided to Sense.


- Navigate to B Menu > System Settings > External Service > Texting.
- Select the + in the upper right.
- Select Sense as the provider.
- Enter your credentials provided by Sense including the following:
- Client Id
- Client Secret
- Select the appropriate option within the “Hierarchy Level for Record Creation” dropdown.
- This is the hierarchy level that new records from Sense will be created at.
- Select "Submit".
- The credentials will be saved for you to view.
- Once credentials are saved, you will be presented with two fields that will need to be provided to Sense for validation:
- Notification URL
- ACR Values

*Note* Once Sense credentials are saved, the "Client Secret" is unable to be edited.
In the event your Client Secret has been forgotten, you will need to either replace it within the setup card or you will need to remove the credentials and re-add them.
Once credentials are saved and validated, information from Beyond will automatically sync to Sense for texting and engage automation. The following record types are synced to Sense:
- Employee
- Customer
- Contact
- Order
- Assignment
- Service Reps
*Note* For a comprehensive list of fields that sync between Beyond and Sense, please see the following article titled: Beyond - Fields that Sync with Sense.
*Note* In order to sync Employee, Contact, or Service Rep records, you must have a phone number and email on file. Please keep in mind that phone numbers on the service rep record must match the phone number used in Sense to correctly log messages.
This syncing process can take upwards of 24-48 hours before the records are able to be accessed within Sense.
Once the initial syncing process is complete, records will sync once per hour.
In the event you are not seeing records that should be accessible within Sense, please contact our Support team.
*Note* Once a record has been switched from Active to Inactive in Beyond, the record is synced to Sense one last time.
Along with required fields for syncing, the following must be true for the automatic syncing of Deactivated records to Sense:
- For Employees:
- Record has been deactivated within the last 2 years, or
- Record was last synced with an Active status prior to being Deactivated.
- For Assignments, Contacts, Customers, Job Orders, and/or Service Reps:
- Record was last synced with an Active status prior to being Deactivated.
Manually Syncing Records
While information will automatically sync every 24-48 hours to Sense, if you've made a lot of changes, you can force the system to sync earlier.
System Sync
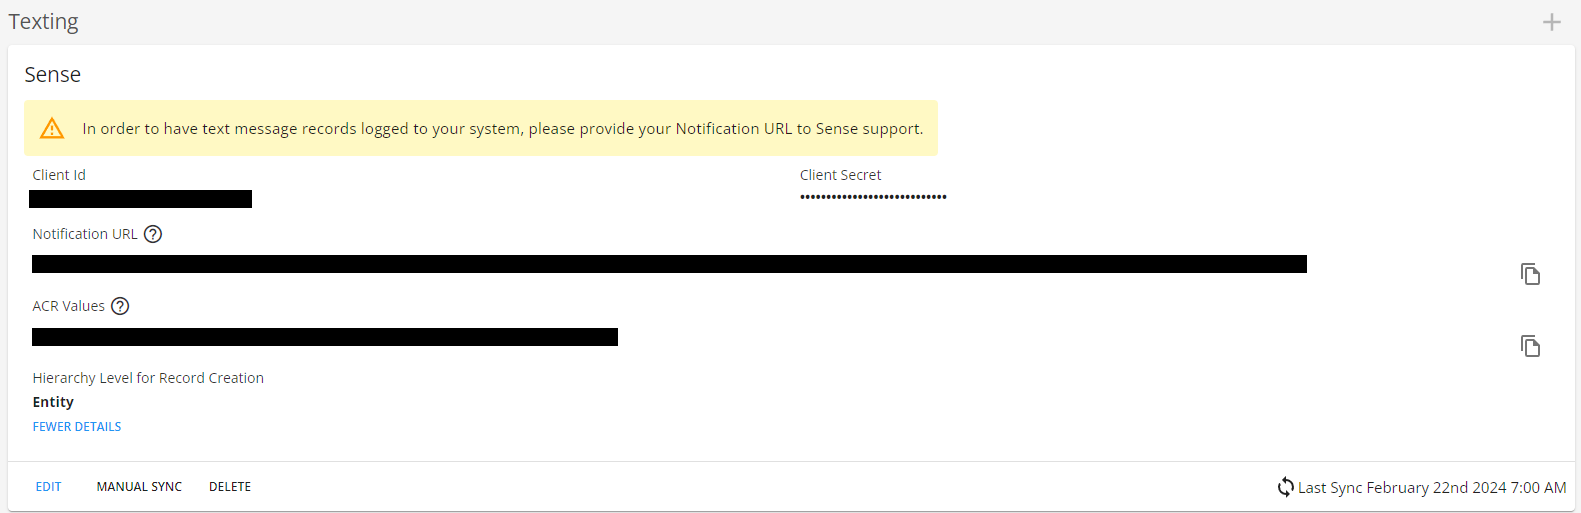
As an admin, you can view when your system last synced and manually sync information to Sense.
- Navigate to Beyond Menu > System Settings
- Select External Services > Texting
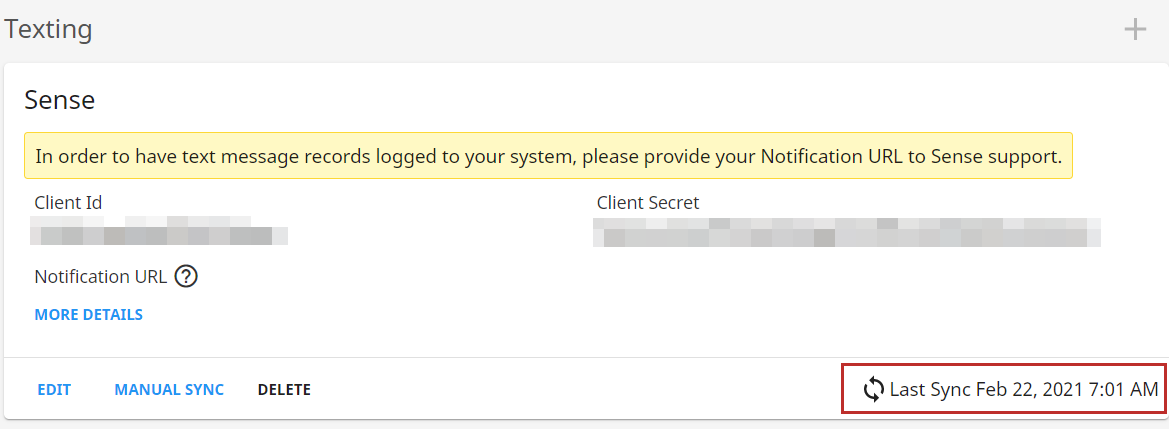
- Last Sync Date and Time will be located in the lower right corner.
- Select the Manual Sync button on the left.
Record Sync Options
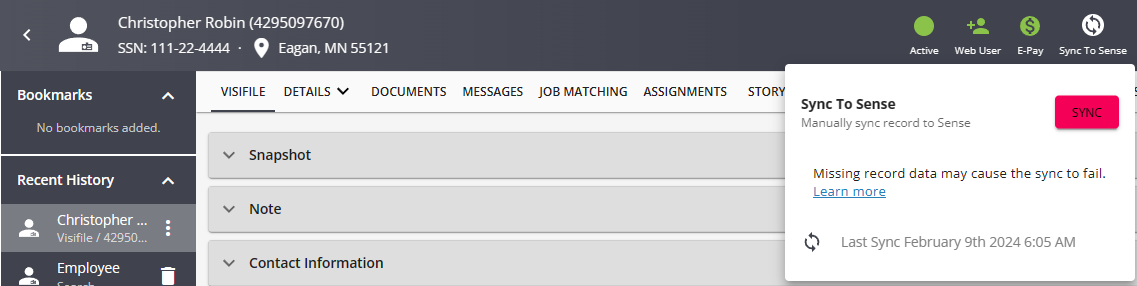
If a lot of updates have been made to a single record, you or your sense users can sync an individual record.
Navigate to the Sense Sync charm on any record to see sync information and click the sync button to sync the record.