Setting up Notifications and Emails for Evaluations
Evaluations can give your staffing company insight to employees and their working conditions or gain useful feedback from clients about the workers you provide them. To ensure the evaluations are sent out properly, to the recipients you desire, this document will walk users through the process of properly setting up configurations within WebCenter.
Notifications
*Note* Make sure you have completed setting up the evaluation questions in Enterprise administration before completing the configurations in WebCenter.
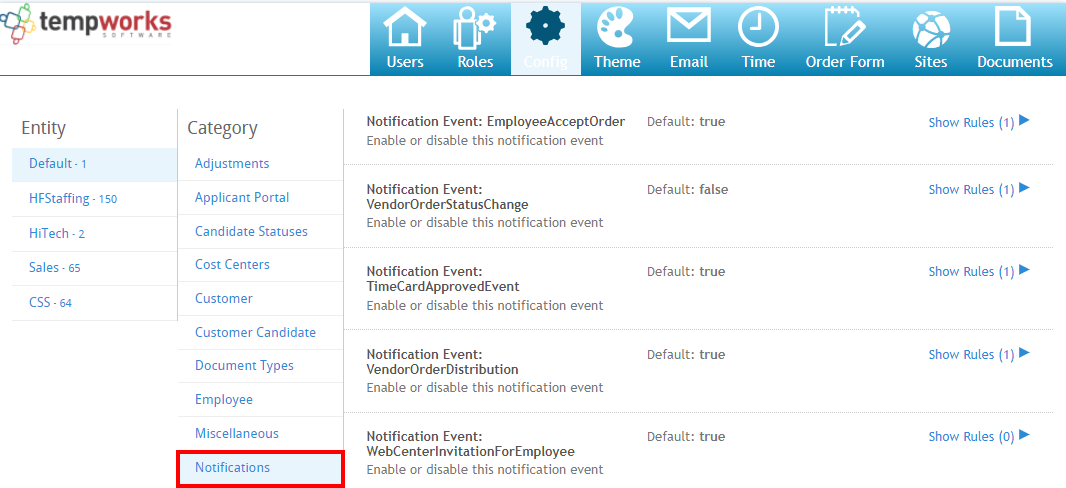
Once the setup of evaluation questions have been completed, navigate to WebCenter administration, under the 'Config' tab, find the 'Notifications' category.

Notification Event: Evaluation Assignment Finished
Setting this configuration will allow notifications to be sent automatically after an assignment has ended. By default, this configuration is set to 'False.'

*Note* This configuration is not dependent on any specific assignment status chosen within Enterprise.
To turn this configuration on, you will create a rule to decide who will receive the evaluations and enter filters to ensure evaluations are being sent to the proper receiver. Choosing 'When' allows users to filter between a Customer, User Role, Entity, etc. and create the parameters to enter in the 'is' section. Selecting 'True' applies the rule and turns the evaluation on.

Once this rule is created and assignments are finished, notification emails will be sent to either the employee or supervisor to complete the evaluation. To setup who will receive the evaluation, jump to the evaluation recipients configuration section of this article.
Notification Event: Evaluation Thank You
If you choose to send "Thank You" emails to recipients filling out the evaluations, you will need to set up the 'Notification Event: Evaluation Thank You' configuration. By default, this configuration will be set to 'False.' To turn this notification on you will need to create a rule and specify who should be receiving the notification.
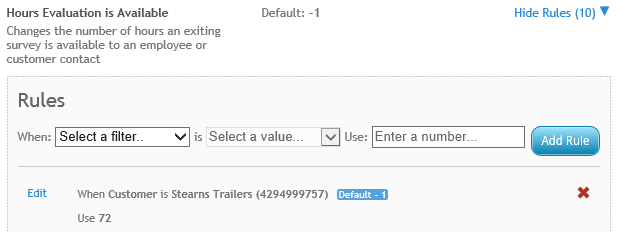
Hours Evaluation is Available
You may setup a set amount of time the user has to complete an evaluation, navigate to the 'Hours Evaluation is Available' configuration. By default, the system has the configuration set to one hour. In the following example we can see that when the Customer "Is" Stearns Trailers they have 72 hours to complete the evaluation.
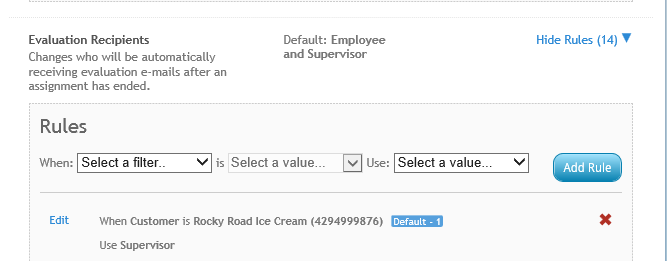
Evaluation Recipients
When evaluations are sent out, by default, the employee and supervisor receive evaluation emails. If this needs to change, navigate to 'Evaluation Recipients' and create a new rule. Below, when Rocky Road Ice cream assignments are completed the evaluations are only sent to the supervisor based on the rule created:
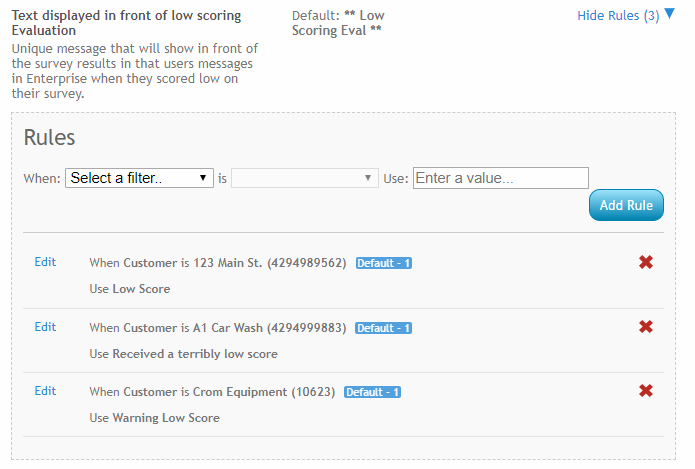
Low Scoring Eval Message
Within Enterprise, the evaluation results will display on the customer or employee record. If a low score is associated with the evaluation, by default, the message will display 'Low Scoring Eval.' To change the verbiage, navigate to the 'Miscellaneous' category, open the 'Text displayed in front of low scoring evaluation" configuration and create a new rule.
Email Template Creation
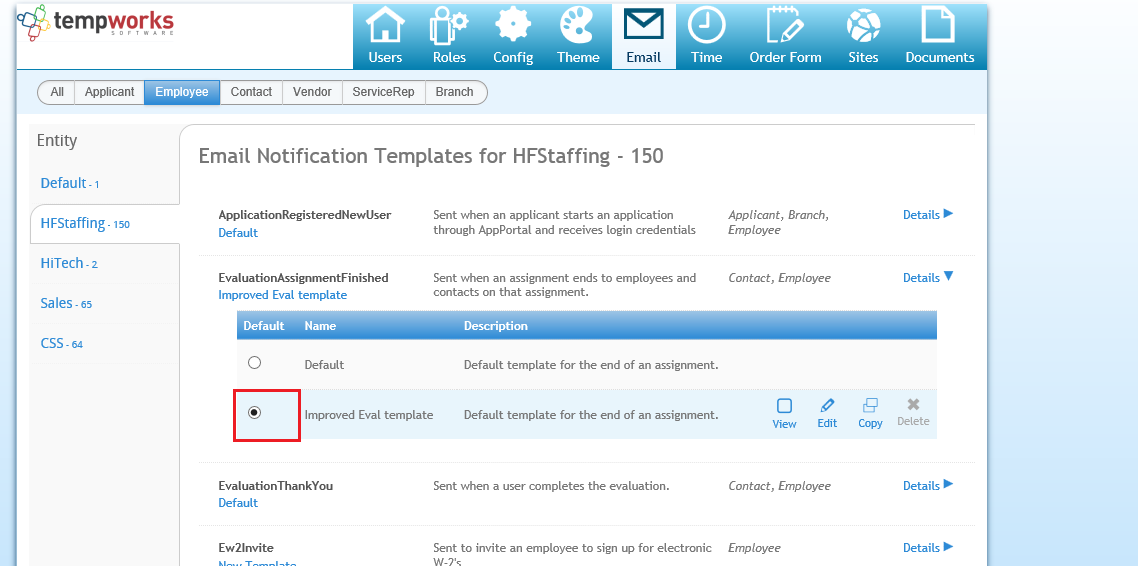
Once notifications are setup, users may select the format of the email templates being sent. Navigate to the 'Email' tab. Choose 'Employee' within the filter bar across the top and select your entity . Selecting the correct entity ensures the clients and employees associated within that hierarchy will see the correct templates created.
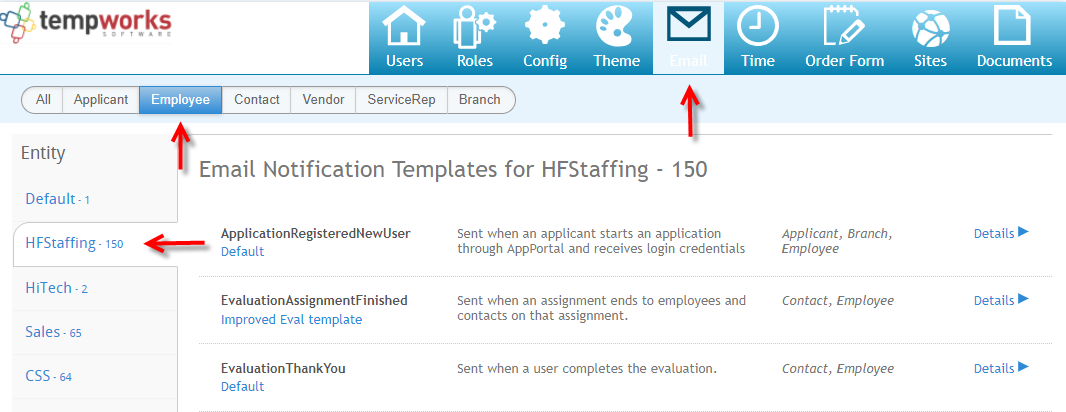
After the correct entity is chosen, select which template you wish to change.
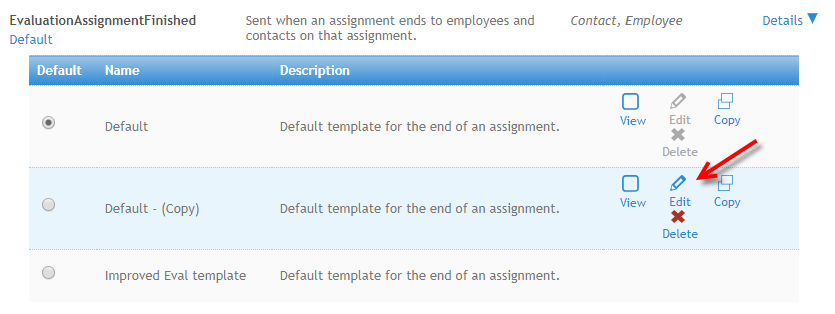
Select 'Details' to view the default template.
Copying a Template
If you wish to modify the original template, select 'Copy.'
Once the copy is created, select 'Edit' to open the edit template window:
You may edit the copy of the default template and enter a new template title, description, and email subject. Within the body of the template, additional edits may be made.
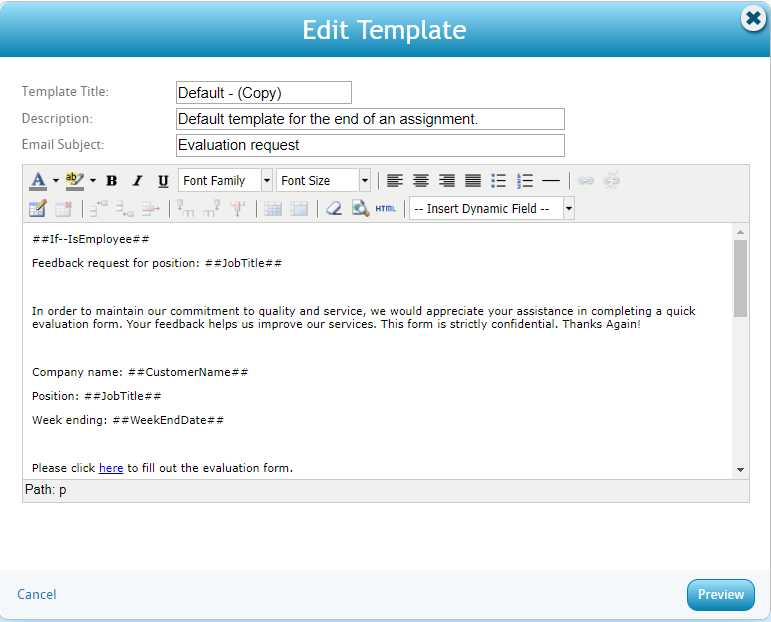
Select 'Preview' to verify all information is added in correctly.
From the preview template screen, select to 'Edit' or 'Save.'
After the template is saved, select the newly created template as your default to be sent when assignments are completed.