Managing HRCenter™ Applications in Enterprise
When applicants apply online through HRCenter, your service reps/recruiters will be able to manage the incoming applications within Enterprise.
After each step an applicant submits, your service reps can review the answers, sign documents, and approve or reject applicants all from Enterprise.
In Enterprise, navigate to all options > HRCenter to begin managing HRCenter applications
In this article:
- Reviewing submitted applications
- Managing incomplete applications
- Assigning additional pages/workflows

Reviewing Submitted Applications
Once applications have been completed and submitted by an applicant, a recruiter or service rep will need to review the application and accept or reject it. For more information on the application process see The Applicant's Process.
- Navigate to All Options > HRCenter
- Select the application workflow you wish to review.
- Workflows available to you are unique to your staffing company.
- Want to learn more about workflows? check out How to Create & Edit Workflows.
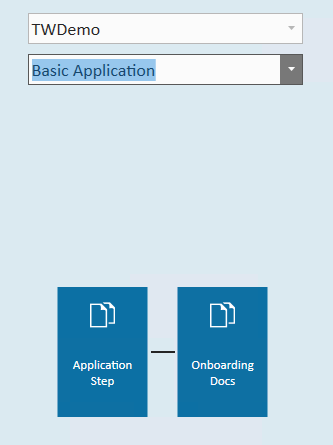
- Select the step you wish to review
- Each workflow is broken into at least one step. Select the step to review. This will show which applicants have submitted said step of the application process for review.
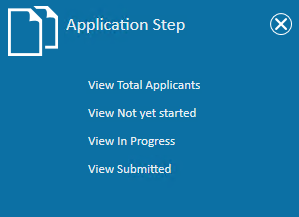
- Select submitted
- This will show only applicants who have submitted said step of the application process.
- This will show only applicants who have submitted said step of the application process.
- Review application
- Double click on an applicant to review their application.
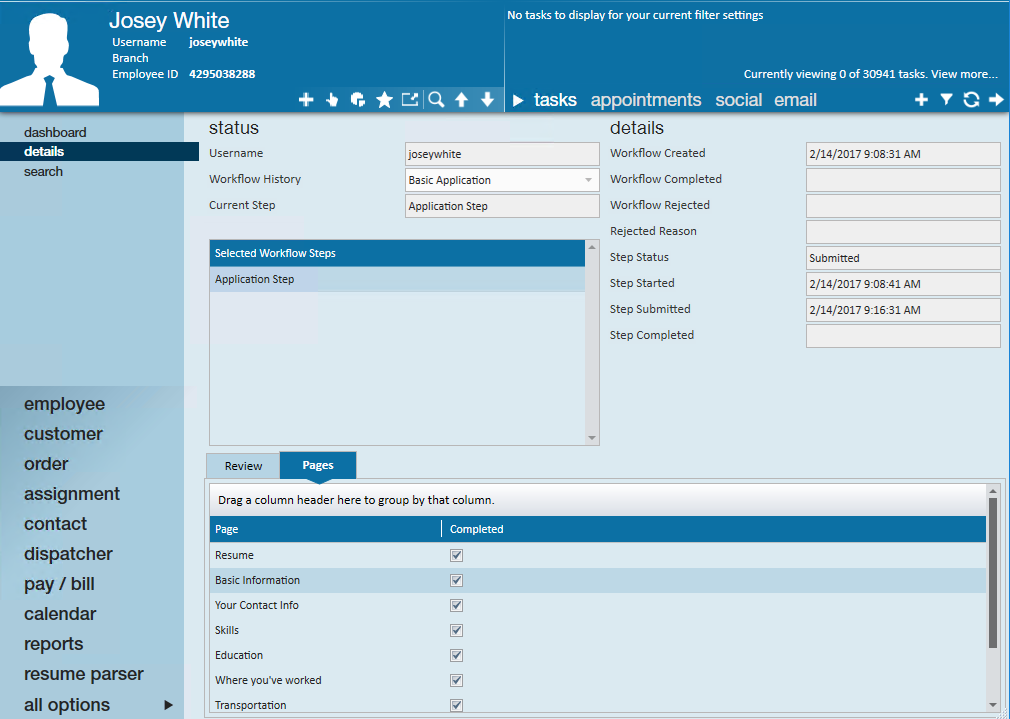
- Select the Pages tab & double click on each page to review answers.
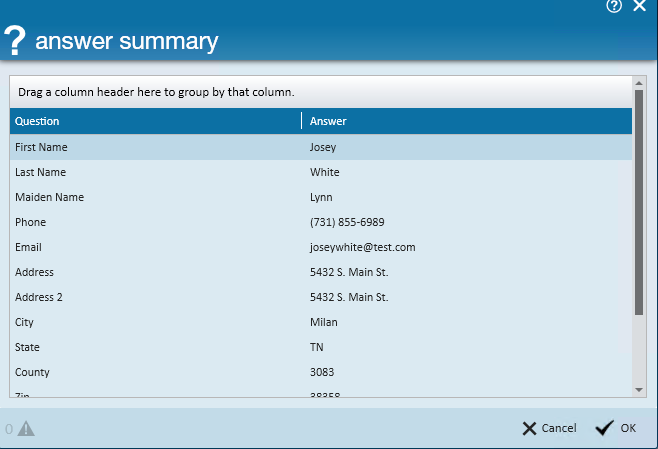
- Double click on an applicant to review their application.
- Mark 3rd Party forms as completed (if necessary)
- There may come a time where, once the applicant has filled out and completed a 3rd Party form within their workflow, the form is not automatically marked as complete. In this case, you will have the opportunity to mark the 3rd Party form as complete within Enterprise.
- Within the applicant's file, navigate to the Pages tab and find the 3rd Party form that needs to be marked as completed.
- Right-click on the 3rd Party form and select "Mark Complete".
- If successful, you will see a message showing that the form has been marked as completed.
- There may come a time where, once the applicant has filled out and completed a 3rd Party form within their workflow, the form is not automatically marked as complete. In this case, you will have the opportunity to mark the 3rd Party form as complete within Enterprise.
- Complete any forms required
- Any forms that require a service reps electronic signature and/or information to be filled out by the service rep will be found under the Review tab.
- Select 'Review and Sign' to complete the documents .
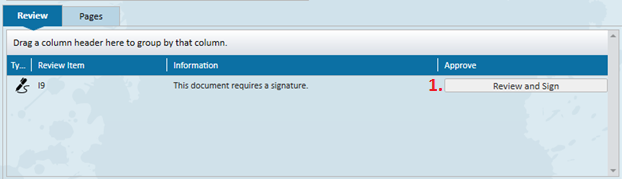
- See Processing an I-9 in HRCenter for more information.
- Approve or Deny
- Applicants that have successfully completed the application step and are approved by the service rep can be moved on to the next application step or completed by selecting the check mark option at the bottom of the page.


- Applicants who will not be moving on with the application process can be rejected by selecting the Reject option at the bottom of the page.

- Consider logging a deactivate message on the employees record to record the reason why they were rejected. Tips for Message Logging.
- Applicants that have successfully completed the application step and are approved by the service rep can be moved on to the next application step or completed by selecting the check mark option at the bottom of the page.


Managing Incomplete Applications
Some prospects might have questions about the application process or have trouble logging back in. You can email applicants with 'In Progress' or 'Not Yet Started' applications to reach out and see why they haven't been able to complete them yet.
Emailing Applicants:
- Navigate to All Options > HRCenter
- Select the application workflow from the drop down
- Select the step of the application you wish to review
- Select "Not Yet Started" or "In Progress" applications
- Select applicants you wish to email
- Right click and select send email
*Note* In order to email employees within Enterprise, you must first setup your email. See Email Functionality article for more information.
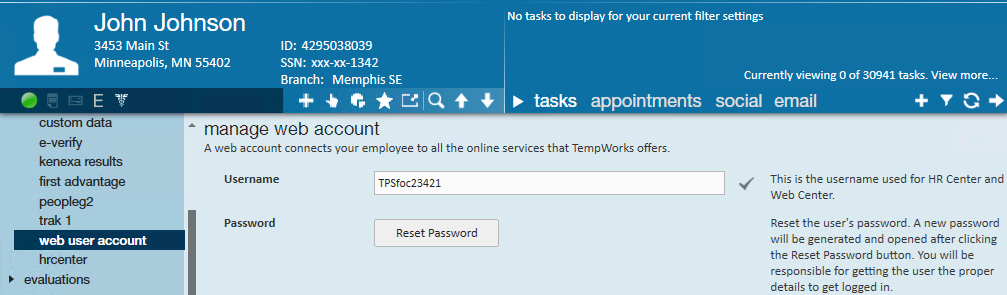
Resetting Passwords:
- Find the employee record you wish to reset a password for
- Navigate to Integrations > Web User Account
- Select Reset Password

Unlocking steps
When an employee wishes to fix mistakes made on a submitted application, a service rep can select the unlock the application step option to allow the applicant to log back into HRCenter and make the necessary changes.
Assign Additional Pages or Workflows
Once an employee has completed an application, you may have additional pages or workflows for them to fill out depending on the job they are assigned, etc. You can assign pages individually or assign another entire workflow with all the necessary pages.
To assign an additional page or workflow:
- Navigate to the employee record you wish to assign a new page/workflow to
- Open the actions menu by selecting the hand icon in the upper center of the page
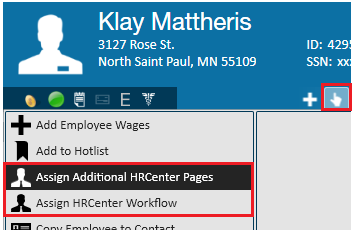
- For additional ad hoc pages, select 'Assign Additional HRCenter Pages'
- For an entire workflow, select 'Assign HRCenter Workflow'
- Select workflow & starting step or pages
- Select Finish to complete

The applicant can now log back into HRCenter to complete the newly assigned options.