System administrators should make sure to keep employer information up to date in the system to ensure accuracy of records including tax calculations.
This article covers:
- Finding Employer Information
- Adding & Editing Tax Jurisdictions
- Adding & Editing SUTA
- Updating Bank Account Information
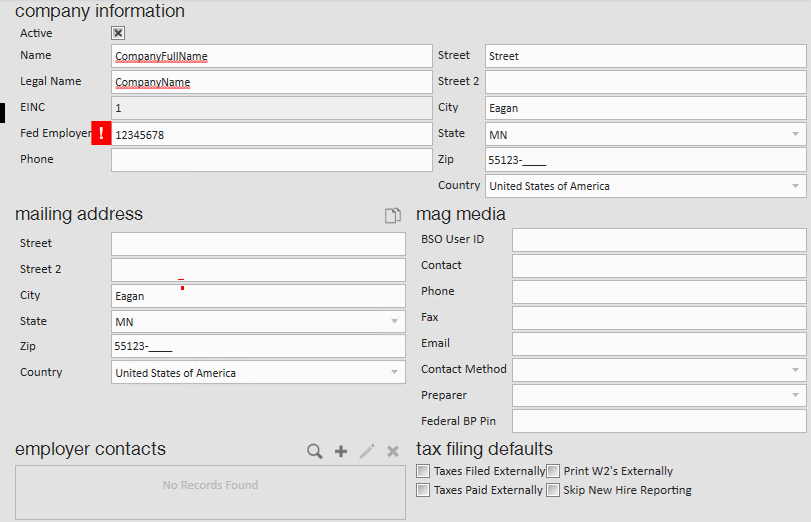
Finding Employer Information
Navigate to all options > administration and select employers on the left to view employer information. 
Once you have double clicked on your company name, we recommend you review and keep updated the following information:
- Legal Name
- Mailing Address
- Federal Employer ID Number
- Mag Media information (from Federal SSA W2 file)

Add & Edit Tax Jurisdictions
If you are staffing in an area subject to its own distinct local tax regulations, such as a municipality, city, county, or school taxes, enter those jurisdictions under the employers section of administration.
Add a Tax Jurisdiction
- When selected on an employer in administration (see steps above), select jurisdiction setup on the left
- Select the + icon on the right to add a Tax Jurisdiction
- Enter the following information:
- Select a jurisdiction from the drop down
- Enter the identification number
- Choose filing options
- Pay method, pay frequency, and filing method (all required) are informational fields only so you can fill it in with your actual information or if you unsure you can pick anything and save and it won't have any negative impact.
- Check the verified box after reviewing all the information is correct
- Select Save
Editing Tax Jurisdictions
- Double click on any existing jurisdiction to edit
- Enter the Identification number and edit any additional field options
- Pay method, pay frequency, and filing method (all required) are informational fields only so you can fill it in with your actual information or if you unsure you can pick anything and save and it won't have any negative impact.
*Note* existing jurisdictions may not appear in the jurisdiction list. If you select the plus icon and type in a juris for which you already have an employer id, the employer id will prefill with the existing ID. All you will need to do is fill in the other required fields and save and it will appear.
Add & Edit SUTA
To ensure that the State Unemployment rates are up to date, TempWorks has made it easy to access each jurisdiction and update information within Core.
Adding State Unemployment Tax (SUTA)
- When selected on an employer in administration (see steps above), select SUTA setup on the left
- Select the + icon on the right to add a SUTA tax jurisdiction
- Select the jurisdiction
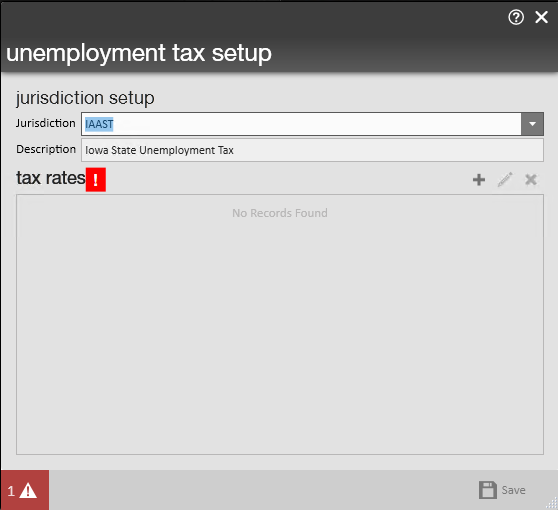
- Add Tax Rates
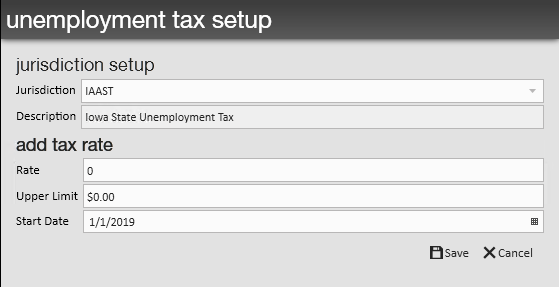
- Select the + icon on the right
- Enter Rate (straight percentage, ex. enter 2.5 for 2.5%)
- Enter Upper Limit: wage limit for state
- Enter Start Date: effective date of the rate
- Select Save


Updating SUTA Rates
When you know your SUTA rates are going to change soon, you can update them ahead of time.
- Double click on the related jurisdiction under employer > SUTA setup
- Select the + icon under the rates section to add a new rate
- Enter Rate (straight percentage, ex. enter 2.5 for 2.5%)
- Enter Upper Limit: wage limit for state
- Enter Start Date: date this new rate will be used
- Select Save
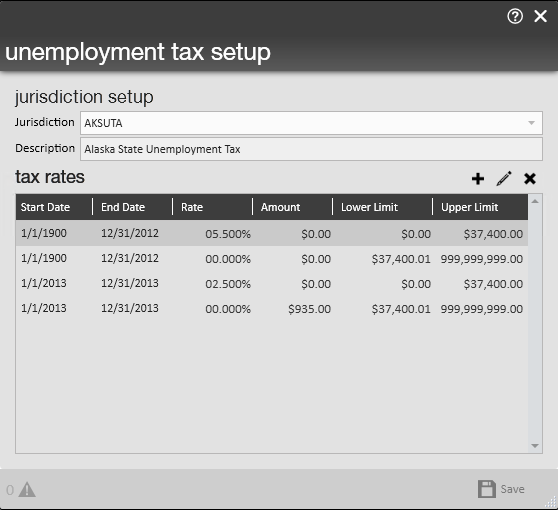

Retroactively Editing SUTA Rates
Changing existing rates should be used when updating SUTA rates as well as when retroactively applying rates.
- Double click on the related jurisdiction under employer > SUTA setup
- Select the pencil icon under tax rates to edit the tax rate
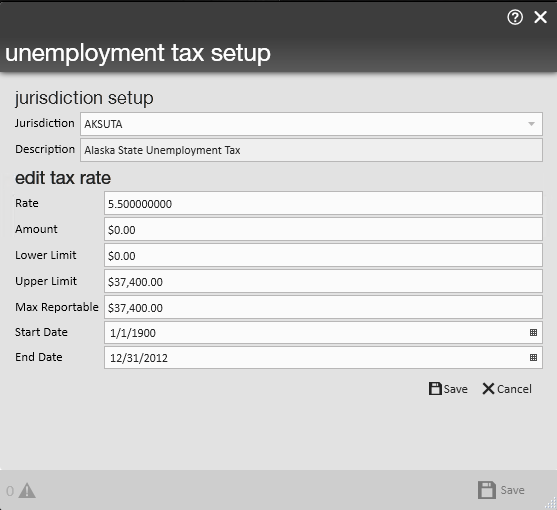
- Edit the following information:
- Rate (straight percentage, ex. enter 2.5 for 2.5%)
- Amount: Rate * Upper Limit; the max amount deducted per employee
- Upper Limit: wage limit for state
- Upper Limit: The threshold of taxable wages determined by each state; see the APA for details
- Max Reportable: The threshold of taxable wages determined by each state; see the APAfor details
- Start Date: date this new rate will be used
- End Date: The anticipated end date of the rate

*Note* When editing an existing SUTA rate be sure to edit the second tier in addition to the first tier. The 'Amount' should be calculated based on the information from the first tier item and then entered into the second tier item. The 'Lower Limit' should be .01 cent more than the upper limit on the first tier.
*Note* Upon entering an updated SUTA Rate, if the start date is prior to the current date, you have the option to correct taxes that have been calculated for the current open year by clicking (8.) the "correct taxes for this jurisdiction..." box. This difference in the originally accrued SUTA cost and the new and accurate SUTA cost will be reflected in the current Week End Bill.
Updating Bank Account Information
- Navigate to All Options > Administration
- Select gls bank account on the left
- Enter your bank account information
- include starting check number and invoice number.
- Select the Save icon in the upper left
