What are Interest Codes?
Interest codes are quick tags on records that provide different searchable and reportable information. These are extremely powerful tools for your employee, customer, contact, and job order records to track any quick bits of information.
Examples of Interest Codes include:
| Record Type | Example Interest Codes |
|---|---|
| Employee Record | Background Check Complete Forklift Driver Bi-lingual Customer Service Warehouse High School Diploma 1st Shift |
| Customer | Warehouse Forklift Uses Competitor 1st Shift Background Check (requirement) Payrolled Interested in Payroll Services |
| Contact | Likes Starbucks Industrial Staffing Clerical Looking for Temp Employees Looking for Direct Hire Employees Uses Competitor |
| Job Order | Background Check (requirement) Forklift 2nd shift License (requirement) Customer Service |
You may notice that some interest codes can be used on multiple records for slightly different meanings.
This Article Covers:
- Gaining Access to Adding Interest Codes & Categories
- How to Add an Interest Code
- How to Add an Interest Code Category
Gaining Access to Adding Interest Codes & Categories
Users will need to be a member of a Security Group that contains the "Can Administrate" permission to gain access to the "Interest Codes" page in Beyond System Settings.
*Note* If you utilize custom Security Groups with Advanced Permissions, please add the "Access" to the "Interest Codes" Pages within Settings > System Settings > Interest Codes to the Security Groups that require the functionality:

For more information on created custom Security Groups with Advanced Permissions, please see the following article titled "Beyond - Creating Security Groups with Advanced Permissions".
How to Add an Interest Code
Interest Codes must be added by an administrator before they will be available for service reps to use. This article will walk through the options when creating an Interest Code in Beyond.
*Note* Before you start adding interest codes, we recommend being at the highest Hierarchy you have available (whether that is entity, subsystem, or system) to ensure you have access to edit and see all options in Beyond.
- Navigate to B Menu > System Settings > Interest Codes
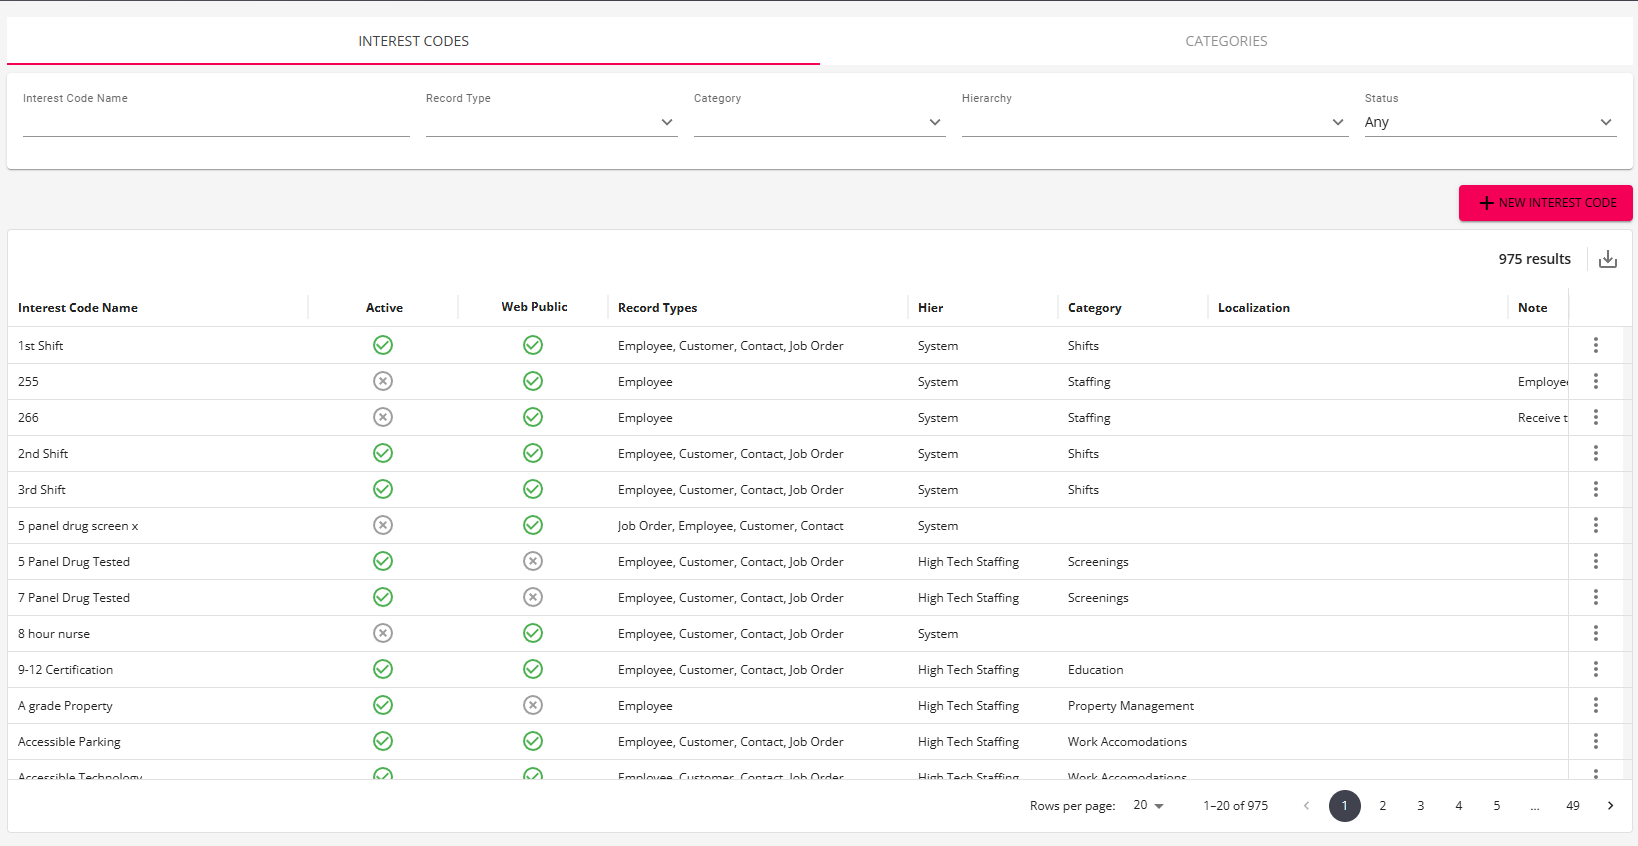
- Select "+ New Interest Code" in the upper right

- Enter/review the following information:
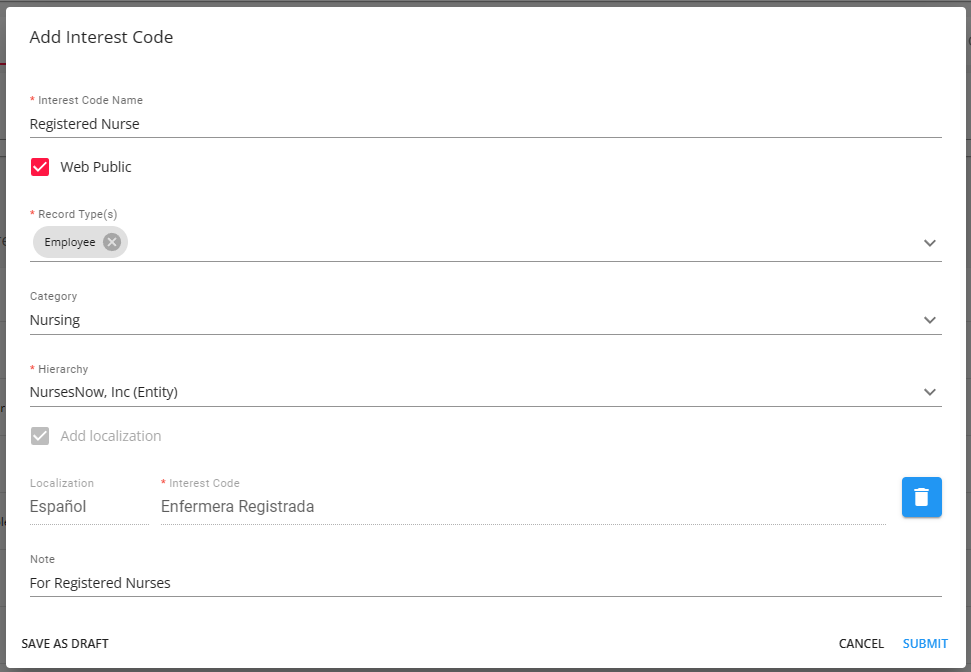
- Interest Code Name - This is where you enter the name of the interest code as you want it to appear in your system
- The "Add localization" option is used if you want this web public interest code to have a Spanish translation in the event an employee/applicant is using the Spanish format of an HRCenter workflow/page. Please note Beyond will not translate the English word for you; you must manually type in the Spanish version.
- Select the "Add localization" checkbox.
- Add in your Spanish translation for the interest code name.
- Select "Add" to add the localization to the interest code.

- When editing an existing interest code, in the event additional localizations (French and/or German) have been added within Enterprise, these will be seen within Beyond and are able to be edited but not added.
- The "Add localization" option is used if you want this web public interest code to have a Spanish translation in the event an employee/applicant is using the Spanish format of an HRCenter workflow/page. Please note Beyond will not translate the English word for you; you must manually type in the Spanish version.
- Web Public (Checked By Default) - Checking this box will make this interest code visible when applicable in HRCenter and WebCenter. This is mostly related to the application page that allows employee's to pick their own skills/interests.
- Record Type(s) - Select all the record types that this interest code can be used on.
- Category - This option gives you the chance to organize Interest Codes into Categories. Select the proper category from the drop down (you'll be able to add more categories, which we'll cover below).
- When selecting a category for the interest code, and you intend for the interest code to be "Web Public", please make sure you are selecting a category that is also listed as "Web Public".
- Hierarchy - Determines where the interest code will exist and be accessible in your database. If this interest code is only applicable to one branch, then you can set it to that branch. Most of the time, we recommend keeping interest codes at the highest level (system, subsystem, or entity) to ensure all users can utilize it.
- Note - This information is only for Admin purposes. You can enter any notes as to why you entered this interest code in case you ever need to look back on it.
- Interest Code Name - This is where you enter the name of the interest code as you want it to appear in your system
- Select "Submit".


*Note* Once added, new interest codes are set to "Active" by default.
Once the interest code has been added, you can edit or deactivate the interest code by selecting the  icon to the right of the interest code and selecting either "Edit" or "Deactivate":

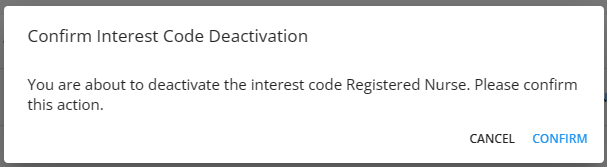
Selecting "Deactivate" will show a confirmation prompt. Select "Confirm" if you'd like to proceed with the deactivation of the interest code:
How to Add an Interest Code Category
Once you've added a few interest codes, your system might start to seem a little cramped with options. Categories allow you to organize your interest codes to make them easier for service reps to find.
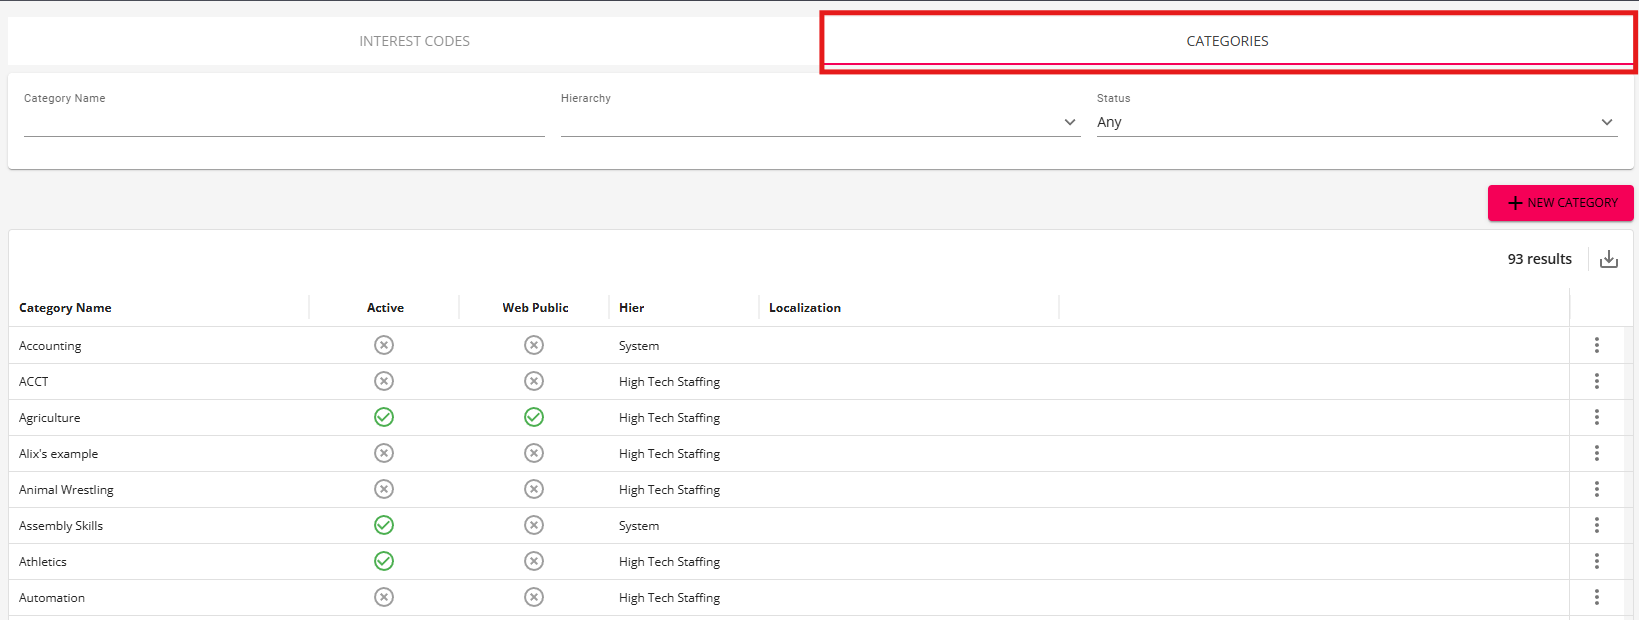
- Navigate to B Menu > System Settings > Interest Codes > Categories tab
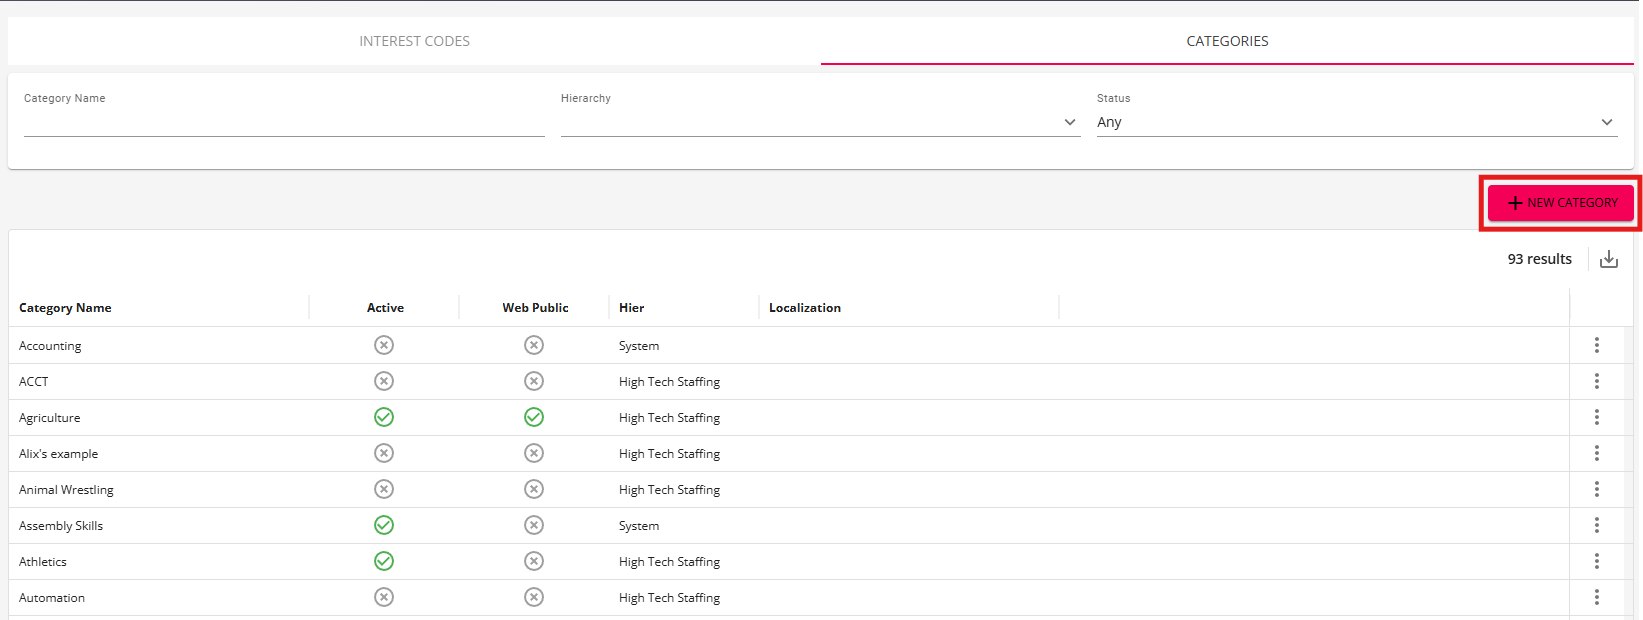
- Select the "+ New Category" on the right to add a new Category
- Enter/review the following information:
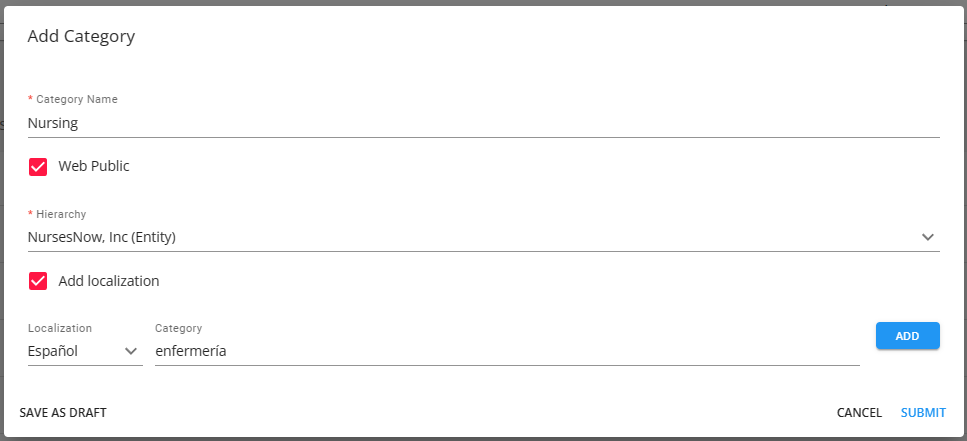
- Category Name- Enter the name of the category as you want it to appear for your users.
- The "Add localization" option is used if you want this web public interest code category to have a Spanish translation in the event an employee/applicant is using the Spanish format of an HRCenter workflow/page. Please note Beyond will not translate the English word for you; you must manually type in the Spanish version.
- Select the "Add localization" checkbox.
- Add in your Spanish translation for the category name.
- Select "Add" to add the localization to the category.

- When editing an existing interest code category, in the event additional localizations (French and/or German) have been added within Enterprise, these will be seen within Beyond and are able to be edited but not added.
- The "Add localization" option is used if you want this web public interest code category to have a Spanish translation in the event an employee/applicant is using the Spanish format of an HRCenter workflow/page. Please note Beyond will not translate the English word for you; you must manually type in the Spanish version.
- Web Public - Checking this box will make this category visible when applicable in HRCenter and WebCenter. This is mostly related to the application page that allows employee's to pick their own skills/interests.
- Hierarchy - Determines where the interest code will exist and be accessible in your system. If this interest code is only applicable to one branch, then you can set it to that branch. Most of the time, we recommend keeping interest codes at the highest level (system, subsystem, or entity) to ensure all users can utilize it.
- Category Name- Enter the name of the category as you want it to appear for your users.
- Select "Submit".


*Note* Once added, new interest code categories are set to "Active" by default.
Once the interest code category has been added, you can edit or deactivate the category by selecting the icon to the right of the category and selecting either "Edit" or "Deactivate":

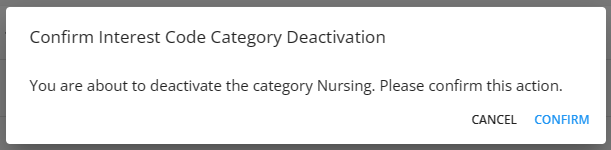
Selecting "Deactivate" will show a confirmation prompt. Select "Confirm" if you'd like to proceed with the deactivation of the category: