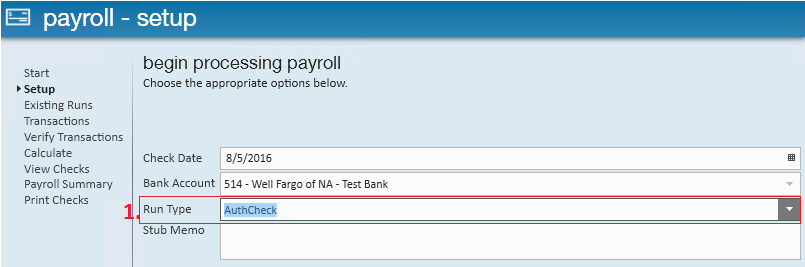
Step 1:
From the pay/bill dashboard, select to create a new payroll run. Within the setup page of the new run, verify the check date and bank account. If you are unsure whether or not your company utilizes a separate bank account/bank ID for authority runs, speak with your manager before continuing. Be sure to select a (1.) run type of "AuthCheck" and then select next.
Step 2:
Select the transactions you would like to pay. The (2.) transactions page of the payroll run will display all authorities that have had related employee garnishments processed by payroll and a check to the authority has not yet been created.
By default, both e-pay and non e-pay authorities will be listed in the transactions page. It is common practice for users to post payroll for authorities in two separate runs - one being e-pay and one being live checks.
To filter the transactions listed select (3.) e-pay only or non e-pay only to group accordingly.

*Note* Hit the "Select All" button to grab all transactions listed.
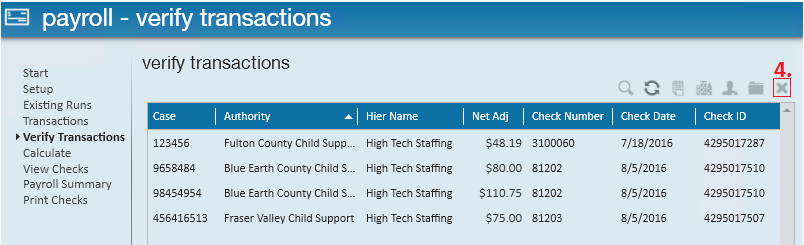
Step 3:
Verify the transactions. The related case number, net amount being paid to the authority, and employee check date and check ID will be listed for review. If after reviewing the transactions amounts appear correct, select "next" to calculate the authority payroll. If one or more transactions are incorrect, select (4.) the x icon to individually remove said transactions from the run and continue with remaining transactions within the run.
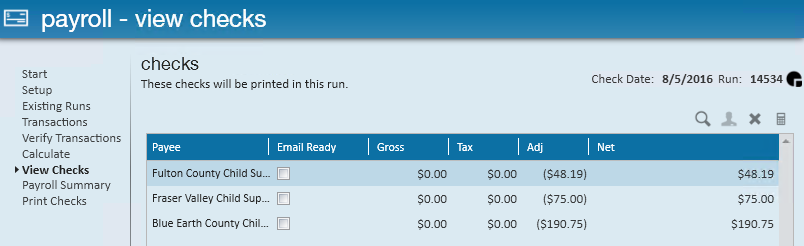
Step 4:
After calculating payroll, users will have another chance to review and remove (if necessary) authority checks contained in the run. Once checks are confirmed as correct, select next.
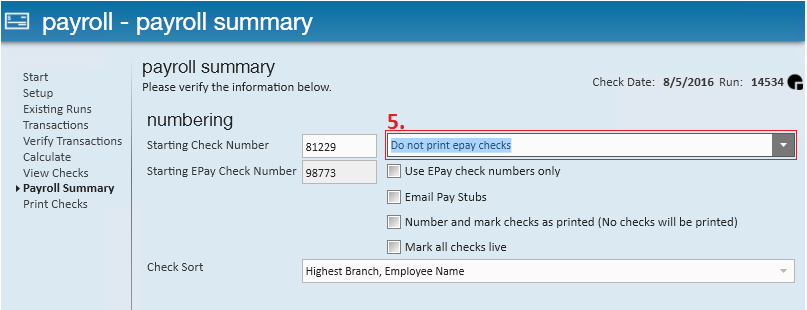
Step 5:
Print and post payroll.
*Note* If you are processing e-pay transactions, you may want to select (5.) "do not print e-pay checks" from the print filter dropdown.