What is the WebCenter Employee Portal?
The employee portal of WebCenter can give your employees access to quick information including past paycheck stubs, current assignment information, important documents, and more!

In this article, we will review roles & configuration options you have to customize the employee portal and set security around what they have access to. If you are looking for information from the employee's perspective, check out (Legacy) Employee Portal - Welcome to WebCenter.
This article includes:
- Setting up Employee WebCenter Roles
- Additional Employee Portal Configurations
- Giving Employees Access to the Employee Portal
Setting up Employee WebCenter Roles
WebCenter roles give you the ability to customize what each employee will have access to in the Employee Portal. It's important to review the role options before giving your employees access to the web portal.
Employee Vs. Applicant
Since HRCenter and WebCenter both utilize the same web user credentials for applicants and employees, an applicant can technically have access to WebCenter as soon as they apply online through HRCenter. 
Applicants can have access to documents, HRCenter, JobBoard, and profile information while employees can also be given access to options like assignments and timecards.
An applicant becomes an employee and is given the default employee role once there washed status is switched from 'Web Pending' to 'Familiar' in Enterprise or Beyond by default (keep in mind some systems may have a different customized setup).
Setting Up Applicant's or Employee's WebCenter Roles
Before you can give an employee or applicant access to WebCenter, you need to decide what different security options you need to have in place and what the default options will be.
For example, you may have a default employee role that is given everything except the timecards tab. I might then have a second role that includes the timecards tab for those employees working where they are expected to fill out online timecards. Then, I might have a third role that is more limited for those employees who no longer work for my company but may still need access to just their paycheck stubs and W-2 information.
First look at all the permissions available & the default role and then decide how many roles or permission levels you may need to have for employees and applicants. Once you have decided this, you will navigate to the Roles tab in WebCenter Admin to set them up.
To Find Employee Roles:
- In WebCenter Admin, Select the Roles Tab
- Choose the employee section
- A list of Roles will be available

To Create Your Own Role(s):
If you want to customize the vendor portal for different users, you can create your own employee roles.
- Select the Copy option next to any existing role
- Update the name and description - this will be helpful when users are giving contacts access to the portal
- Check or Uncheck the different Role Permissions (check out more details on permissions below)

Role Permissions Available:
A Role will give a specific set of permissions to the employee. Each employee can be assigned a different role depending on the access you want to give them. Below we will review the permissions available.
- Common: This option is needed for every role. It allows users to log in to the portal, etc.
- Employee - Assignments: Will allow employees to access the assignments tab where they can see their assignment information. Check out (Legacy) Employee Portal - The Assignment and Calendar Tabs for more information.
- Employee - Calendar: Will allow employees to access the calendar tab where they can see which days and times they are expected to report for work (Days & times must be included on the order/assignment in order for them to show up here) and report their availability. Check out (Legacy) Employee Portal - The Assignment and Calendar Tabs and Enterprise - Tracking Employee Availability Using Activity Tracker for more information.
- Employee - Documents: Will give the employees access to the documents tab where you have important docs they can download at any time including an employee handbook, benefits, etc. Check out WebCenter Admin - How to Add Documents to Portals for more information.
- Employee - Home: This option is needed for all roles and gives users access to the home page they will be brought to each time they log in.
- Employee - HRCenter: Will give employees access to the HRCenter tab where they can see any outstanding HRCenter workflows/pages they need to fill out and complete them without ever leaving WebCenter. Check out (Legacy) Employee Portal - The HRCenter Tab.
- Employee - Jobboard: Will give employees access to your TempWorks Job Board where they can browse web public jobs and make themselves candidates on orders. Check out The Job Board for more information.
- Employee - Orders: Will give employees access to the orders tab. This is only available if you are utilizing the Education Module.
- Employee - PayHistory: Will give employees access to their past pay stub information. Check out (Legacy) Employee Portal - The Pay History Tab.
- Employee - Timecards: Will give employees access to the timecards tab where they may be able to create their own timecards and submit their time electronically. Check out Setting up Timecards in WebCenter for more information.
- Profile - Address: Will give the employee the option to view and update their current address on file from the home tab > my information.
- Profile - Employee: Will give the employees the option to upload a new resume and other documents under the home tab > my information
- Profile - Info: Will give the employees access to view and update their email and password information under the home tab > my information.
- Profile - Notifications: Will give employees access to change their email notification preferences under the home tab > my information.
Additional Employee Portal Configurations
In addition to the role options available, you can also set WebCenter configurations to turn on/off specific features for employees. We recommend reviewing these configurations (configs) to determine what your employees should and should not be able to access specific features.
Never used configs in WebCenter before? Configs have a default value and additional exceptions or rules underneath them to turn features on and off for different sets of users. To learn more about config basics, check out WebCenter Admin - Intro to Configurations.
Configurations are found under the Config tab in WebCenter admin. Below is a list of configs related to the employee portal access. 
The list is broken down into the following groups:
General/Home Page Configs
The following configurations can be found under the Employee category of the config tab in WebCenter Admin. All of the configs listed in this group relate to options available from the home page including the "my information", "manage pay stubs", and "manage W-2" links in the upper left.
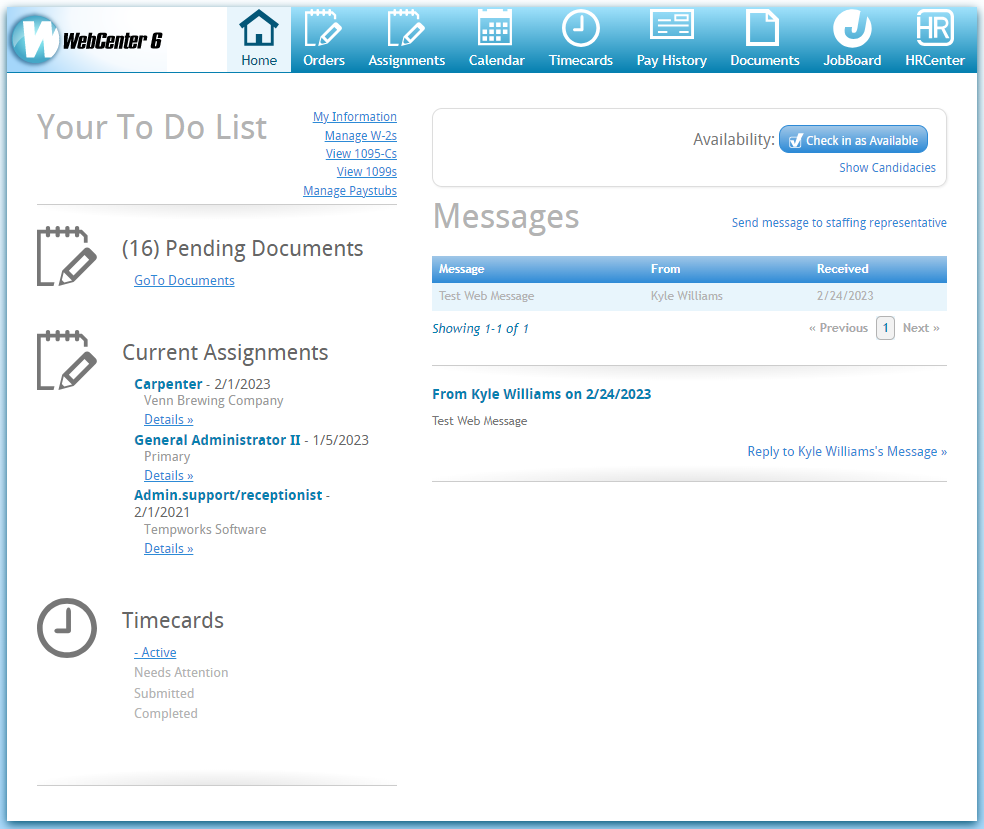
- Employee Home Show Availability:
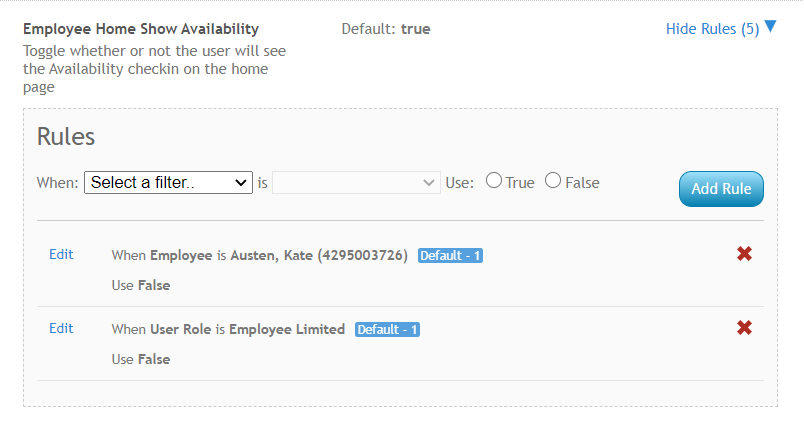
- This configuration, when set to true, will display a button on the home page for employees to mark themselves as available for that day. When they do this, it will log a message on the employee's record with the message action code of "Available" so that you can search and report on it.

- This configuration, when set to true, will display a button on the home page for employees to mark themselves as available for that day. When they do this, it will log a message on the employee's record with the message action code of "Available" so that you can search and report on it.
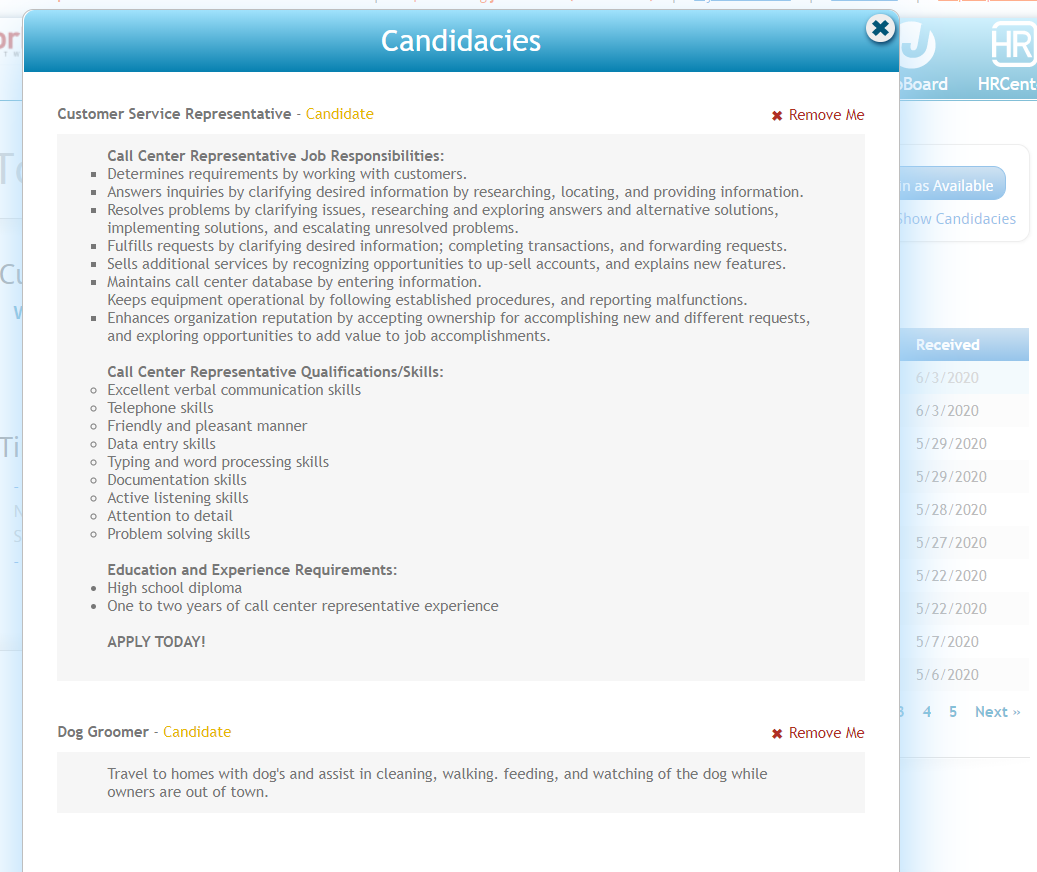
- Applicant Home Show Candidacies or Employee Home Show Candidacies:
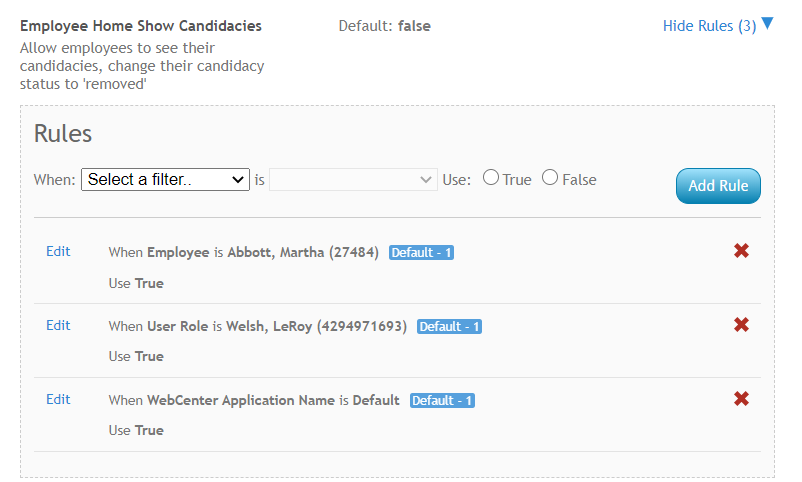
- These two configs behave the same way (one is for applicants and one is for employees). When this config is set to true, employees will be able to see which orders they are set as a candidate for (whether they added themselves from the job board or they were added by a recruiter). This will include public job descriptions and the option to remove themselves as a candidate.
- The "Show Candidacies" button appears above the messages section on the home page for the employee.
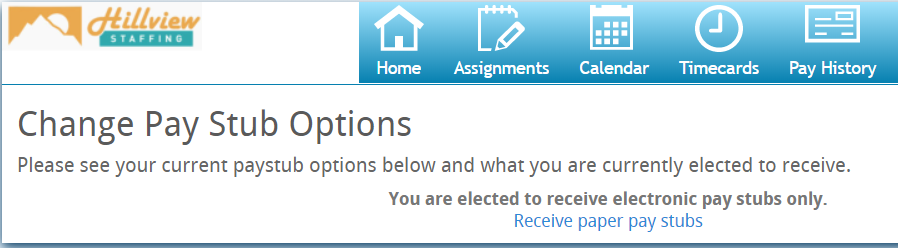
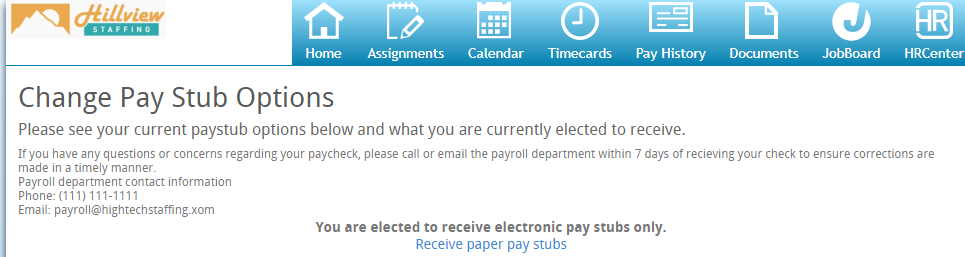
- Show Pay Stub Links:
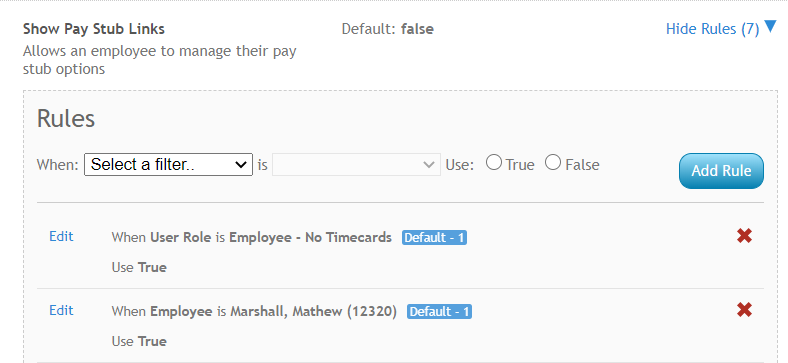
- This configuration, when set to true, will allow employees to manage whether they want their pay stubs via email or paper (found on the home page under "Manage Paystubs")
- This configuration, when set to true, will allow employees to manage whether they want their pay stubs via email or paper (found on the home page under "Manage Paystubs")
- Pay Stub Legal Agreement
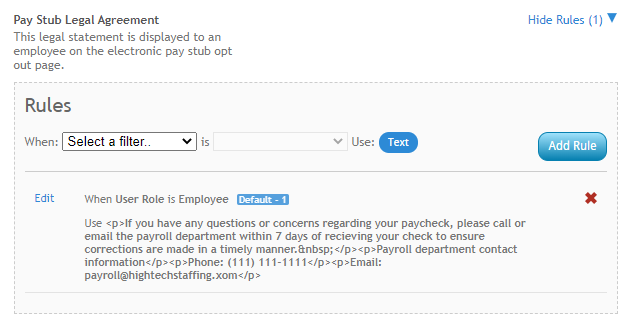
- This configuration will allow you to add a legal agreement or additional note for employees if they have the option to manage their paystub options
- This configuration will allow you to add a legal agreement or additional note for employees if they have the option to manage their paystub options
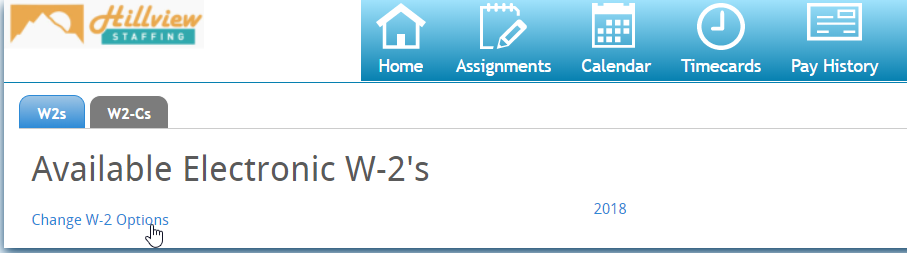
- Show W-2 Links:
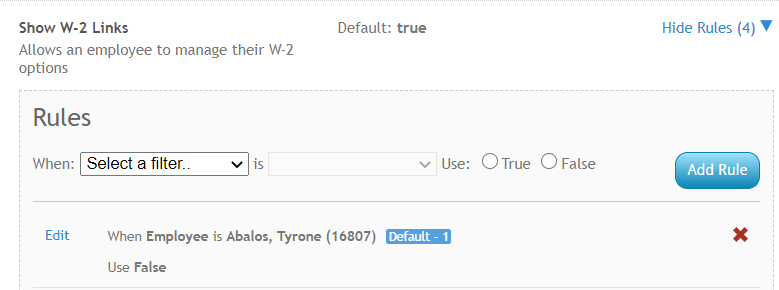
- Similar to Show Pay Stub Links, this option, when set to true, allows users to see any electronic W-2s and manage whether they want their W-2 sent electronically through WebCenter or only receive a paper copy at the end of the year (found on the home page under "Manage W-2")
- Similar to Show Pay Stub Links, this option, when set to true, allows users to see any electronic W-2s and manage whether they want their W-2 sent electronically through WebCenter or only receive a paper copy at the end of the year (found on the home page under "Manage W-2")
- Show Generate Invite Code Link:
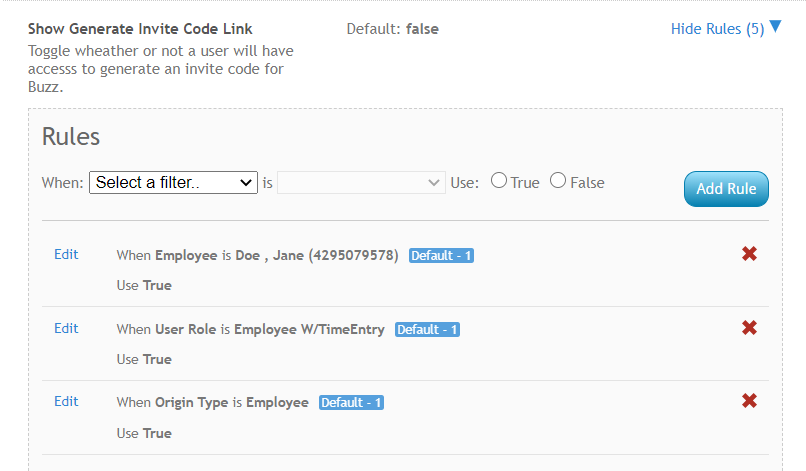
- If you are utilizing Buzz, the TempWorks mobile app, when this configuration is set to true, your employees will be able to generate an invite code to invite themselves to the app. The invite code is generated under the "My Information" section. Check out Buzz - Inviting Employees to Buzz for more information.
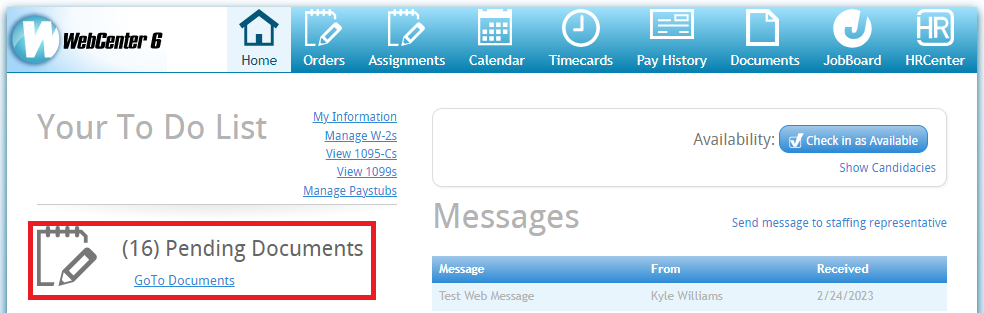
- Show Pending HRCenter Workflows/Documents:
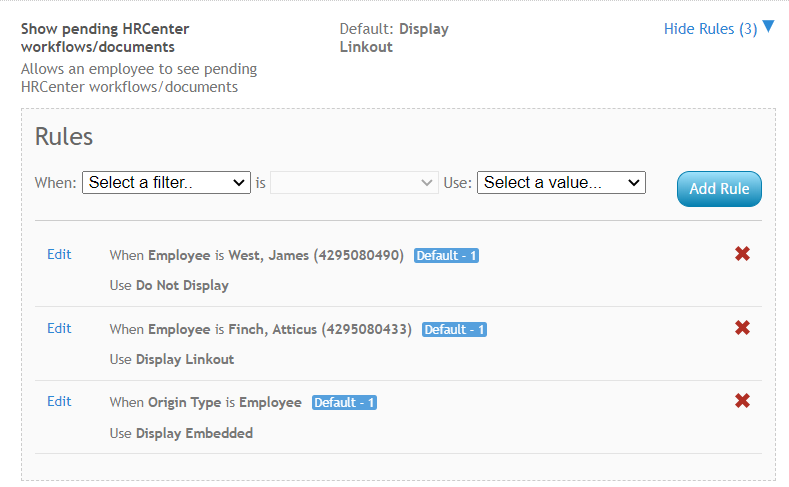
- When set to "Do Not Display," the employee will not see a link on the home page for "Go To Documents" (keep in mind if you do not want them to have access to HRCenter from WebCenter at all, you will also want to update their role to not have the HRCenter tab)
- When set to "Display Linkout," when the employee clicks on the Go To Documents link from the home page, they will be brought to HRCenter in a separate tab.
- When set to "Display Embedded," when the employee clicks on the Go To Documents link from the home page, they will be brought to the HRCenter tab within WebCenter where they can view and manage workflows/documents while still in WebCenter.
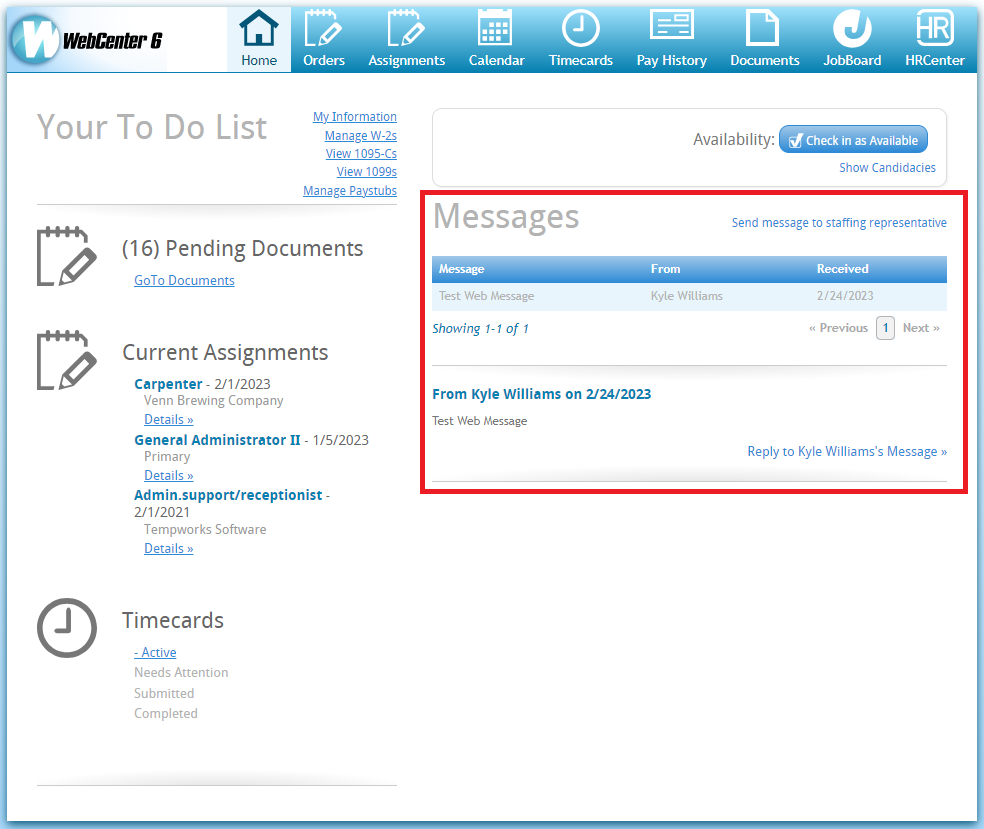
- Show Messages On Home Screens:
- This config is found under the misc. category but will effect whether the employees see the messages section on the home page in WebCenter.
- This config is found under the misc. category but will effect whether the employees see the messages section on the home page in WebCenter.


Bonus Configuration: Notification Event: UserMessageServiceRep
This config, located under Notifications category, allows you to turn on a message feature which will allow your employee(s) to send their service rep a message (email). Please note this config also works for your customer contacts and vendor contacts.

By default, this config is set to false which means the message option will not appear unless you set a new rule to true.
Setting this Config to True:
If you want to enable this feature, you will need to create a new rule to make sure this option is available to your employee(s). Reminder this config also works for your customer contacts and vendor contacts. Once you set a new rule to true, the employee should see the following option seen below:

Upon selecting the "send message to staffing representative" they will be greeted with a message box (seen below). They can type in their message and hit send. A message will be logged on their employee record with the message action code of "Web Message."
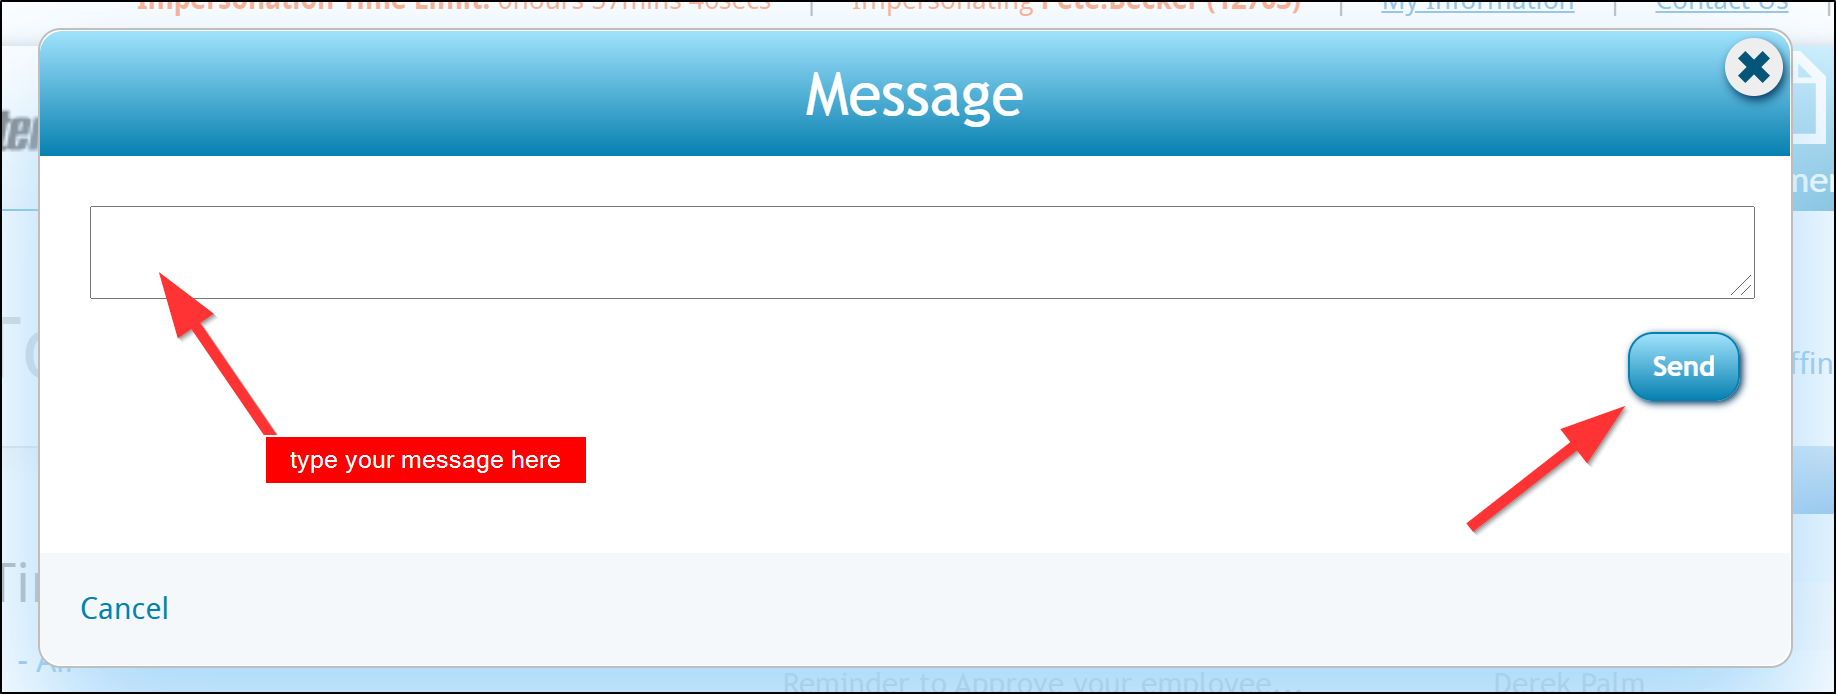
Where does this message go? This message will be sent to the email of the staffing representative/staffing specialist listed on their employee record. If this is a contact for a customer or vendor it will also be the staffing representative listed on their contact record (located under the details tab).

Unsure what your service rep email is? Please ask your admin. They can find your email under your service rep in administration. Click Here to Learn More.
Document Related Configs
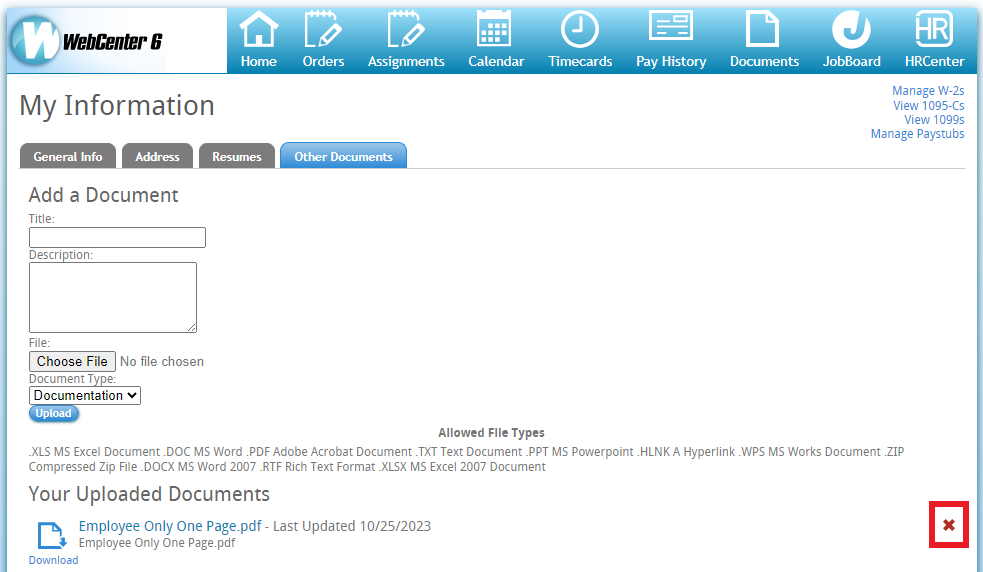
The following configurations under the employee category are related to the document options found under the home tab > my information. These configs are only necessary if you enable the "Profile - Employee" role option to allow the employees to upload documents. 
- Allow Employees to Delete Documents:
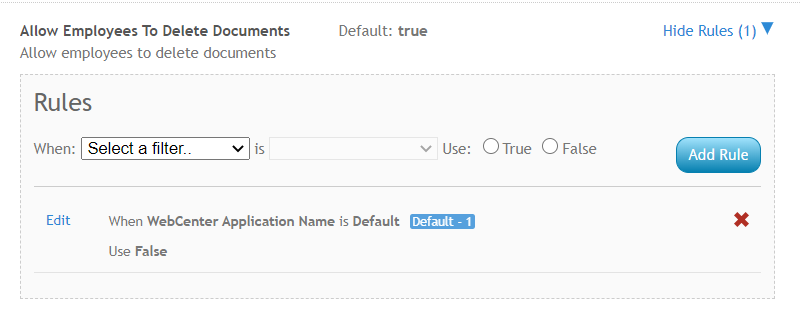
- This config, when set to True, will allow employees to delete documents from their record and WebCenter
- This config, when set to True, will allow employees to delete documents from their record and WebCenter
- Employee Profile Documents - Show Resumes Only:
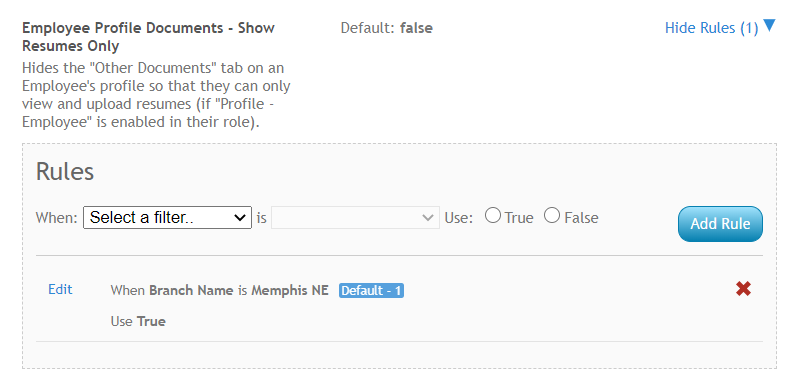
- This config, when set to true, will hide the "Other Documents" tab so employees will only be able to see or upload resume documents.


Assignment Related Configs
The following configurations are related to Assignment tab in the Employee Portal and can be found under configs > Employee category in WebCenter Admin.
- Employee Assignment Details Contact Phone Number:
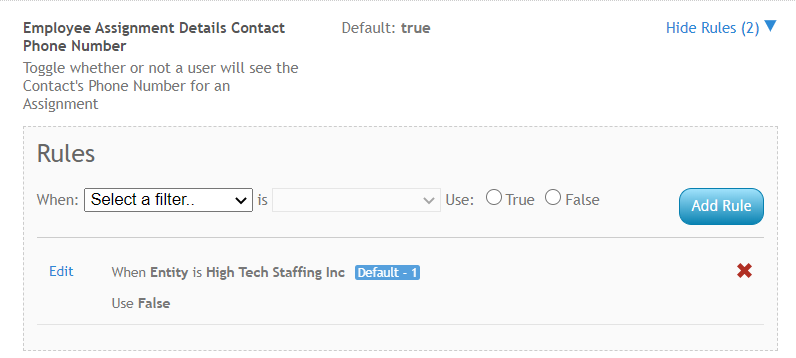
- When this config is set to true, employees will be able to the phone number for the supervisor as long as they can see the contact info tab on their assignment.
- Employee Assignment Details Hide Contact Tab:
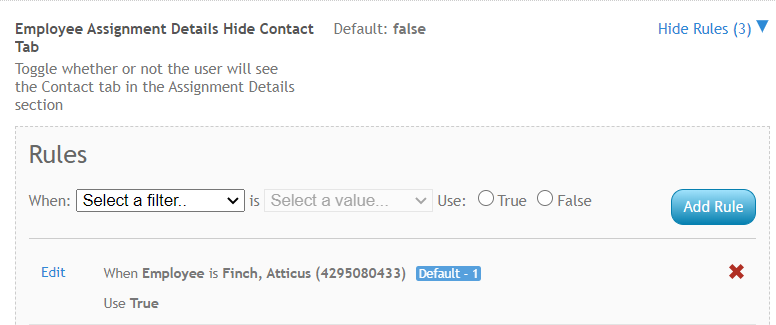
- When this config is set to false, employees will be able to see the contact tab under their assignment details.

- When this config is set to false, employees will be able to see the contact tab under their assignment details.
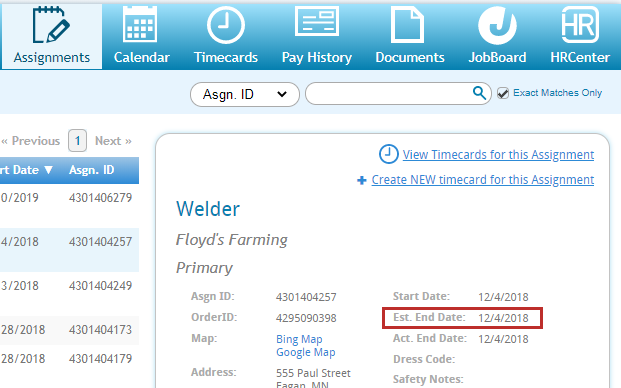
- Employee Assignment Details Show Expected End Date:
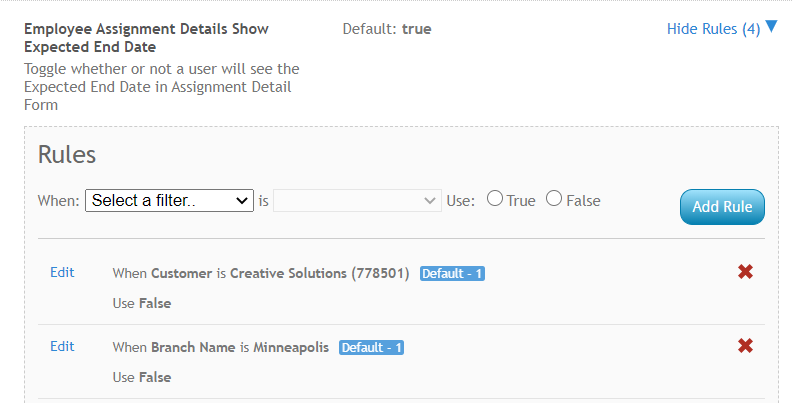
- When this config is set to true, the employee will be able to see the expected end date if one is entered for their assignment.
- When this config is set to true, the employee will be able to see the expected end date if one is entered for their assignment.
- Hide Salary Payrate
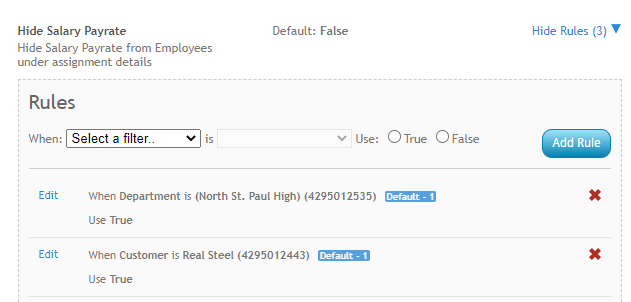
- When this config is set to true, employees will not see their pay rate listed under assignment details


Payroll Related Configs
The following configurations are related to the Pay History tab on the Employee's record.
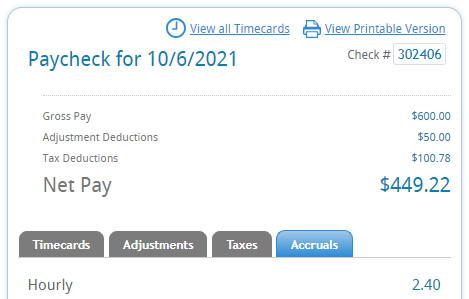
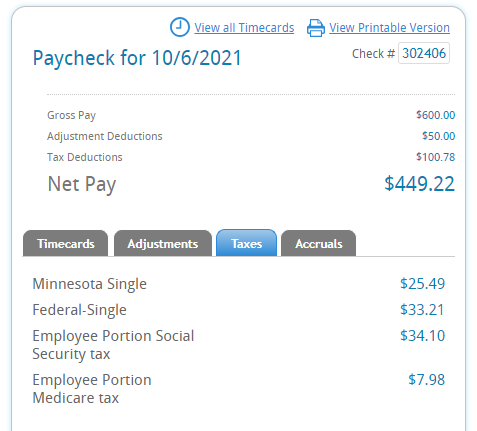
- Employee Payroll Detail Show Accruals
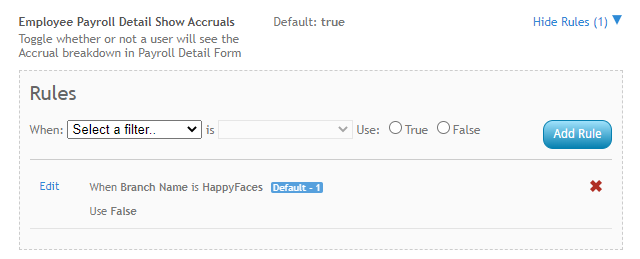
- When this config is set to true, employees will be able to see any accrual information on their paycheck stub
- When this config is set to true, employees will be able to see any accrual information on their paycheck stub
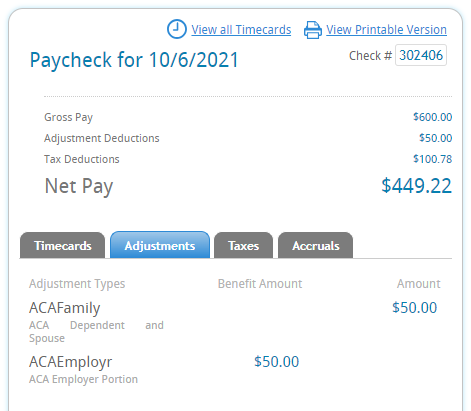
- Employee Payroll Detail Show Adjustments
- When this config is set to true, employees will be able to see any adjustments made on their paycheck under the adjustments tab
- When this config is set to true, employees will be able to see any adjustments made on their paycheck under the adjustments tab
- Employee Payroll Detail Show Tax
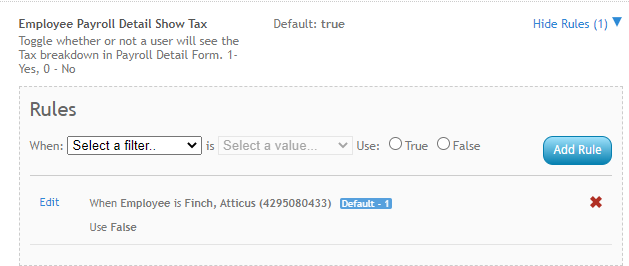
- When this config is set to true, employees will be able to see any taxes taken out of their paycheck under the taxes tab.
- When this config is set to true, employees will be able to see any taxes taken out of their paycheck under the taxes tab.
- Employee Payroll Paycheck
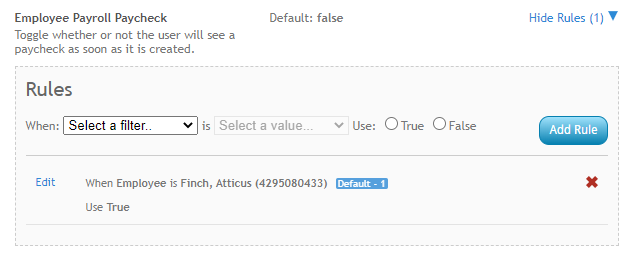
- When this config is set to true, employees will be able to see a paycheck as soon as it's created (staged).


Giving Employees Access to the Employee Portal
Now that you've set up the roles and configs the way you want them, you can give your employees access to their WebCenter Employee Portal. Keep in mind, log in information is the same as their HRCenter account.
From WebCenter Admin
If you are already in WebCenter Admin, you can create a web user account for an employee by navigating to the User tab and searching for the user in the employee section 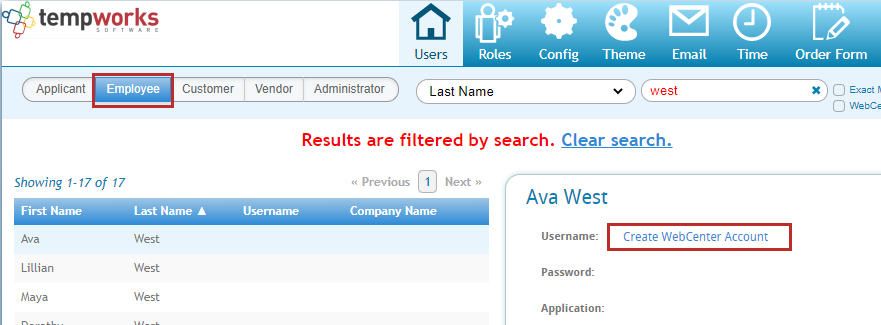
The "Create WebCenter Account" will be available if the do not already have an account set up. You will be prompted to enter username and password for the user.
If the employee already has an account, you can update their password or change their role by selecting the edit options next the to details. 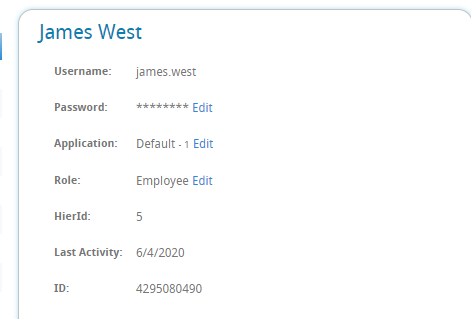
From Enterprise or Beyond
The people who have access to WebCenter Admin might not be the same as the recruiters who are onboarding new employees. Recruiters can give employees access
- Enterprise: Manage Web User Account
- Beyond: Beyond - Managing Web User Account