What are Insight Widgets?
Insight widgets provide snap shots of important information in your system. These options are located on your dashboard, the first thing every user sees when they log in. As an admin, you choose which widgets each user, or group of users, has access to. We recommend first reviewing a list of all the available default insight widgets so you have an idea of who you want to access which options.

Setting Insight Widget Access
Each user needs to be given access to the insight widgets that are applicable to them before they can add them to their dashboards or see them on shared dashboards. Never used security groups before? Check out Beyond - Managing Security Groups.
To Locate Insight Widget Security Settings:
Navigate to B Menu > System Settings > Security > Insight Widgets

*Note* We recommend reviewing or editing Security Group settings at your highest hierarchy level (ex. System or Subsystem) to give you the most control while making changes.
Using Default Security Groups
There are 2 default security groups that TempWorks provides to make it easy for you to give access to those who need it right away.
- TempWorks Default - All Insight Widgets: Great for your admins, managers, and corporate who you want to have access to all the insight widgets available
- TempWorks Default - No Insight Widgets: Great for read-only or limited access users that do not need access to any insight widgets.
Adding Users to the Default Groups:
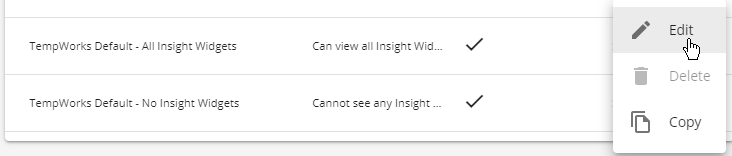
- In Security Groups > Insight Widgets section, Select the
 to the right of the group you want to add users to
 - Select Edit
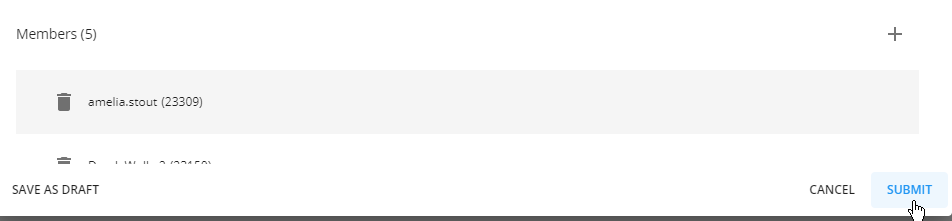
- Select the + under Members
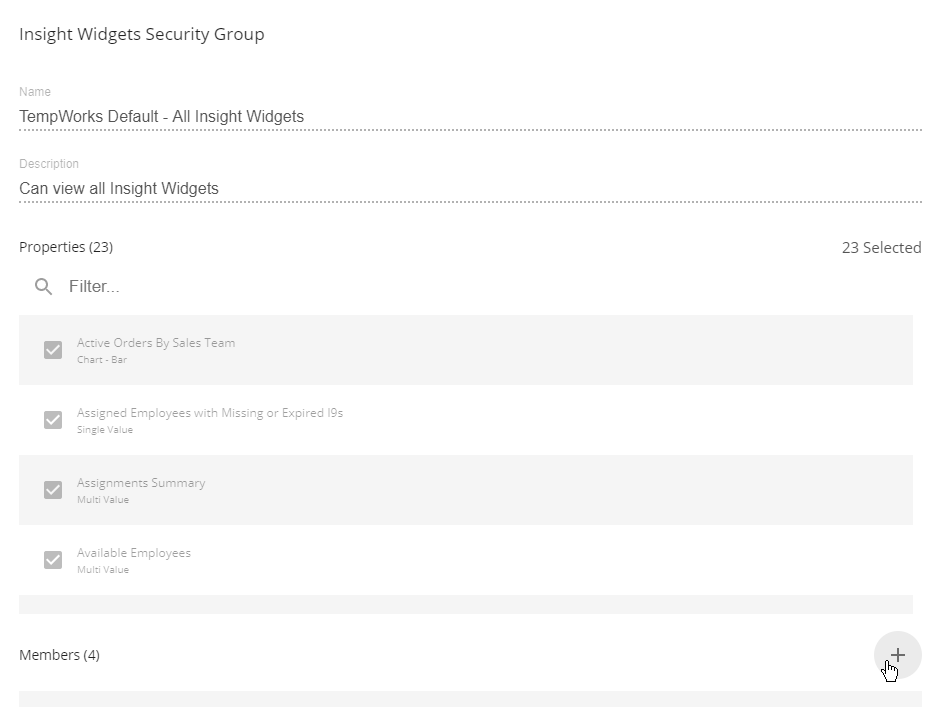
- Start typing in a name or select it from the drop down

- Select Add
- Repeat steps 3-5 until all members have been added
- Select Submit
 to the right of the group you want to add users to


*Note* If a user is not part of any Insight Widget Security Groups they will not be able to access any insight widgets.
Additional Security Options
You may have some user groups in the middle that don't need access to everything, but should have access to some of the insight widgets available.
In these cases, you can create custom Security Groups to pick and choose what widgets they have access to. First, think of your users and come up with groups (maybe by role or information they care about, etc.). We find it's best to create a plan before you start making custom security groups.
- In Security Groups > Insight Widgets section, Select the
 to the right of one of the default groups
 - Select the Copy option
- Enter the following information:
- Name the security group (something easily identifiable so you later will know which users go in this group)
- Provide a description (optional but usually handy for your own admin notes)
- Select a Hierarchy Level (should default to your current level - we recommend setting this at the highest level so it applies to everything)
- Check or uncheck the different widgets you want available
- Select the + under Members
- Start typing in a name or select it from the drop down
- Select Add
- Repeat steps 4-6 until all users have been added
- Select Submit
 to the right of one of the default groups
Sharing Dashboards with Teams
Beyond Team functionality allows you to group users for sharing searches, receiving tasks, and even sharing dashboard information.
A team dashboard can be created by anyone who has access and is in the team and configured to have the most important information for that team. For example, only showing messages in the message stream or tasks from people who belong to that team.
Giving Someone Access to Create Team Dashboards:
A user will need the permission security group option: "Can edit Team Dashboards" 
Default Permission Security Groups with this access:
The following is a list of the default groups that have this permission
- Administrator
- Back Office Manager
- Front Office Manager
- Billing Clerk
- Pay Clerk
- Sales
- Staffing Specialist