*Note* TempWorks Software is no longer selling physical TimeClocks.
While physical TimeClocks are still in the Extended Support product life cycle, it is recommended that clients utilizing physical TimeClocks begin to research and plan for future TimeClock solutions.
Please contact TempWorks Account Management to discuss new solutions including the On-Site TimeClock that utilizes our Buzz application.
What are Cost Centers?
Companies may use cost centers to help organize and track which companies or departments employees are working at. The TempWorks TimeClock allows employees to select the correct cost code when clocking in.
This document will walk users through initial setup of cost centers within WebCenter administration, and how the cost code information will display within a TimeClock.
*Note* If no cost centers are setup within WebCenter administration, cost centers will not be visible within the configurations section or appear within the TimeClock.
*Note* Staffing companies may choose the cost center option if their customer wants items tracked, but the staffing company does not want to create multiple orders and assignments for TimeClocks.
Adding Cost Centers
Cost Centers can be added directly to WebCenter in WebCenter Administration.
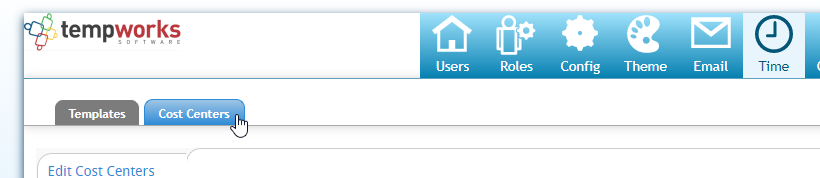
- In WebCenter Admin, navigate to the Time tab
- Select Cost Centers on the left
- Select the "Add New Cost Center" button on the right
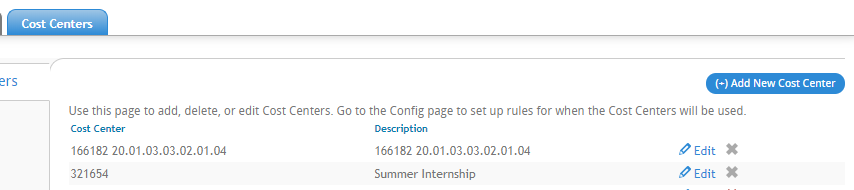
- Enter the Cost Center Number & Description
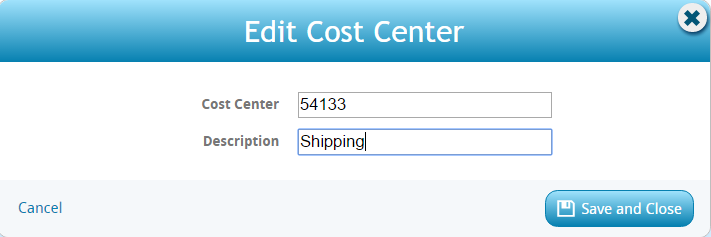
- Select Save and Close


Cost Center Rules
Once a Cost Center has been added to WebCenter, you will be able to create rules or parameters for who can select/use this cost center.
*Note* By default, the newly created cost center will be set to false, meaning no one will be able to select it when using a TimeClock.
- In WebCenter Admin, Navigate to the Config Tab
- Choose the Cost Center category
- Find the cost center you added
- Choose the show rules option on the right

- Create a new rule
- Select a Filter: Choose Department or Customer (will this cost center be specific for one department or the full customer)

- Select the department/customer from the second drop down - remember that you can start typing the name to limit results
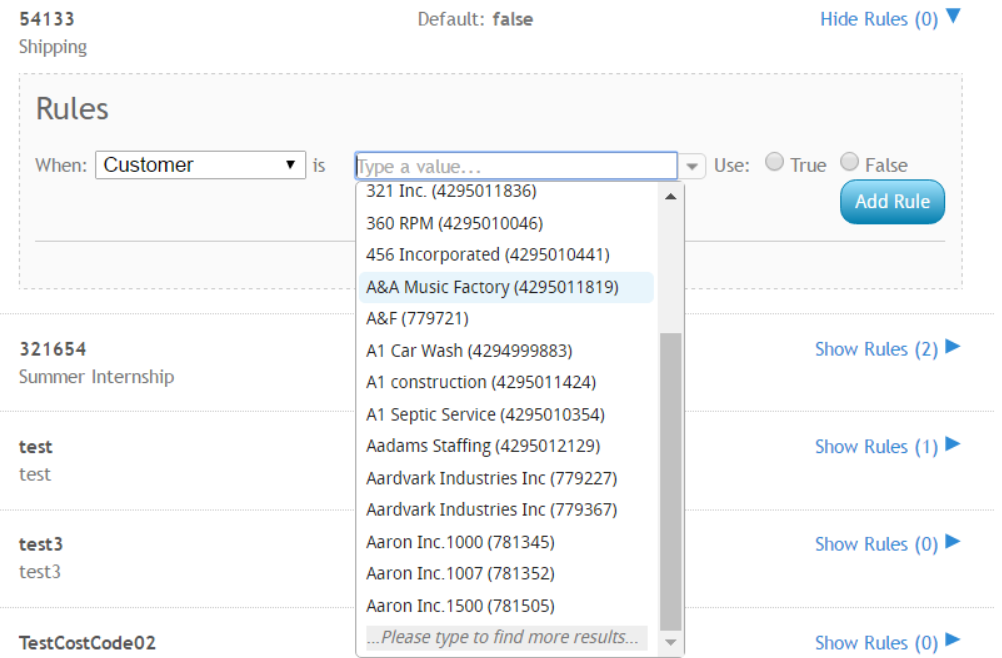
- Select True - True in this case means that the cost center will show
- Select a Filter: Choose Department or Customer (will this cost center be specific for one department or the full customer)
- Select Add Rule button on the right
- Repeat steps 5 & 6 if you are adding multiple departments or customers that can use this cost center


Viewing Cost Centers in the TempWorks TimeClock
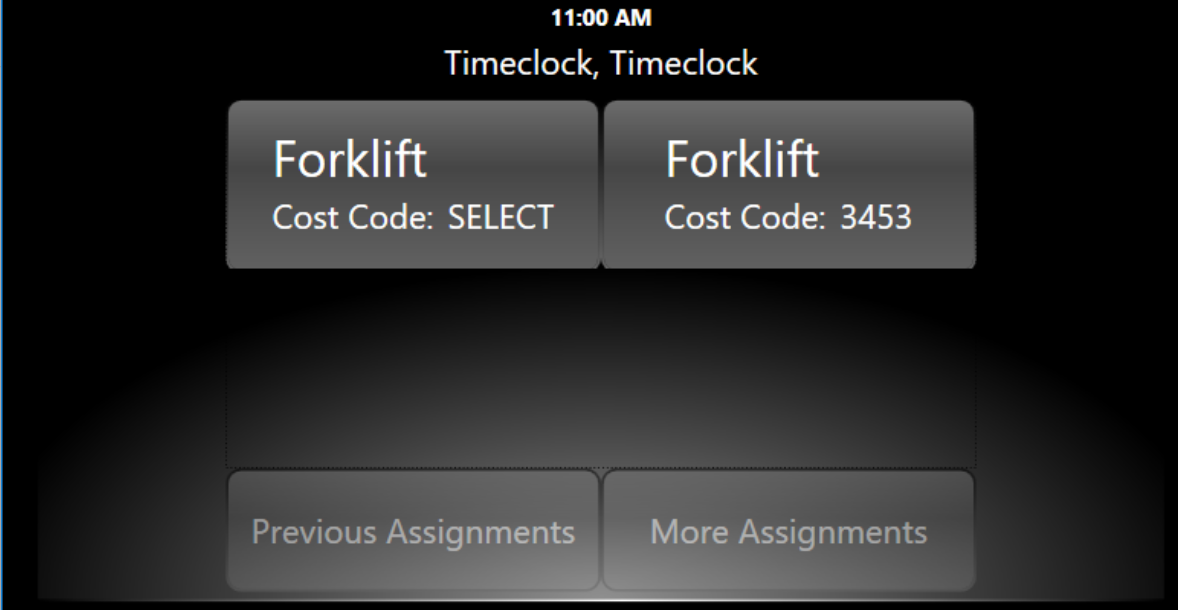
After cost centers have been added within WebCenter administration and initial TimeClock setup has occurred, employees will now be able to select the correct cost center they wish to clock in for:

TimeClocks with two cost center options to choose from:
Contacts logged into WebCenter will also be able to review the cost centers employees have clocked into:
