Storing Documents in Beyond
You can save and store documents electronically in Beyond. This can help make documents easier to find and stop you from having to buy another filing cabinet. Documents can be saved under the documents tab, found on most records.
Documents can be stored on the following records:
| Record Types | Example Documents |
|---|---|
| Employee | Save a copy of a resume, signed documents (ex. I9), saved correspondence, worker comp claims, etc. |
| Prospect | Save a copy of a business card, contact information, or quote provided to them |
| Customer | Save a copy of a contract, safety evaluation, and other forms provided to this customer |
| Contact | Save a business card or other documentation provided to or sent by this contact |
| Order | Save the request from the customer for this job order and any specific documentation that is related to this order |
| Assignment | Save any specific documentation that is related to this assignment record. |
Document types that are accepted include:
- DOC
- DOCX
- XLS
- XLSX
- CSV
- TXT
- RTF
- JPEG
- PNG
- GIF
- ODT
- HTML
This Article Includes:
- Saving Documents to a Record
- Searching for Documents
- Creating a URL Link to a Document
- Documents & Security
Saving Documents to a Record
Whether you scanned in a document, or saved an electronic document on your computer, you can save it to a record in Beyond.
*Note* If you are having employee's fill out onboarding documents such as an I-9 or W-4 online via HRCenter, their filled out forms will automatically save on their file in Beyond.
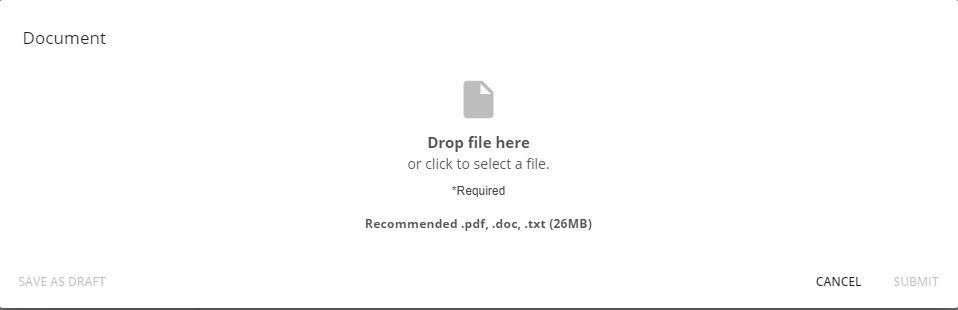
The maximum document size we allow for uploading is 26MB.
To Upload a Document
- Navigate to the record you want to add a document to
- Select the + in the upper right
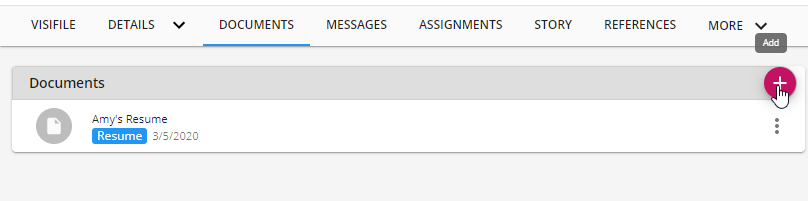
- Drag and drop the file or tap to select a file from your device
- Enter the following information:
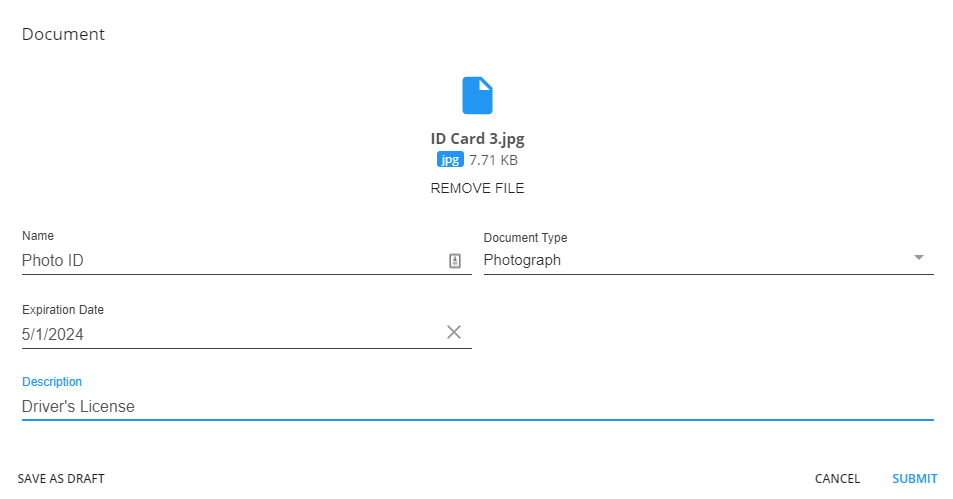
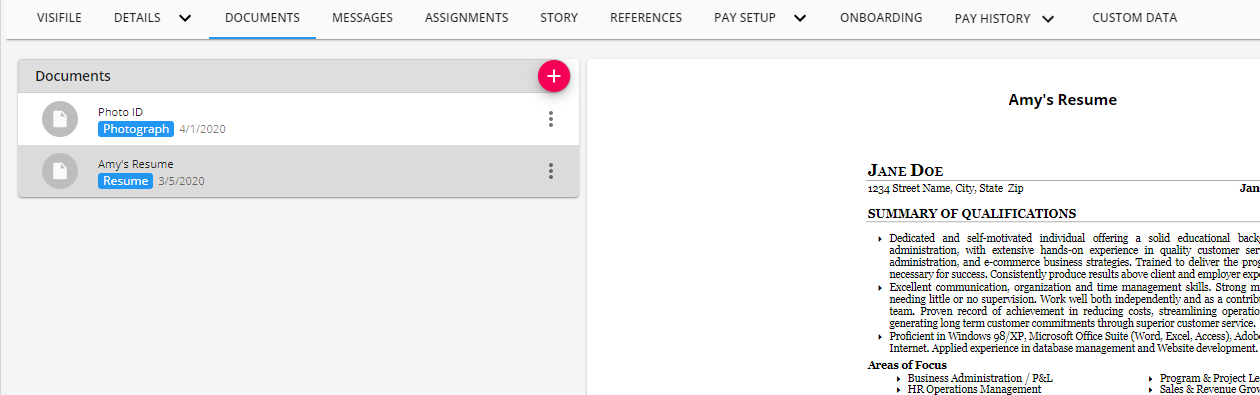
- Name: Name of the document (ex. Amy's Resume)
- Document Type: Select what type of document this from the drop down. This is used for searching and security purposes
- Optionally, enter a expiration date if this file expires
- Optionally, enter a description or note about this particular document
- Tap Submit to save the document


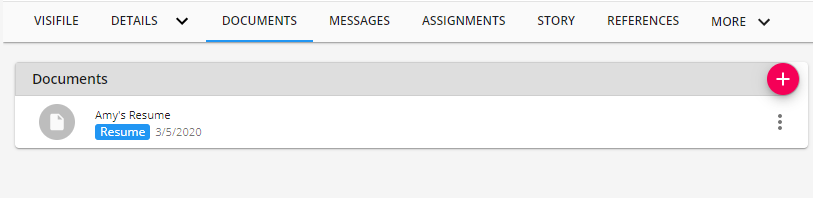
The document will now appear in the document section on the record to view, edit, download and preview. To preview the document, as seen to the right below, select from the list and the preview will generate for .txt, .pdf and .doc document files.
To Edit, Download, or Delete a Document:
- Navigate to the document you wish to edit, download, or remove
- Select the
 icon to the right
 - Choose from the following options:

- Choose Edit to change the information (document type, description, etc. of the document
- Choose Download to download a copy of the file
- Choose Delete to remove the document - You may not have this option depending on your security
 icon to the right
Searching for Documents
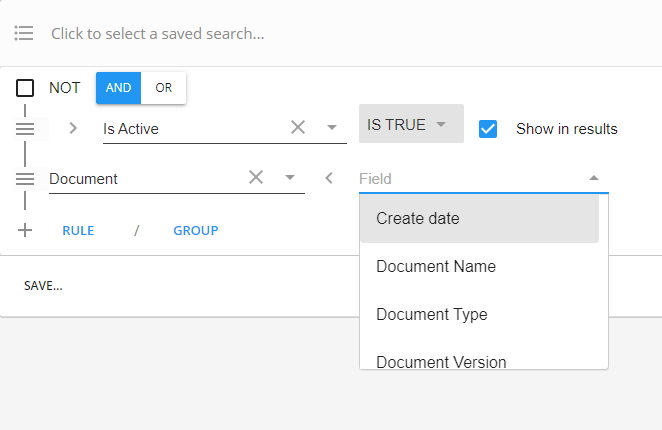
You can search for employees by which documents they have under advanced search. To learn more about searching check out Beyond - Advanced Searching.
When you create a new rule you can click the arrow on the left to open up the category and choose Document category. This will show you all Document related fields you can search by:
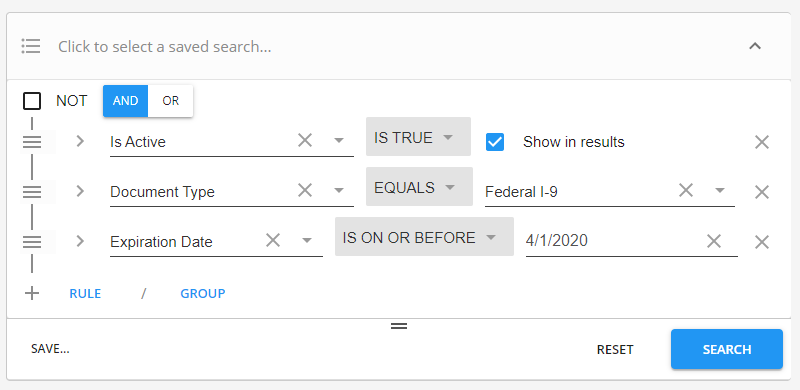
Searching for records that have a specific document type:
ex. Document type equals Federal I-9

Searching for Expired Documents:
Keep document type rule and add another rule for expiration date is on or before [Today's date or date next week, etc.]
Searching for Missing Documents:
Use the group option and create a rule in the group where Document Type equals Federal I-9. Then check the box in the top left of the group to indicate NOT - meaning that the search will exclude people who have an I-9 on file which leaves only the employees who are missing the document.

Creating a URL Link to a Document
In order to save time searching for specific documents, you have the ability to create a direct link to a document within Beyond. This link can then be given to another user to they are able to log into Beyond and be immediately directed to said document.
To Create a URL Link to a Document:
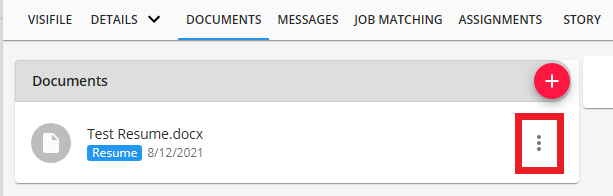
- Navigate to the record (Employee, Prospect, Customer, Contact, Order) that contains the document you want to create the URL for.
- Select the 'Documents' tab
- Find the document you want to create the URL for and select the
 icon to see the options related to the document:
- Select the option to 'Copy URL':
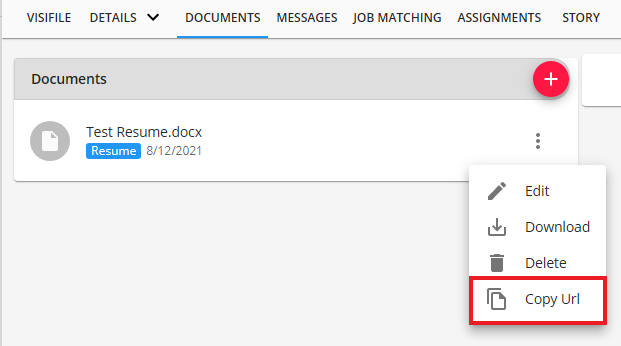
- Once selected, you will see the following confirmation message at the bottom of the page:

- With the URL for the document copied, this can now be provided to another user for access.
 icon to see the options related to the document:


*Note* When the user navigates to the URL to the document, if they are not already logged into Beyond, they will be prompted to log in.
*Note* Document permissions apply for the URL as well. Therefore, if the URL is provided to a user who does not have access to the viewing of documents in Beyond, they will not be able to see the document that the URL is referencing.
Documents & Security
*Note* You must be set as an admin with the correct permissions in order to review or change security for users. Talk with your manager if you think you need different permissions.
Some documents that you save may contain sensitive or secure information that not every one in your system should have access to. As an Administrator in Beyond, you can set up document security to limit who can upload, view, or remove documents based on document type.
New to security in Beyond? Check out Beyond - Managing Security Groups.
To Manage Document Security in Beyond:
- Make sure you are at your highest Hierarchy level (system or subsystem, etc.)
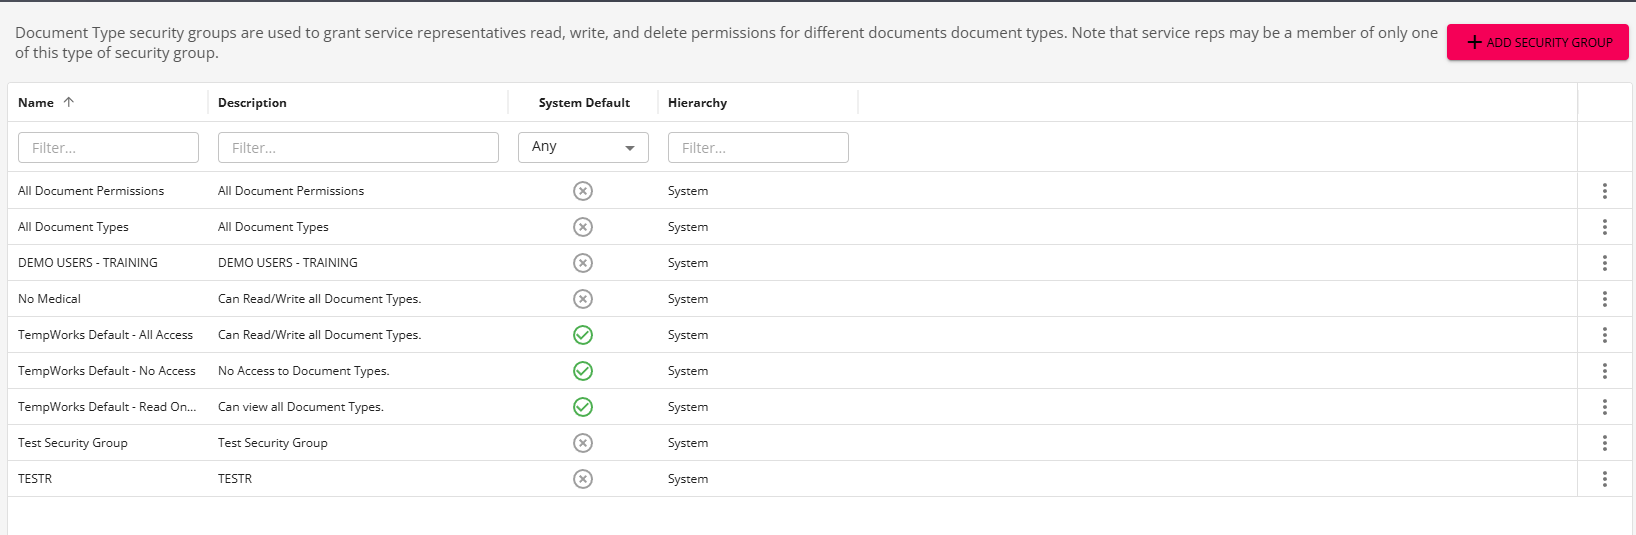
- Navigate to B Menu > System Settings > Security > Document Types:
- Select the
 to the right of the security group you want to add members to or edit
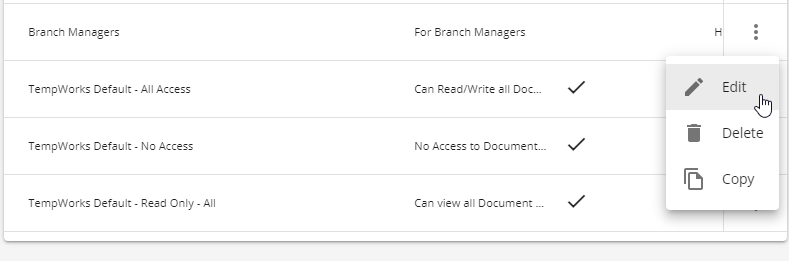
- Select Edit

 to the right of the security group you want to add members to or edit

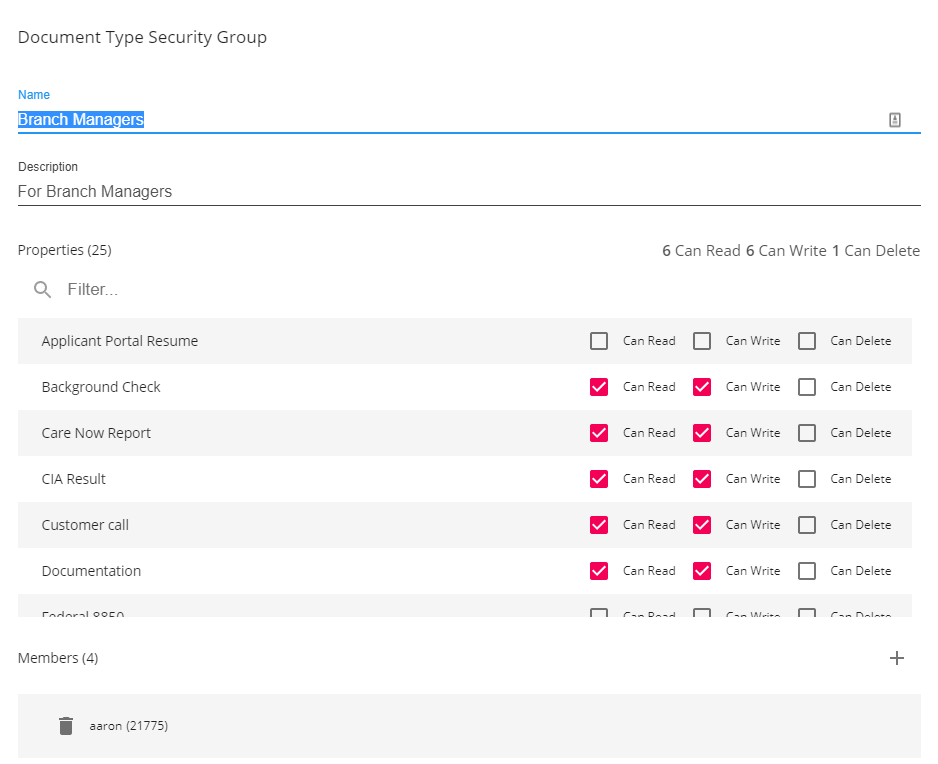
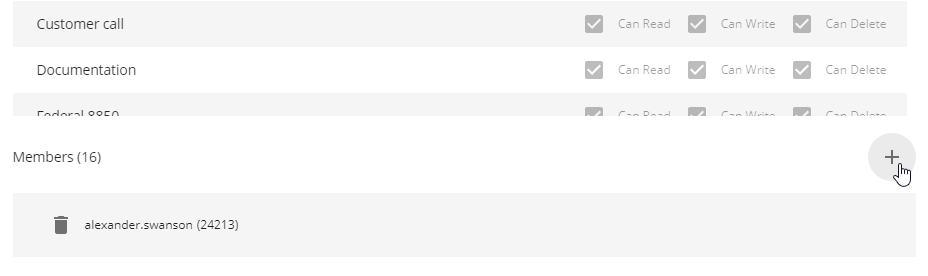
- Read = View documents
- Write = Upload documents
- Delete = Remove documents
Default Groups Available:
TempWorks has a few default groups you can utilize. Default group permissions can not be edited but users can be added or removed from these groups. 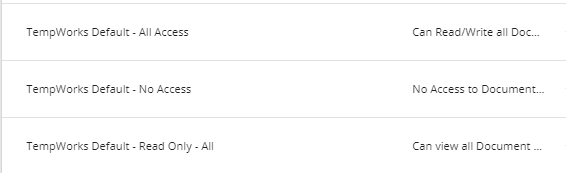
- All Access - Can Read/Write/Delete all document types
- No Access - Can NOT Read/Write/Delete any document types
- Read Only - Can only read (view) documents
We recommend considering your team members and customizing a few groups based on what they should have access to. Review your employees and separate them into groups and then create or utilize the default groups to match the security accordingly.
For Example:
- Admins/HR who should have all access to all documents
- Managers that have access to most and can delete documents
- Recruiters/Sales that can upload most document types but can not view docs with sensitive information and can not delete
Check out Beyond - Managing Security Groups for more information on creating your own groups.
Add Users To Groups
Whether you made your own or you've decided to use the TempWorks defaults, you will need to add each of your users to the correct document type security group to ensure they have the correct permissions.
- Find the group you want to add users to
- Select the
 to the right of the group
 - Select the + under the members section (towards the bottom) to add a new user
- Type in a user's name or select from the drop down
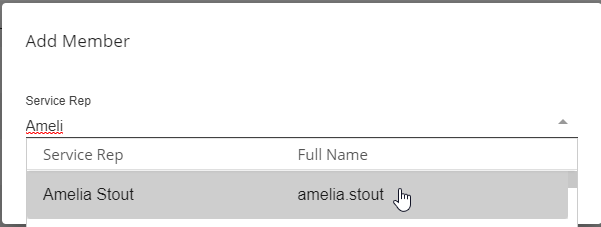
- Select ADD

- Repeat 3 through 5 until all users are added
- Once all users are added, tap on Submit in the lower right to save your changes
 to the right of the group

