Enterprise offers an option to import time from 3rd party time clocks or spreadsheets that you may receive from your customers. This is a great option to help save time and cut down data entry mistakes in payroll.
*Note* Since each timecard feed is unique, so is each import. Our TempWorks Support Team will need to help you set up this import initially before you can utilize this option.
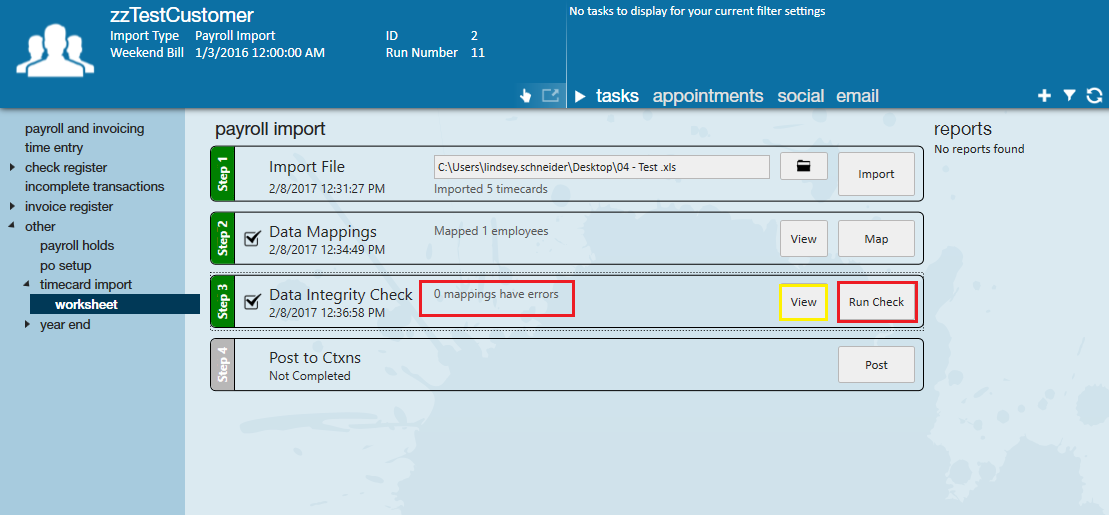
The timecard import process is broken into four parts:
- Import File - upload file to Enterprise
- Map Data - match timecards to employees in the system
- Run Data Integrity Check - Review any errors or missing information
- Post Transactions - post the time information to the time entry area in Pay/Bill in order to complete payroll/billing
Locating the Timecard Import
To locate the timecard import:
Navigate to Pay/ Bill and expand Other in the upper navigation tree

Once in "Other" select Timecard Import.
Import a New File
To import a new file select the + icon

After selecting the + icon, a secondary window will populate. Within this window select the import "Feed Type" you wish to use, if there are multiple they will also appear here.

Once the feed type is selected, select the customer that you will be importing time for. All of your customers that will be using imports will be linked to the import they're using and will appear in the drop down:

The Weekend Bill is always going to be the open Weekend Bill from Pay/Bill:

For the file name, you'll need to use the folder icon to navigate to where the saved file with hours are stored from the customer you're importing.
Once you've located the file, select the save icon:

Once you hit save, you will be brought to the worksheet page beneath Timecard import. Under step one you will have the opportunity to select a new document if you selected the wrong one, or you can hit the import button to start the process.
*Note* In the event you do not see the desired Customer record within the "Parent Customer" drop-down, navigate to the Customer Record > Invoice Setup > Misc > Select the "Timecard Feed" checkbox > Select "Save" to save the changes.

At any time should you realize there was a typo on the document you can update the document and re-import it to fix any mapping issues resulting from the typo.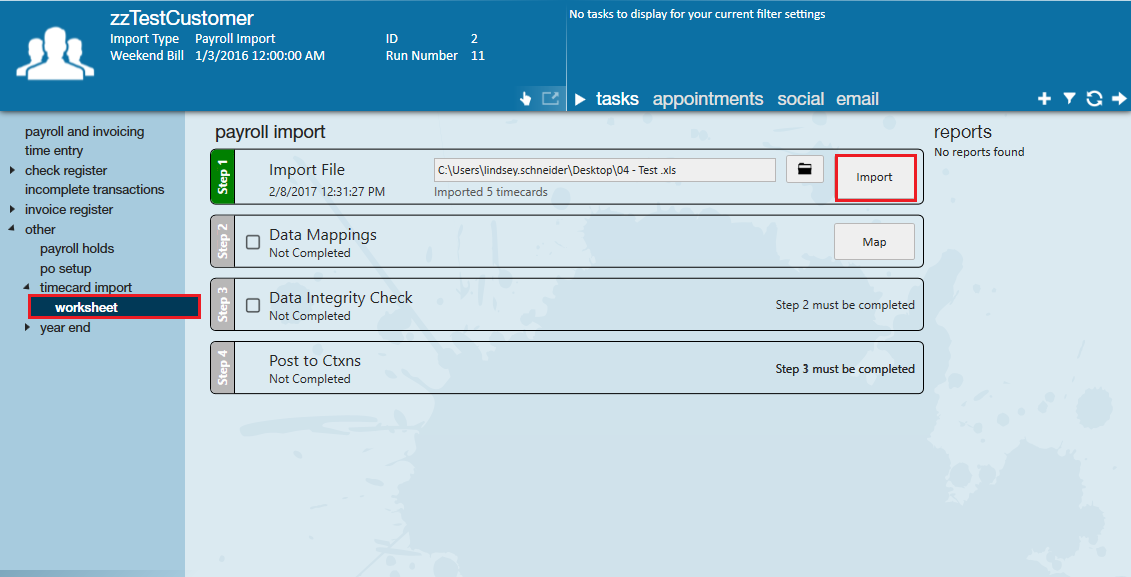
Mapping Imports
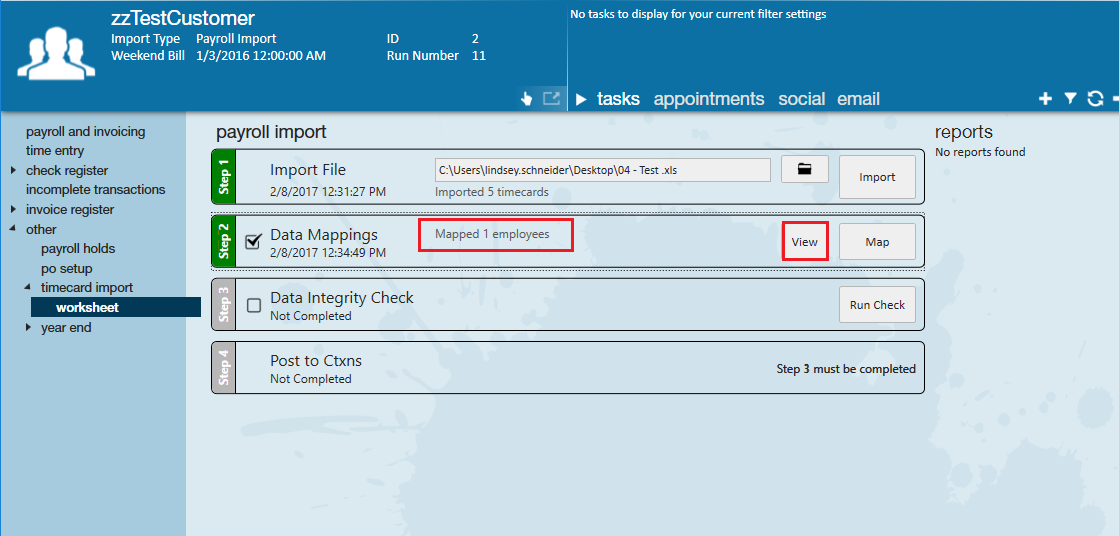
Once you've hit import, the Map button will become available.
Map
Select the map button first to have the system attempt to map the correct employees, customers, paycodes, etc. to the time entered on the import. The system will let you know how many employees it mapped for you but it's always a good idea to double check the mapping before continuing.
View
Once you've clicked the map button, click the view button to review any remaining unmapped items from the import and double check the transactions that were mapped successfully.
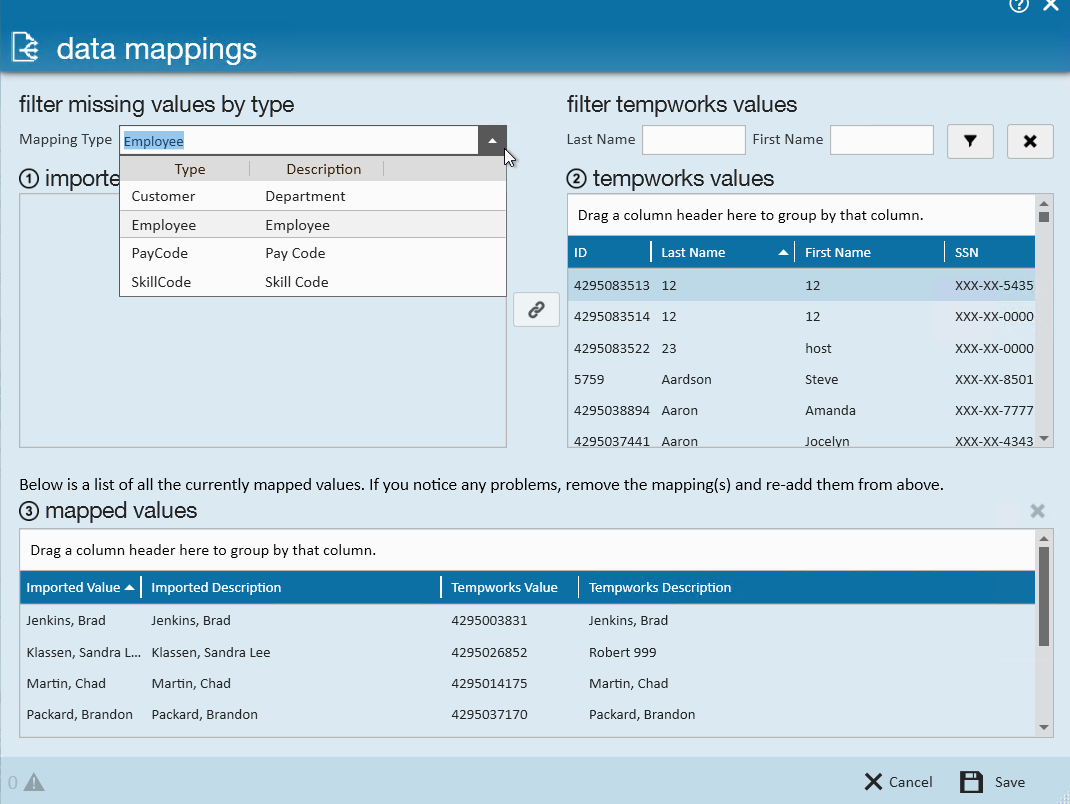
Time listed under 1. Imported values still needs to be mapped to a TempWorks value.
For example, maybe the employee's name was spelled slightly differently in the import than in the system, you would look at the line item under imported and then find the matching employee under the TempWorks values using the the filter options above. Then you would click the link button once you have the correct import and TempWorks value selected.
Successfully mapped values will appear in the "Mapped Values" section. If one was added incorrectly, you can select it and choose the X in the upper right to remove the mapping.
Once all mapping looks correct, select the save button to continue.
Data Integrity Check
Once you’ve double checked the mapping and manually mapped any exceptions, select the Run Check button to begin the integrity check on the data in the file.
If any errors occur (for instance if an employee in the file couldn’t be mapped or an employee has two open assignments at the current customer and the import doesn’t know which to choose), they will occur now and you’ll be told how many there are.
To view these errors and correct them you can use the view button.
Under the view area is also where you can see any warnings brought up in the integrity check. Warnings are not hard stops and won’t prevent you from posting the data to time entry. On the right hand side you can also see how the data was mapped. The assignment, WEB, employee name and SSN, and Reg/OT/Total hours from the imported document are listed.

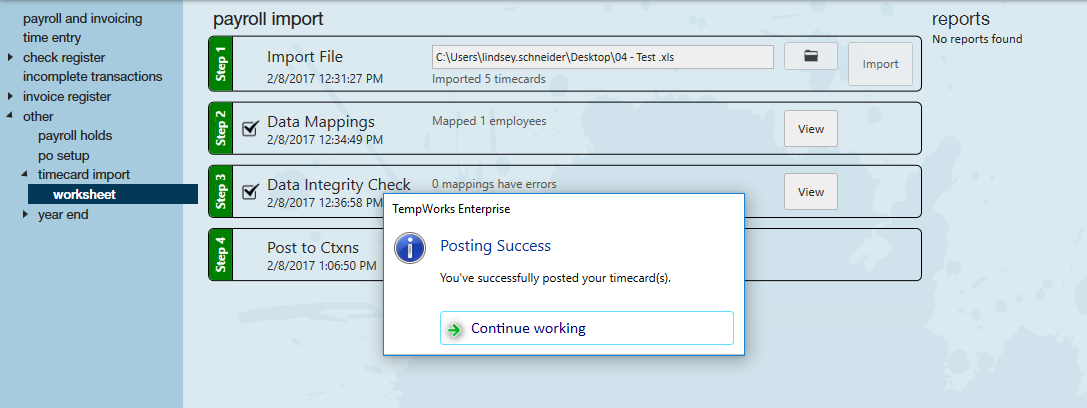
Posting Import
Once everything has passed the integrity check and all errors have been resolved or excluded select post, allowing the transactions to be created in time entry.
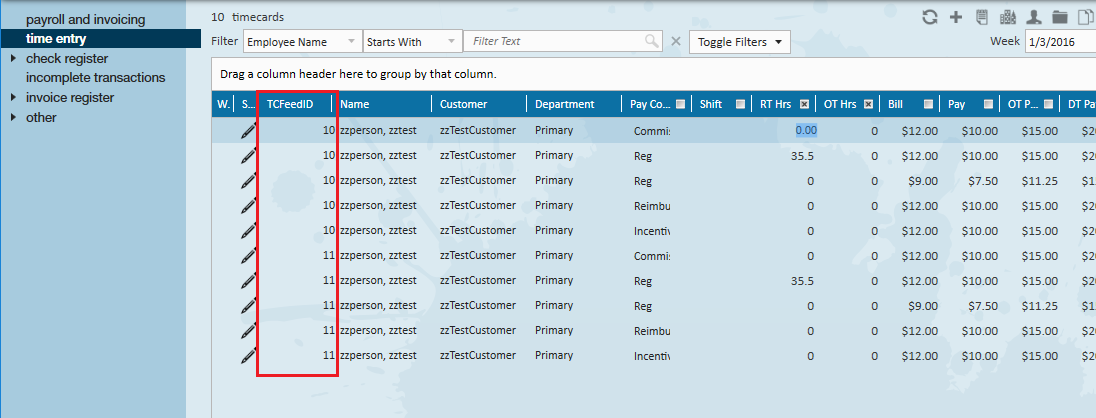
If you do a lot of time entry through the timecard import you can add the TCFeedID column to the time entry screen to sort on your imports. That column will relate back to the ID field from the worksheet page and the ID column on the Timecard Import page.
Timecards that come over from a timecard import are also automatically thrown into a proofing session the name of whoever posted them. You can review the timecards in time entry or go straight to proofing.