What is a Timecard Template?
Timecard Templates allow you to customize what field options are available for timecards filled out by employees. These are meant to be approved by customer supervisors. Would you like a total number of hours or hours broken up into each day? Would you like punch in and out times? Do they need to be able to add their own adjustments or leave a note? You have a lot of options to choose from.
How Do I Utilize Timecard Templates?
Timecard templates can be set up for specific customers or employees. They can also be used as a default for all. Brand new to timecards or configurations and don't know where to start? Utilize the following steps:
Timecard Templates are located in WebCenter Admin under the time tab.
To set up a timecard template to be used in WebCenter:
Picking the Right Template
When you start creating a timecard template there are several available options.
To Find Timecard Templates:
- Log into WebCenter Admin
- Select the Time Tab

Here will be a list of timecard templates already created. If you have multiple entities or instances of WebCenter, you may have options on the side to select from.
To Add a New Configured Timecard Template:
- Select the
 button in the upper right
 - Enter a Description that describes the purpose of the timecard template. Make it something that will be easy to find again
- Select the Template Type (see templates available below for more information)
- Select options (see customize your timecards below)
- Save & Close
 button in the upper right
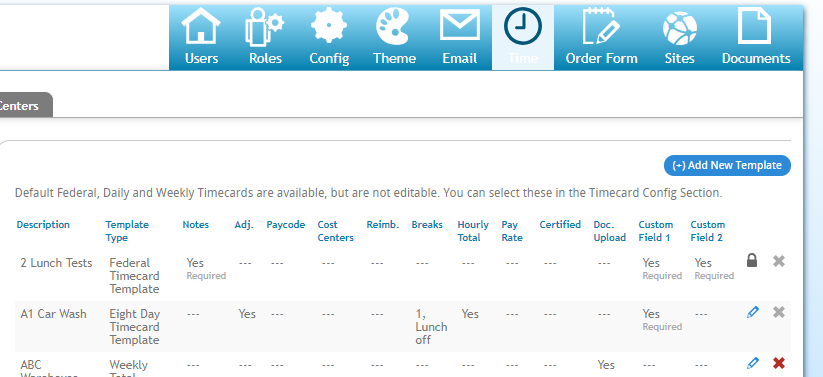
Timecard Templates Available
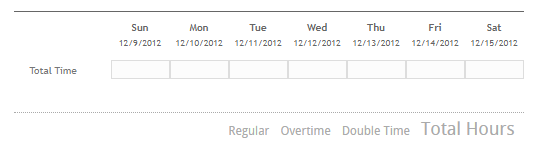
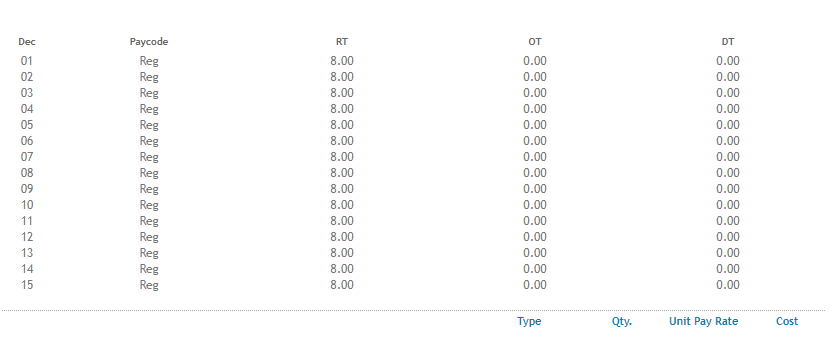
Daily Total
Allows employees to enter total hours for each day of the week.
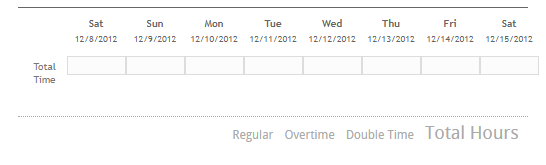
Eight Day
Similar to Daily Total above but for 8 day week.
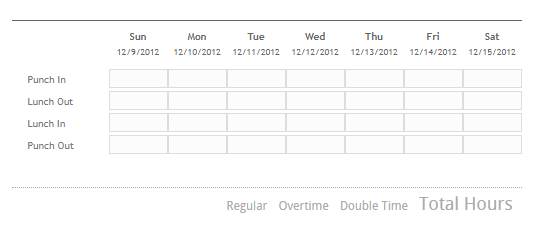
Federal
Employees enter time punched in and out. There are configuration options to allow for lunch and break punches.
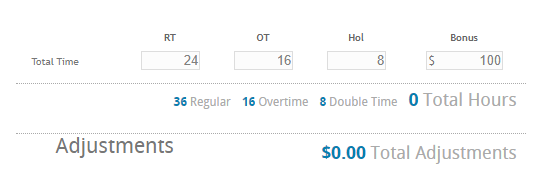
Professional
Customized template that can show RT, OT, DT, Hol, Bonus, etc. options.
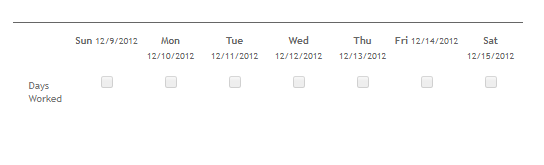
Salary
Has employees check boxes for days worked in a week instead of entering time.
Semi-Monthly
Allows employees to enter hours for 1/2 a month.
Unit
Employees only enter number of units for pay.

Weekly Total
Enter RT, OT, and DT total hours for the current week.

Customize Timecards to Fit Your Needs
Each timecard template has different customizable options for you to select from.
After you have named and selected the timecard template you wish to use, you will have additional options to choose from.
In the example below, we chose the Professional Timecard Template. Underneath the template type, different fields and options will appear for you to customize what the employee or customer contact fills out.

Set up Rules to Apply Timecards
Once you set up a timecard template the way you like it, you need to set up a rule for when this timecard should be used. Is this timecard template only for a particular customer or a whole branch? Are these only employees who have a specific job title or work for a specific supervisor?
Rules can be set up for a specific contact, employee, job title, department, customer, branch, or entity.
To set up a rule:
- In WebCenter Admin, navigate to Configs tab and select 'Timecards' on the left
- Click on
 next to Timecard Template
 - Fill out the following information:

- Select a filter: choose an option from the drop down (ex. Customer or Employee)
- Select the criteria in the next drop down by selecting it or using the drop down to choose from options ( ex. Buy N Large or Lorelai Woodbury)
- Select a Value: select the timecard template you created earlier
- Select the Add Rule button to complete.
 next to Timecard Template

To Edit or Remove a Rule:
Locate the rule under Timecards > Timecard Template.
- To delete, select the X next to the rule you wish to remove
- To edit, select the edit option to the left of the rule.