Why Merge Invoices?
If your customer is asking for one invoice when normally they ask for invoices split by worksite, etc. or when you have a few invoices because of corrections made, you can merge these invoices to have all the transactions on a single invoice to send the customer.
This article covers:
Before You Merge:
Know that the main purpose of the functionality associated with merging invoices is so that your customer can see the total owed balance of multiple invoices in one invoice, as you intended.
It is important to note that this merge process does not erase or delete any original invoice details.
For example, let's say I have 2 invoices that I want to combine:
| Invoice | Parent Invoice (#1234) | Additional Invoice (#4321) |
| Balance | $500 | $200 |
When we merge these 2 invoices together:
| Invoice | NEW MERGED Parent Invoice (#1234) |
| Balance | $700 |
Post merge, if you searched the invoice register you would still find Invoice #4321 with $200 amount.
The historical data remains the same; we are simply updating the way the parent invoice will display for the customer.
Following this logic, when the Customer sends a payment for invoice #1234, you will need to mark $500 payment on invoice #1234 and $200 on invoice #4321.
To Merge Invoices
- Locate the first invoice you would like to merge
- This invoice is known as the parent invoice.
- Navigate to the details page of the invoice:
- Click
 and select merge invoice:
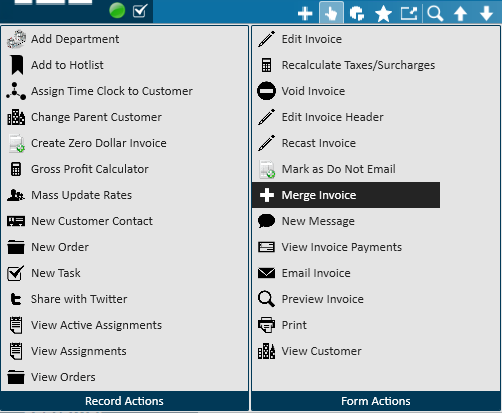
- This will open a new window to start the merging process.
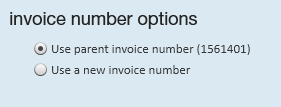
- Select your new invoice number.
- You can choose to keep the parent invoice or create a new invoice number:
- Select 'Next' to continue.
- You can choose to keep the parent invoice or create a new invoice number:
- Locate the additional invoice(s) you wish to merge into the parent invoice.
- Utilize the search options to locate the invoice(s).
- Select the checkbox next to each invoice you would like to merge with the parent invoice.
- Select 'Next' to continue:

- Select 'View' or 'Print.'
- 'View merged invoice details' will take you to the newly merged invoice.
- 'Print preview' will open a file for you to print the newly merged invoice in order to send to your customer.
- Otherwise, select 'Finish' to close the window and complete the merge.

 and select merge invoice:


Post-Merge Things to Know:
Reviewing Invoice Details
On the parent invoice, you will see all transactions under the invoice details. To see merging information, click on extended invoice details and select merged invoices to see merged invoice information: 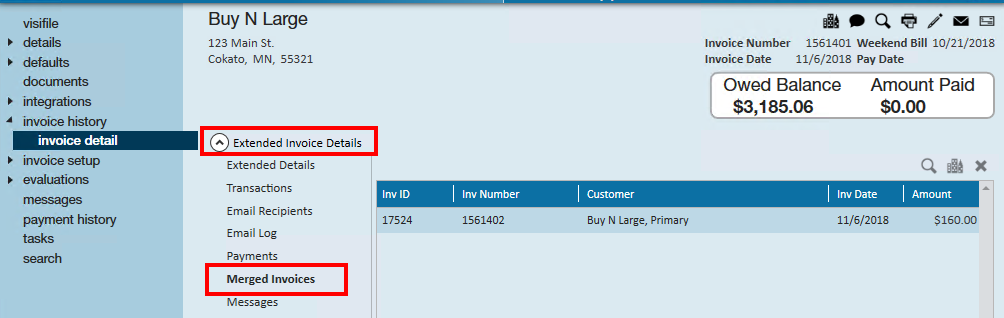
Utilize the 'X' icon in the corner of this screen to unmerge an invoice that was merged by accident.
Viewing a Merged Invoice
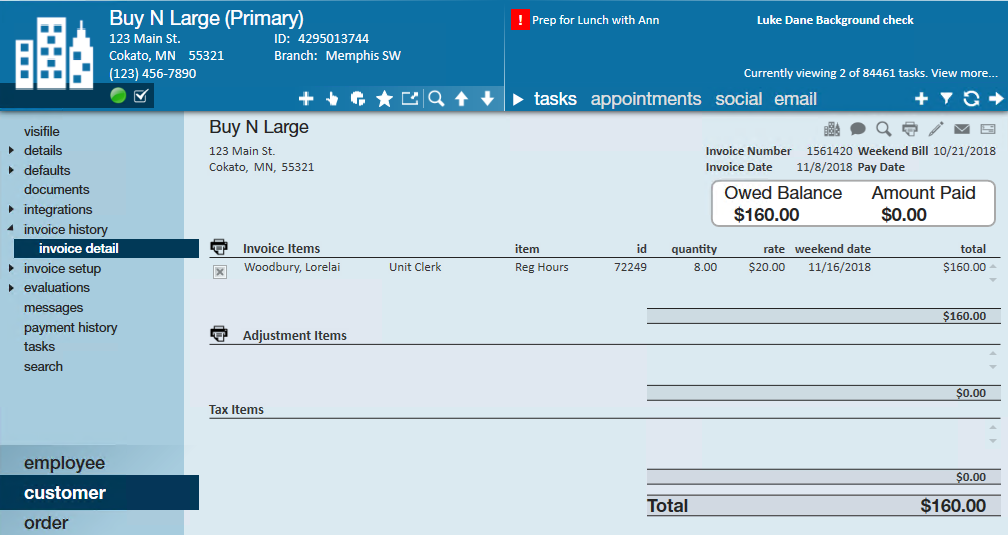
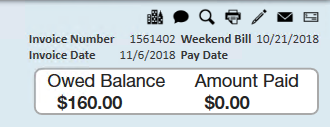
The invoices that were merged to the parent are still in your system.
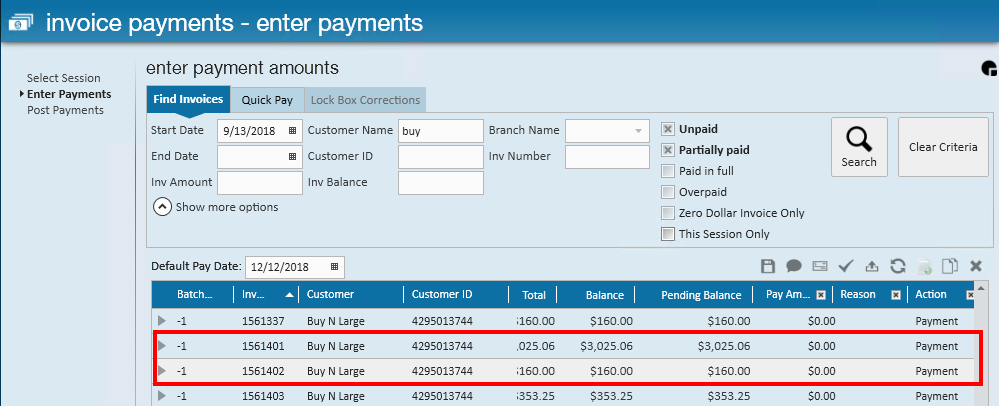
In our example, I merged invoice #1561402 with the parent invoice #1561401. When we navigate to invoice #1561402, you will see we can still preview, print, email, edit, and even void the invoice.
When paying the merged invoice balance, you will still apply the payments to each invoice's original number.
Following our example, when in the invoice payments wizard, both invoices display with individual balances and must also be paid individually.