What is TextUs?
TextUs and TempWorks have partnered to give you the ability to text your employees or contacts en masse without ever leaving Beyond. Our TextUs integration allows you to text candidates and employers directly from TempWorks and automatically archive conversations to the relevant employee or contact record.
Looking to learn more about TextUs? Check out https://textus.com/
*Note* This integration requires additional setup and an existing account with TextUs. For more information, please contact your TempWorks Account Manager.
Setting Up the TextUs Integration
Once you have your account with TextUs and have worked with your TempWorks Account Manager to set up this integration, use the following steps to get you and your users ready for TextUs.
This article includes:
Giving Users Access to TextUs
Each user that you want to be able to text in the system will need the "Can Text" Permission in order to set up their credentials and text in Beyond. This permission is typically set up by an Admin.
- Navigate to B Menu > System Settings > Security > Permissions
- Either:
- Add users to any group that already has this permission OR
- Create a new group with the Can Text permission checked and add users to it (remember that users can only be part of one permissions group and will inherit all the permissions that you check.
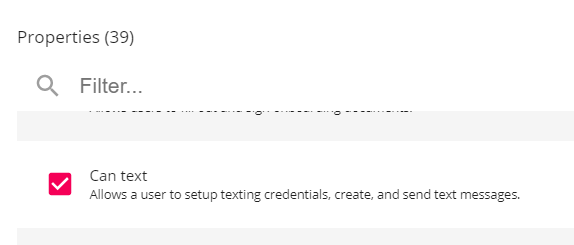
Looking for more information? Check out Beyond - Managing Security Groups
*Note* Users will also need to be apart of a message action security type to see the messages on employee records.
Entering TextUs Credentials
Once you have the correct permissions, each user will need to enter their TextUs credentials in user settings. Admins can manage TextUs accounts in TextUs administration. Having each user have their own credentials will allow the system to track who is sending the text messages and allow them to continue the conversation in TextUs.
Each user will need to have their own unique TextUs username in order to accurately track in Beyond which user sent which message.
There will be two types of credentials that will need to be entered for TextUs:
Entering System Credentials (Admins Only)
Each system will need one set of credentials set at system level before users can set up their own accounts. Entering credentials here will register the necessary webhooks to link TextUs and TempWorks ensuring the messages are being correctly logged.
- Navigate to B Menu > System Settings > External Services > Texting:
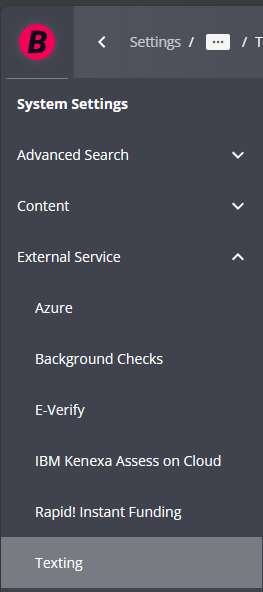
- Select the "+" in the upper right
- Select "TextUs" as the provider
- Enter the system credentials:
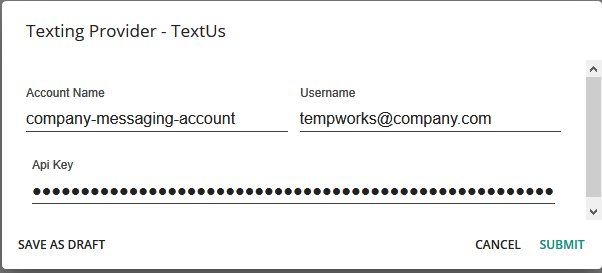
- Account Name: Found in your TextUs URL (aka Account Slug)
- Username: Typically email address
- API Key that you can generate in TextUs
- Select "Submit"
- The credentials will be saved for you to view
- Select the "Test" option to make sure your credentials are up to date with TextUs.
*Note* Once an API Key has been saved within Beyond, it will not be able to be viewed/retrieved.
If your API Key has been forgotten, you will need to either replace it within the setup card or you will need to remove the credentials and re-add them.
Entering User Credentials (For All Texting Users)
- Navigate to B Menu > User Settings > Texting:
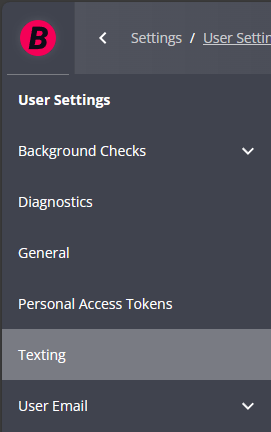
- Select the "+" in the upper right
- Select "TextUs" as the provider
- Enter your "TextUs" login credentials
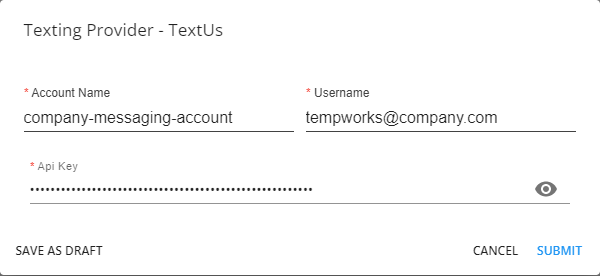
- This includes your TextUs Username and an API Key that you can generate in TextUs.
- For the "Account Name", this is also referred to as the “slug". Each user can pull the "slug" from their URL when they are logged into TextUs. The "slug" is the portion between ".com/" and "/inbox" within the URL. That "slug" will need to be entered into the “Account Name” field in Beyond.

- For the "Account Name", this is also referred to as the “slug". Each user can pull the "slug" from their URL when they are logged into TextUs. The "slug" is the portion between ".com/" and "/inbox" within the URL. That "slug" will need to be entered into the “Account Name” field in Beyond.
- This includes your TextUs Username and an API Key that you can generate in TextUs.
- Select "Submit"
- The credentials will be saved for you to view
- Select the Test option to make sure your credentials are up to date with TextUs.
*Note* Once an API Key has been saved within Beyond, it will not be able to be viewed/retrieved.
If your API Key has been forgotten, you will need to either replace it within the setup card or you will need to remove the credentials and re-add them.


