Overview
The ability to add and manage employee tax information has been added to Beyond.
Employee taxes can be managed via Beyond > Employee > Pay Setup > Taxes:

Setting Up Permissions
For users utilizing standard Security Groups, as long as the user has access to the Employee Taxes page, they can add/update the employee tax information.
*Note* If you utilize custom Security Groups with Advanced Permissions, you will need to add the Access to the "Taxes" page within Employee > Pay Setup > Taxes along with all associated fields and forms within the dropdowns to the Security Groups that require the functionality:
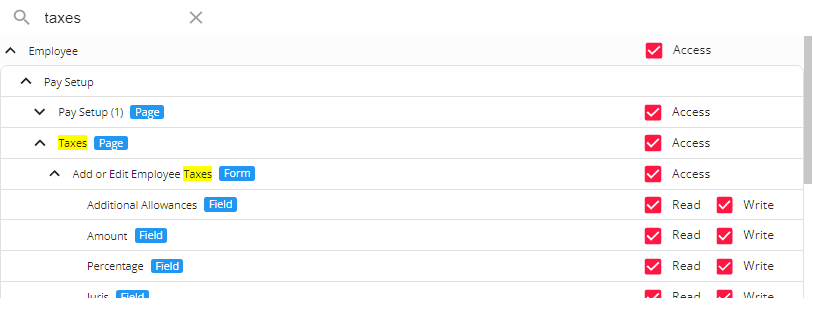
For more information on created custom Security Groups with Advanced Permissions, please see the following article titled "Beyond - Creating Security Groups with Advanced Permissions".
Managing Employee Taxes
Navigate to Employee > Pay Setup > Taxes to see an overview of the employee's current tax setup:

Once within the "Taxes" page of the employee record, you will be able to see all of the associated tax jurisdictions for that employee.
Adding a Tax Jurisdiction to an Employee
To add a tax jurisdiction to the employee, select the "+ Add Tax" button to the top right which will open the "Tax Setup" window:
*Note* Always consult a tax professional if you are unsure about a tax setup.
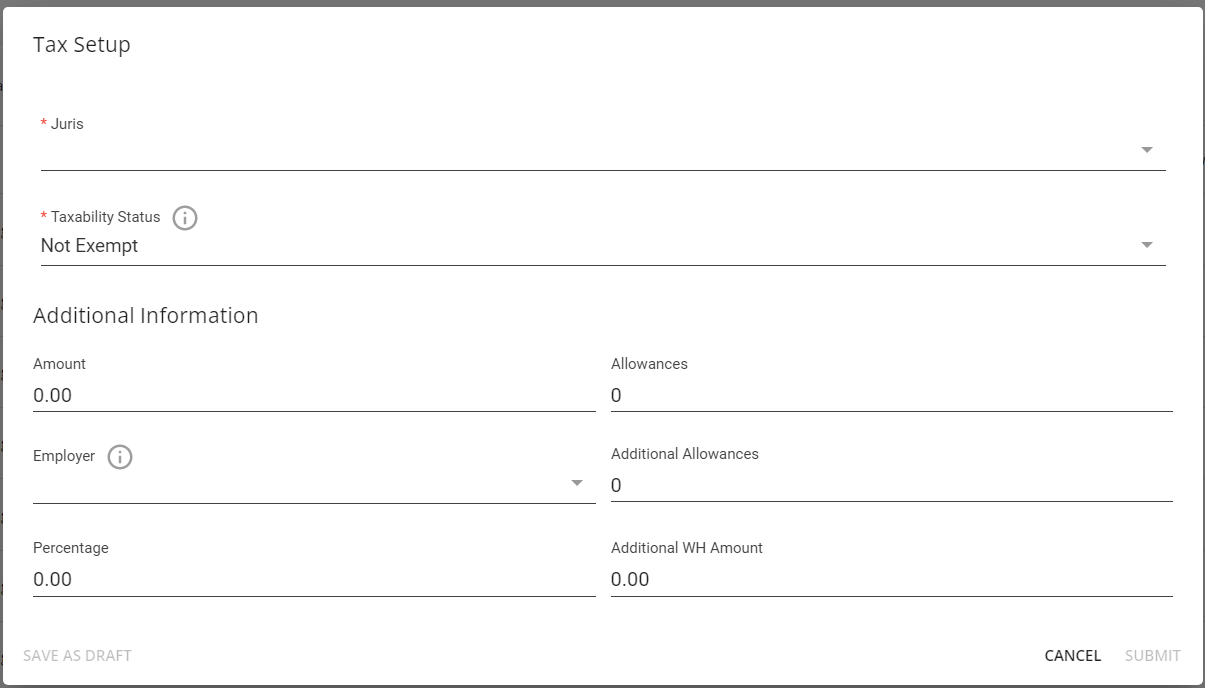
Within the "Tax Setup" window, complete the two required fields:
- Select the appropriate tax jurisdiction from the "Juris" dropdown.
- Select the appropriate status ("Not Exempt", "Exempt from Withholding", or "Exempt from Taxability") from the "Taxability Status" dropdown.
*Note* The following are explanations on the three options within the "Taxability Status" dropdown:
- Not Exempt: The employee incurs taxable wages and has this tax withheld from paychecks. Wages are printed on the W2.
- When this option is selected, you have the ability to add information within the "Allowances", "Additional Allowances", "Percentage", and "Additional WH Amount" fields.
- Exempt from Withholding: The employee incurs taxable wages, but this tax will not be withheld from paychecks. Wages are printed on the W2.
- When this option is selected, "Allowances" gets auto populated with "99" and you will NOT have the ability to add/edit information within the "Amount", "Allowances", "Additional Allowances", "Percentage", and "Additional WH Amount" fields.
- Exempt from Taxability: The employee does not incur any taxable wages for this tax, and no wages for this tax are printed on the W2. Please consult with a tax professional.
- When this option is selected, you will NOT have the ability to add/edit information within the "Amount", "Allowances", "Additional Allowances", "Percentage", and "Additional WH Amount" fields.
Once the appropriate tax jurisdiction and taxability status have been selected, enter any needed information within the additional fields (if able).
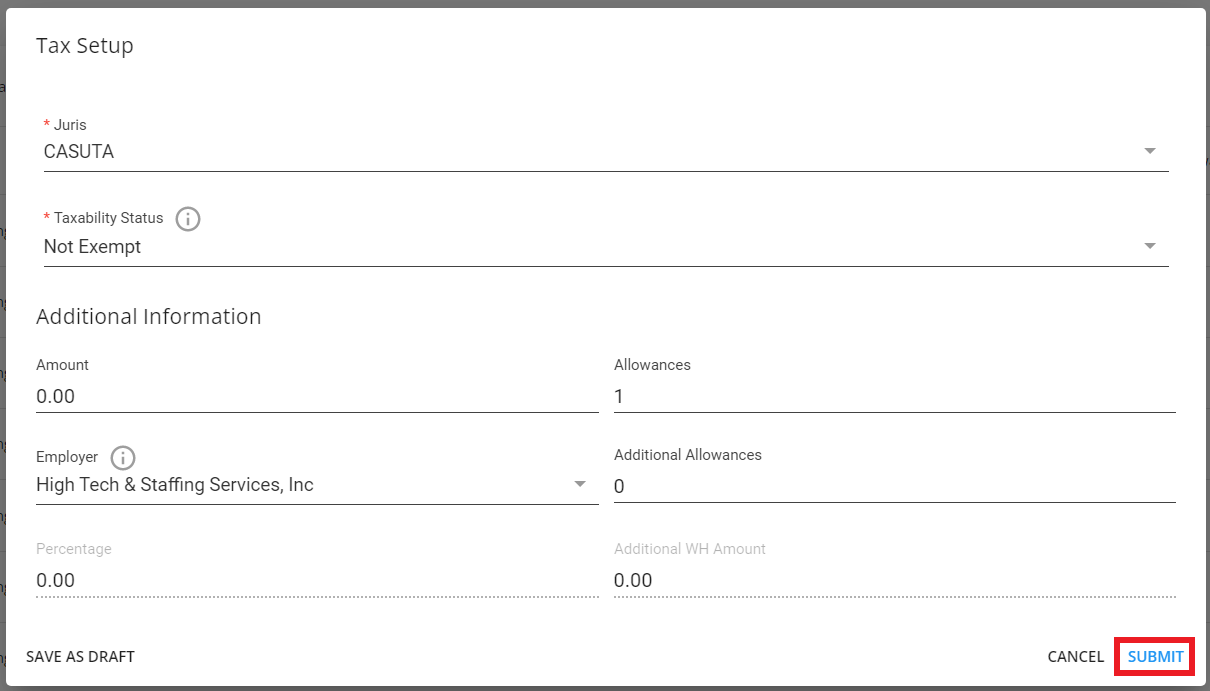
Once all of the necessary information has been added, select "Submit" to save the changes:
*Note* For employees living/working in the state of Colorado, to comply with the optional Colorado Employee Withholding Certificate, the field of "Alternative Standard Deduction" has been added when adding/editing a Colorado tax jurisdiction:
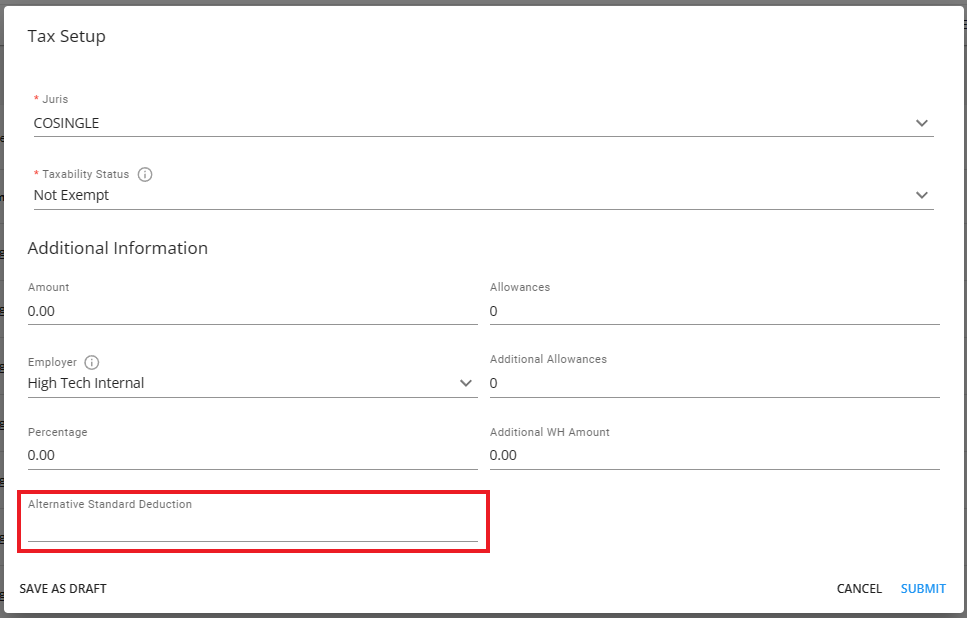
This field is mapped directly to Line 2 within the Colorado Employee Withholding Certificate. Therefore, in the event an employee completes the Colorado Employee Withholding Certificate within their HRCenter workflow, the value entered within Line 2 will post-fill into the Alternative Standard Deduction field.
For more information on the Colorado Employee Withholding Certificate, please click here.
Once submitted, the tax will be shown within the "Taxes" page of the employee record.
Editing a Tax Jurisdiction on an Employee
To edit an existing tax jurisdiction on the employee, select the  icon the right of the specific jurisdiction and select "Edit" which will open the "Edit Tax Setup" window:
*Note* Tax records cannot be deleted.

Within the "Edit Tax Setup" window, you will have the same options as outlined within the "Adding a Tax Jurisdiction to an Employee" section above:
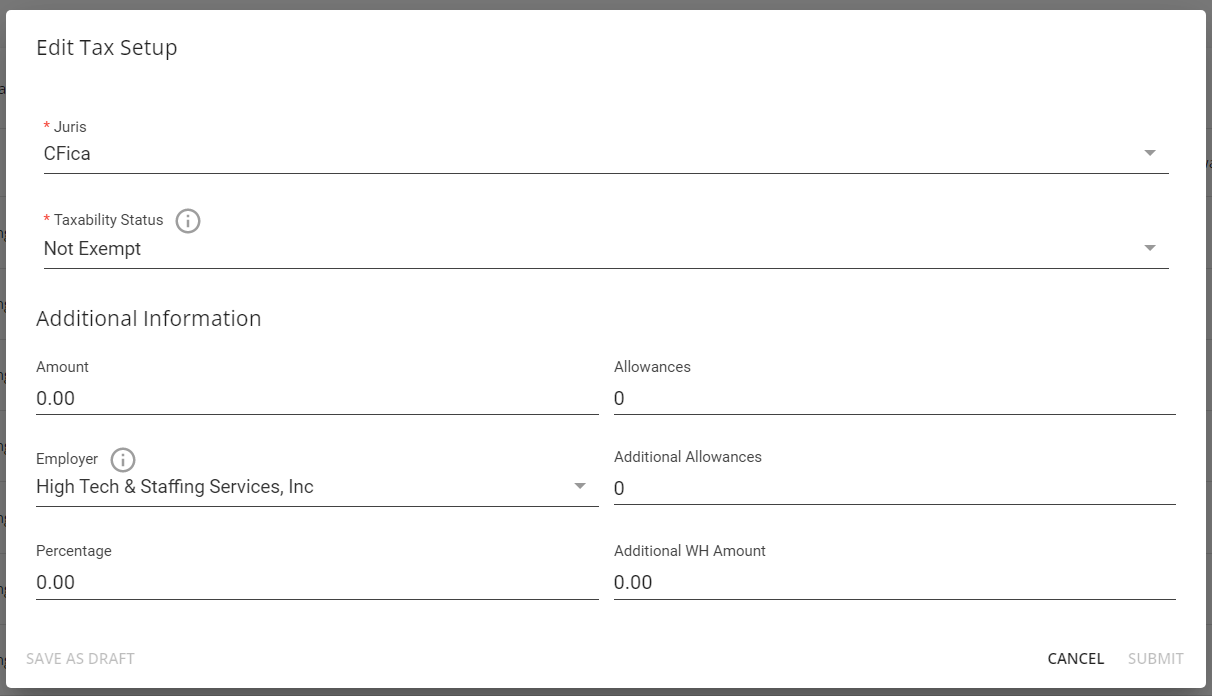
Once all of the necessary information has been updated, select "Submit" to save the changes.
Related Articles
- None