What are Security Groups?
Security groups are a new way in handling permissions and reports for our next generation products that make APIv3 calls, such as Beyond. This process is distinct and different from security roles and are not interchangeable. With security roles, users select individual roles that make up the permissions of the user. With security groups, users are only ever assigned one group per group type.
*Note* Security groups is for Beyond only. If you are looking to set up security from Beyond Administration, check out Beyond - Managing Security Groups.
Locating Security Groups
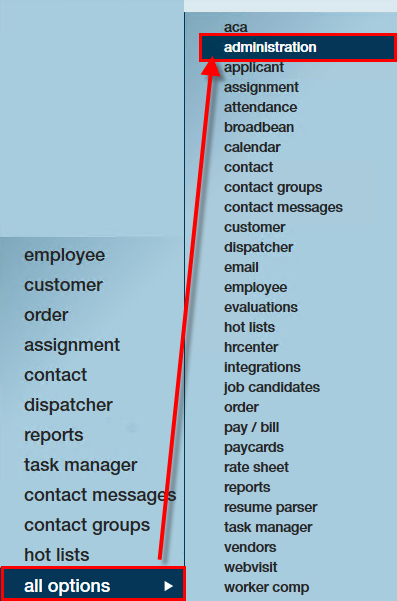
Security groups can be created by navigating to the 'administration' section in enterprise under 'all options':
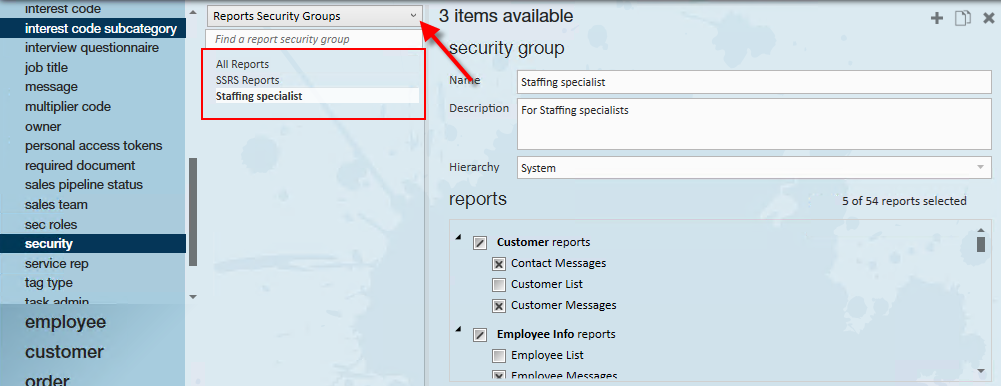
Navigate from here to the 'security' form. This is where security groups can be created, edited, and deleted. Each service rep can be allocated only one security group per security group types. Currently, five groups exist:
- Permission Security Groups- a group that determines functionality a user can access.
- Reports Security Groups- A group that determines the reports a user has access to.
- Custom Data Security Groups- A group that determines the custom data fields a user can view/ and or edit.
- Customer Status Security Groups- A group that governs the customer statuses that an individual service rep can change.
- Document Type Security Groups - A group that governs the document types an individual service rep can view/print/or download.
Select from the drop-down to preview any of the available security group types. After selecting a group type, the available groups will be displayed:
Creating Security Groups
Creating a new security group allows you to decide what that group is capable of. For example, if making a new report group, you may determine which reports are available to members of that group.
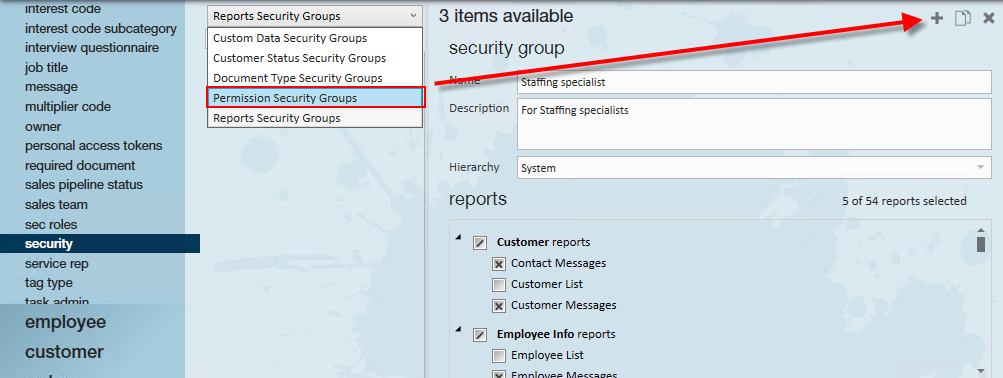
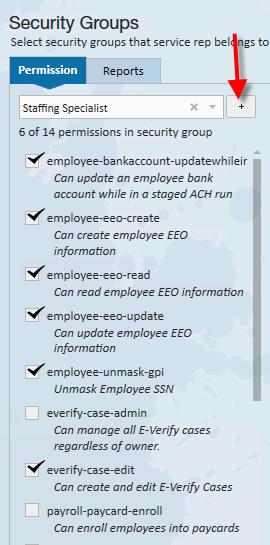
When creating a security group, be sure to determine which group type you are creating. Service reps can belong to one of each type. When you have decided which group to create, select the '+' icon:
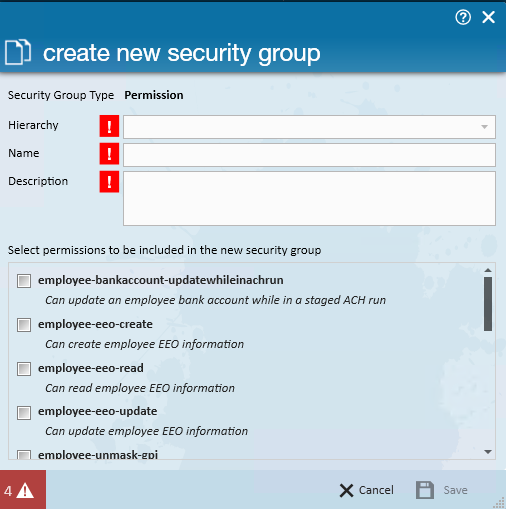
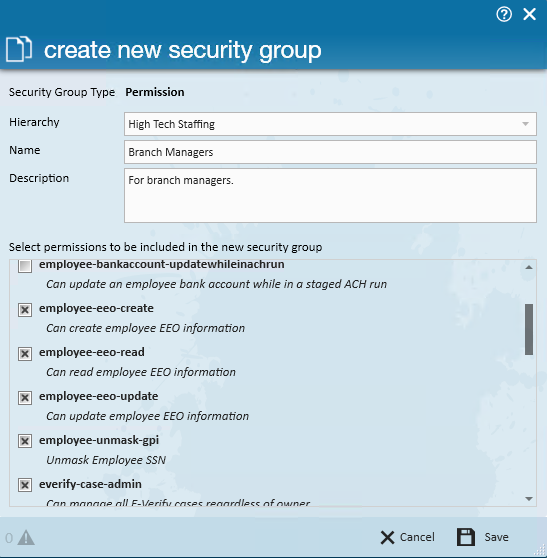
When creating a new security group, consider paralleling this with the real groups who work for your company. Creating a group can provide clarity in what the user can do and what they can see. Once a new security group is created, a wizard opens. Enter the following information:
- Security Group Type- The current type of group you are creating. This is dependent upon which group you were in when the '+' icon was selected.
- Hierarchy- The hierarchy level/location this security role will be available at.
- Name- The title for your security group.
- Description- An explanation of this group that is a concise summary of the role.
Depending on the group created, you will be prompted to select the criteria that defines that group. For permissions, that means selecting permissions. For custom data, that may mean what fields are visible/editable to that rep.
Permission Security Groups
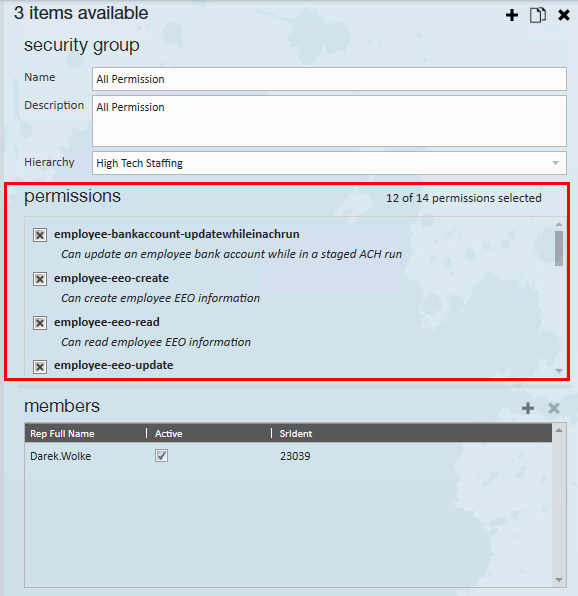
This group type governs specific functionality that can be set for a group. Select the permissions you wish to grant members of this group:
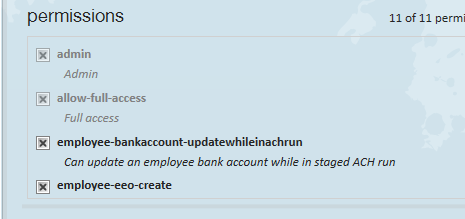
If you don't have access to the 'admin' permission, some permissions may be grayed out:
*Note* If you are unsure of what a specific permission does, hover your cursor over the permission for a quick tool tip on the functionality: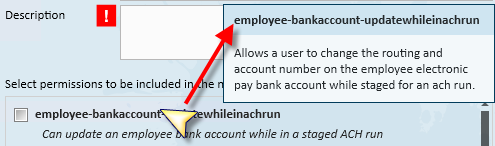
Reports Security Groups
This group type determines which reports the members of its group can run. Select the reports you wish to grant members of this group:
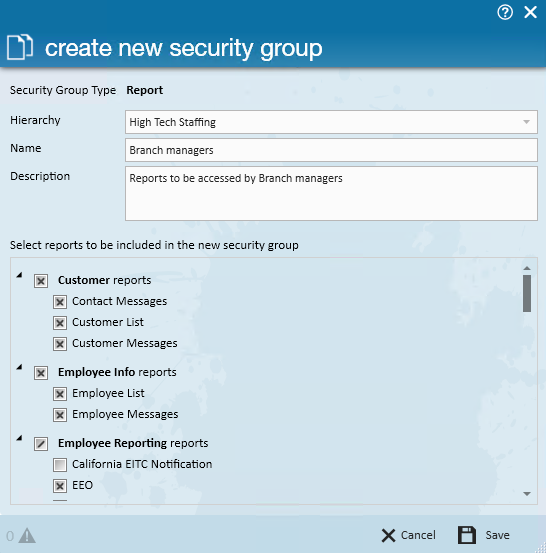
*Note* When selecting reports for a reports security group, you may choose to select some or all of the reports in a given grouping. If only some reports are chosen, that group will have a '/' in the checkbox representing that group. If all the reports in a group are selected, this will be denoted by an 'x':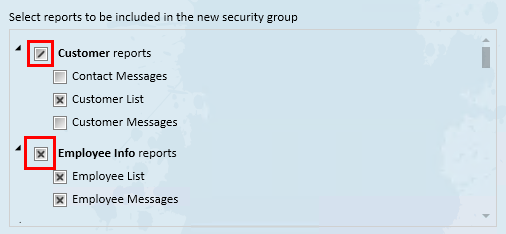
*Note* When selecting reports for a reports security group, you may choose to select some or all of the reports in a given grouping. If only some reports are chosen, that group will have a '/' in the checkbox representing that group. If all the reports in a group are selected, this will be denoted by an 'x':
Custom Data Property Security Groups
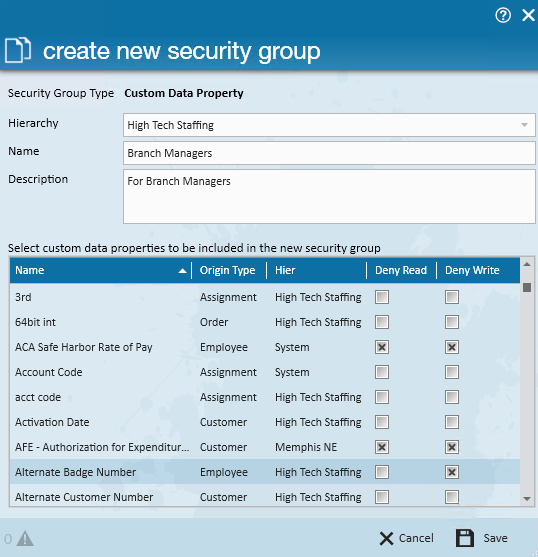
This group type determines what custom data fields can be viewed/created by a service rep. Select whether members of this group can write and/or read this custom data field. For more information on custom data fields: How to Set up and Manage Custom Data:
Once a custom data security group is created, the group will display every active custom data field that is in your system. Click on the column headers to reorganize the list of fields.
Five columns will display on the custom data properties to define each field:
- Name- The name of the custom field.
- Origin Type- The record the field applies to.
- Hier- The hierarchy in which the field exists.
- Deny Read- When checked, the field will not be viewed by a member of this group.
- Deny Write - When checked, the field will not be editable by a member of this group.
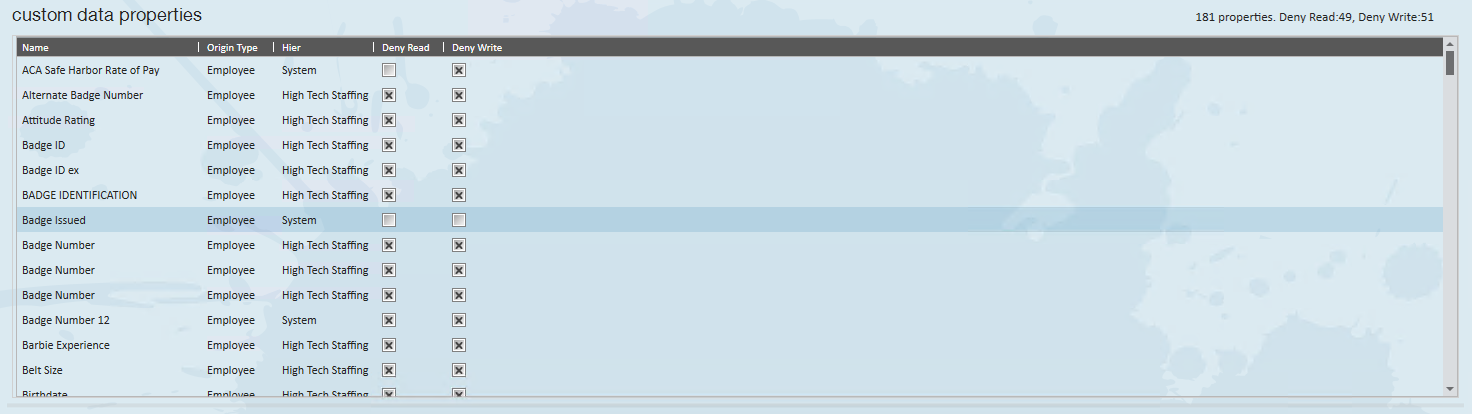
*Note* If a field is not checked, it will be visible to the user.
*Note* If a field is currently inactive in the administration section of Enterprise under custom data, it will not be viewable.
Customer Status Security Groups
This security group governs a service rep's ability to update customer statuses. Select statuses that members of this group should be able to change:
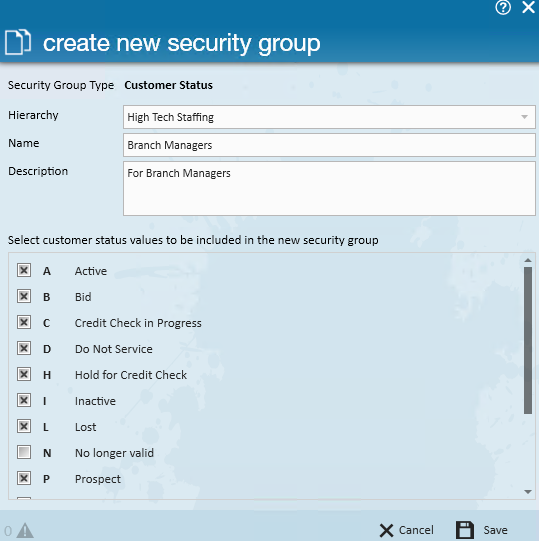
In the example above, the users in this group will be able to change any customer record except a customer with the status of "No Longer Valid."
*Note* Service reps that do not belong to any customer status security groups will not be able to update customer records in Beyond.
Document Type Security Groups
This group governs the document types that are available so be seen/created/deleted by service reps. Select whether or not the members of this group may read/write/delete these document types:
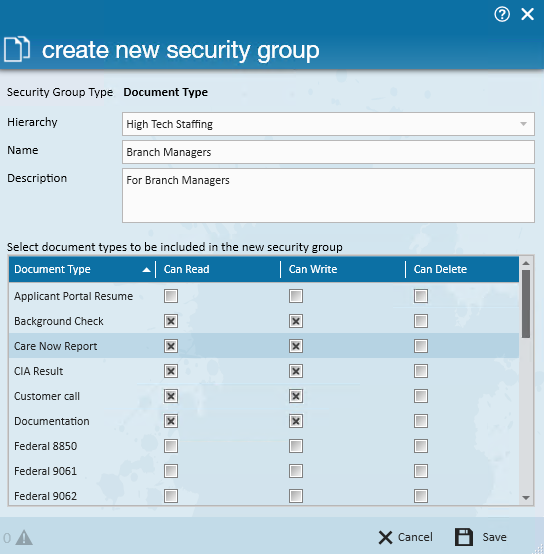
*Note* It should be an exceptionally rare occurrence that any group be given the ability to delete documents.
Editing Existing Groups
An existing group may be edited by selecting/deselecting the check-boxes representing that group's permissions:
Adding Members/Service Reps to Security Groups
Members can be reviewed from the 'members' section on the security form: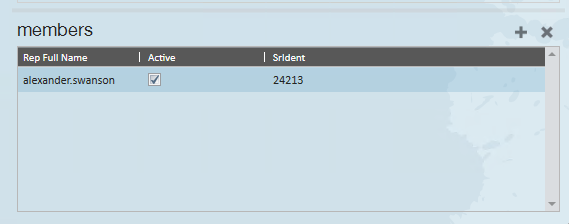
There are two ways to add members/security reps to a security group:
1. From within the security form, simply select the group you wish to review the members of and select the '+' icon:
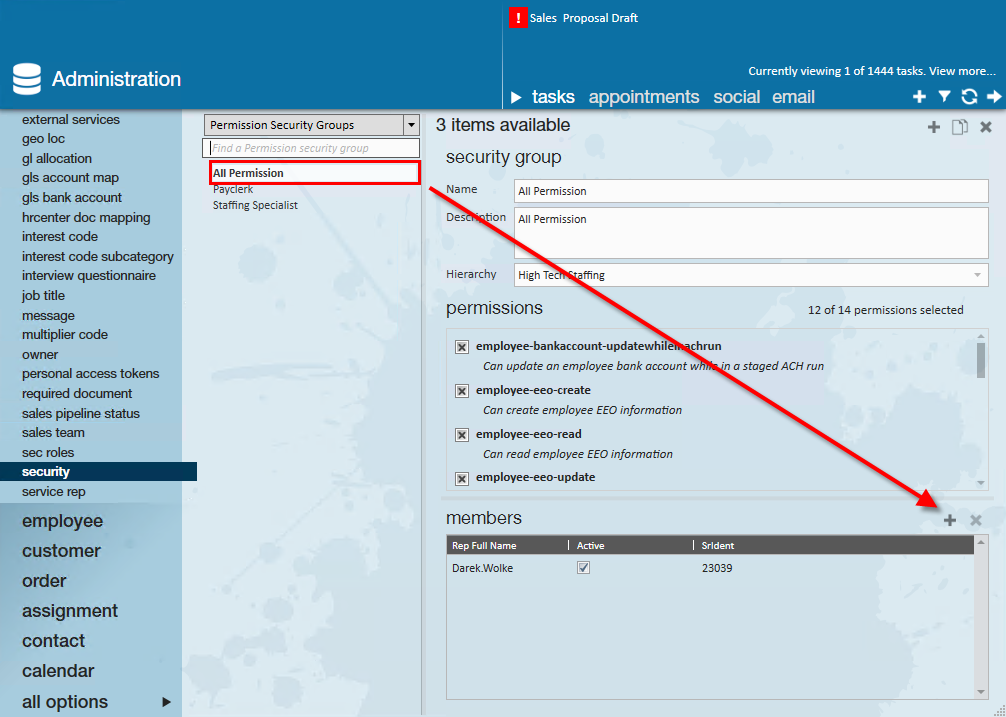
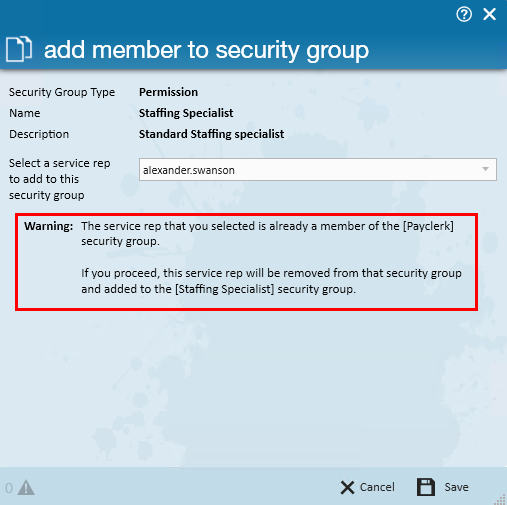
Here, a wizard will appear where a service rep can be selected.
*Note* If service rep already has a security group for the selected type, they will be deleted from that group and added to the new group.
2. This can also be achieved from the 'service rep' form. Here, the service rep may be selected and their security group may be determined or changed per type listed:
*Note* If you have changed a user's permissions, we recommend having the user clear their system cache by either navigating to the  menu > User Settings > Clear Data Cache or by clearing the browser cache. This will ensure the permission changes are made instantly.
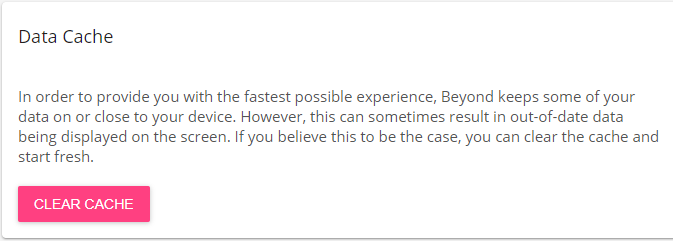
A new security group may even be created using the '+' icon:
*Note* Security groups can be used to further limit what service reps are allowed to view or edit through property permissions. If you have more questions or want additional options limited, contact our support team.