Overview
Required documents allow you to store, track, and manage documents that are required for employees.
Users in Beyond have the ability to add and manage required documents on Customer, Job Order, and Employee records.
*Note* Required Document functionality is backwards compatible between Enterprise and Beyond. This means when a Required Document is created, modified, or removed within Enterprise, the same take place within Beyond. The process is the same from Beyond to Enterprise.
*Note* In order to view/add/edit Required Documents in Beyond, you must have the proper Security Group of Document Type with Read/Write permissions.
This article covers the following for Employee Required Documents:
- Adding Employee Required Documents
- Attach a File to a Required Document
- Editing Employee Required Documents
- Filtering Employee Required Documents
- Copy URL to Required Document
- Deleting Employee Required Documents
- Searching for Employee Required Documents
- Beyond Dashboard Widget
*Note* This article is part of a series that outlines how to utilize Required Documents in Beyond. For more information, please see the following articles:
Adding Employee Required Documents
Begin by navigating to the Employee record > Documents:
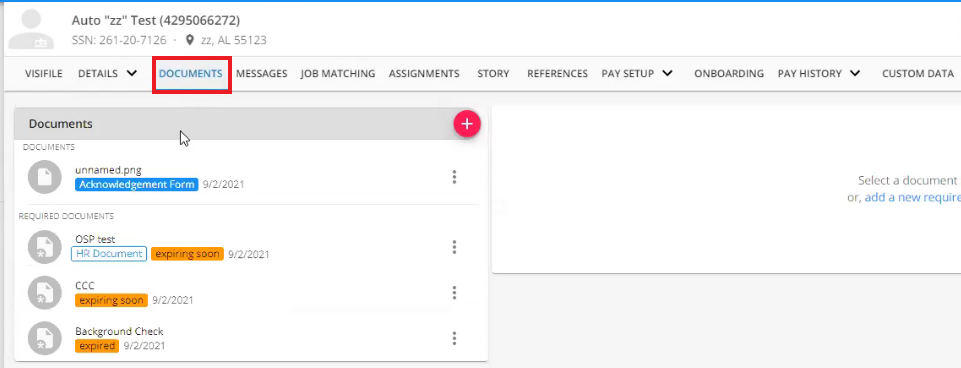
Select the option for "+" at the top right of the "Documents" card to open the "Document" window:
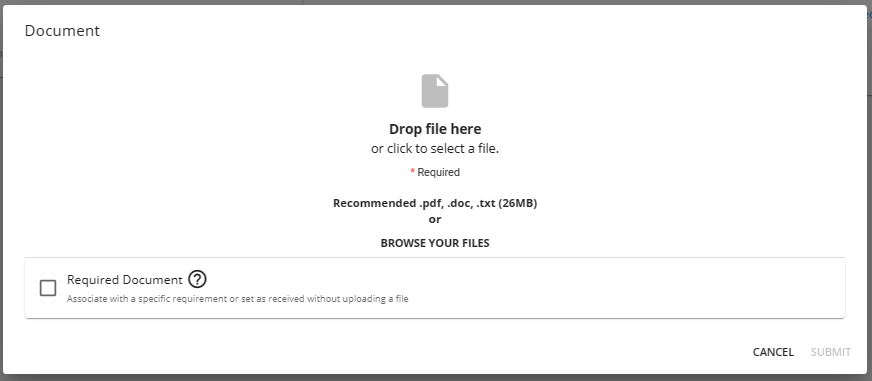
To add the document, either click and drag the file from the computer into the window, or click within the window to open the file selector.
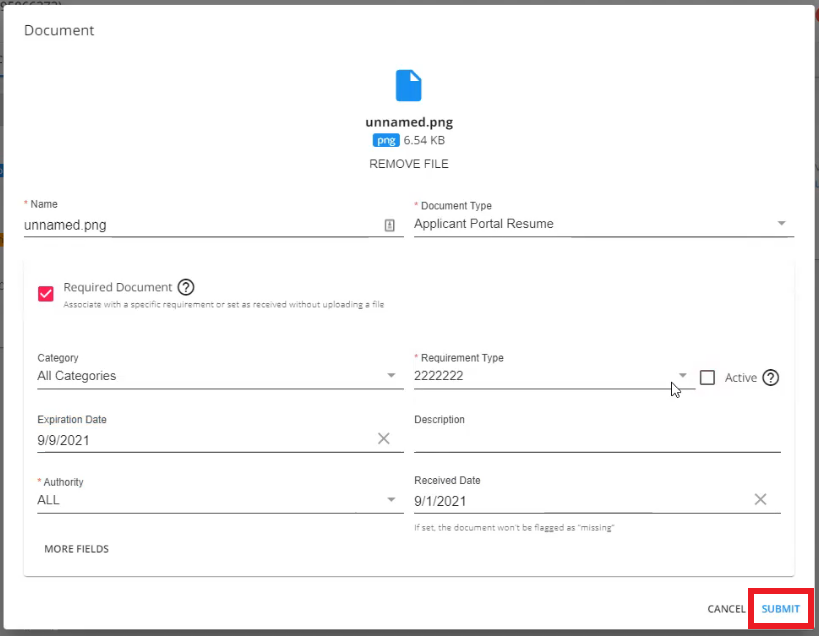
Add the document within the window, verify the name of the document, select the Document Type from the dropdown, and select the checkbox for "Required Document" to be shown more fields:
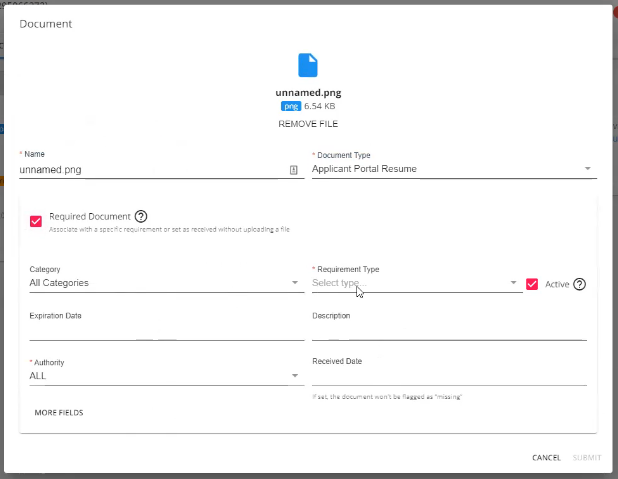
Select the following:
- Category: The category of the Required Document Type.
- Requirement Type (Required): The Required Document Type.
*Note* In order to view the items within this dropdown, you must have the proper Security Group of Document Type with Read permissions.
*Note* Within Beyond, the Requirement Type will need to be chosen manually.
- Active: Selecting this determines whether or not the Required Document is referenced against Assignment Restrictions.
- Expiration Date: The date the Required Document is set to expire.
- Description: A description of the Required Document.
- Authority (Required): The state or location the document originates.
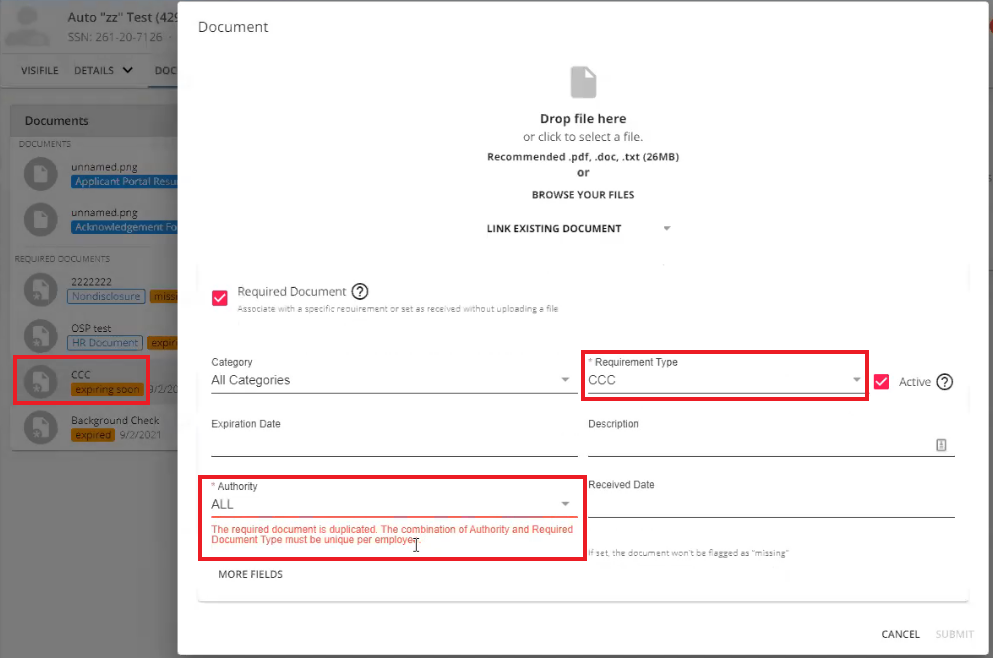
*Note* In the event there two of the same Required Document Type for an Employee, they both must have different Authorities selected before being able to save them to the Employee record.
If you attempt to save a duplicate Required Document Type with the same Authority listed, you will receive the following message:
- Received Date: The date the Required Document was received from the Employee.
For additional fields (not required), select the "More Fields" option within the window for the following additional options:
- Document Status: The status of the document.
- Requested Date: The date the Required Document has been requested from the Employee.
- License Number: If a drivers license is the uploaded document, this is the license number.
- Issued Date: If a drivers license is the uploaded document, this is the issued date.
Once all of the fields have been completed for the Employee Required Document, select "Submit" at the bottom right:
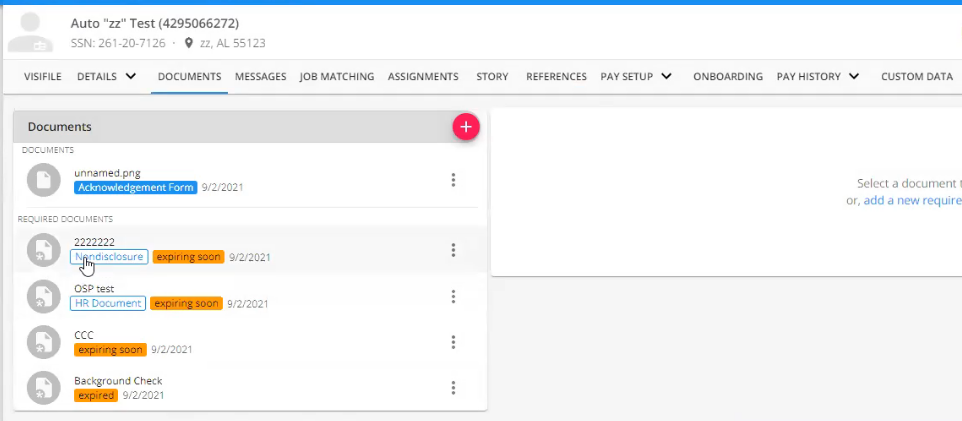
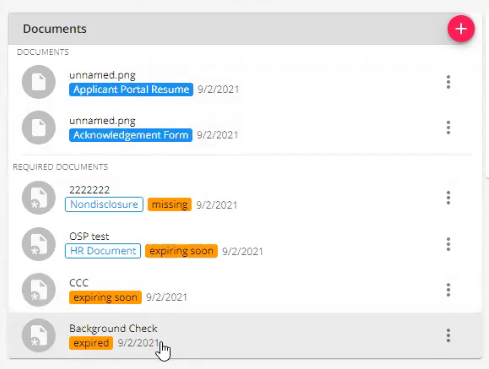
You will now see the added Required Document within the main list on the Employee record:
*Note* The date being shown to the right of the Required Document is the date of creation for the Required Document.
*Note* As seen within the following screenshot, additional colored badges have been added to the Required Documents section of the Employee record:
- Light Blue: This is the Required Document Category.
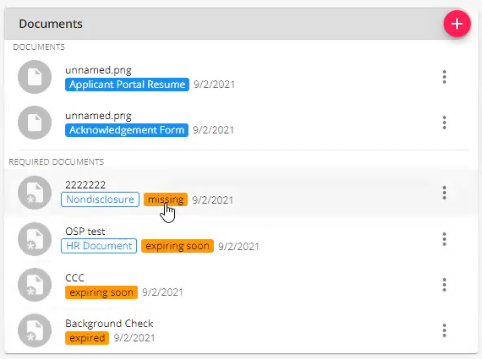
- Orange: Whether the Required Document is missing, expiring soon, or has expired.
- Missing: This badge appears when a Received Date has not been entered for the Required Document.
- Expiring Soon: This badge appears if the Expiration Date entered is within 2 weeks of the Required Document being created.
- Expired: This badge appears if the Expiration Date entered has passed.
A new charm has also been added to the Employee record for Employee Alerts. This charm will show whether the Employee has missing and/or expired documents along with the amount of each:

There are also a couple points to be made for the documents that appear within the list on the Employee record:
- The name shown for normal Documents is the name of the Document that was provided by the Service Rep.
- The name shown for Required Documents is the Required Document Type that was selected by the Service Rep.
Once the Required Documents have been added to the Employee record, you can do the following:
- Attach a file to a Required Document
- Edit
- Filter
- Copy URL
- Delete
Attach a File to a Required Document
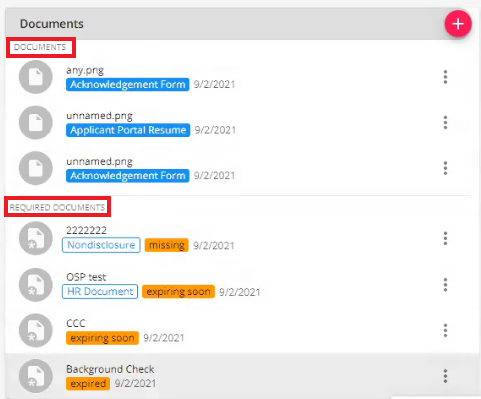
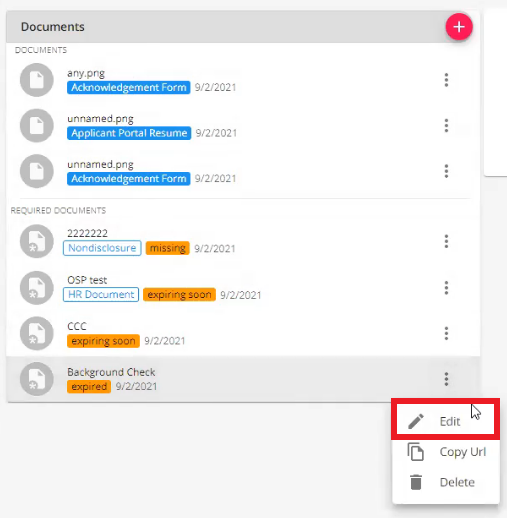
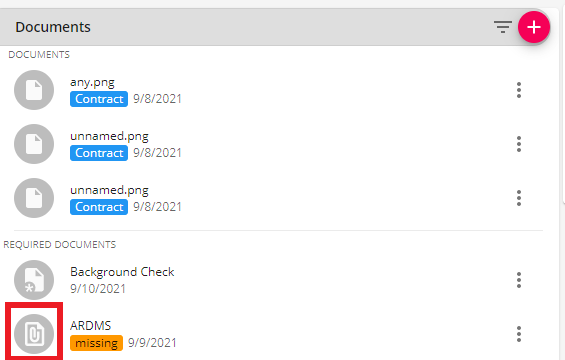
The Documents area of the Employee file in Beyond has been split into two segments, "Documents" and "Required Documents":
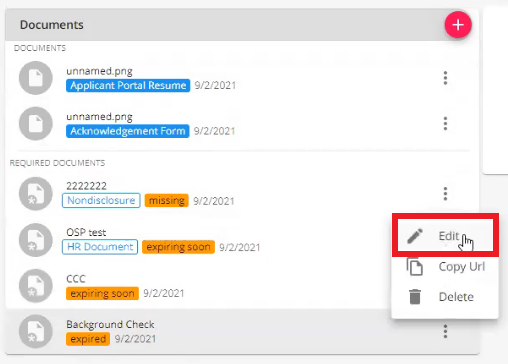
To attach a file to an Employee Required Document, select the  icon to the right of the Required Document and select "Edit":
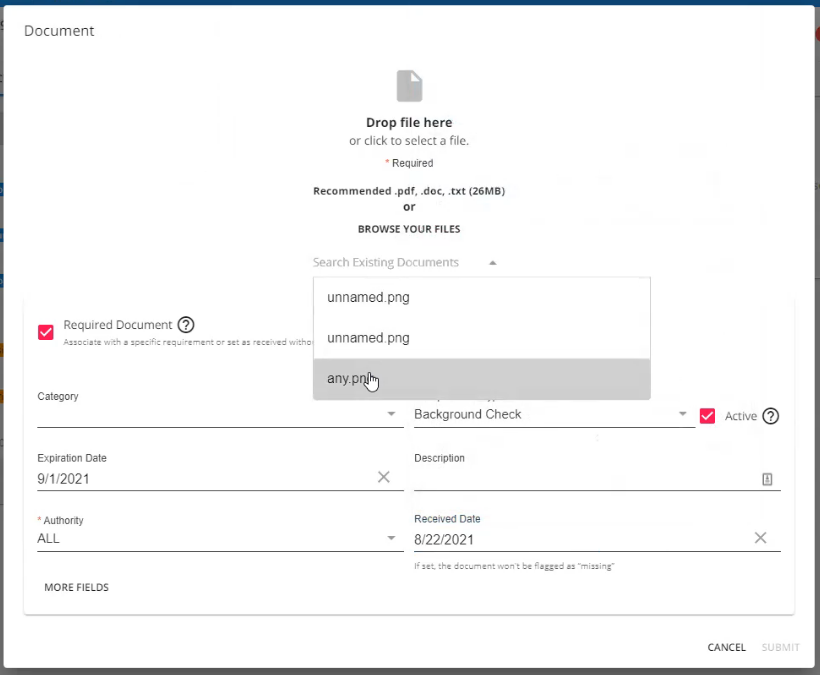
Within the "Document" window for that Required Document, select the option to "Link Existing Document", and select the existing file within the dropdown:
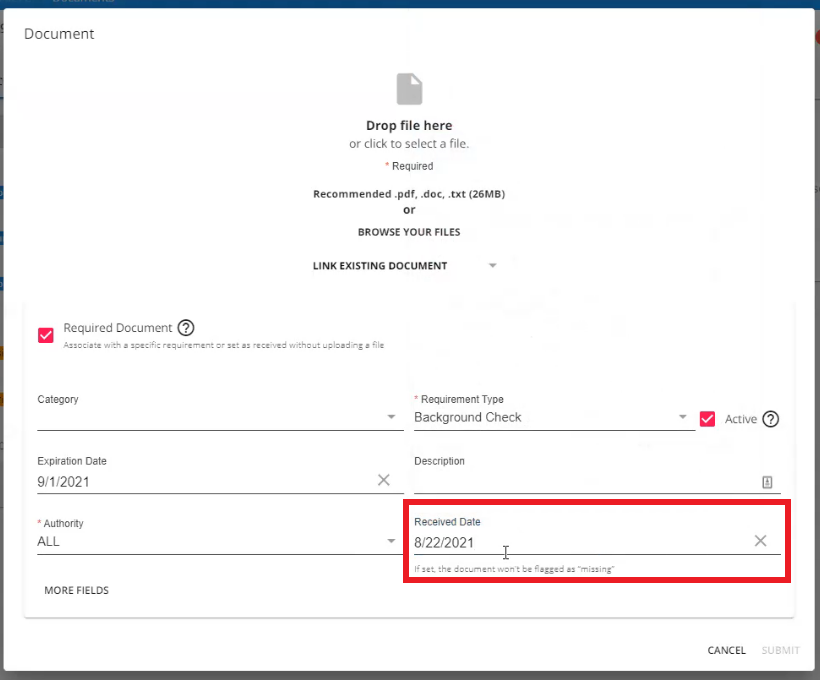
*Note* In the event you have a hard copy of an Employee document and you do not need to link it to the Required Document as the document is not within Beyond electronically, you can still enter a Received Date so the system understands the Required Document is not missing for the Employee:
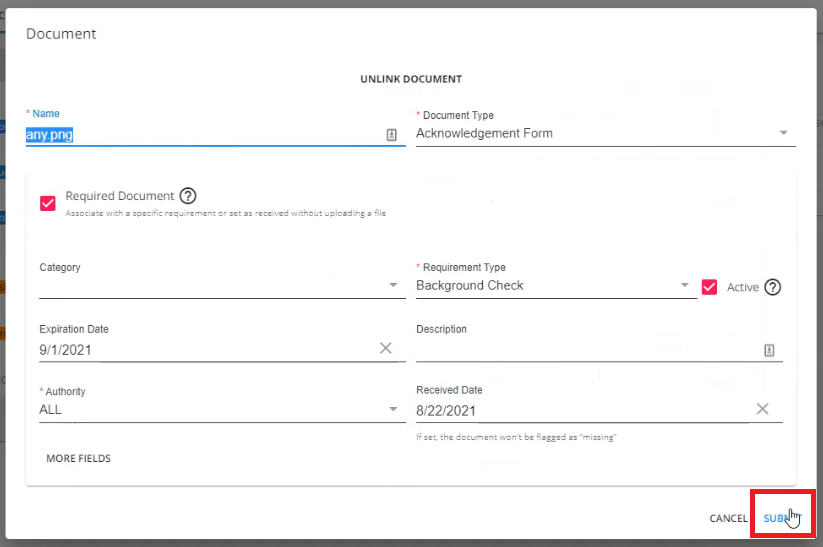
Once the selected file has been linked, select "Submit" at the bottom right of the window to save the changes:
By attaching a standard Employee Document to a Required Document, the file shown within the "Documents" segment will be removed:
Once a file has been attached to a document, the document icon within the list will show an attachment being added:
*Note* Keep in mind that it is possible to link the same existing file to multiple Employee Required Documents even if that file is no longer appearing within the Documents segment of the Employee record.
Editing Employee Required Documents
To edit a required document within the list, select the  icon to the right of the item and select "Edit":
Within the "Document" window, you will be able to modify the following:
- Name (Required): The name of the linked Document.
- Document Type (Required): The Type of the linked Document.
*Note* In order to view the items within this dropdown, you must have the proper Security Group of Document Type with Read permissions.
- Required Document: Check to signify whether the Document is Required.
- Category: The category of the Required Document Type.
- Requirement Type (Required): The Required Document Type.
- Active: Selecting this determines whether or not the Required Document is referenced against Assignment Restrictions.
- Expiration Date: The date the Required Document is set to expire.
- Description: A description of the Required Document.
- Authority (Required): The state or location the document originates.
- Received Date: The date the Required Document was received from the Employee.
For additional fields (not required), select the "More Fields" option within the window for the following additional options:
- Document Status: The status of the document.
- Requested Date: The date the Required Document has been requested from the Employee.
- License Number: If a drivers license is the uploaded document, this is the license number.
- Issued Date: If a drivers license is the uploaded document, this is the issued date.
Once the changes are complete, select "Submit" for the changes to be saved.
Copy URL to Required Document
In order to save time searching for specific documents, you have the ability to create a direct link to a Required Document within Beyond. This link can then be given to another user to they are able to log into Beyond and be immediately directed to said Required Document.
To Create a URL Link to a Required Document, find the document you want to create the URL for, select the  icon to the right of the Required Document, and select the option to "Copy URL":
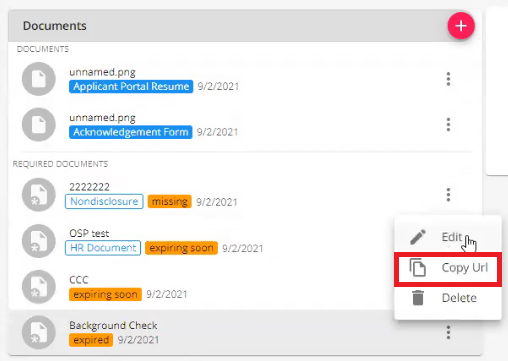
With the URL for the document copied, this can now be provided to another user for access.
*Note* When the user navigates to the URL to the document, if they are not already logged into Beyond, they will be prompted to log in.
*Note* Document permissions apply for the URL as well. Therefore, if the URL is provided to a user who does not have access to the viewing of documents in Beyond, they will not be able to see the document that the URL is referencing.
Filtering Employee Required Documents
To filter Required Documents on the Employee record, select the icon to show the filters at the top right of the Documents section:
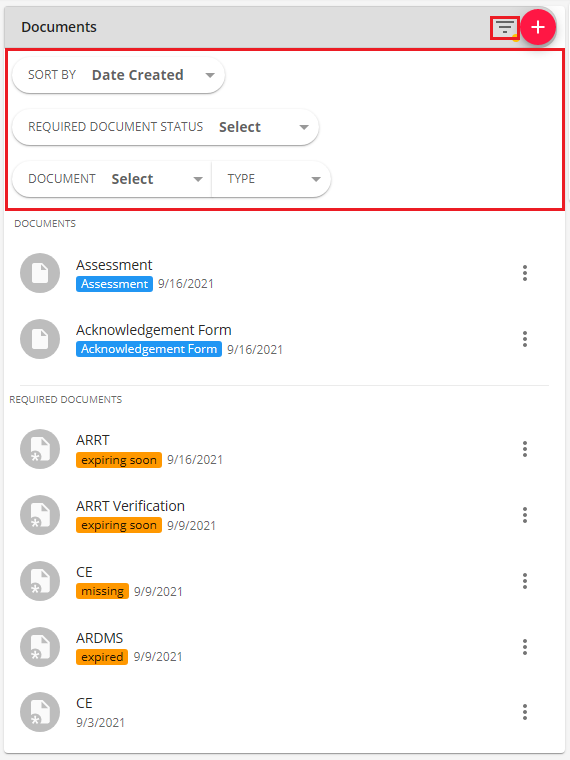
You will have the following filtering options:
- Sort By:
- Date Created: The date the Document/Required Document has been created on the Employee record.
- Type: The type of the Document/Required Document, in alphabetical order.
- Required Document Status:
- Select: The default option when no other option is selected.
- Active: This is indicated by the Active checkbox being checked for the Required Document.
- Inactive: This is indicated by the Active checkbox not being checked for the Required Document.
- Expired: This is indicated by the Requirement Expiration Date entered being passed.
- Expiring Soon: This is indicated by the the Requirement Expiration Date entered being within 2 weeks of the Required Document being created.
- Missing: This is indicated by a Received Date has not being entered for the Required Document.
- Document:
- Select: The default option when no other option is selected.
- Document: Indicates that Documents are selected and not Required Documents.
- Type: This is the Document Type for the normal Employee Document.
- Required Document: Indicates that Required Documents are selected and not Documents.
- Type: This is the Document Type for the Employee Required Document.
Deleting Employee Required Documents
*Note* Deleting a Required Document will also delete the attached file completely.
Therefore, if you want to delete only the Required Document entry and not the attached file, edit the Required Document entry and unlink the attached file before proceeding.
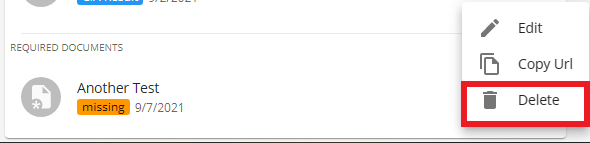
To delete a Required Document within the list, select the icon to the right of the item and select "Delete":
You will receive a confirmation prompt asking if you are sure you want to delete the specific Required Document from the Employee record:
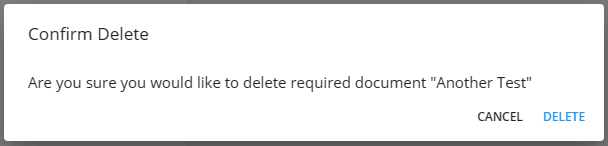
Select "Delete" to confirm and once deleted, the Required Document and the attached file will be removed entirely.
Searching for Employee Required Documents
In the event you want to search your entire system for all Employee Required Document, this can be done by navigating to the B Menu > Records > Required Documents:

You will have the following criteria to search upon:
- Category: This is indicated by the Requirement Category field of the Required Document.
- Required Type: This is indicated by the Required Document Type.
- Document Status: This is indicated by the Document Status field of the Required Document by selecting "More Fields".
- Expiration Date: This is indicated by the Requirement Expiration Date field of the Required Document.
- Branch: This is the Branch in which the Required Document is created within.
- Active Status:
- Any: The default option when no other option is selected.
- Active: This is indicated by the Active checkbox being checked for the Required Document.
- Inactive: This is indicated by the Active checkbox not being checked for the Required Document.
- Expired: This is indicated by the Requirement Expiration Date entered being passed.
- Expiring Soon: This is indicated by the the Requirement Expiration Date entered being within 2 weeks of the Required Document being created.
- Missing: This is indicated by a Received Date has not being entered for the Required Document.
Once you have all the criteria entered, select the "Search" option to see the results:

Selecting the Required Document(s) on the right hand side will navigate you to the Required Documents on the Employee record.
For more information related to the Employee Required Document, select the "Expand All" option to the right of the Search results:

You can also expand a single Employee by selecting the drop down arrow to the left:

Beyond Dashboard Widget
A new Default Insight Widget has been added within Beyond titled Missing Or Expired Documents - Top 5 By Last Name.
For additional information on this new Default Insight Widget, please see the following Knowledge Base article.
*Note* This article is part of a series that outlines how to utilize Required Documents in Beyond. For more information, please see the following articles: