What is an Assignment Restriction?
In certain circumstances, you may want to prevent an employee from being assigned to a customer; this may be at the request of the employee, customer, or both parties. Assignment restrictions, also known as DNA (Do Not Assign), can be set from the employee, the customer, and the assignment records.
*Note* This is NOT the same as deactivating an employee record.
Quick Steps
Create Assignment Restrictions from Employee Record
- Navigate to the Employee record.
- Expand ‘details’ and select ‘assignment restrictions.’
- Select the ‘+’ icon in the upper right.
- From the drop down, select the Customer & Department the employee should not return to.
- Enter details in the ‘Description’ field.
- Select All departments if employee should not return to customer in any form.
- Check the box next to Customer DNA Employee if the request is Customer initiated.
- Check the box next to Employee DNA Customer if the request is Employee initiated.
- Select ‘Save.’
Create Assignment Restriction from Assignment
- Navigate to the Assignment record.
- Expand 'details' and select 'assignment restrictions.'
- Check the box next to Customer DNA or Employee DNA or both.
- Select ‘Save.’
Edit or Remove Restriction
- Navigate to the assignment restriction on the Employee record.
- Select the restriction you wish to edit or remove.
- Select the pencil icon to edit.
- Select the 'X' icon to remove.
- Select ‘Save’ when complete.
Complete and Detailed Steps
Create an Assignment Restriction from the Employee Record
Step 1: Navigate to the employee for whom the restriction should be set. Expand the details section and select the assignment restrictions page:

Step 2: Select the + icon to create the new assignment restriction:

Step 3: Select the appropriate customer and within the description field, enter any relevant notes as to why the employee should not return to this customer/department:
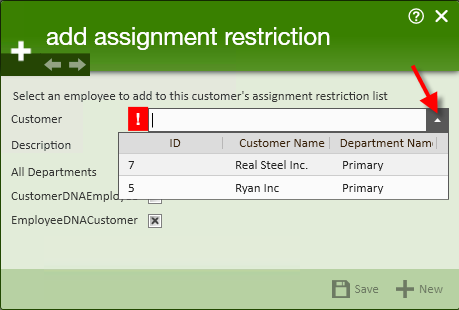
*Note* If the selected customer has multiple departments, be sure to select the correct department as well. If the employee should not return to any of the customer's departments, select the primary or root record, and select the "All Departments" checkbox.
Step 4: Select CustomerDNAEmployee and/or EmployeeDNACustomer based on where the request has come from:

Step 5: Click 'Save.' Once the Assignment Restriction has been added, a few things will happen automatically:
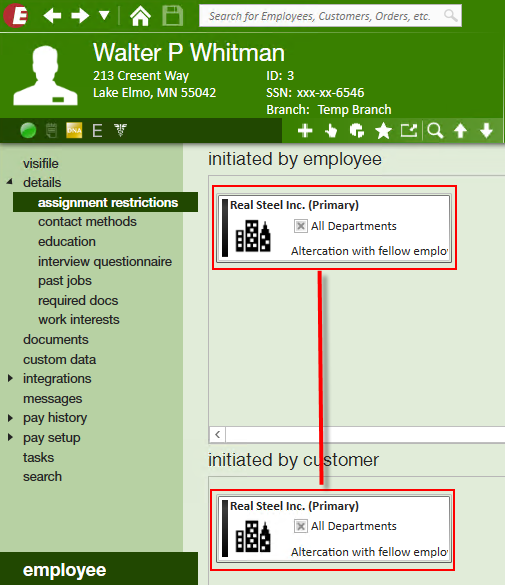
- In the employee>details>assignment restriction page, the assignment restriction will be listed:
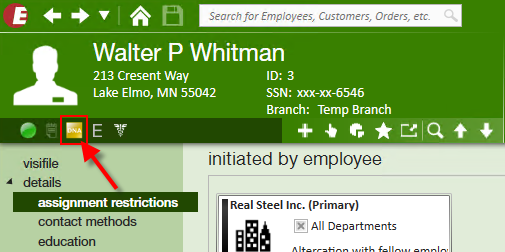
- An assignment restriction avatar icon will appear on the employee record:
- A message will be logged on both the employee and the customer/department for whom the assignment restriction has been set.
In the future, if there is an attempt to assign this employee to that customer/department, Enterprise will react with an assignment restriction, which may be a hard stop, preventing the assignment:
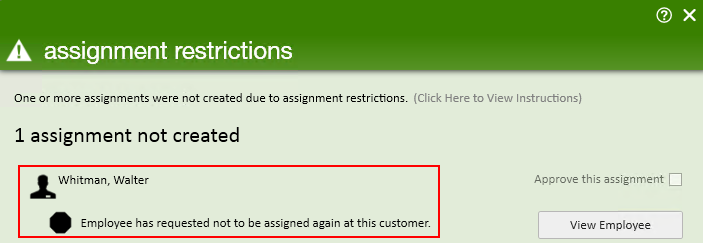
*Note* Based on your Enterprise configurations, this type of assignment restriction may display as a "soft stop" (i icon) instead of a "hard stop" (stop sign icon).
Creating an Assignment Restriction from the Assignment Record:
An assignment restriction can be set when ending an assignment.
Step 1: From the details page of the assignment, end the assignment as usual. Users will notice that there are two check boxes related to DNA- one to set a Customer DNA the other to set an Employee DNA:

*Note* All aspects of the assignment restriction will be set by creating the restriction from the assignment, except when setting the assignment restriction from the assignment, the restriction will only be applied to the department of the customer to which the employee was assigned. If the assignment restriction should be set for sub-departments or all departments, it is recommended that the restriction be set at the employee or customer record.
Removing an Assignment Restriction
A customer or employee may change their mind about the assignment restriction or perhaps a restriction expires.
Step 1: Navigate to the assignment restriction page of the employee record.
Step 2: Click to highlight the assignment restriction which is to be edited or removed. Click on the pencil icon to edit or the x button to remove the restriction:
