Personal Access Tokens
What are personal access tokens? A personal access token is a code passed between computer programs- a unique identifier and a secret token used for authentication that allows the two computer programs to communicate. You need a personal access token for any Enterprise third-party integration who uses this method to pass information between parties.
For example, let's say you wanted to integrate Kenexa Assess on Cloud with Enterprise. In order for assessments from Kenexa to be viewed and assigned from Enterprise, a personal access token is needed. This token gives the green light (e.g. verifies that the software is not malicious) and creates a communication bridge between the two programs allowing information (i.e. resumes) to pass.
How to Add a Personal Access Token
There are two ways to add a token:
1. The first way is accessible only by those with the 'System Admin' secrole or 'SA'. This can be done by navigating to 'all options' in the navigation tree and selecting the 'administration' section. From here, select the 'personal access tokens' page:
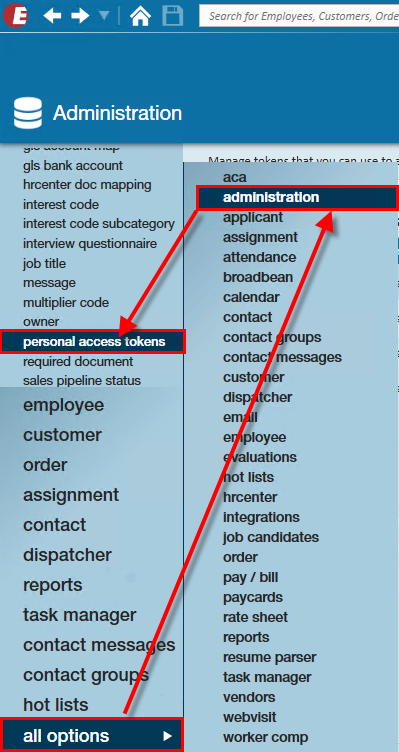
*Note* You will need admin permissions to access 'administration in Enterprise.
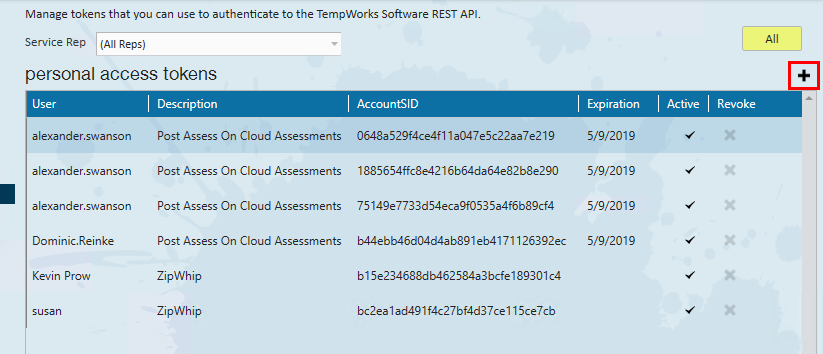
Within this section you may review/edit your active/inactive personal access tokens. You may also filter these tokens by individual service rep if desired. From here select the '+' icon in the top right corner, this will open a 'create personal access token' wizard:
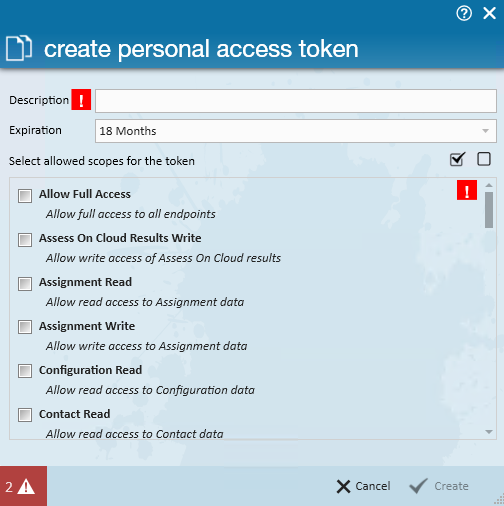
A new window will open, enter the following:
- Select the Service Rep from the drop down that you wish to give a token to
- Enter a description so it's clear to your admin team and you what this access token is for
- Select the access you want to give them
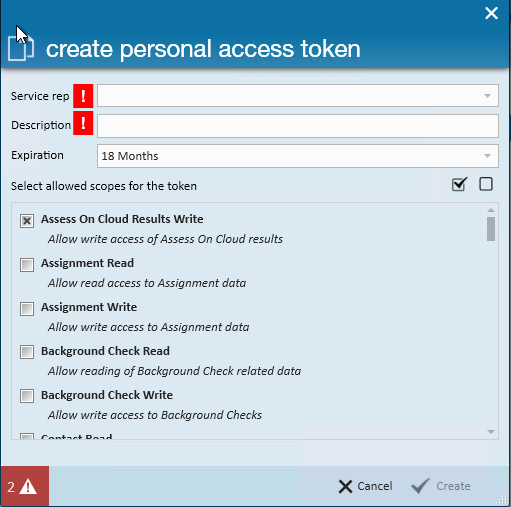
Once you've checked the necessary boxes, select Create to create the personal access token.
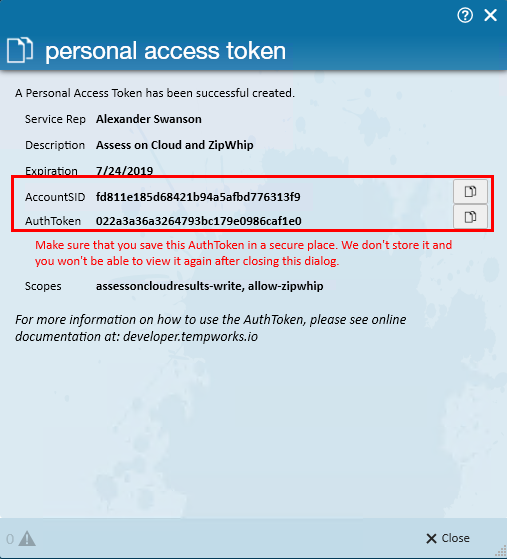
Once generated, be sure to copy your personal access token so that information is readily available to your third party integration:
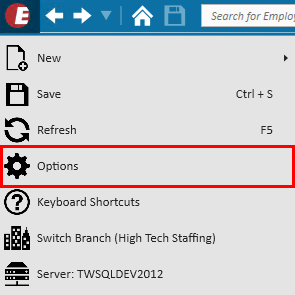
2. The second way to view/create tokens can be done by a user for themselves and only for their own service rep. This can be done by navigating to the 'E' menu in the upper left-hand corner of the screen and selecting 'Options':
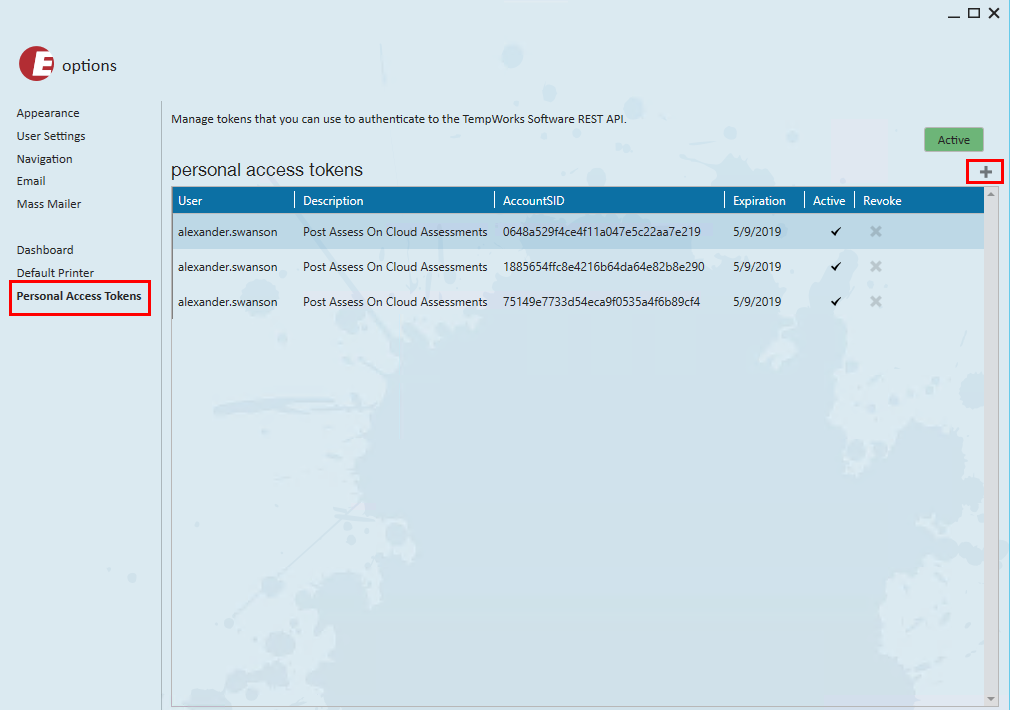
Here, personal access tokens can be managed and interacted with in the same way as step 1. Select the '+' icon in the top right corner to open the 'create personal access token' wizard:
Follow the same steps for laying out criteria with regards to their own token as seen in step 1:
Related Articles
- None