Year End processing details the necessary steps in order to complete closing the year in TempWorks. This involves the completion of Data Integrity Checks, generating and printing any W2s, 1099s and 1095s, and creating state and federal electronic W2 files.
*Note* Please utilize the following resources when preparing for Year End processes:
How do I Close the Year?
To navigate through your Year End processing and successfully close the year, navigate to pay/bill > other > Year End. Please note that you should be at the highest level of your hierarchy to encompass all entities while running through this process. Once the Year End form is opened, you will see a list of years to select from. If you do not see the current year, select the plus icon in the upper right-hand corner to add it.

If the current year is there, or if you’ve completed adding it, you can double click the row to bring you into the Year End worksheet and begin the steps to close the year.
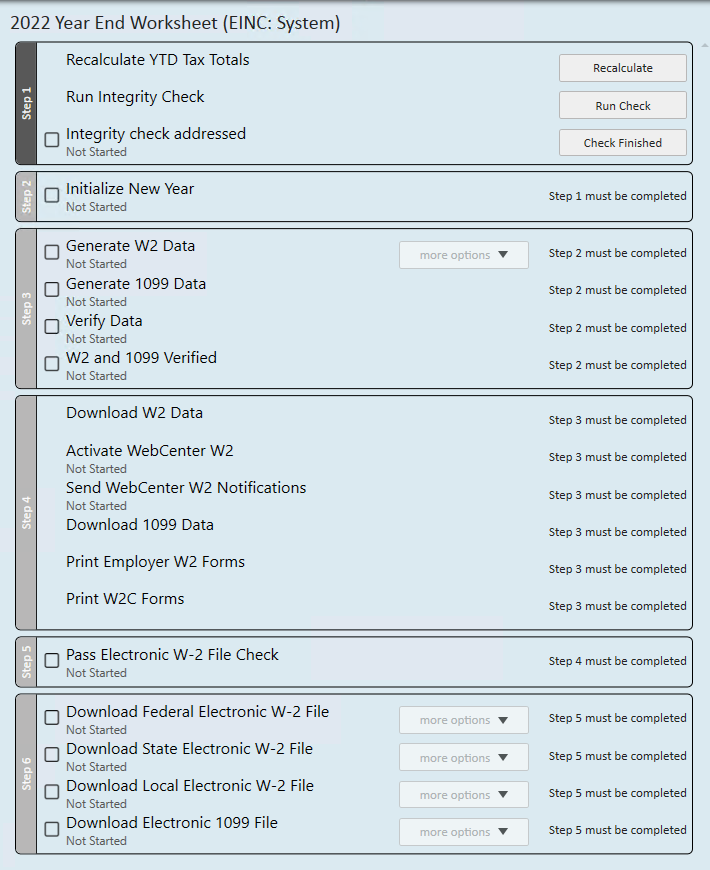
Closing the year in Enterprise requires the following 6 steps:
- Run Integrity Check
- Initialize New Year
- Generating W2 and 1099 Data
- Downloading W2s, 1099s, and Employer W2s
- Pass Electronic W2 Check
- Downloading Electronic Files
Check out this video and follow along with the steps below:
Step 1: Run Integrity Check
For instructions on how to run your Integrity Check, please see the following Knowledge Base article.
Step 2: Initialize New Year
Initializing the New Year is essentially the point of no return. You should closely review the Data Integrity Check, Tax Deposit or Payroll Journal and ensure all of your items are accurate.
Initializing the year takes all current year information, saves it off, and sets the system up for the New Year. Any corrections or voids that need to take place after this step has been completed will need to be done with the assistance of TempWorks and may result in billable time.
Step 3: Generating W2 and 1099 Data
*Note* Generating, regenerating and refreshing W2 and 1099 data must be done at System level.
Use the Generate buttons on the right side of the worksheet to generate the W2 and 1099 data. Review the W2 Summary report for accuracy. This report can be ran to generate the summary for Federal, Local and State.
- Federal W2 Summary: This report breaks out the wages and tax withheld amounts shown on the W2s for Federal taxes. This can be expanded to see the detail per employee.
- State W2 Summary: This report breaks out the wages and tax withheld amounts shown on the W2s for State taxes. It summarizes by state and can be expanded to see the detail per employee.
- Local W2 Summary: This breaks out the wages and tax withheld amounts shown on the W2s for Local taxes. It summarizes by state and can be expanded to see the detail per local and employee.
*Note* If necessary you can refresh employer and employee data by using the regenerate options in the “more options” drop-down.
Once the W2 and 1099 data has been generated, the data will need to be verified.
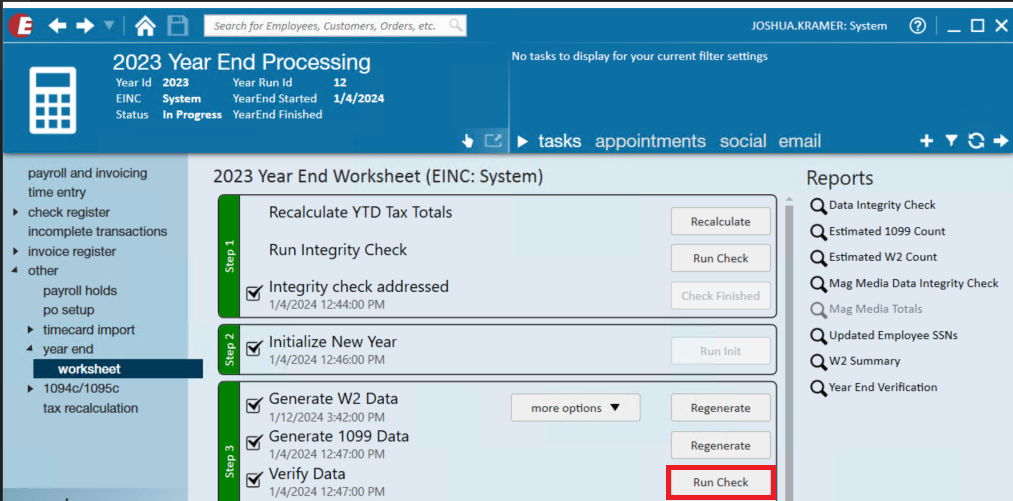
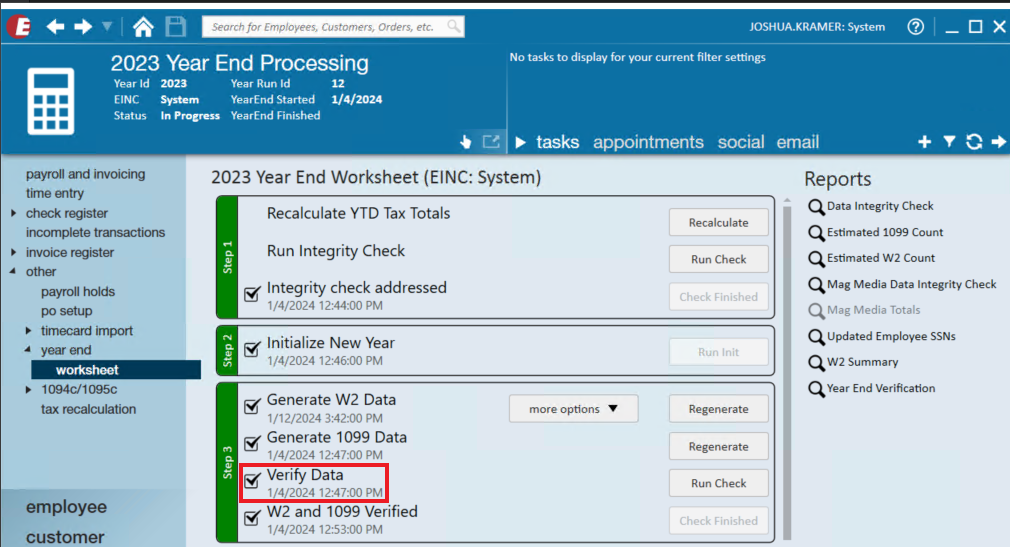
Within Step 3, select the "Run Check" option to the right of "Verify Data":
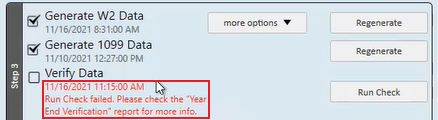
In the event the verification of the data has resulted in errors, you will see a prompt within the Year End Worksheet under the "Verify Data" section:
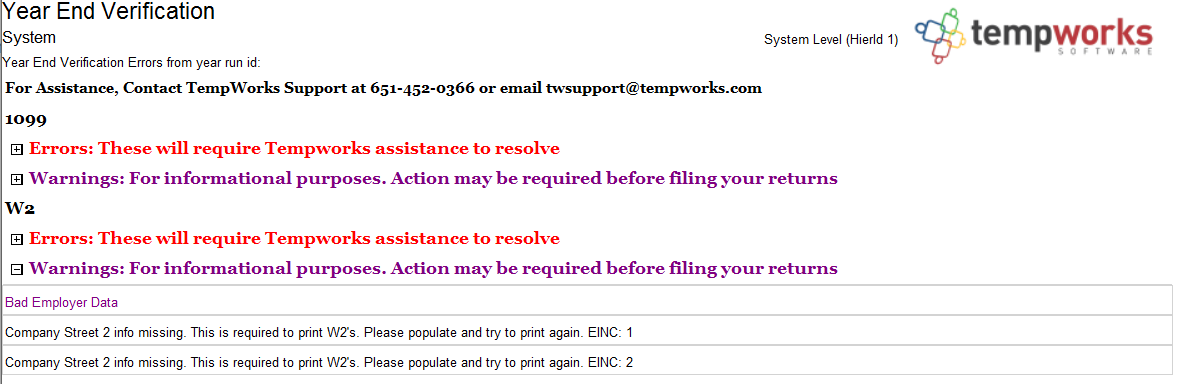
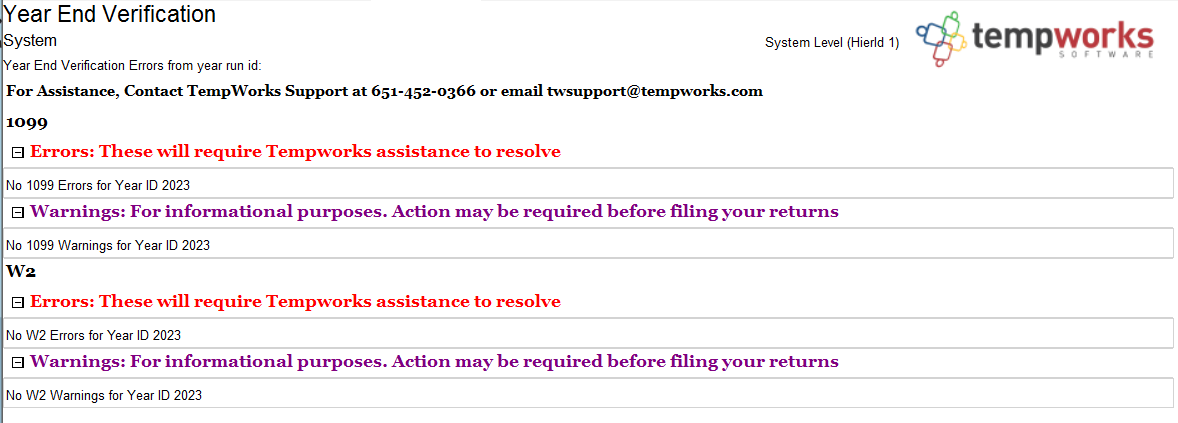
The "Year End Verification" report will also automatically generate:
Once the "Run Check" has been completed, you are able to select the "Year End Verification" report within the "Reports" section to the right:
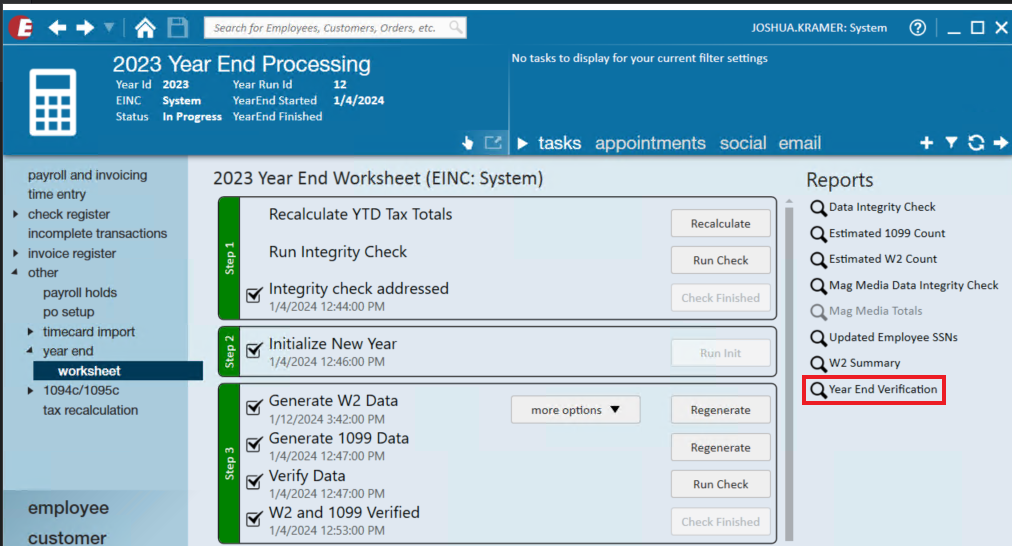
*Note* The "Year End Verification" report is unavailable to be generated until the "Run Check" has been completed for the "Verify Data" step.
*Note* All errors presented within the "Year End Verification" report will need to be resolved before being able to continue within the Year End Worksheet. If you have any questions about the errors being received within the report, please contact a TempWorks Year End Support Representative.
In the event the verification of data resulted in no errors, the "Verify Data" section will be automatically checked as completed:
With no errors being presented, the "Year End Verification" report will also automatically generate:
Step 4: Downloading W2s, 1099s, and Employer W2s
Once you have generated the data and are ready click ‘Download’ to open the following screen:

*Note* If downloading W2 data: It is considered best practice to leave the "Print two states of local jurises per W2" unchecked. This will result in only one state and one local juris per W2.
Once you’ve selected your desired sorting and filter options, click ‘Download’ located in the lower right. This will result in a CSV with the information requested.
If your company utilizes WebCenter, you have the option to make W2s, 1099s, and 1095s accessible for employees via the Employee Portal. This can be enabled by using the "Activate" button:
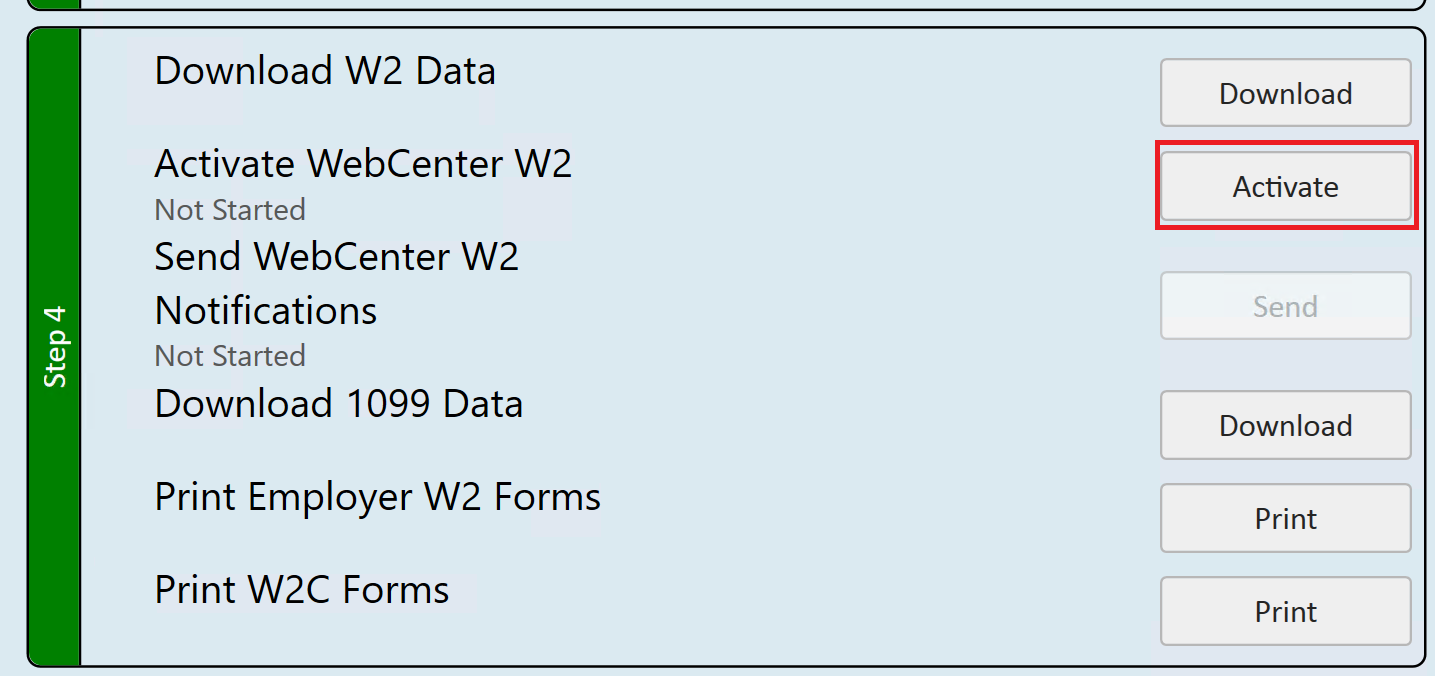
*Note* If changes to tax forms need to be made, select the “Deactivate” button to temporarily disable WebCenter forms.
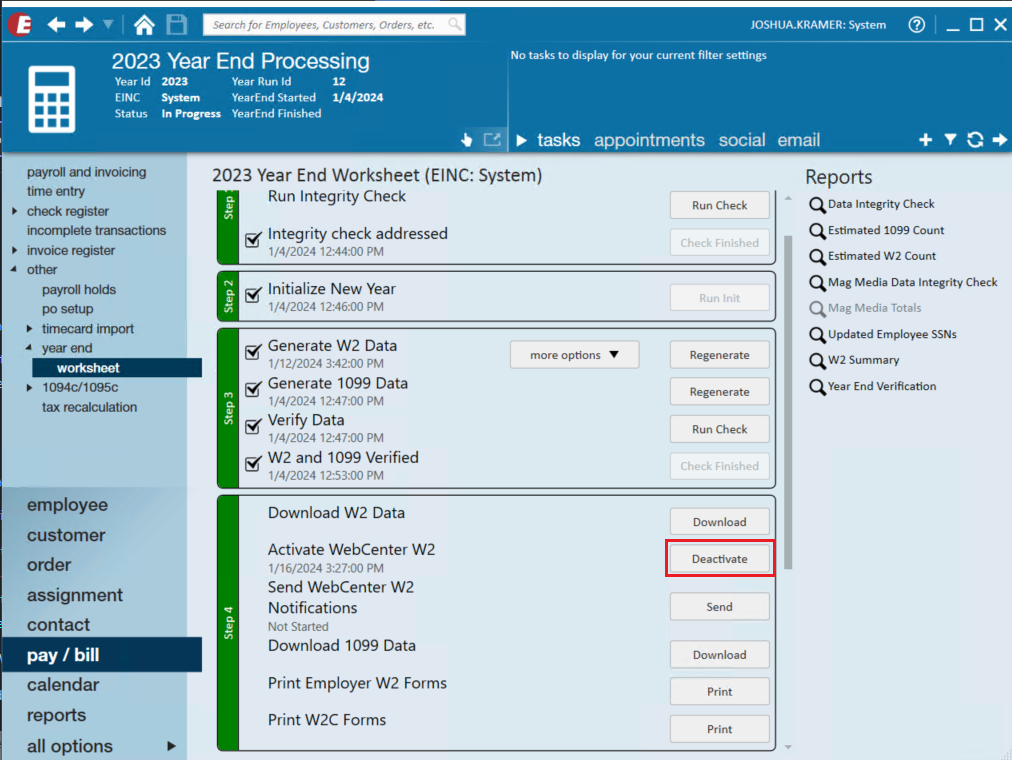
Enable them again once the changes have been made.
Step 5: Pass Electronic W2 Check
TempWorks will not generate Electronic W2 files unless this step has been completed. After this is completed the Data Integrity Check report will be displayed. If the check didn’t pass use this report to review the errors and contact Year End Support if applicable.
*Note* All errors must be fixed before moving past this step.
Step 6: Downloading Electronic Files
Once the Electronic W2 check has been completed, you can download the Federal, State and Local Electronic W2 Files. Click on ‘Download’ next to each option to generate and download the data. Once generated you can use the ‘Electronic W2 Totals’ report. These files can be uploaded to their respective government agencies.
*Note* If necessary you can refresh data by using the regenerate options in the “more options” drop-down.
Once you have downloaded the Federal W-2 file you will want to run it through the AccuWage Software that is provided by the Social Security Administration. As of 2017, the SSA no longer offers a downloadable version of AccuWage. Instead, you will need to access AccuWage Online by doing the following:
- Log on to Business Services Online (BSO) and go to the Employer Wage Reporting webpage.
- Log in with your BSO username and password.
- Access AccuWage Online (fourth tab).
*Note* The Federal Mag Media information is required to be submitted online; they are no longer accepting diskettes. Please note that the TempWorks W2 service does not include the Mag Media filing.
Completing the Year
Once all of the above steps have been completed, the year will automatically be marked as complete.