Items to Consider Before Beginning:
Will you be entering a dollar or percentage?
- The Enterprise employee adjustments wizard supports both options. Users can enter the employee and/or employer contribution as a gross or net dollar or percent amount.
Do you offer an employer match?
- If you do offer an employer match and an employee is eligible to receive that match, it will need to be added to their employee adjustments page in addition to the employee 401K contribution adjustment.
Is your 401K a pre or post tax plan?
- If your employee is enrolling in a traditional 401K, the adjustment should be setup to adjust their gross pay (pre-tax).
- If your employee is enrolling in a Roth 401K, the adjustment should be setup to adjust their net pay (post tax).
*Note* If your employee is enrolled in a Roth 401K plan, and they are eligible to receive employer match, in all likelihood this match should be added as a pre-tax benefit. Consult with a member of your finance department/benefit department to verify and to answer any questions.
Have these 401K adjustments (both employee and employer) been setup in Enterprise Administration?
- Before 401K and 401K Match adjustments can be added to an employee record they must first be setup in Enterprise administration. If you do not have access to the administration module of Enterprise, please consult with your manager to have these adjustments added.
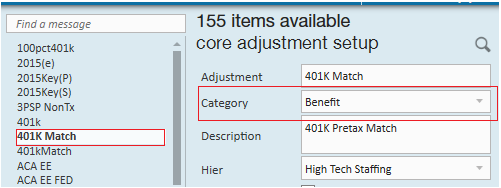
*Note* If you offer an employer match, verify that the match adjustment has been setup as a benefit in the adjustment setup category. Using this category, the benefit "adjustment" will not affect the employees pay but will instead, track your contribution.
This Article Covers:
- Adding the Employee 401K Contribution
- Confirming Employee Contribution Details
- Adding the Employer 401K Contributions
- Adding the Routing & Account Number for Roth IRA/IRA Adjustments
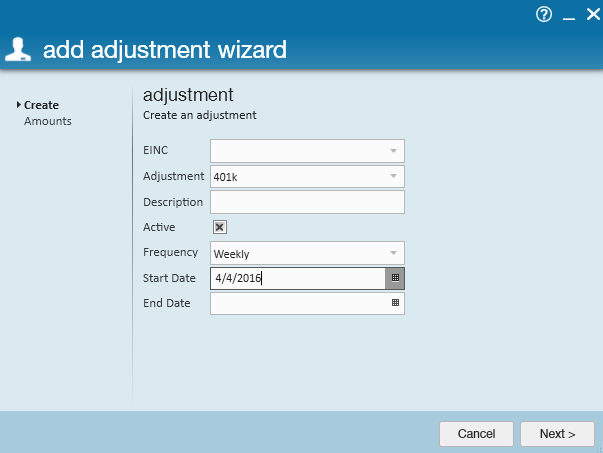
Step 1: Add the Employee 401K Contribution
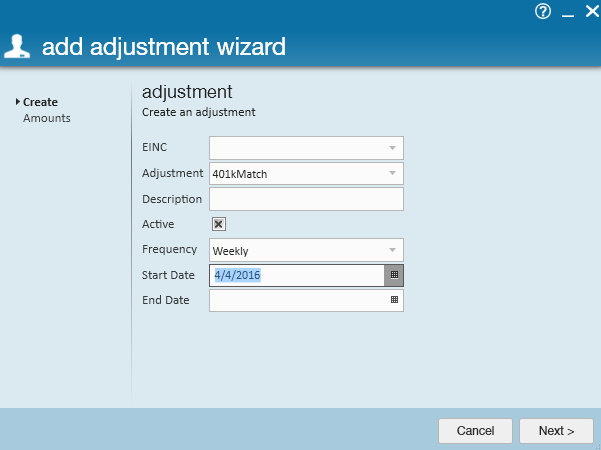
- Begin by navigating to the employee's record → expand the pay setup section → select the adjustments page
- Once there, click the + icon in the upper right to open the add adjustment wizard
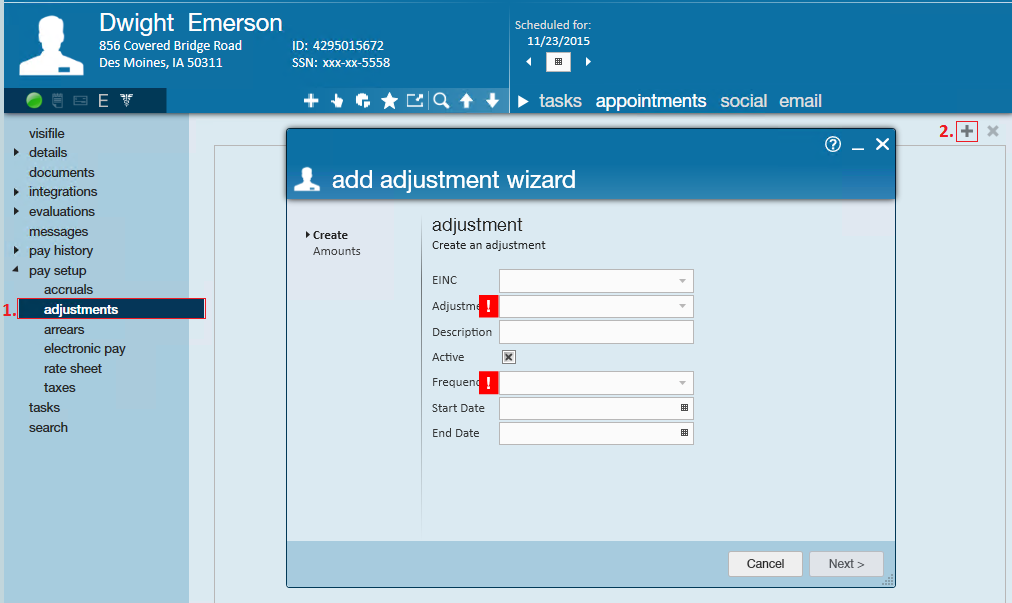
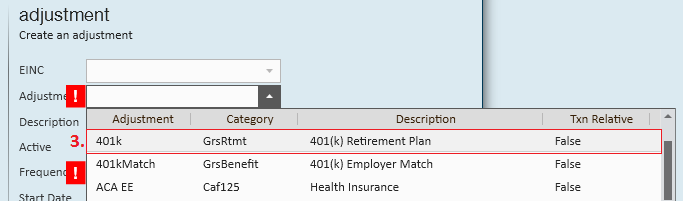
- Within the adjustment dropdown, select a type that has been designated for Employee 401K Contribution (ask your administrator if you are unsure)
- *Note* If an Employee 401K contribution is not listed in the adjustment type, it can be added in the administration section of Enterprise. If you do not have access to Enterprise administration, see your manager for assistance.
- The frequency dropdown will also be required and should always match the frequency with which you pay the employee - daily, weekly, bi-weekly, semi-monthly, or monthly.
- Once you have completed filling out the basic adjustment information, select next to continue
- This brings us to the adjustment rule page where users define the exact amount that the employee is contributing to their 401K account.
- In this example, our employee is going to contribute 5% of their gross pay weekly.
- *Note* Selecting to deduct from the gross or net pay depends entirely upon the type of 401K plan (pre or post tax) that the employee is contributing to.
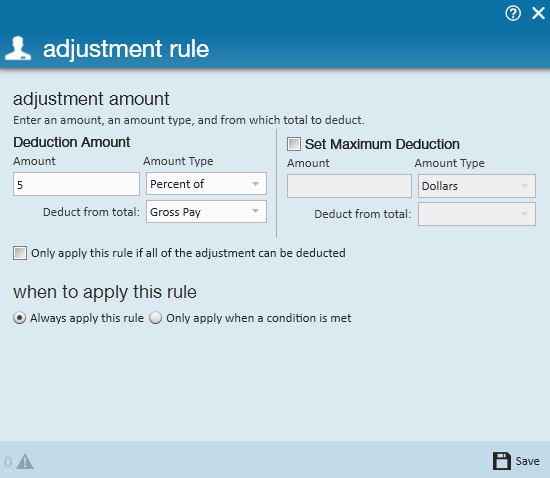
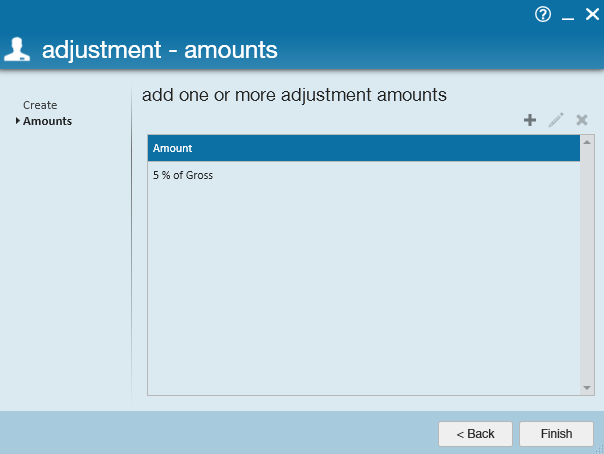
- Upon selecting save, users will be brought to the final page in the wizard to review the amount/percent that will be contributed. Users can edit the adjustment rule by clicking the pencil icon, or, if the setup looks correct, select finish to officially add the 401k adjustment and exit the wizard.


Step 2: Confirm the Employee Contribution Details
With the employee contribution now added, confirm the sequence (4.) and the yearly max from the main tab of the detailed adjustment.
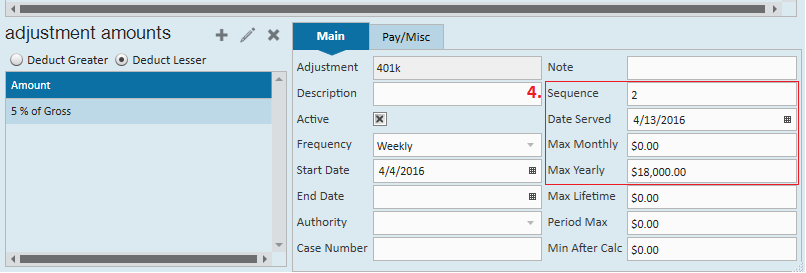
Why Enter a Sequence?
When an employee has multiple adjustments setup on their record the sequence is how Enterprise will know which adjustment takes priority.
For example, let's say this employee in addition to contributing to their 401K, also has a child support adjustment, a government levy and a garnishment for a car repo. The child support adjustment(s) receives priority over the levy. The levy receives priority over the car repo. The car repo receives priority over the 401K.
Applying sequences to adjustments tell Enterprise which adjustments take precedence.
Why Enter a Yearly Max?
401K plans include annual salary deferral limitations. By entering a yearly max we prevent Enterprise from deducting more than the annual limit.
If you have questions on what to enter for the yearly max, check IRS.gov: 401K Plans - Deferrals and matching.
Step 3: Add the Employer 401K Contribution
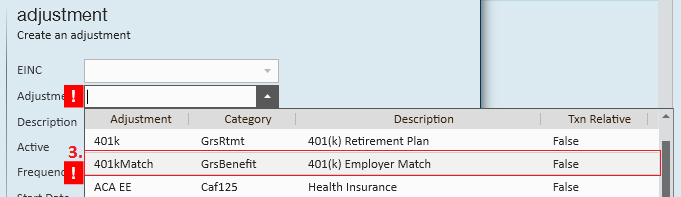
- Begin by navigating to the employee's record → expand the pay setup section → select the adjustments page
- Once there, click the + icon (2.) to open the add adjustment wizard
- Within the adjustment dropdown, select a type that has been designated for the Employer 401K Match
- *Note* If an Employer 401K Match is not listed in the adjustment type, it can be added in the administration section of Enterprise. If you do not have access to Enterprise administration, see your manager for assistance.
- The frequency dropdown will also be required and should always match the frequency with which you pay the employee - daily, weekly, bi-weekly, semi-monthly, or monthly
- Once you have completed filling out the basic adjustment information, select next to continue
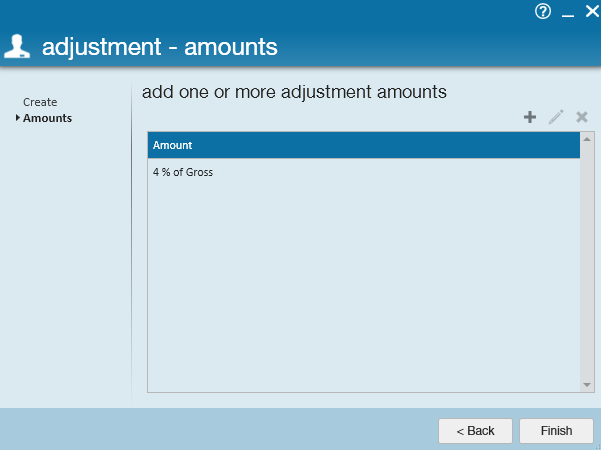
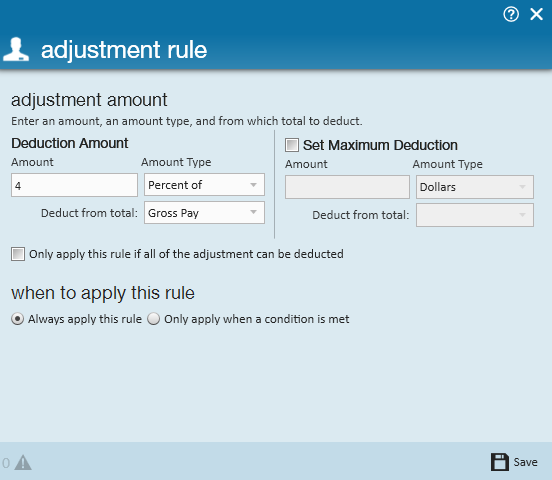
- This brings us to the adjustment - amounts page where users define the exact amount that the employer is matching against the employee's 401K contribution. Select the + icon to open the adjustment rule window.
- In this example, let's say our employer matches 100% of each dollar deferred, up to 4% of an employee pay.
- *Note* Employee adjustments are designed to deduct from an employee's wages when a positive amount is entered (e.g. when entering the employee contribution we listed the deduction amount as 5%). However, a benefit adjustment is unique in the fact that entering a positive 4%, will increase the benefit amount given to the employee
- Upon selecting save, users will be brought to the final page in the wizard to review the amount/percent that will be contributed. Users can edit the adjustment rule by clicking the pencil icon, or, if the setup looks correct, select finish to officially add the garnishment and exit the wizard.