Processing an I-9 in HRCenter™
When utilizing HRCenter, it is possible to include an electronic I-9 form as part of your applicants journey. In order to do so, a fully compliant digital I-9 form has been created for you and your team to utilize in your applicant's workflow. When working with TempWorks to implement HRCenter with your system, this is typically inserted into your workflow for you. If you do not have an I-9 as a part of your workflow or are unsure of whether this has been included, work with your HRCenter administrator to include this form in your process.
For more on HRCenter: HRCenter 101.
Before Starting
Be sure that :
- The I-9 Form is part of your workflow.
- The I-9 form is in the correct step of your workflow.
- The employee has been sent the I-9 form as an additional page, or is in the step of their workflow that includes this document.
The Applicant's Perspective
Applicants that are experiencing filling out documents electronically will encounter them while working through their workflow. Typically the I-9 is one of several documents included in what might be considered the "Onboarding Docs" step of a workflow however, in your workflow, this may be reflected by a step of a different name or even multiple steps.
In the example below, this document is the last document to be completed by the applicant:
*Note* Most documents that have been built for HRCenter may include forms that are already filled out by your system with information already collected about the employee. The I-9 is unique in that it may never be pre-filled for the applicant for compliance reasons. Each I-9 must be filled out independently by the applicant.
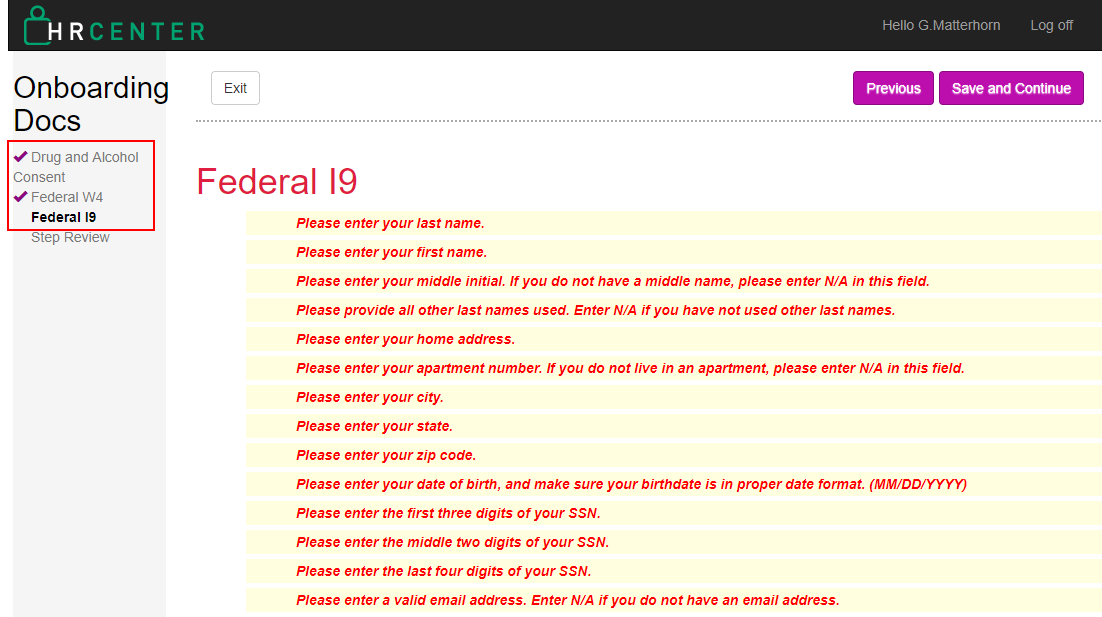
This electronic I-9 will include all three pages of a paper I-9 but only the fields that are filled out by the applicant will be accepted. The applicant will also be given instructions at the top of this form represented by required rules. These will disappear as the applicant fills out the document. Skipped required fields will still need to be interacted with before the employee will be allowed to continue:
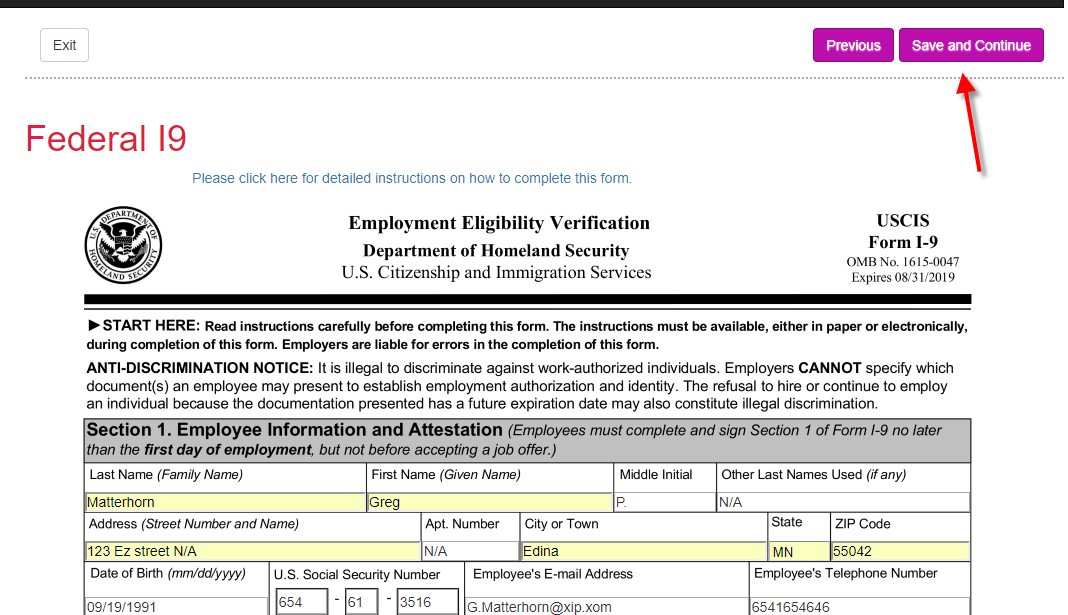
 Once the applicant has filled out the document in its entirety with all required fields, they will be allowed to continue:
The employee will now be presented with the remaining two pages of the I-9. They will not, however, be able to incorrectly interact with these pages as those pages will be filled out by you/your team when processing this document. They will be asked to 'Save and Continue' to the next page.
The service rep's page:

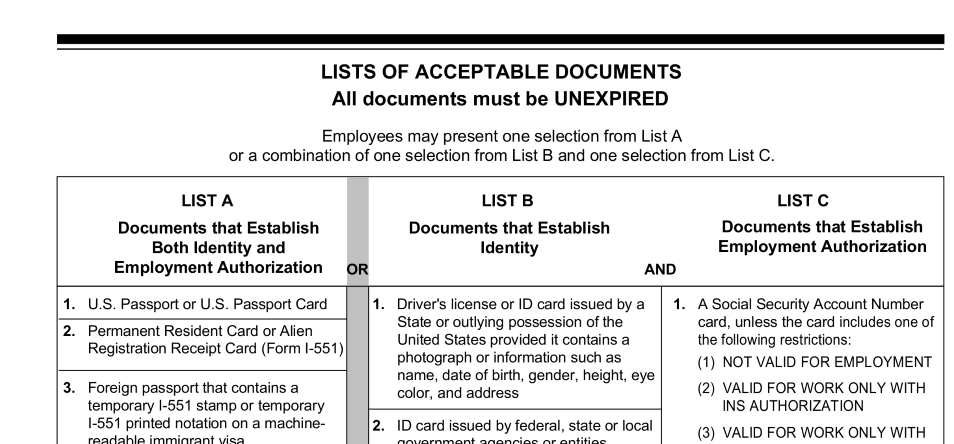
Lists of acceptable documents will be represented by the third page:

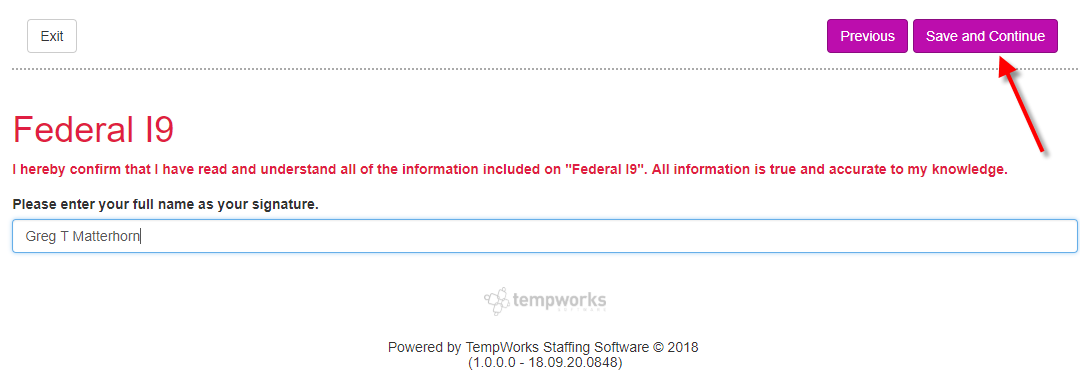
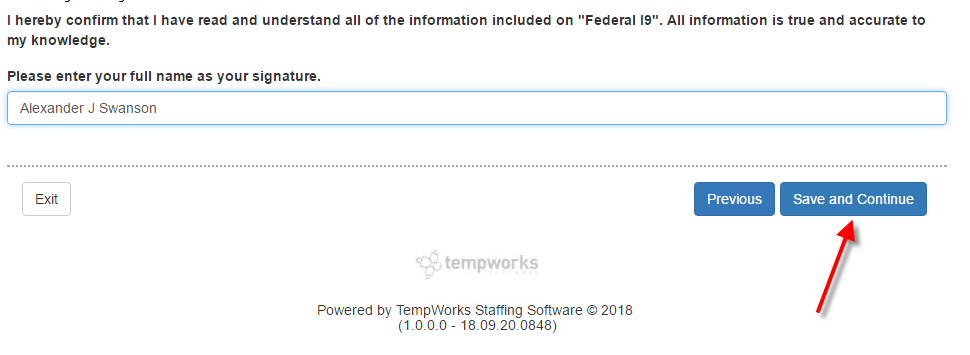
Once all pages have been viewed by the applicant, they will then sign the document electronically. This is a legal signature linking them to this document and can be reviewed upon completion of the document. They will type their name and then select 'Save and Continue':
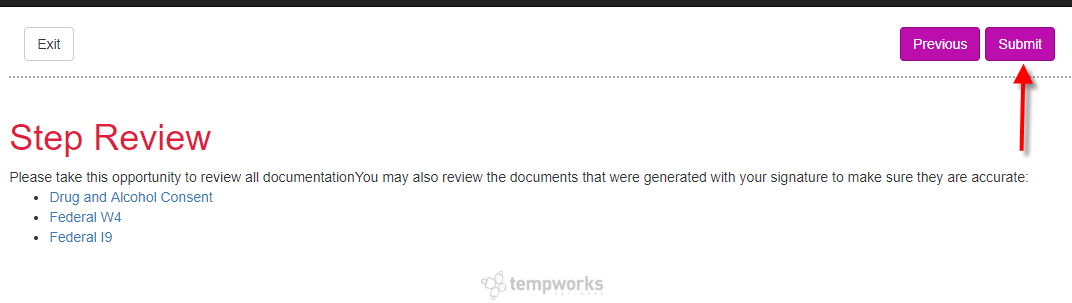
The applicant will be able to review any of the documents in that step including the partially completed I-9. This is not a complete I-9 until processed by the service rep. Once the applicant is ready to process, their application they will submit that document to you/your team:
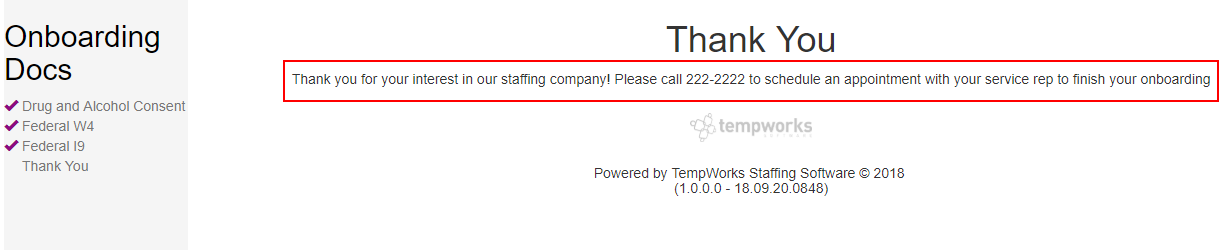
The next page will include a thank you. This is an important page as it serves as a defining point for the employee and your process. The language on this page will be unique to your application. An HRCenter administrator is able to edit this text. It is highly recommended the employee is instructed on what action should be taken next. In the example below, the employee is encouraged to schedule an appointment with their service rep.
Post-Submittal
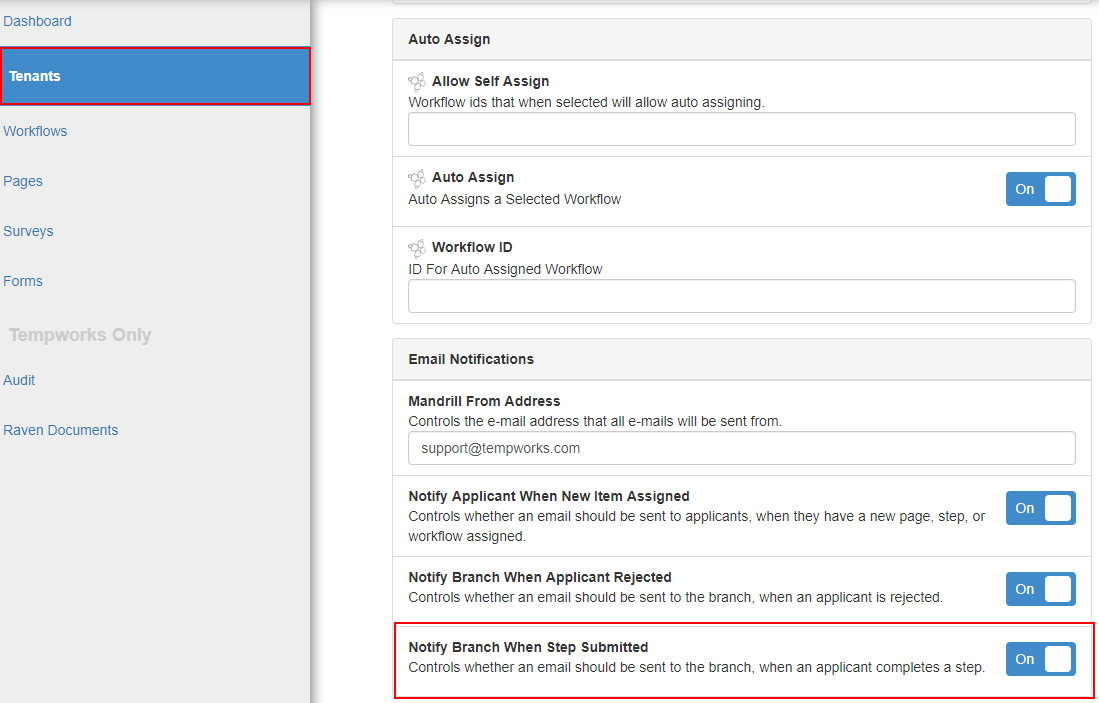
Depending on how your HRCenter is configured, your branch may or may not receive a notifications when someone submits a step. For high volume systems, this is usually turned off. For low volume systems, it is recommend this be turned on. For HRCenter admins, this can be controlled per tenant under the 'Email Notifications' configurations:
However your branch is notified, the employee will inevitably need to come in and finish their I-9 by presenting these documents to you/your team.
Processing the Employee
Below are a list of quick things that will need to be completed after the I-9 has been submitted:
- Upon arrival at a branch, the employee needs to present their identification to your service rep.
- The service rep may scan in those documents as a jpeg, png, or pdf in order to attach them later (optional).
- The service rep should look up the employee's record in Enterprise and locate their 'hrcenter' page under integrations:

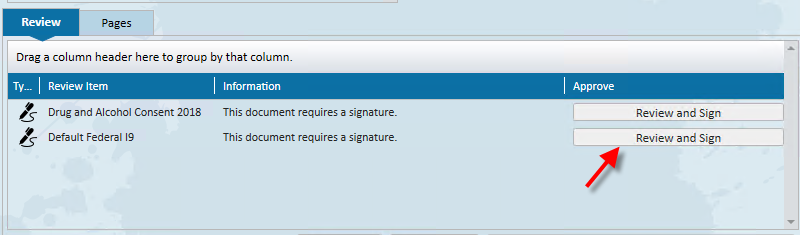
4. The processor may now review and sign the I-9 and any other documents that may need a signature.
Signing the I-9
Select to review and sign the I-9:
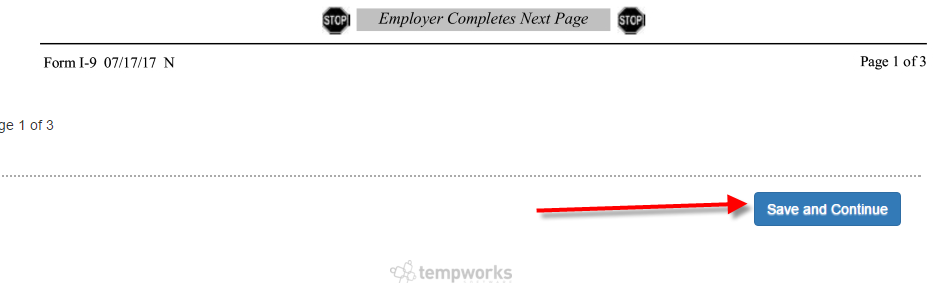
This will open a document signer dialog wizard. It is required that the document be reviewed with the applicant as the processor will be signing this document digitally and is responsible for correct information. The first page is the page that the applicant originally filled out through HRCenter. Select 'Save and Continue':

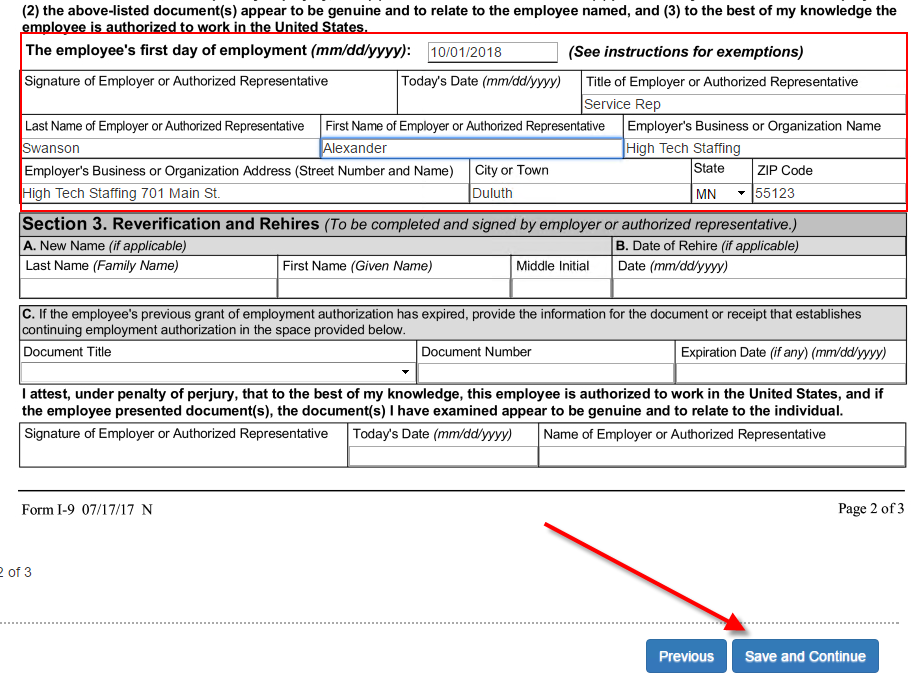
The second page is service rep's page and will be used to document their forms of identification as well as key employer details. Complete the document with accurate information considering their identification:
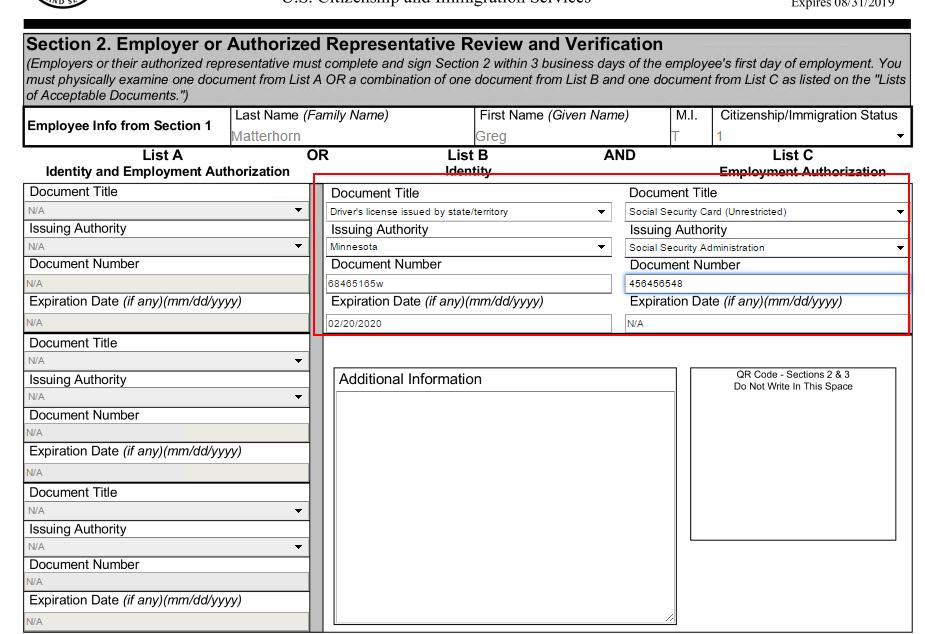
Much of the employer information is allowed to be pre-filled and you will only need to provide information concerning your role:
The final page of the I-9 will be displayed for compliance reasons. Select 'Save and Continue':

The next screen will allow a service rep to link a file to the completed I-9. This will be where you can attach any document scanned to your computer so that both the forms of identification and the I-9 are stored as a single file. When ready, select 'Save and continue':

Finally, sign the document verifying that you have successfully finished the I-9 with the employee:
Storage
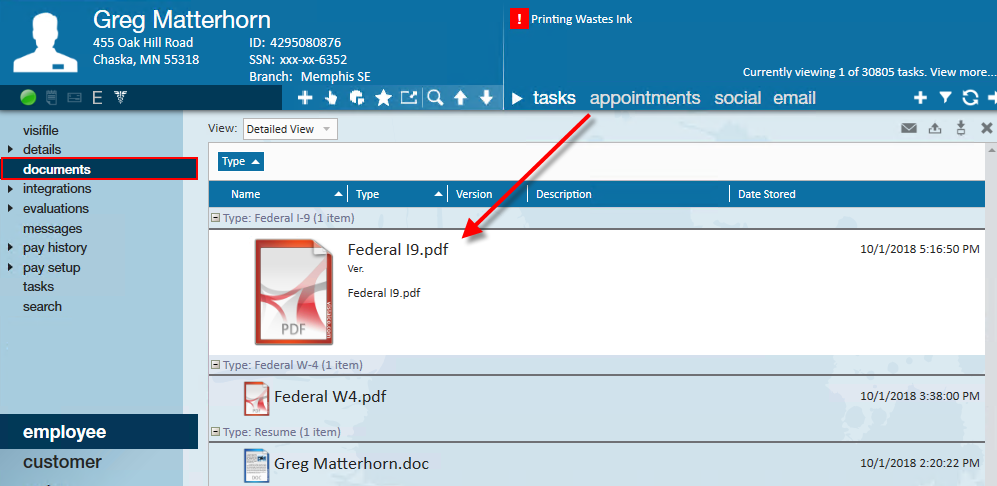
Once an I-9 has been signed, it will be stored in the documents section of that employee's record. If your service rep has access to the I-9 document type, they will be able to view the I-9 (for more information on security & access see Security Roles):
Electronic Signatures
For those unfamiliar with electronic signatures, they can be found in the bottom corner of any document signed through HRCenter: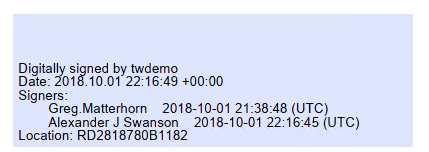
For more information on electronic signatures see: Electronic Signatures or E-Sign Legality