Managing Documents on the Employee Record
Enterprise allows for a truly paperless experience, as documents can be electronically stored within an employee record. This provides fast searching and easy access to files. Within this area documents can be attached, such as resumes, certifications, photographs, I-9 or W4 information and organized by types.
This Article Includes:
Uploading Documents
If you want any documents sent to or filled out by the employee to be easily accessible, you can upload any documents to the employee record.
*Note* If you are utilizing HRCenter for filling out application and on-boarding forms, the forms your employee's sign and/or fill out will be saved on the employee's record automatically. See HRCenter Applicant Process for more information.
How to Upload a New Document:
- Save document file on your computer
- Navigate to Employee Record you wish to attach a resume to
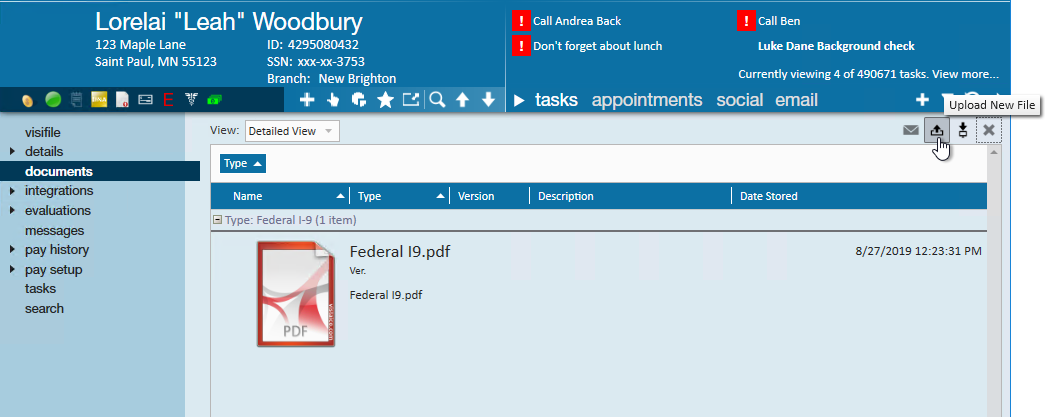
- Go to 'Documents' and select 'Upload New File' icon in the upper right
- Select the folder icon and choose the saved file
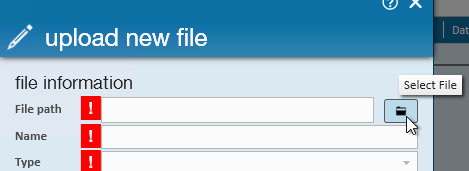
- If you are having trouble finding the file you want to upload check out Accessing Local Drives in Enterprise.
- Enter name of the document
- Select the Type of document (choose the most applicable)
- Type is used for searching purchases
- Enter any additional details
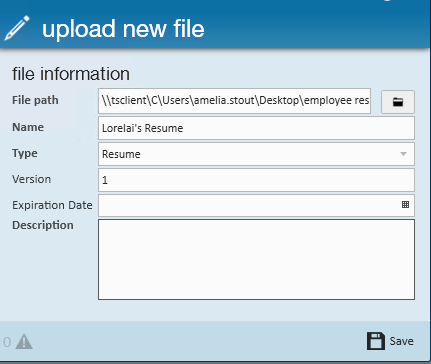
- Version - if multiple versions are saved on document, you can enter a version number to help differentiate them
- Expiration date - if this document expires (ex. drug test) you can enter the date of expiration. This field is also searchable for compliance
- Description - add any additional important notes or information about this document here
- Click 'Save'
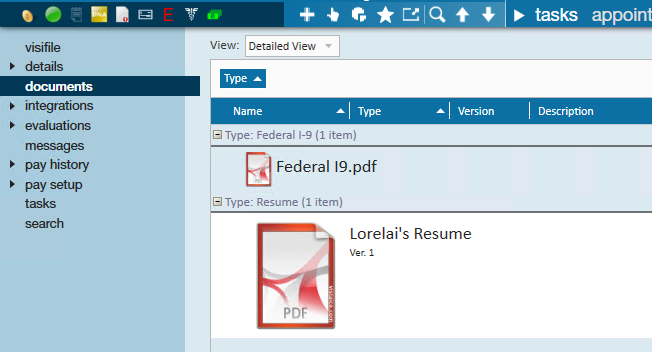


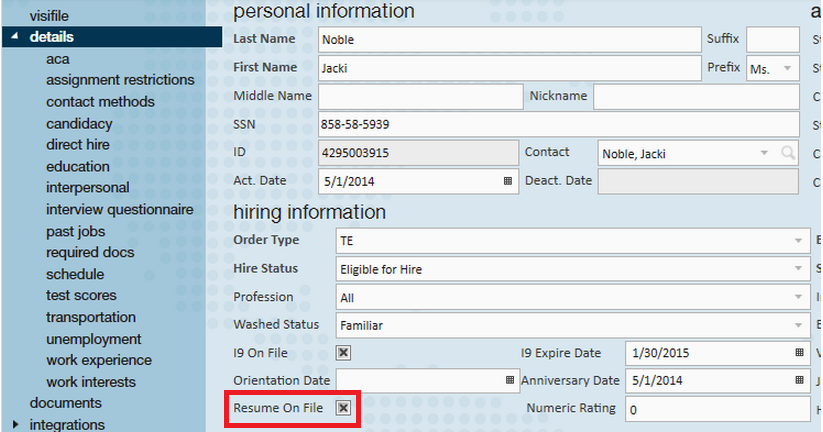
*Note* Saving a document type of Resume automatically updates the "Resume Received" and "Resume on File" boxes within the visifile, details area of an employee record. Once checked, the boxes allow users to filter by the "Has Resume" option within the employee enhanced search.

Interacting with Employee Documents
Once documents have been uploaded, you will see a few different icons in the upper right to interact with the documents located on the page.

- To Preview: Double-click the document to preview the resume
- To Email: Select the
 icon; the document will automatically attach to the email window which appears
- *Note* Email functionality must be setup prior to using the email capabilities
- To Download: If a document has been attached to a record and you wish to save it to your computer, select the
 icon
icon - To Delete: Documents that have become invalid, or no longer need to be stored on the record can be removed by selecting the document and clicking the x icon
 icon; the document will automatically attach to the email window which appears
 icon
iconSearching for Documents
Once documents have been saved on an employee's record, you can search for employees who have specific documents on file. This is great for compliance and recruiting.
Finding Document Search Options:
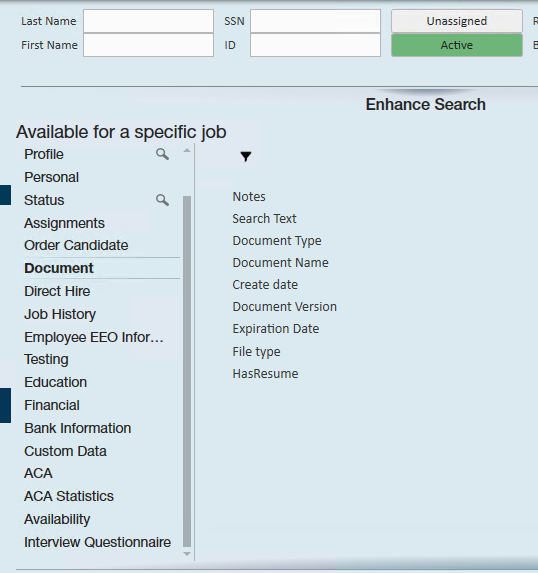
Navigate to the employee search by selecting the magnifying glass next to employee in the navigation tree
- Select 'Enhance Search' under
- Choose 'Document' and select type, text, name, etc. to search from
- Enter Search Criteria
- Click 'Search'
Search Examples:
Searching for expired documents
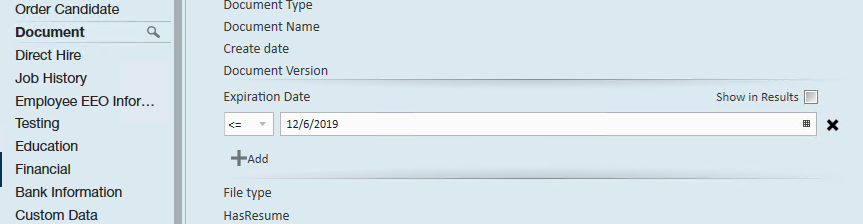
- Less than (<) = before date entered
- Greater Than (>) = after date entered
- Equals (=) = same as date entered
- Use the Add button underneath to add another date criteria which can be used for creating a date range
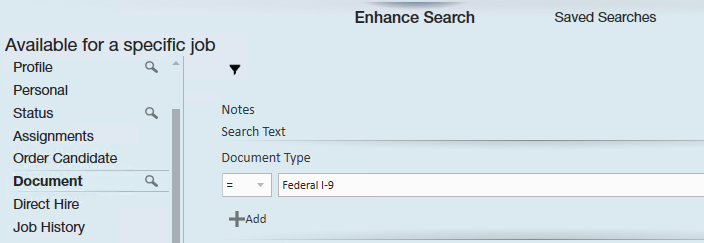
Searching for employees with an I-9
Searching for text within a document
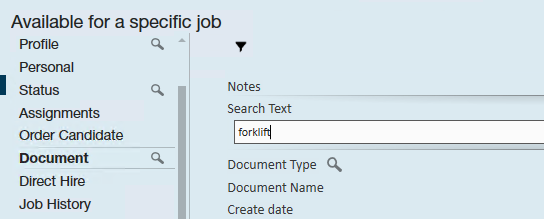
- This option only works when the document is a text-based document. If the document was scanned and saved, the computer will view this as a picture and not a text-based document.