Do you have one, two, or a handful of invoices that are carrying a small or next-to-nothing balance? One option that you have when it comes to short paid invoices is to write off that small balance within the AR module of Enterprise.
*Note* If you are unsure how many invoices have been short paid and/or what balance they are carrying, you can utilize the "Short Pay Invoices" report. This report will display a list of invoices that have had a payment applied to them but still have an open balance.

Run Short Pay Invoices Report:
The "Short Pay Invoices" report can be run by branch and grouped by either branch or customer. In the following write-off example, let's use the invoice #45800 for Murphy Construction that has a current balance of $0.41.

How to "write off" a small balance
1. Begin by expanding the invoicing box from the pay/bill dashboard of Enterprise and select to (1.) pay invoices. 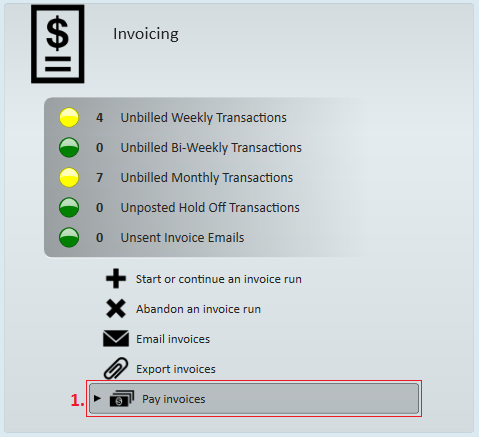
This will automatically open the invoice payments wizard.
2. Select to (2.) start a new session.
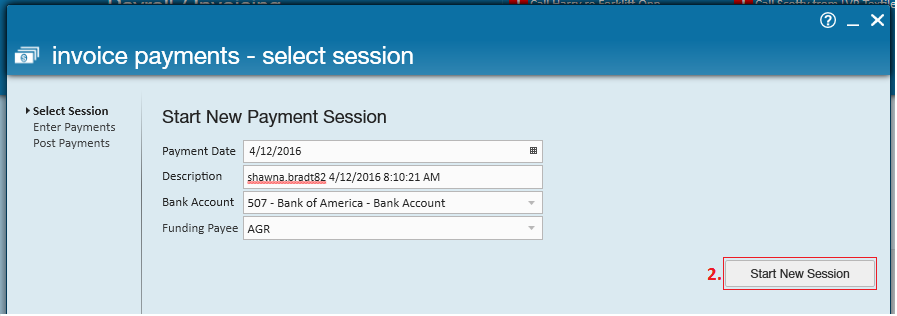
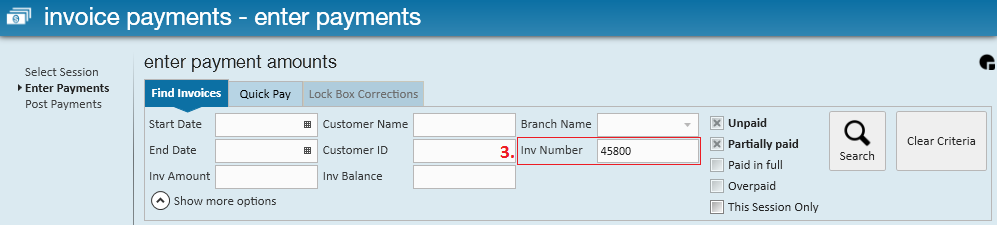
3. Upon selecting this, users will automatically be advanced to the "enter payments" step of the wizard.
In the following example, within the "Find Invoices" tab of the enter payments screen we enter the (3.) invoice number 45800 and select the magnifying glass to search.
4. As expected, this search returns one result - our $0.41 invoice for Murphy Construction. To write off the balance, we set the (4.) action dropdown to write off and the (5.) reason dropdown to small balance write off (SBWO). Not seeing the action or reason columns? Click here for help.

5. Next, enter (6.) $0.41 in the pay amount column. Select the save icon → (or use the hot key combination of ctrl + s) to run this command.

6. You may continue to locate invoices to apply payments and adjust balances. Once you are done entering in payments/adjustments, select the "next" button to move to the "post payments" step of the invoice payments wizard.
Customi*Note* Friendly reminder that if you are not seeing the "Action" or "Reason" column within your invoice payments wizard, this means it simply hasn't been included in your table. Each user has the ability to customize the columns that display in nearly all tables within Enterprise.
Anytime you'd like to change the displaying columns, simply right click the (7.) column header and select/de-select from the options listed. Changes that are made will be "remembered" by Enterprise even after logging out and logging back in.

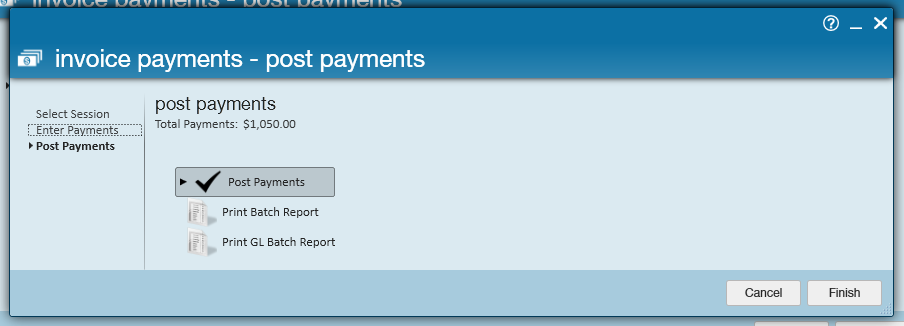
7. Click "post payments" when ready and select "finish" to exit the wizard.