What is the Invoice Wizard?
The invoicing wizard allows you to take the billable time that has been entered and proofed to create invoices based on the invoice setup for each customer. Invoicing can be done before or after payroll is processed. This article will walk through some of the basics in the invoice section under pay/bill in Enterprise.
Creating an Invoice Run
Once a timecard (or transaction) that has billable rates on has time entered in Time Entry and reviewed in Proofing then it will be available to be processed in an Invoice Run.

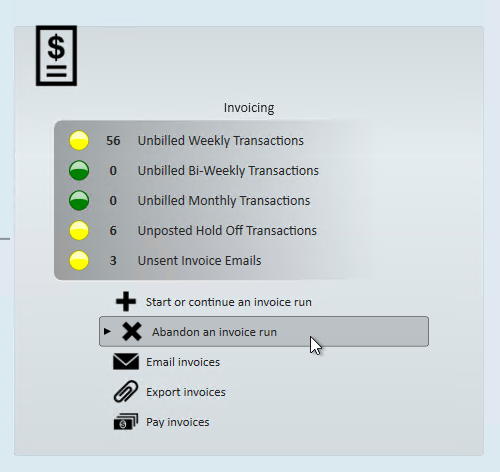
Once transactions are ready to be billed you will see the lights in the invoicing area turn yellow with a number of the unbilled transactions. Keep in mind that depending on your invoice setup, transactions might be set to be billed weekly, bi-weekly, or monthly.
Invoice runs allow you to process some or all the transactions that are ready to be billed. It's important that you work with you team to decide when each customer, or set of transactions should be billed. You can choose to process all available transactions or only specific selected timecards.
To Create a Invoice Run
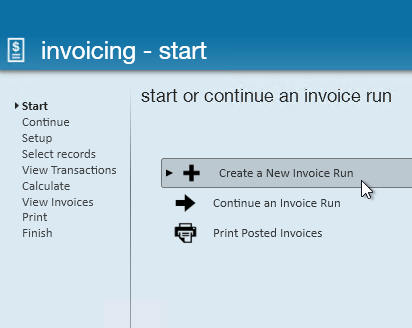
- In Enterprise Navigate to Pay/Bill and click on Invoicing
- Select Start or Continue an Invoice Run
- A new window will open, choose "Create a new invoice run"
- Review the following information:
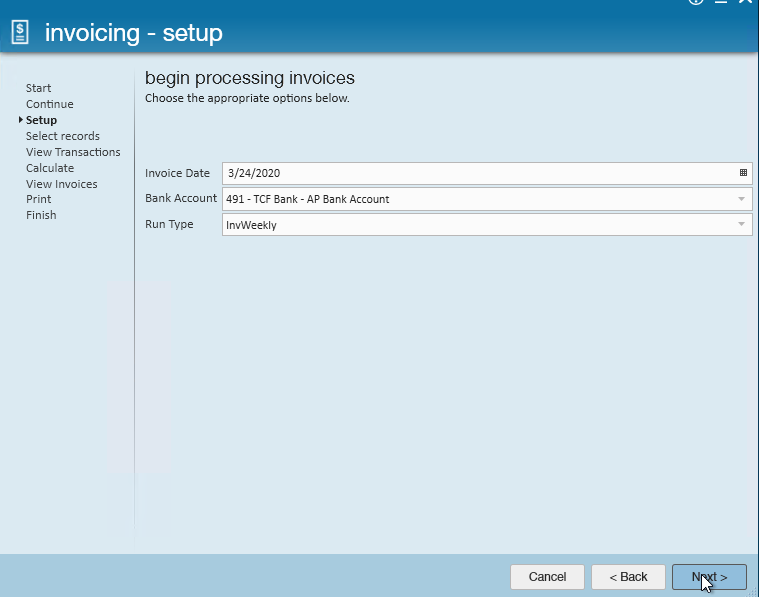
- Invoice Date: Date invoice processed for AR purposes
- Bank Account: What bank account the money should be deposited into when this money is paid (most companies only use one account here for GL purposes)
- Select a Run Type: Are you processing weekly, biweekly, or monthly invoices in this run
- Once you have selected your options, select Next


Your invoice run is now created, you can continue to follow the invoice wizard to finish processing your invoices. Below we will review the process for weekly invoices.
- For Bi-weekly invoices, check out Enterprise - How to Process Bi-Weekly Invoicing.
- For Monthly invoices, check out Enterprise - How to Process Monthly Invoicing.
Processing Weekly Invoices
Weekly invoices are by far the most common invoice processing. Before you invoice a new client, make sure you walk through the invoice setup section of the customer record to ensure the invoices will be processed correctly.
- Start by creating an invoice run, as instructed above (make sure you choose a run type of weekly)
- Next, select which transactions you want to process
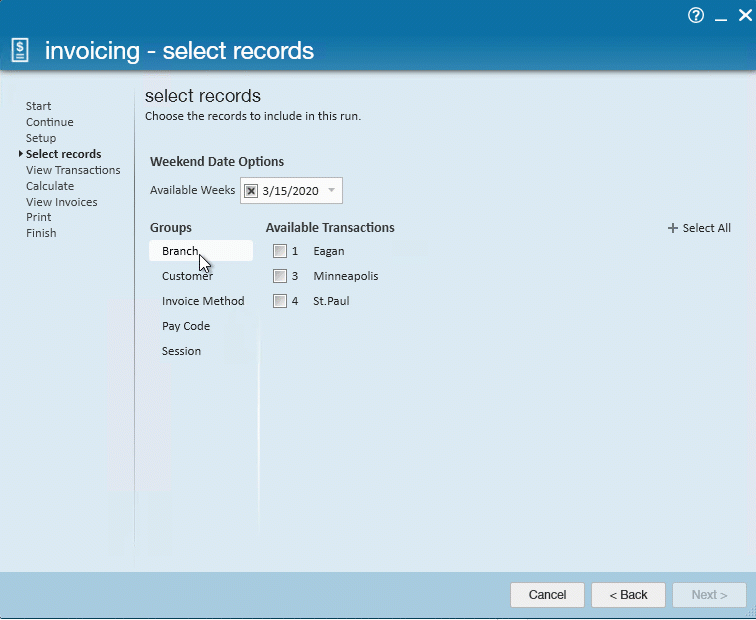
- Work with your team to know when all the transactions are ready (ex. one branch has finished all time or one customer's time has been processed)
- You can select a preset grouping by using the group options on the left: Choose branch if you are ready to process all transactions for one branch or by customer if one customer's transactions are ready
- If all are ready choose the "Select all"
- Select Next
- Review the transactions
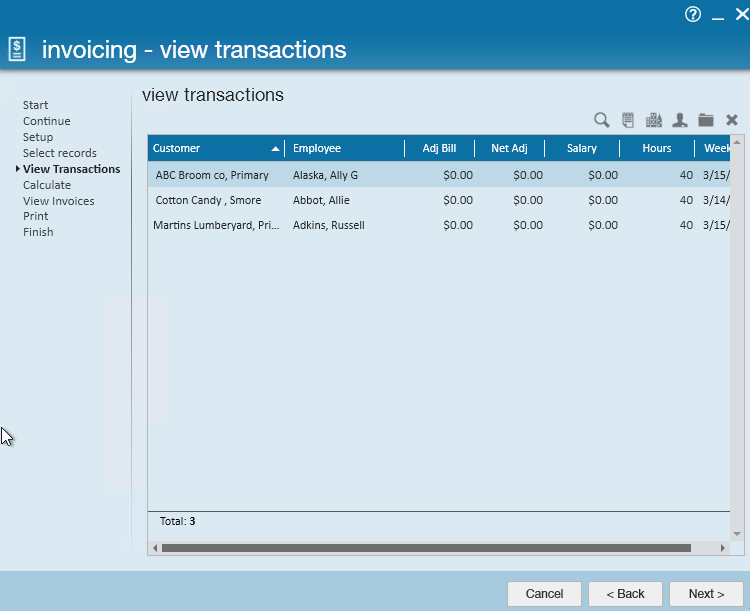
- This is another chance to triple check transactions before you process them.
- Did you grab all the transactions you wanted? If not, click the back button and select more
- Once transaction doesn't look right? select it and use the X to remove it from this run (keep in mind it will not be processed in this run but will still be available for future runs)
- Use the jump buttons in the upper right to navigate to records related to that transaction if you need to double check anything

- Select next, the system will then review the transactions, invoice setup, sales tax, etc. to calculate the invoices
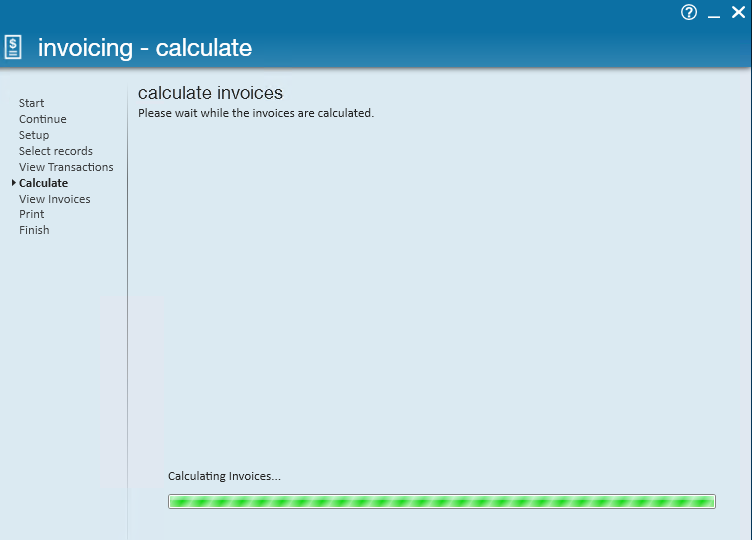
- Once calculations are complete, you will either review errors, or be able to click Next to continue
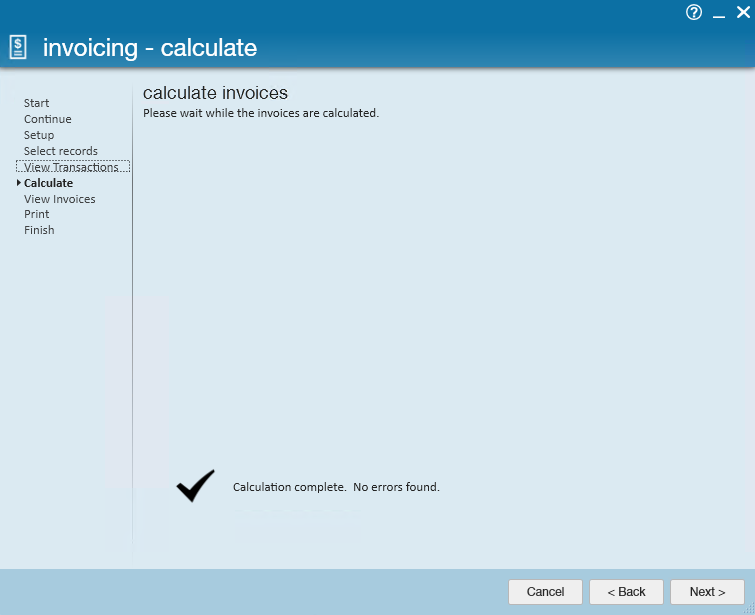
- Invoice errors are not very common as most invoice related issues are caught in the proofing stage. Check out Enterprise - How to Fix Issues During Invoice Processing for more information.
- Preview the Invoices
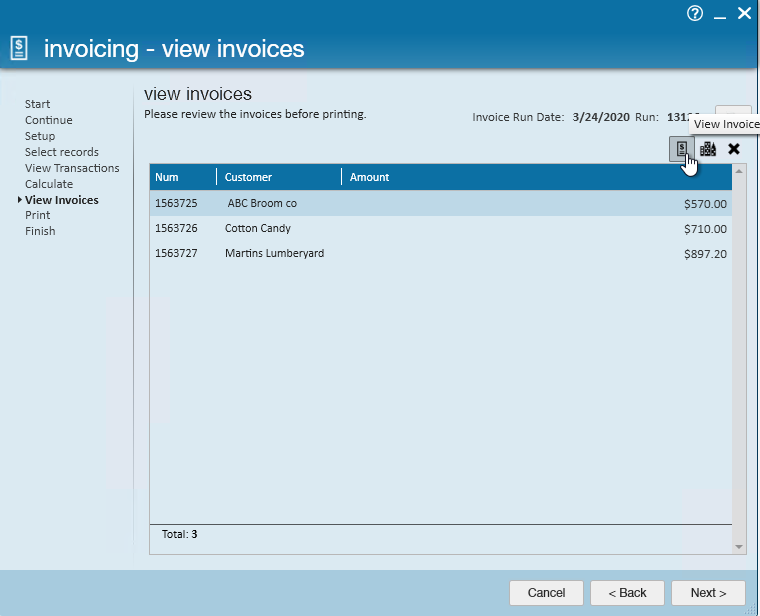
- This step allows you to view what the invoices will look like once processing is completed/finalized - this is a great last check to make sure the invoice setup settings are working the way you intended.
- Does one invoice look wrong but the rest are ready? Don't wait! Select the invoice that is questionable and choose the X in the upper right to remove it from this run. The transactions will still be available to be pulled into another run later.
- Once you are ready, select Next
- Depending on the customers you are processing for, You may be asked to print invoices
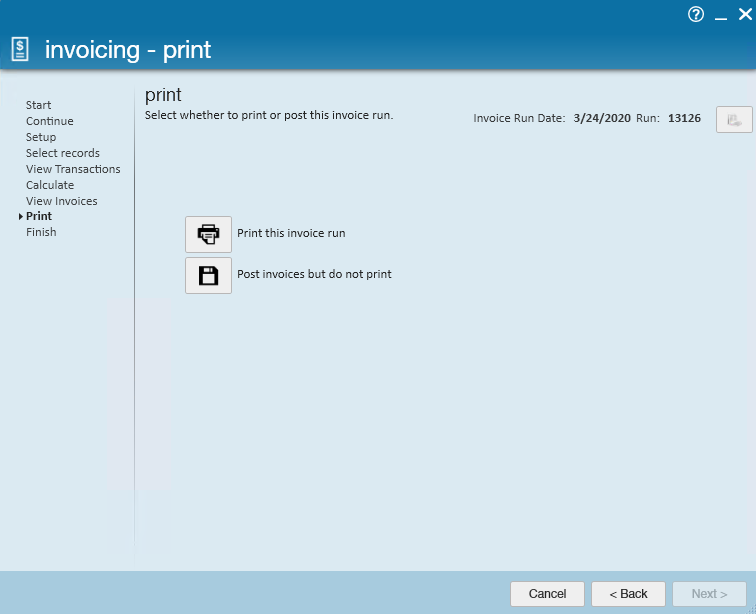
- This is all determined by the invoice setup for each customer whether print, email or both
- If you have invoices that should be printed, you will be able to print, otherwise you may just have a post option that will finalize the invoices
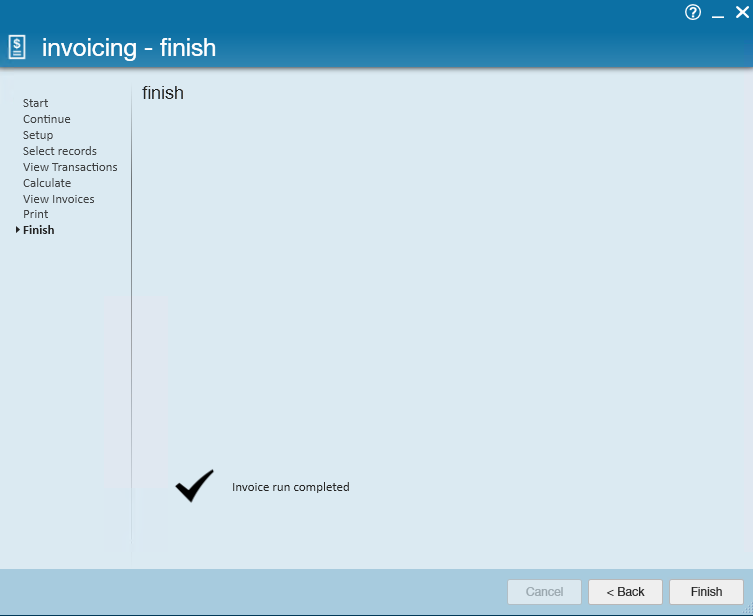
- Once you have completed this step, select next and you will be greeted with a finished screen letting you know the invoices have been successfully processed


What's Next?
- Need to email an invoice? Check out Enterprise - How to Email Invoices.
- Need to make a correction? Check out *Invoice Corrections
- Need to merge two invoices into one? Check out Enterprise - How to Merge Invoices
- Looking to track payments? Check out Enterprise - Invoice Payments Overview
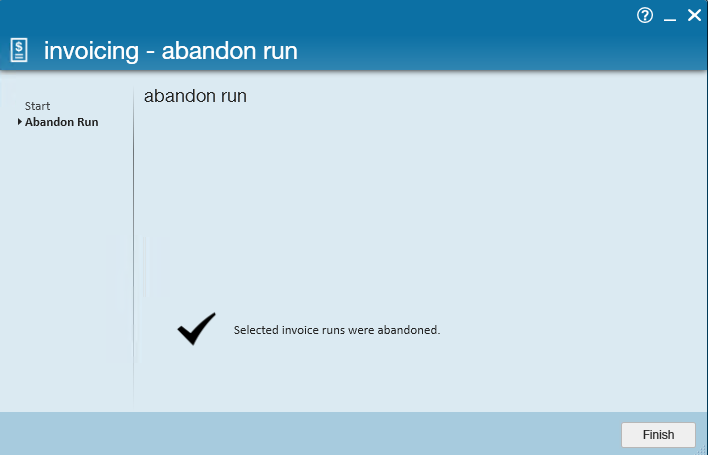
Abandoning an Invoice Run
Sometimes you start an invoice run and then you realize you just really want to start over. You can abandon an invoice run anytime before you print/post. Once you abandon an invoice run, any transactions in that run will be available to be pulled into a new run or edited in Time Entry as necessary.
All invoice runs must be processed all the way through or abandoned in order to close the week.
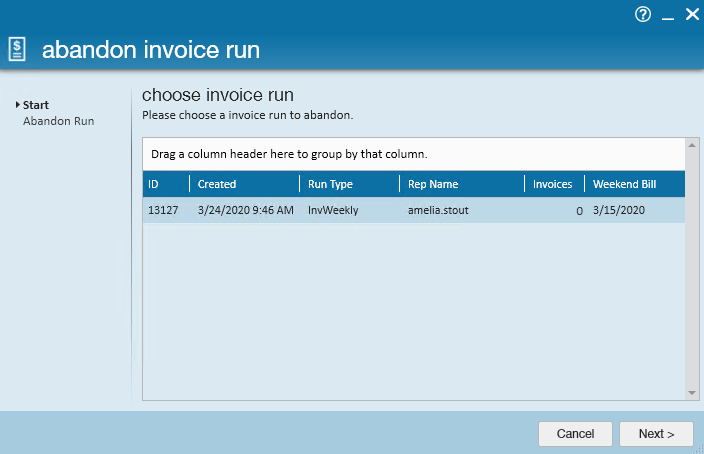
To Abandon an Invoice Run
- In Enterprise, from Pay/Bill navigate to the invoicing section
- Select "Abandon Invoice Run"
- A new window will open, select the invoice run you wish to abandon and click Next
- The abandon process will then load, once it is complete you will be able to click finish to close the window