What is a Customer Record?
The Customer section of Enterprise contains your prospect, current, and any past customers you have worked with. These records are filled with relevant sales, and contract related information as well as invoice options, etc. 
This Article Covers:
Check out our TempWorks University Videos to get started with Enterprise: Customer Part 1: The Basics
Adding a Customer Record
When you have a new customer that has signed a contract, or a new prospective customer your sales team is working with, you'll want to create a customer record in your system to track conversations, create orders, and generate invoices.
*Note* When adding a customer, or any record in your system, be mindful of your current hierarchy level.
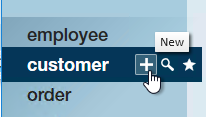
- Navigate to the Customer option on your navigation tree and select the + option (or use the keyboard shortcut Alt + 2)
- A new window will open, enter the customer name as you want it to appear on the record
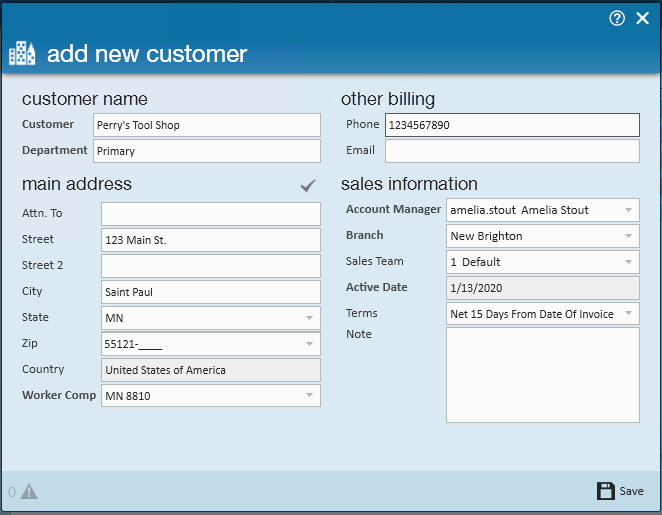
- Optionally, enter the following information:
- Address: This should be the main location address. Entering the address here populates on the details page and creates your first worksite for this customer. (we highly recommend adding an address). If you have address standardization turned on, you may be required to standardized the address entered before continuing.
- Default Worker Comp: If this is a prospect you are entering, don't worry too much about this option as it can be changed later in defaults.
- Phone/Email: This would be a phone or email that is not for a specific person/contact like the general phone number for this business. Documenting this can be helpful for cold calls, etc.
- Sales & Service Information: Information such as Account Manager, Sales Team, etc. appear under the sales & service section of the customer record and can always be updated there.
- Terms: This is saved under the credit and payroll section on the customer record and determines when an invoice is overdue. Typically this is updated after the contract is signed and does not need to be changed here.
- Notes: Anything entered here will appear on the notes visifile section. Notes here should always be applicable and important since they have no name or date/time stamp associated with them. For other notes and conversation information, we recommend logging a message.
- Select Save


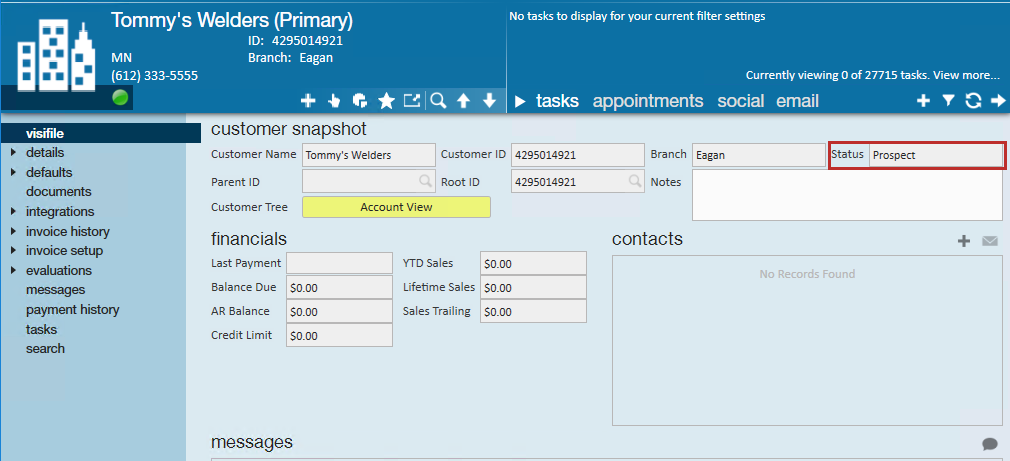
By default, the customer record will be saved with a Prospect status.
*Note* Wondering about the defaulted information?
- The Account Manager defaults to the service rep who is entering the record
- Branch is defaulted based on the service rep's current hierarchy
- Worker Comp is defaulted based on the option selected on the branch setup
- Sales Team defaults based on the service representative information in Administration
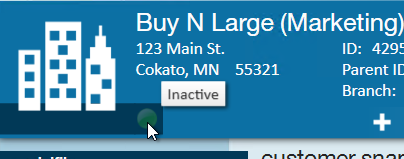
Avatar Area Information
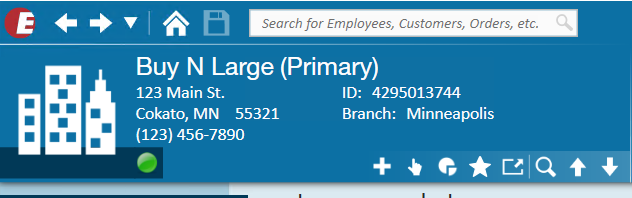
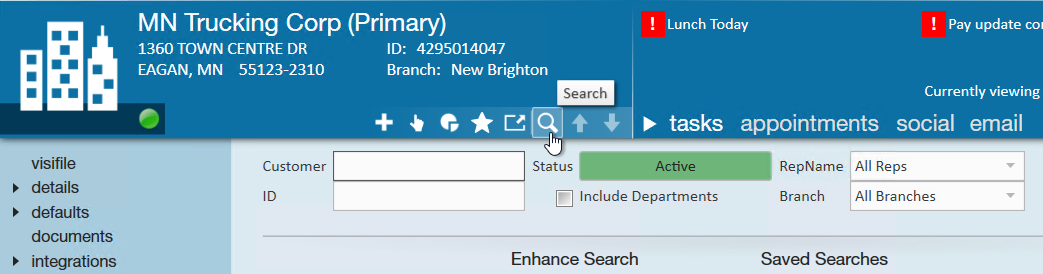
The avatar area is located in the upper left corner when you open any customer record:
Information Displayed Includes:
- Customer Name (and Department Name)
- Customer Contact Address (can be different from the billing address located under customer details)
- Customer Main Phone Number (located under details > contact methods)
- Record ID #
- Branch Associated with the Customer Record (located under details > sales and service)
Avatar Icons
Below is a short description for each of the icons located in the Avatar area:
Active Status

A circle icon located in the bottom left of the avatar area on the customer icon indicates whether the customer record is active. Active records indicate prospective or current customers while deactivated customer records indicate customers not currently being worked with.
- Green = Active
- Grey = Inactive

To learn more about customer statuses, check out Enterprise - Default Customer Statuses.
New Customer Record
To quickly create another customer record, select the + icon in the Avatar area of any customer record.
Actions Menu
The actions menu will give you access to additional related actions on this customer record. Here you can create new orders, use a gross profit calculator, and more. 
- Add Department: Opens the “add new department” form and will create a new department record directly beneath the customer record you are currently viewing. Check out Enterprise - Departments for more information.
- Add to Hotlist: Opens the “add hotlist members for customer” form where you can add the open customer record to an existing hotlist or create a new hotlist. Check out How to Create and Manage Hot Lists for more information.
- Assign Time Clock to Customer: This option allows you to assign a TempWorks TimeClock to this customer record. Check out TimeClock Overview for more information.
- Change Parent Customer: Opens the “move customer” form and allows users to change the location of the customer/department within a customer hierarchy. Check out Enterprise - How to Change a Parent Customer for more information.
- Create Zero Dollar Invoice: Allows you to create a zero dollar invoice for AR. Check out Enterprise - How to Create a Zero Dollar Invoice for more information.
- Gross Profit Calculator: Opens the gross profit calculator so that users may calculate the estimated gross profit percentage and amount based on the pay rate, bill rate, duration and estimated hours per week worked. Check out Enterprise - How to Utilize the Gross Profit Calculator for more information
- Mass update rates: Opens the mass update options for assignments. Check out Enterprise - How to Mass Update Assignment Rates for more information.
- New Customer Contact: Allows you to quickly create a new contact associated with this customer. Check out Contact Record Must Haves for more information.
- New Order: Allows you to create a new order record for this customer. Check out Enterprise - How to Create and Manage Temporary Orders for more information.
- New Task: Opens the “task details” form and automatically assigns the task to the logged in service rep and links the task to the currently open customer and department record. Check out How to Utilize Tasks for more information.
Reports
Selecting the pie chart icon will give you a list of reports that you can pull for this specific customer. 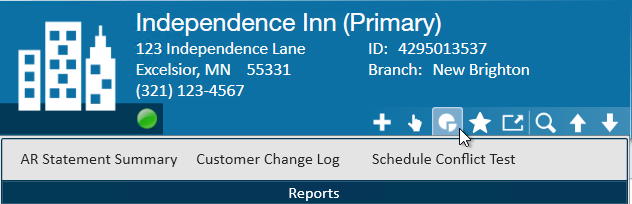
Favorites
Selecting the star icon will display a list of your favorited customer records. you can add and remove favorites from here: 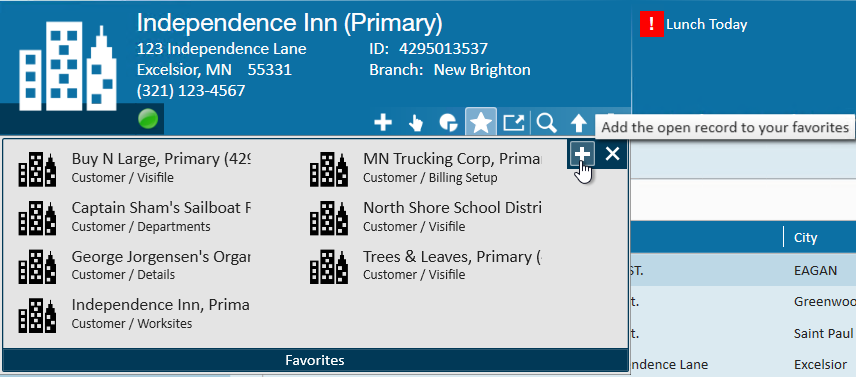
Tearaway Page
The tearaway page option allows you to open the current page you are viewing in a new window. 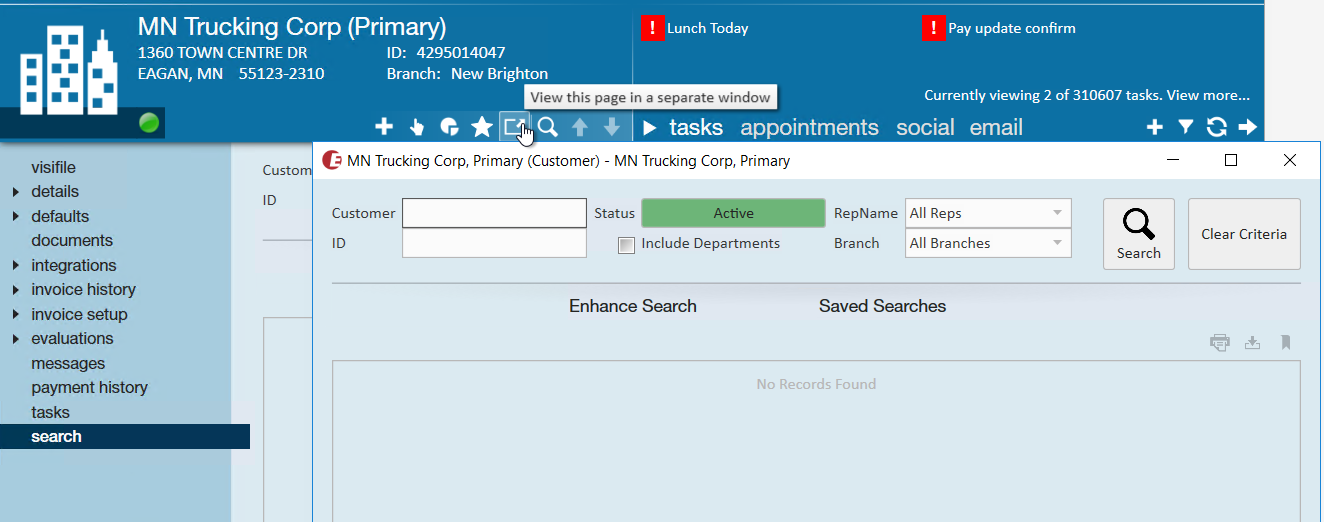
To learn more, check out The Tearaway Page.
Search Options
The magnifying glass will open the customer search option. The arrows will allow you to move between customer record search results.
To learn more, check out Searching.